100
Using USB Connectors and SD/SDHC Memory Cards: Using This Unit With a Hard Disk
7
When the confirmation message appears again,
select [YES] and press the SET button.
This starts hard disk formatting.
A TYPE S hard disk allows you to export data to a hard disk
(by writing data from a P2 card to a hard disk) in P2 card units.
First use this unit to format the hard disk. Up to 23 cards can
be exported to a hard disk.
The exported data from a P2 card is recognized as a separate
drive on a computer.
1
Switch to the USB host mode.
2
Connect a USB hard disk.
If the hard disk has not been formatted by this unit, use this
unit to format it.
➝
For details, refer to “Formatting Hard Disks” (page 99).
3
Insert a P2 card
4
Open the thumbnail screen.
5
Press the MENU button.
6
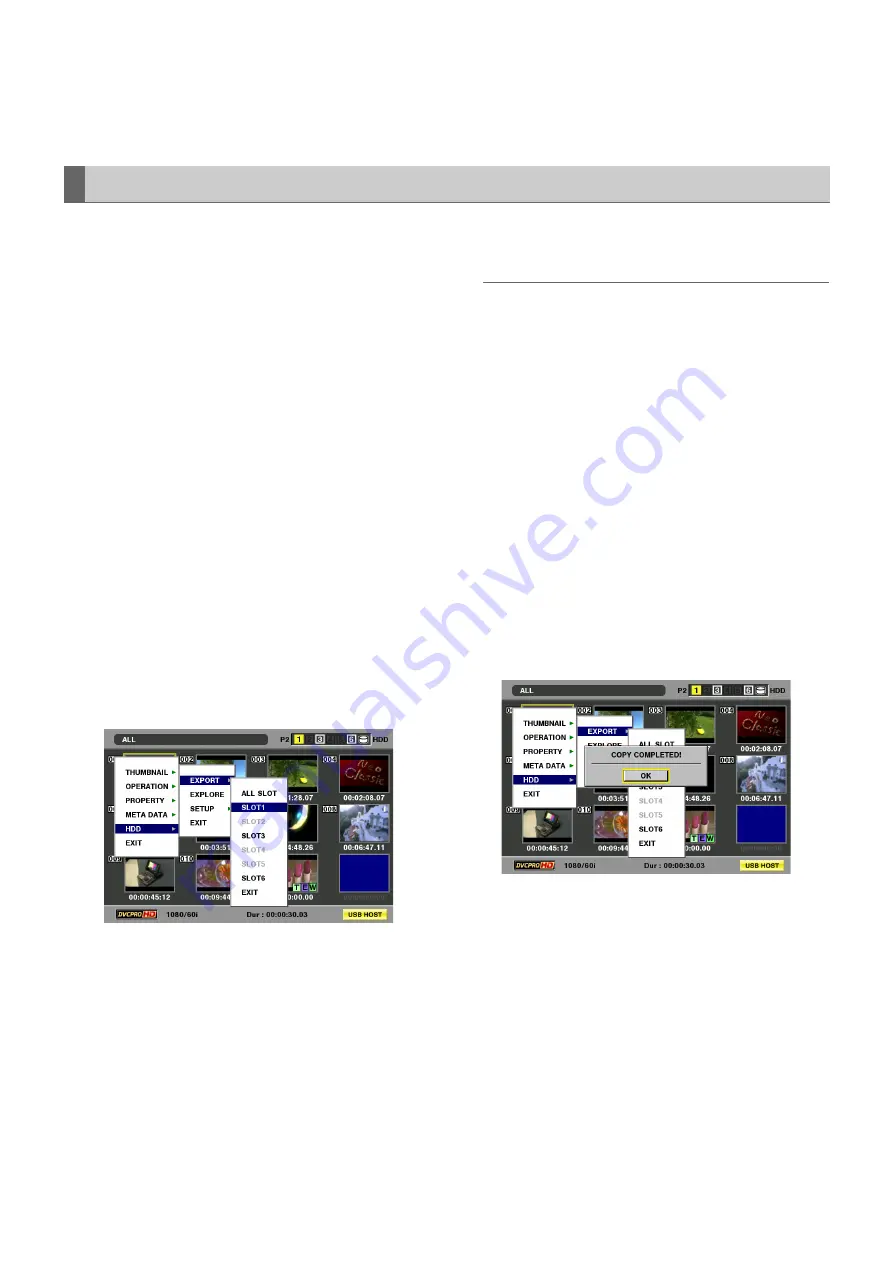
Use the cursor buttons to choose [HDD] –
[EXPORT].
7
Select the number of the source P2 card slot and
press the SET button.
Selecting ALL SLOT will result in a batch export of all
cards.
8
Select [YES] and press the SET button.
This starts exporting.
◆
NOTE:
• A progress bar appears during exporting.
• To interrupt exporting, press the SET button, select [YES] in the
cancel confirmation screen and press the SET button again.
• The export operation will end earlier if the verify setting is not
engaged.
To turn off this setting, choose [HDD] – [SETUP] – [VERIFY] –
[OFF].
• Copying of a P2 card that is interrupted during verification will
still be successful.
• To export data to the specified folder when the hard disk is
connected to a PC running under Windows, use the drive mount
converter that you can download freely from the following web
site. You may use the drive mount converter when there is un
invisible partition because the drive overlaps an already
assinged network.
https://eww.pavc.panasonic.co.jp/pro-av/
When the export operation ends, “COPY COMPLETED!”
appears.
Exporting to a Hard Disk in Card Units


