– 155 –
Chapter 5 Shooting — Convenient shooting functions
Display of zebra pattern output to the <HDMI> terminal is based on the following setting.
f
[VIDEO OUT/LCD/VF] menu
→
[HDMI OUT]
→
[SIGNAL SEL]
f
[VIDEO OUT/LCD/VF] menu
→
[SDI OUT1]/[SDI OUT2]
→
[SDI OUT ZEBRA]
@
@
NOTE
t
The zebra pattern is not displayed when the [SCENE FILE] menu
→
[GAMMA MODE SEL]
→
[HLG] is selected.
Focus assist function
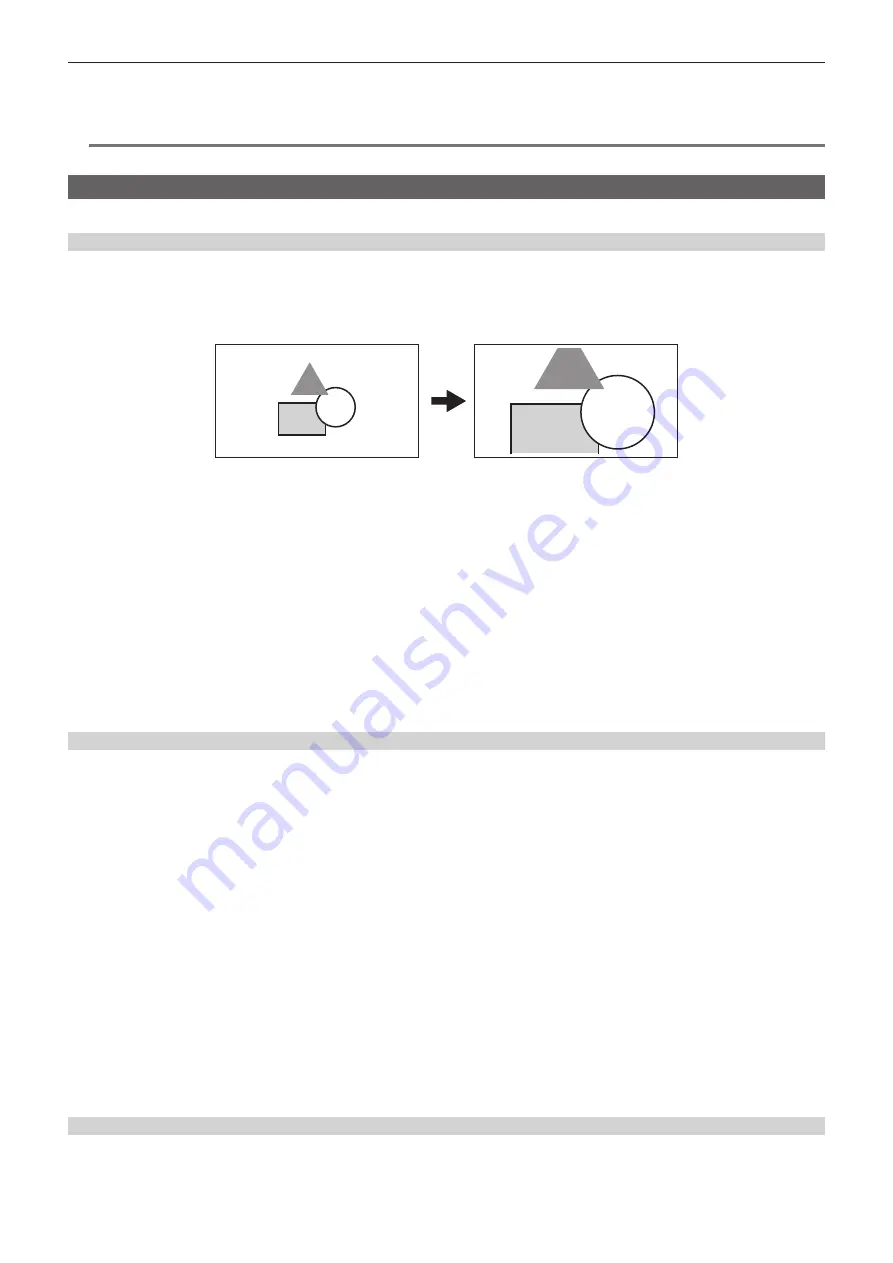
The focus assist function enables you to focus the target easily.
Enlarged display
r
Assigning [FOCUS ASSIST] to the USER button
Assigns [FOCUS ASSIST] to the desired USER button or <RET> button on the lens.
Pressing the assigned USER button enlarges the center of the screen and make it easier to focus when the [VIDEO OUT/LCD/VF] menu
→
[FOCUS
ASSIST]
→
[FOCUS ASSIST SELECT]
→
[EXPAND] is selected.
r
Setting the mode for enlarged display function
The method to cancel the enlarged display can be selected in the [VIDEO OUT/LCD/VF] menu
→
[FOCUS ASSIST]
→
[EXPAND MODE].
When using peaking display and focus square display simultaneously, they may be disabled depending on the setting of the enlarged display.
[10SEC]:
Cancels in 10 seconds.
[HOLD]:
Cancels when the button to which [FOCUS ASSIST] is assigned is pressed.
[UNTIL REC]:
Cancels when recording starts. Enlarged display is not available during recording.
r
Setting the enlargement rate
Can be selected from the [VIDEO OUT/LCD/VF] menu
→
[FOCUS ASSIST]
→
[EXPAND VALUE]
→
[
×
2]/[
×
3]/[
×
4].
r
Setting the enlargement position
The enlargement position can be selected from nine positions when the enlarged display function is enabled.
In the case of the jog dial button:
Turn the jog dial button to move the enlarged position. It will return to center when the jog dial button is pressed.
It can also be operated by pressing the cursor operation button.
In case of touching the LCD monitor:
The enlarged position will move by touching the vertical and horizontal arrow markers on the LCD monitor.
Peaking display/focus square display
The peaking display will outline the contour of the focused image in red, green, or white.
The degree of focus is indicated by the size of the square in the focus square display.
r
Displaying the peaking display/focus square display
Assigns [FOCUS ASSIST] to the desired USER button or <RET> button on the lens.
Select the [VIDEO OUT/LCD/VF] menu
→
[FOCUS ASSIST]
→
[FOCUS ASSIST SELECT]
→
[PEAKING]/[SQUARES] and press the USER button
assigned with [FOCUS ASSIST] to display in the set type. Press the USER button again to return to the normal display.
r
Setting the focus assist display type
Select the type of display in the [VIDEO OUT/LCD/VF] menu
→
[FOCUS ASSIST]
→
[FOCUS ASSIST SELECT].
[EXPAND]:
Sets the enlarged display.
[PEAKING]:
Sets the peaking display.
[SQUARES]:
Sets the focus square display.
[PEAKING]:
Displays in combination of [EXPAND] and [PEAKING].
[SQUARES]:
Displays in combination of [EXPAND] and [SQUARES].
r
Setting the peaking level
Sets the intensity of the peaking display.
Can be selected from the [VIDEO OUT/LCD/VF] menu
→
[FOCUS ASSIST]
→
[PEAKING LEVEL]
→
[LOW]/[MID]/[HIGH].
r
Setting the color for peaking display
Can be selected from the [VIDEO OUT/LCD/VF] menu
→
[FOCUS ASSIST]
→
[PEAKING COLOR]
→
[RED]/[GREEN]/[WHITE].
How to use the focus square display
Adjust focus so that the size of the square shown over the desired subject to focus on becomes the largest size.
Содержание AJ-CX4000
Страница 12: ...Before using the camera read this chapter Chapter 1 Overview ...
Страница 179: ...This chapter describes about the output image Chapter 7 Output ...
Страница 187: ...This chapter describes how to use the camera by connecting to a network Chapter 9 Network Connection ...
Страница 204: ...Maintenance of the camera and error message are described Chapter 10 Maintenance ...
Страница 212: ...This chapter describes the dimensions specifications and connector signals Chapter 11 Specification ...
Страница 223: ...Web Site https www panasonic com Panasonic Corporation 2019 ...


