background image


33 


DEVICE DISCOV ERY  

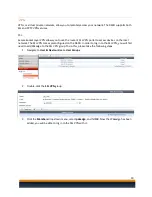
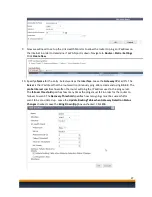
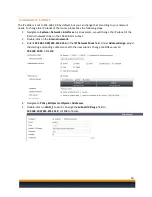
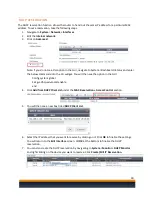
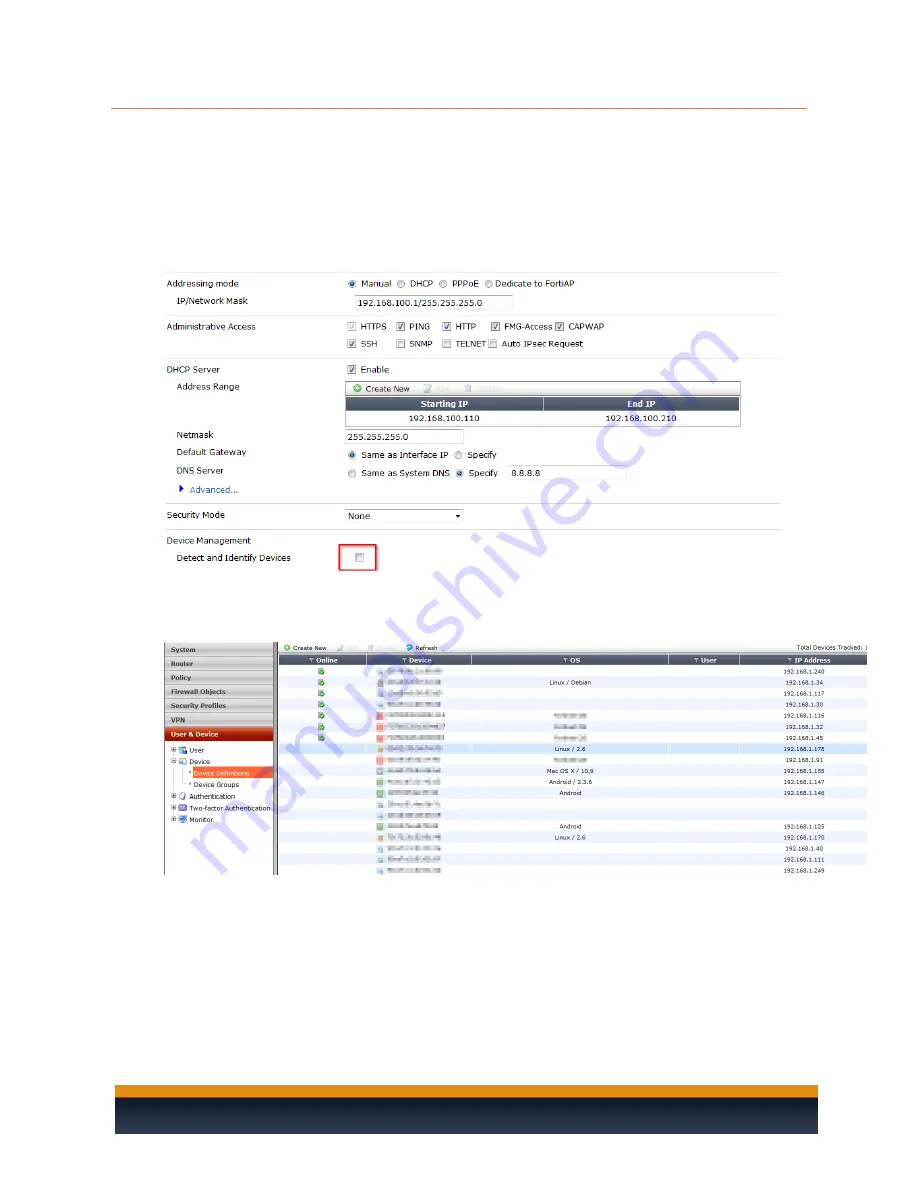
Device Discovery will allow the router to discover devices on your network. This will allow you to keep 
track of all the devices you connect on the network. Please take the following steps to configure the 
Device Discovery. 

1.


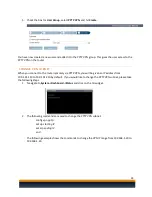
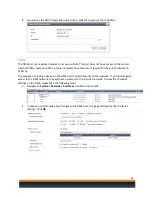
Device Discovery is disabled by default. To enable it, navigate to 

System

->

Network

->

Interfaces

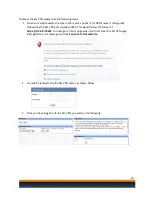
Double-click on the 

internal network

.  

2.


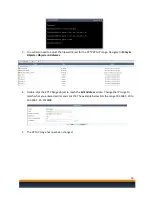
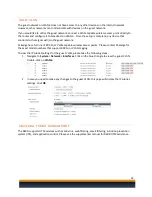
Check the box titled 

Detect and Identify Devices

. Click 

OK

.  


3.


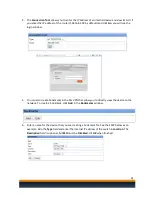
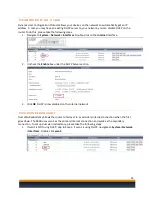
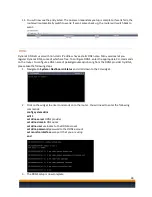
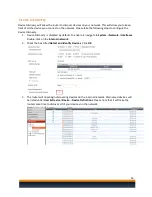
The router will now begin discovering devices on the internal network. Discovered devices will 
be listed under 

User & Device

->

Device

->

Device Definitions

. Please note that it will take the 

router some time to discover all of your devices on the network.  


Содержание K60D

Страница 1: ...USER MANUAL VERSION 1 1 PAKEDGEDEVICE SOFTWARE INC K60D PRECONFIGURED AUDIO VIDEO BRIDGING ROUTER ...

Страница 2: ...ution symbols that are affixed to this equipment Comply with all instructions that accompany this equipment Upon completion of any service or repairs to this product ask the service technician to perform safety checks to determine that the product is in safe operating condition Installation of this product must be in accordance with national wiring codes and must conform to local regulations Avoid...

Страница 3: ...iew 14 Changing Administrative Password 14 Port Forwarding 16 VPN 19 SSL 19 PPTP 22 Change VPN Subnet 23 Disabling DHCP on a VLAN 25 Dual Wan Redundancy 25 DDNS 28 Changing IP Subnet 29 DHCP Reservation 30 DMZ 31 Guest VLAN 32 Universal Threat Management 32 Device Discovery 33 Shutting down the router 34 Appendix A FAQs 35 Appendix B Specifications 36 R60D Router 36 Appendix C Limited Warranty 49 ...

Страница 4: ...ime installing this product please read this manual in its entirety Preset IP Address Values The K60D is preconfigured for out of box VLAN installations Therefore the IP addresses of all VLANs are predefined Please note that changing IP addresses may affect other preconfigured features Contact Pakedge support for more information Warning Factory Reset Pakedge does not recommend performing a factor...

Страница 5: ...customerservice pakedge com Phone 650 385 8701 Technical Support Email support pakedge com Phone 650 385 8703 Website www pakedge com Visit our website for up to date support information Please be prepared to provide your product s model and serial number when contacting Pakedge Support Your model and serial numbers are printed on a label located on the electronic housing Pakedge Device Software I...

Страница 6: ... assembly the operating ambient temperature of the rack environment may be greater than room temperature Make sure you install the equipment somewhere within the recommended temperature range For rack installations make sure that the amount of air flow required for safe operation of the equipment is not compromised For free standing installation make sure that the R60D has at least 1 5 in 3 75cm o...

Страница 7: ...rt on the router using an Ethernet cable C Open any internet browser on the PC and go to http 192 168 1 99 D Log in to the router using pakedge pakedgef as the username and password E Navigate to Network under System on the left hand side of the screen and click on Interface F Next click on the wan1 row You should see the configuration page for wan1 G Start by selecting Manual under the Addressing...

Страница 8: ...wser on the PC and go to http 192 168 1 99 D Log in to the router using pakedge pakedgef as the username and password E Navigate to System Network on the left hand side of the screen and select Interface F Next click on wan1 You should see its configuration page G Click on the PPPoE radio button under the Addressing Mode heading H Enter the username and password information provided by the ISP Hit...

Страница 9: ...iscovery Each of these features is independent of one another and sequence of installation does not matter Please visit the Dealer Portal of our website for the latest user manuals http pakedge com for dealers portal html The K60D is a kit that comes with the R60D router and the mounting kit For the purposes of this manual we will now refer to the router as the R60D NOTE Pakedge does not support a...

Страница 10: ...peration POWER Green The router is powered on Off The router is turned off STATUS Green The unit is operating normally Off The unit is off HA Green Unit is being used in an HA cluster Ports 1 7 LINK ACT Green Port is online link established Flashing Green Activity SPEED Green Connected at 1000 Mbps Amber Connected at 100 Mbps Off Connected at 10 Mbps WAN1 WAN2 DMZ LINK ACT Green Port is online lin...

Страница 11: ...ovides access to the command line interface CLI Note The console port is located on the front of the R60D USB USB A USB Optional connection for FortiUSB key modem or firmware backup and installation DMZ RJ 45 10 100 1000 Ethernet Optional connection to a DMZ network WAN1 and WAN 2 RJ 45 10 100 1000 Ethernet Redundant connections to the Internet Internal RJ 45 10 100 1000 Ethernet 7 port switch con...

Страница 12: ...NG TO KNOW YOUR PRODUCT CONTINUED The R60D comes preconfigured on VLANs 2 6 allowing you to isolate the traffic on various network devices Below is an example of a network with multiple VLANs and their devices ...

Страница 13: ... 1 DHCP WAN1 Interface Dynamic IP Service WAN2 Interface Dynamic IP Service DHCP Server on Internal Interface VLAN1 192 168 1 110 to 192 168 1 199 DHCP VLAN 2 192 168 2 110 to 192 168 2 199 DHCP VLAN 3 192 168 3 110 to 192 168 3 199 DHCP VLAN 4 192 168 4 110 to 192 168 4 199 DHCP VLAN 5 192 168 5 110 to 192 168 5 199 DHCP VLAN 6 192 168 6 110 to 192 168 6 199 Pakedge Factory Default Settings for t...

Страница 14: ...twork card is set to obtain an IP address automatically Then open any internet browser e g Mozilla Chrome etc and go to the address http 192 168 1 99 3 Enter the default username pakedge and the password pakedgef Click Login It is highly recommended that you change this default password Please see the section titled Changing Administrative Password ...

Страница 15: ...TIVE PASSWORD It is strongly recommended that you change the default password for the R60D To change the password please take the following steps 1 Log in to the router using the steps mentioned two sections ago under Accessing the Router Then navigate to System Admin Administrators Double click the default pakedge username 2 Click on Change Password ...

Страница 16: ...15 3 Enter your password information Click OK 4 You will then be prompted to log in to the unit with the new password ...

Страница 17: ... as the name Leave a brief description under the Comments section Select the WAN port you are using for the External Interface You can specify which public IP addresses would be allowed to use this virtual IP with the Source Address Filter but we recommend leaving it unchecked We will leave the External IP Address Range as all 0 s This will tell the router to use the public IP address currently on...

Страница 18: ...outer from We will use port 80 in our example which is most often used for HTTP We will confirm it in the right hand side box Map to Port refers to the port that the traffic will use when it enters the internal network In our example we will use 80 We will also enter it in the right hand side box The complete virtual IP will look like the following Click OK 3 You should now see your Virtual IP lis...

Страница 19: ...e device that we are forwarding the port to In our example we will select the virtual IP that we created earlier Schedule allows us to select a time at which the policy will be active In our example we will select always Service allows us to specify the allowed port for this policy We select ACCEPT as the Action The Enable NAT option would allow the router to perform a network address translation ...

Страница 20: ...ces on the local network The SSL VPN comes preconfigured on the R60D In order to log in to the SSL VPN you will first need to add Pakedge to the SSL VPN group To do this please take the following steps 1 Navigate to User Device User User Groups 2 Double click the SSL VPN group 3 Click the Members drop down menu select pakedge and hit OK Now that Pakedge has been added you will be able to log in to...

Страница 21: ...lowed by the SSL VPN port number 10443 This would follow the format of https X X X X 10443 You may get an error page when you first access the SSL VPN page Disregard the error message and click Continue to this website 2 You will be redirected to the SSL VPN portal as shown below 3 Once you have logged in to the SSL VPN you will see the following ...

Страница 22: ... can also create bookmarks in the SSL VPN that allow you to directly view the device on the network To create a bookmark click Add in the Bookmarks window 6 Enter a name for the device that you are creating a bookmark for See the S24P below as an example Skip the Type field and enter the internal IP address of the switch in Location The Description field is optional but SSO must be Disabled Hit OK...

Страница 23: ...work access This means your computer will be given an IP address and become part of the network The PPTP VPN is preconfigured so all you will need to do is create a user for yourself This requires the following steps 1 Navigate to User Device User User Definition and click Create New 2 Select Local User and hit Next 3 Enter a username and password for the user and hit Next 4 Leave this page on its...

Страница 24: ...PTP VPN you will be given an IP address from 10 0 191 110 to 10 0 191 210 by default If you would like to change the PPTP VPN subnet please take the following steps 1 Navigate to System Dashboard Status and click on the CLI widget 2 The following commands are used to change the PPTP VPN subnet config vpn pptp set sip starting IP set eip ending IP end The following example shows the commands to cha...

Страница 25: ...te to Policy Objects Objects Addresses 4 Double click the PPTP Range object to reach the Edit Address screen Change the IP range to match what you entered earlier and click OK The example below lists the range 192 168 1 20 to 192 168 1 25 Click OK 5 The VPN IP range has now been changed ...

Страница 26: ...internal interface 2 Uncheck the Enable box under the DHCP Server section 3 Click OK DHCP is now disabled on the internal network DUAL WAN REDUNDANCY Dual Wan Redundancy allows the router to fail over to a secondary internet connection when the first goes down The R60D uses wan1 as the primary internet connection and wan2 as the secondary connection To set up dual wan redundancy please take the fo...

Страница 27: ...eld to 5 Click OK 5 If wan2 does not use DHCP skip to step 7 If wan2 uses DHCP navigate back to System Network interfaces Double click on wan2 6 Set the distance field to 10 Click OK 7 If wan2 is set to a static IP navigate to Router Static Static Routes Double click on the static route that you created to get internet access for this wan port 8 Set the distance field to 10 Click OK ...

Страница 28: ... is the IP address that the router will continuously ping We recommend using 8 8 8 8 The probe interval specifies how often the router will ping the IP address used in the ping server The failover threshold specifies how many times the pings must fail in order for the router to failover to wan2 The Recovery Threshold specifies how many pings must be successful for wan1 to be considered up Leave th...

Страница 29: ...riate CLI commands on the router To configure a DNS name of pakedgerouter dyndns org from the DDNS provider DynDNS please take the following steps 1 Navigate to System Dashboard Status and scroll down to the CLI widget 2 Click on the widget to enter commands onto the router You will need to enter the following commands config system ddns edit 1 set ddns server DDNS provider set ddns domain DNS nam...

Страница 30: ...he IP subnet of the internal network to be on the 192 168 10 x subnet 2 Double click on the internal network 3 Enter 192 168 10 99 255 255 255 0 in the IP Network Mask field Under Address Range adjust the starting and ending address to match the new subnet Change the DNS server to 192 168 10 99 Click OK 4 Navigate to Policy Objects Objects Addresses 5 Double click on VLAN_1 to edit it Change the S...

Страница 31: ...will then see the option in the GUI Config system global Set gui dhcp advanced enable end 4 Click Add from DHCP Client List under the MAC Reservation Access Control section 5 You will then see a new box titled DHCP Client List 6 Select the IP address that you want to reserve by clicking on it Click OK to finalize the settings You will return to the Edit Interface screen Hit OK at the bottom to fin...

Страница 32: ...cept for the guest network on VLAN 6 The purpose of placing a device on the DMZ port is to add security to the network If an intruder gains access to the DMZ network they will have no access to the internal network To view the IP subnet settings on the DMZ please take the following steps 1 Navigate to System Network Interfaces Double click on DMZ 2 In case you need to make any changes to the DMZ p...

Страница 33: ...802 1q or VLAN capable wireless access points Please contact Pakedge for the exact model numbers that support 802 1q or VLAN tagging To view the IP subnet settings for the guest VLAN please take the following steps 1 Navigate to System Network Interfaces Click on the blue triangle to view the guest VLAN Double click on VLAN6 2 In case you need to make any changes to the guest VLAN this page will d...

Страница 34: ...ry 1 Device Discovery is disabled by default To enable it navigate to System Network Interfaces Double click on the internal network 2 Check the box titled Detect and Identify Devices Click OK 3 The router will now begin discovering devices on the internal network Discovered devices will be listed under User Device Device Device Definitions Please note that it will take the router some time to dis...

Страница 35: ... console window 1 Navigate to System Dashboard status 2 Click on any black area in the CLI console to run a command Type exe shutdown and press enter 3 The router will now shutdown and only the power light will be left on It will now be safe to unplug the router 4 You can reboot the router by running the command exe reboot ...

Страница 36: ...uration If an integrator wants to perform any configuration beyond it they would have to contact Fortinet 3 Do I need to purchase antivirus for my router to work The router will work without an antivirus subscription However the router will not reach its full potential and malware could potentially penetrate your network An antivirus subscription gives the router perimeter network protection for a...

Страница 37: ...1 5 Gbps Firewall Throughput 512 byte UDP packets 1 5 Gbps Firewall Throughput 64 byte UDP packets 1 5 Gbps IPSec VPN Throughput 512 byte packets 1 Gbps SSL VPN Throughput 30 Mbps Intrusion Protection Security Throughput 200 Mbps Antivirus Throughput Proxy 35 Mbps Gateway to Gateway IPSec VPN Tunnels 200 Mbps Client to Gateway IPSec VPN Tunnels 500 Mbps Max Concurrent Firewall Sessions 500 000 New...

Страница 38: ...oup Support SECURITY FEATURES Gateway Antivirus Protection Virus Spyware Trojan Integrated IPS signature anomaly Integrated URL Filtering Integrated Spam Filtering VPN IPSec SSL PPTP VOIP Security H323 SIP MECHANICAL Dimensions dimensions are approximate Height x Width x Length 1 50 x 8 5 x 5 83 in 38 x 216 x 148 mm Weight 1 9 lb 0 9 kg OPTIONAL SUBSCRIPTION SERVICES Automatic and Scheduled Antivi...

Страница 39: ...riod 19 2 What Is Not Covered Under the Terms of This Warranty This warranty only covers failure due to defects in materials and workmanship that occur during normal use and does not cover normal maintenance This warranty does not cover any appearance item any damage to living structure failure resulting from accident for example flood electrical shorts insulation misuse abuse neglect mishandling ...

Страница 40: ...se the above limitations or exclusions may not apply to you This warranty gives you specific legal rights and you may also have other rights that vary from state to state 19 4 Effective Warranty Date This warranty begins on the effective date of delivery to the end user For your convenience keep the original bill of sale as evidence of the purchase date from your authorized dealer 19 5 Important W...

Страница 41: ...51 For additional information about this warranty visit our website Pakedge Device Software inc 3847 Breakwater Avenue Hayward CA 94545 USA Email support pakedge com Phone 650 385 8703 www pakedge com ...

Страница 42: ...52 pakedgedevice software inc 3847 Breakwater Avenue Hayward CA 94545 USA Visit us at www pakedge com Pakedge Device Software Inc 2014 All Rights Reserved ...

Отзывы: