


13
MA50-24 GB 2022
ENGLISH
K
abe
l 4m
M
ut
ter
Packning
silikon
Ko
nta
ktdon
LED
m
od
ul
A
B
C
D
E
page 6 of 20
Connector installation
1
2
3
page 7 of 20
4
5
6
page 7 of 20
4
5
6
page 6 of 20
Connector installation
1
2
3
page 7 of 20
4
5
6
page 6 of 20
Connector installation
1
2
3
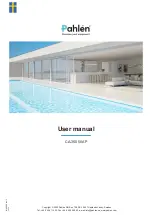
CA-350 50AP
A LED-module
B Connector/Socket
C Silicone packing
D Nut
E Cable
This is the way you install the cable to the LED module:
1. Loosen screws in socket (B) so that the hole for cable opens
leaving space enough for actions with cable guides.
2. Pull seal (C) onto the cable (E)
Pull cable guide through the socket.
3. Make sure the cable cover goes right under the socket.
4. Tighten screws.
Make sure the screws are firmly seated.
5. Cut or cut off the piece of the guide that sticks
through the socket
6. Align the socket into the LED module (A).
Make sure the seal is properly sealed.
Tighten nut (D).
If the cable is not dragged sufficiently far, there is a risk that the
silicone seal will not function properly. Water may then leak into
the lamp.
Replacement lamps:
1.
The power must be off.
2.
Loosen existing front. Raise the lamp above the water surface.
3. Disconnect the cable from the lamp body.
4.
Install the new lamp, see above and “Install as follows” for each type of pool frame.