background image

Table of Contents

file:///C|/PACH-CO.COM-2022-B/online_manual/qvoip_manual.htm[3/24/2022 1:59:26 PM]

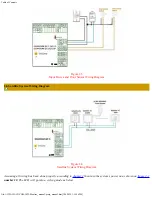
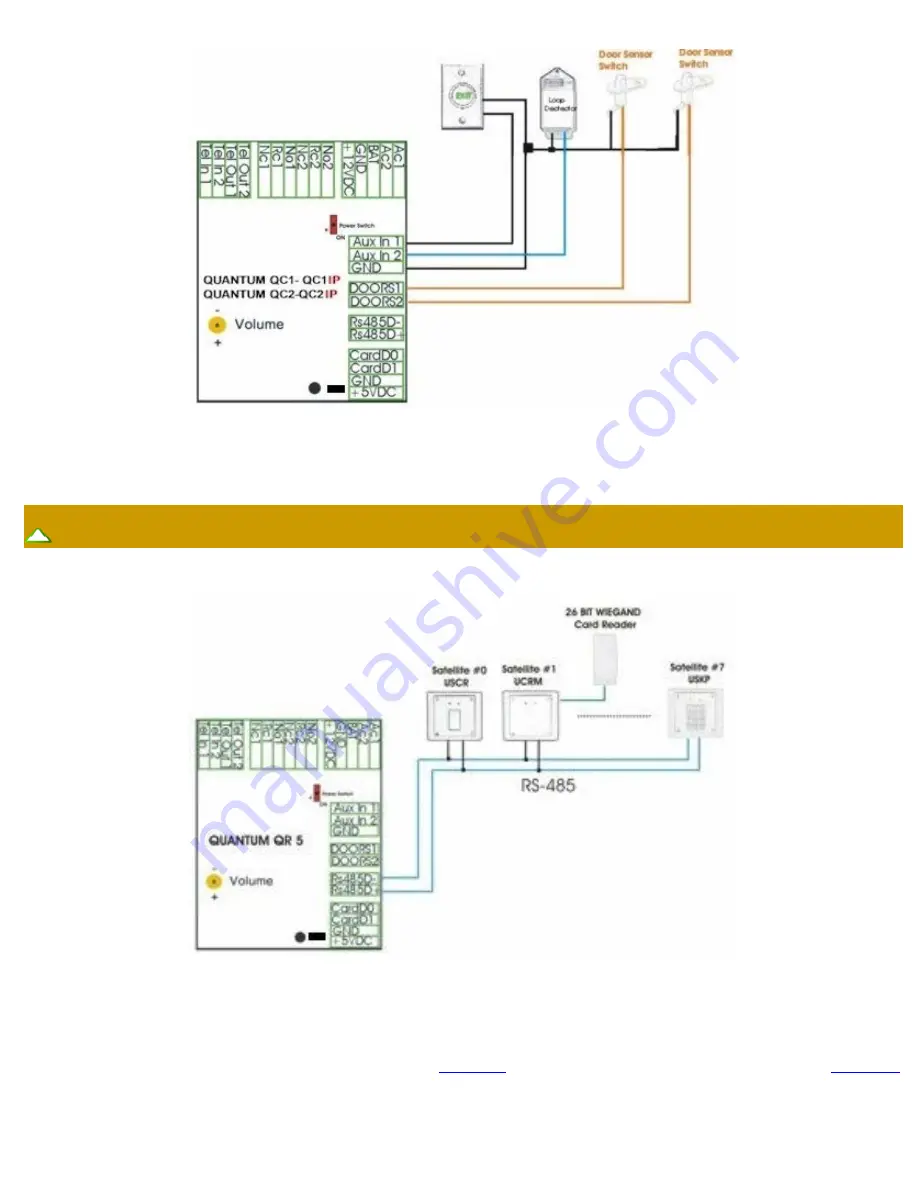
Figure 2.5

Input Device and Door Sensor Wiring Diagram


2.6 Satellite System Wiring Diagram


Figure 2.6

Satellite System Wiring Diagram


Assuming all wiring has been done properly according to 

chapter 2

 then turn the system s power on as shown on 

figure 2.1

number 10. The LCD will go into a cycling mode as below

Содержание QUANTUM QVOiP SERIES

Страница 1: ...g Diagram VOIP Diagram Function Code 15 Initializing Event Recording Function Code 16 Auto Unlock Schedule AUS Function Code 17 Time Zone TMZ Function Code 18 Holiday Zone HLD Function Code 19 Directo...

Страница 2: ...Code 43 Do Not Disturb Zone Function Code 44 Disable Time Zone Relay Function Code 45 Relay 1 and 2 Unlock Timer Function Code 46 Firmware Version Function Code 48 PBX Enable Function Code 49 Edit Exi...

Страница 3: ...consumer controls improper maintenance power line surge lightning damage modification introduction to sand humidity or liquids or product has been installed by non license installer or damage that is...

Страница 4: ...AC supplied 12VDC 3 0A Minimal Current consumption 750 100mA DIMENSION 6 7 16 H x 10 W x 2 1 16 D 1x16 Liquid Crystal Display LCD Built in 26 Bit Wiegand Card Reader RS 485 for Satellite system up to...

Страница 5: ...have any difficulties during the installation Click the selection below for different applications General Wiring Diagram Power Wiring Diagram VOIP Telephone Diagram Door Strike Wiring Diagram Input D...

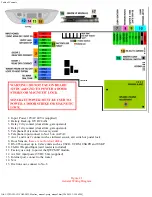
Страница 6: ...tem 6 Telephone input connect to No 15 on AATA2 7 Aux 1 and Aux 2 connect such as infrared sensor exit switch or postal lock 8 Door Sensors these are not for door strikes 9 RS 485 coonect up to 8 slav...

Страница 7: ...able of Contents file C PACH CO COM 2022 B online_manual qvoip_manual htm 3 24 2022 1 59 26 PM 2 2 Power Wiring Diagram Figure 2 2 Power Wiring Diagram 2 3 VOIP Telephone Wiring Diagram See Figure 2 1...

Страница 8: ...C PACH CO COM 2022 B online_manual qvoip_manual htm 3 24 2022 1 59 26 PM Figure 2 3 VOIP Wiring Diagram 2 4 Door Strike Wiring Diagram Figure 2 4 Door Strike Wiring Diagram 2 5 Input Device and Door...

Страница 9: ...2 5 Input Device and Door Sensor Wiring Diagram 2 6 Satellite System Wiring Diagram Figure 2 6 Satellite System Wiring Diagram Assuming all wiring has been done properly according to chapter 2 then tu...

Страница 10: ...C a b c 2 P Q R S p q r s 7 D E F d e f 3 T U V t u v 8 G H I g h i 4 W X Y Z w x y z 9 J K L j k l 5 SPACE Cancel call Erase incorrect letter or number exit programming CALL ENTER EXCEPT PROGRAM CHAP...

Страница 11: ...ory is in single digit and cannot be changed then see Chapter 3 for keypad layout 4 Enter name up to 16 characters name can be a person real name apartment number etc directory will be sorted in alpha...

Страница 12: ...name see Chapter 3 for keypad layout 4 Enter the a new tenant phone number up to 16 digit then press or press without entering anything to keep the existing number Return to step 3 to edit another te...

Страница 13: ...disable is selected the system can t make calls 1 Log in to programming 2 Enter 30 then 3 Enter 0 disable default pr 1 enable then press Function Code 06 Add New Access Code An access code is a keyles...

Страница 14: ...n press 7 Enter 00 24 hours 20 see function code 17 then press 8 Enter satellite system ID 0 7 enter 0 if no satellite connected to the QR5 then press 9 Enter 0 no more additional time zone then press...

Страница 15: ...Code 08 Clear All Access Codes 1 Log in to programming 2 Enter 07 then 3 Enter 1 to clear all access code then press or to cancel Function Code 09 Access Code Digit 1 Log in to programming 2 Enter 09...

Страница 16: ...utomatically register then press see Chapter 3 for keypad layout 4 Enter name up to 16 characters then press 5 Enter door 1 or 2 or 3 for both then press 6 Enter time zone 1 3 then press 7 Enter 00 24...

Страница 17: ...dow the number will register automatically or enter the last 8 digits of the number on the card then press if card exists if card does not exist Repeat this step to delete another code Function Code 1...

Страница 18: ...Date then press 4 Enter 0 Sunday 1 Monday 2 Tuesday 3 Wednesday 4 Thursday 5 Friday 6 Saturday then press 5 Enter 0 NO Daylight Saving Zone Hawaii Indiana and Arizona 1 Daylight Saving Zone then pres...

Страница 19: ...ng and locking the door as program automatically if the open time is 06 00 and close time 18 00 door 1 2 or both will unlock at 06 00 am and close at 06 00 pm 10 AUS can be programmed 1 Log in to prog...

Страница 20: ...ay 1 and 2 then press 9 Return to step 3 to enter another AUS Function Code 17 Time Zone TMZ A maximum of 20 Time Zone can be programmed and up to three time zone can be assigned to each access code o...

Страница 21: ...y 3 Wednesday 4 Thursday 5 Friday 6 Saturday then press Return to step 3 to program more time zone Function Code 18 Holiday Zone HLD HLD is to ever ride Time Zone TMZ and Auto Unlock Schedule AUS duri...

Страница 22: ...digit It also uses to do direct call 1 Log in to programming 2 Enter 19 then 3 Enter 2 3 or 4 digit then press Function Code 20 AUXIN1 AUXIN1 is used for input device such as postal lock infrared sens...

Страница 23: ...call from the system 1 Log in to programming 2 Enter 21 then 3 Entert 0 disable 1 enable then press Function Code 23 Lock out Count The system will be disabled in about 60 seconds after pressing inval...

Страница 24: ...then press Function Code 25 Keypad Beep Turn the keypad press beep On or Off 1 Log in to programming 2 Enter 25 then 3 Enter 0 off 1 On default then press Function Code 26 Door Beep Turn the door beep...

Страница 25: ...r 1 Log in to programming 2 Enter 28 then 3 Enter 01 99 second then press Function Code 29 Unlock Relay 2 Time The amount of time for relay 2 to trigger 1 Log in to programming 2 Enter 29 then 3 Enter...

Страница 26: ...tting on function code 09 see Chapter 3 for keypad layout 6 Enter name then press 7 Enter 1 relay 1 door 1 2 relay 2 door 2 or 3 both relay then press 8 Enter time zone set 1 3 then press 9 Enter 00 2...

Страница 27: ...code again to lock close door or gate Up to 10 special codes can be programmed 1 Log in to programming 2 Enter 34 then 3 Enter 0 delete 1 add then press 4 Enter code 01 10 then press 5 Enter 4 8 digit...

Страница 28: ...ther temporary code 1 add additional time zone then press and return to step 8 exit programming Function Code 35 Temporary Card The card will be expired after being used a certain amount of times spec...

Страница 29: ...on code 17 then press 10 Enter Sat ID 0 7 then press enter 0 if no satellite connected to the QR5 11 Enter 0 no more additional time zone then press and return to step 3 to program another temporary c...

Страница 30: ...k window the system will register the card or fob 8 digit number printed then press 7 Enter 1 relay 1 door 1 2 relay 2 door 2 or 3 both relay then press 8 Enter time zone 1 3 then press 9 Enter 00 24...

Страница 31: ...sable and Enable Remote Access If no remote opening allow disable it using this function code Default setting is enabled 1 Log in to programming 2 Enter 39 then 3 Press 0 disable remote access 1 enabl...

Страница 32: ...en though relay 1 is not used 1 Log in to programming 2 Enter 41 then 3 Press 1 9 9 is default setting then press Function Code 42 Relay 2 Mode Relay 2 can be set to four different mode 1 door control...

Страница 33: ...e must be later than start time if start time 22 00 hour and end time 06 00 two time zone must be created 22 00 hour 24 00 hour 00 01 hour 06 00 hour 7 Enter 0 Sunday 1 Monday 2 Tuesday 3 Wednesday 4...

Страница 34: ...5 Enter start time in military then press 6 Enter end time in military then press 7 Enter 0 Sunday 1 Monday 2 Tuesday 3 Wednesday 4 Thursday 5 Friday 6 Saturday then press Return to step 3 to program...

Страница 35: ...is installed behind a Private Branch Exchange PBX then 9 is necessary before dialing an outside line If this function is enabled then the system can only be dialing an outside line it cannot dial the...

Страница 36: ...Code click here or Editing a Special code then click here Function Code 50 Erase Memory to Factory Default Warning This function code will erase the memory to factory default no way to restore them u...

Страница 37: ...used for limited number of times maximum 10 times then the code will be expired see function code 33 Special Code is used to unlock hold door and then use same code to lock the door see function code...

Страница 38: ...expired It can be extended more another full cycle by pressing 5 7 Call the System from Remote Location 1 The system must be install in Intercom and Call Forwarding Mode Wiring Diagram or Call Forwar...

Страница 39: ...l htm 3 24 2022 1 59 26 PM QWCM Internet IP Module The QWCM is only applicable for QR5IP Click here for complete manual for QWCM QR5IP DEFAULT SETTING IP 192 168 1 230 SUBNET 255 255 255 0 GATEWAY 192...

Отзывы: