User Manual
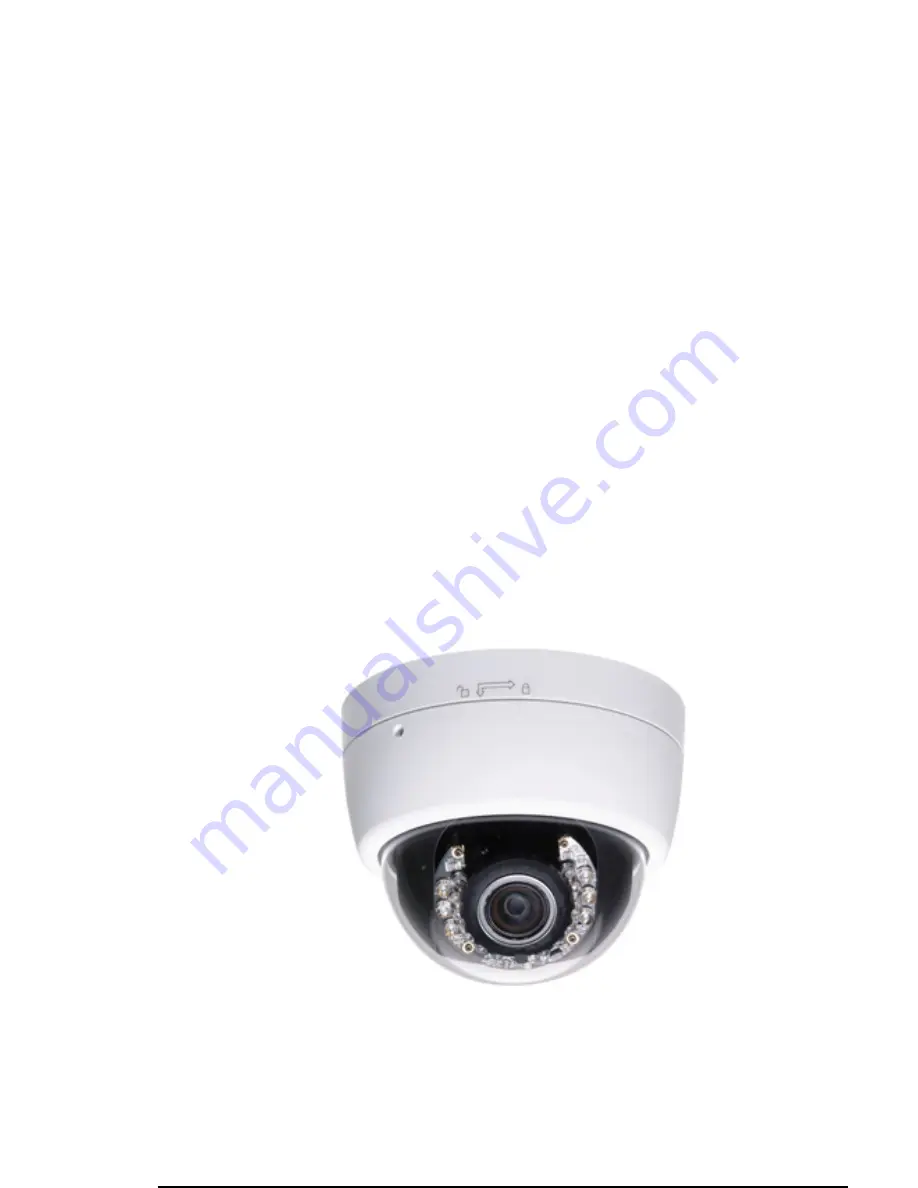
3-AXIS INDOOR DOME
IP CAMERA
Страница 1: ...User Manual 3 AXIS INDOOR DOME IP CAMERA...
Страница 2: ...THROUGH VENTILATION GRILLS CAUTION CAUTION DO NOT CHANGE THE LENS CAUTION THIS CAMERA DESIGN IS BASED ON THE INCLUDED LENS LENS REPLACEMENT MAY CAUSE INSTABILITY OF IMAGE QUALITY PLEASE REFER SERVICIN...
Страница 3: ...roduct Installation 7 Monitor Setting 7 Hardware Installation 8 IP Assignment 10 Install ActiveX control 12 Live Video 18 IP Camera Configuration 20 System 21 Network 25 A V Setting 45 Event List 52 N...
Страница 4: ...on Product Specifications Main Features 5 Megapixel 3 Axis Indoor Dome 3D 2D Digital Noise Reduction Support Digital Wide Dynamic Range Day Night Switch time control manually IR LED Built in 15 Meter...
Страница 5: ...s list IEEE 802 1X RTSP TCP IP UDP SMTP FTP PPPoE DHCP DDNS NTP UPnP 3GPP SAMBA Bonjour System Video Resolution 2592x1944 15fps 2048x1536 15fps 1600x1200 15fps 1280x960 15fps 1920x1080 30fps 1280x720...
Страница 6: ...o 10 SD card management Recording trigger Motion Detection IP check Network break down wire only Schedule DI Video format AVI JPEG Video playback Yes Delete files Yes Client System requirement OS Wind...
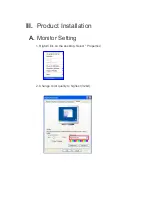
Страница 7: ...III A Product Installation Monitor Setting 1 Right Click on the desktop Select Properties 2 Change color quality to highest 32bit...
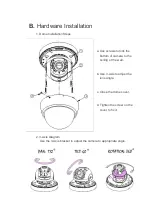
Страница 8: ...Use screws to lock the bottom of camera to the ceiling or the wall b Use 3 Axis to adjust the lens angle c Close the dome cover d Tighten the screw on the cover to fix it 2 3 Axis Diagram Use the 3 Ax...
Страница 9: ...PoE Power Over Ethernet Optional 802 3af PoE Switch is recommended Power over Ethernet PoE is a technology that integrates power into a standard LAN infrastructure It enables power to be provided to...
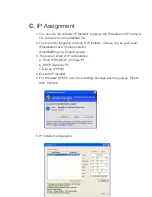
Страница 10: ...ons of IP installer Choose one as your need IPInstallerCht exe Chinese version IPInstallerEng exe English version 3 There are 3 kinds of IP configuration a Fixed IP Public IP or Virtual IP b DHCP Dyna...
Страница 11: ...pply the change and reboot the Device 9 Please make sure that the IP address of your PC and IP Camera are on the same subnet The same Subnet IP CAM IP address 192 168 1 200 PC IP address 192 168 1 100...
Страница 12: ...Install ActiveX control 1 To users of IE 6 0 above At the first time you access the camera via IE it will ask you to install the ActiveX component If the installation failed please check the security...
Страница 13: ...1 2 3 4 5 When popup the following dialogue box click Yes...
Страница 14: ...Internet Options Security Tab Trusted sites Add the IP address and click OK In the site list you can key one single IP address or a LAN address For example if you add 192 168 21 all the IP address und...
Страница 15: ...below First Click the link Firstly please install Microsoft Visual C 2010 Redistributable Package x86 i ii The link conducts you to the Microsoft official site that you can download the tools Please s...
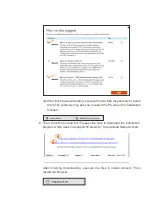
Страница 16: ...may ask you to reboot the PC when the installation finished b Then Click the second link Please click here to download the installation program which does not support IE browser to download Setup Act...
Страница 17: ...se use the search bar on the top right of the Windows Explorer ii Delete all the files named np_hoem_x dll They re the ActiveX control tools having been installed in your computer but the old version...
Страница 18: ...ddress field It will show the following dialogue box Key in the user name and password The default user name and password are admin and admin When the IP Camera is connected successfully it shows the...
Страница 19: ...rd Stop The video format is AVI Use Microsoft Media Player to play the recorded file 3 Mute Turn off the audio Click again to turn on it The mute bottom does not affect the playback recording video As...
Страница 20: ...V IP Camera Configuration Click to get into the administration page as below Click to back to the live video page...
Страница 21: ...uages to choose from When you change the language it will show the following dialogue box for Confirmation b OSD Setting Select a position where date time stamp text showing on screen Click Text Edit...
Страница 22: ...saving the time will be 1 hour faster NTP Key in the NTP server IP address and update interval The camera time will be synchronized with NTP server time To use this option if the NTP Server is under W...
Страница 23: ...ge the camera will ask you to key in the username and password to log in Select No and then username and password are required to access the camera b Add user Type the user name and password then clic...
Страница 24: ...w b Reboot system re start the IP camera c Factory default delete all the settings in this IP camera d Setting Management User may download the current setting to PC or upgrade from previous saved set...
Страница 25: ...provides a much larger address pool than IPv4 which accounts for most of today s Internet traffic You can manually key in IPv6 address enable DHCPv6 and use automatically generated IPv6 address simul...
Страница 26: ...mputer the camera will automatically be detected and a new icon will be added to My Network Places i ii UPnP Port Forwarding When the camera is installed under a router Enable UPnP Port Forwarding to...
Страница 27: ...and click Show icons for networked UPnP devises in the tasks column on the left of the page Windows may ask your confirmation for enabling the components Click Yes Now you can see the IP devise under...
Страница 28: ...Digest authentication mode the camera asks the user to give username and password before allows accessing The password is transmitted as clear text under basic mode which provides a lower level of sec...
Страница 29: ...accessing the camera via ONVIF Select Enable then username and password are necessary iii RTSP Keepalive When the function is enabled the camera checks once in a while if the user who links to the ca...
Страница 30: ...nection status properties and device position like IP address of this IP Camera in the network map In the computer running Windows Vista or Windows 7 you can find LLTD through the path Call out the Co...
Страница 31: ...ction type it may cause connection error or disconnection error if you switch the protocol directly Therefore Http Https mode is necessary If you want to change from Http to Https please switch to Htt...
Страница 32: ...nd click apply iii After you generate a certificate request if you choose to turn it to the trusted third party to verify please click Content and copy all the request content iv According to the cert...
Страница 33: ...inish installed it After finishing installation you can click Content to call out and check the certificate content v To use Https to access camera open your browser and key in https IP address in the...
Страница 34: ...SNMPv2 The term Community name in SNMPv1 and SNMPv2c can be roughly regarded as key The person who has the community name has the authority to read or edit the information of IP camera via SNMP Tick t...
Страница 35: ...y the security name similar with community name in v1 v2c but the password in order to access the IP camera Please set security name authentication type authentication password encryption type encrypt...
Страница 36: ...If you want to add the new user who has read authority key in correct security user name public key in authentication password of read security and key in encryption password of read security iii SNM...
Страница 37: ...connected again V3 Authentication Failed A SNMPv3 user account tries to get authentication but failed Due to incorrect password or community SD Insert Remove A SD card is inserted or removed Example O...
Страница 38: ...mple IP address 192 168 50 151 161 are not allowed to connect to the camera but only 192 168 50 159 can access Note In the list allow condition must be ranked before deny condition For example if we e...
Страница 39: ...is 5 10 20 The item getting more bandwidth has lower probability to be delayed There is no difference between setting 0 0 0 or 63 63 63 because under these two setting the three items will get equal b...
Страница 40: ...this function you need a device to build IEEE 802 1x LAN at first The EAPOL protocol support service identification and optional point to point encryption over the local LAN segment Please check what...
Страница 41: ...ail account For the mail setting please refer to Server settings b DDNS It supports DDNS Dynamic DNS service i ii Enable this service Key in the DynDNS server name user name and password iii Set up th...
Страница 42: ...ns camddns com Register successfully Update Failed the name is already registered The user name has already been used Please change it Update Failed please check your internet connection Network conne...
Страница 43: ...her one or all of them a Mail Setting Set up the server address and account information of your e mail Click Apply to save the setting then use Test button to test the server connection A message box...
Страница 44: ...TP server waits for the data transmission connection built by the user Make sure that the server supports the mode you select c Samba Select this option to send the media files via a network neighborh...
Страница 45: ...age and remember to save your setting The masked area will not show on both the live view and recording Please refer to the details below for Image setting a Brightness Contrast Hue Saturation Sharpne...
Страница 46: ...f Video Orientation Flip or mirror the image as your requirement g Day Night The camera can detect the light level of environment If you choose Light Sensor Mode the image will be turned to black and...
Страница 47: ...0 1 50 1 10000 1 50 1 60 1 10000 1 60 1 100 1 10000 1 100 1 125 1 10000 1 125 1 250 1 10000 1 250 1 500 1 10000 1 500 1 1000 1 10000 1 1000 Sense up options 1 30 1 15 1 10 1 5 Note When you select a n...
Страница 48: ...60 640x480 320x240 or 176x144 here If 1920x1080 30fps is selected in Input Resolution you can select 1920x1080 1280x720 640x480 320x240 or 176x144 here Profile Profiles are different compression way o...
Страница 49: ...cted in Input Resolution you can select 1920x1080 1280x720 640x480 320x240 or 176x144 here Profile High profile provides better coding efficiency Note that some devises do not support every profile Fo...
Страница 50: ...deo Format H 264 or M JPEG ix RTSP Path RTSP output connecting route d 3GPP Streaming mode 3GPP Streaming is designed for mobile viewing Please lower the resolution bitrate or frame rate if the image...
Страница 51: ...Camera to PC To receive Audio from IP camera select Enable to start this function The Audio compression format can be choosing from 3 options You can also adjust the volume of 2 way audio b PC to IP C...
Страница 52: ...trigger the output devise or save video to FTP SD card Samba If you select save to SD card the video or snapshot will be saved to SD card If you also tick E mail FTP Samba of Log option the motion det...
Страница 53: ...EG File Single File with Interval Setting Save single JPEG picture file when event happens JPEG Files with Record Time Setting Only when you select JPEG in streaming 1 video format of Video Setting th...
Страница 54: ...s full This function is only enabled under wire connection e Network IP check The same with Network Dis connected function Network IP check is designed for avoiding video loss Even when the Ethernet c...
Страница 55: ...ata will be recorded according to the schedule setup b Snapshot After enable the snapshot function user can select the storage position of snapshot file the interval time of snapshot and the reserved...
Страница 56: ...ing 11 00 12 00 on Monday b Output Setting The output mode affects the DO or relay out duration i ii OnOff Switch The camera triggers the external devise and lasts for certain of time according to the...
Страница 57: ...4 Log List Sort by System Logs Motion Detection Logs and I O Logs In addition System Logs and I O Logs won t lose data due to power failure...
Страница 58: ...Deletion means the recoding files will be deleted after several days as you selected Example If The 2st day is selected then the recording files at 2012 11 21 5 00AM will be deleted from SD card at 2...
Страница 59: ...follow the steps i ii Enter the data list and right click Files link daily select save target as to save the link list to PC Open FlashGet select File Import Import list and find the link list file y...
Страница 60: ...iv Click OK to start download FlashGet is a free software that can be downloaded from FlashGet official website The example above is based on FlashGet ver 1 9 6...
Страница 61: ...to the internet d For fixed real IP set up the IP into IP Camera For dynamic IP start PP PoE Configuration 2 a Internet AccessL ADSL or Cable Modem b IP address More than one real IP or one dynamic IP...
Страница 62: ...ion 3 a Internet Access ADSL or Cable Modem b IP address one real IP or one dynamic IP c IP Camera and PC connect to the internet d Device needed IP sharing e Use virtual IP set up port forwarding in...
Страница 63: ...nnected When the camera detects event happening and triggers external alarm DO output is 0V DO and GND are connected If you select N O in Input sensor setting when external devise or circuit makes DI...
Страница 64: ...Setting from the system setup page via IE and check Out1 to enable I O signal b Output Test After the external input and output hardware is installed you can use the Relay Out bottom on the live video...
Страница 65: ...ii Time Switch mode Click Pulse the camera will trigger the external output devise for several seconds The duration length is according to the interval setting in Output Setting...
Страница 66: ...and press and hold the button as the picture below Connect power to the camera again and do not release the button during the system booting It will take around 30 seconds to boot the camera Release t...
Страница 67: ...16G SanDisk 1G SanDisk 256M SanDisk 2G SanDisk 32G SanDisk 4GB SanDisk 512M SanDisk 8G SiliconPower 128M SiliconPower 256M TEKQ 128M TEKQ 256M Toshiba 128M Toshiba 256M Toshiba 4GB Tracend 128M 80X T...