


Use
Invader Pointer
Ottobock | 17
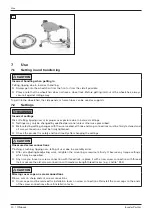
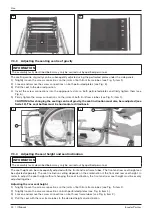
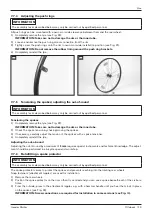
7.6.2 Optional: Adjusting the lateral heel blocks
The lateral heel blocks support the secure placement of the feet and can be adapted to the anatomical condition of
the user�
1) Loosen the screw connections on both lateral heel blocks (see Fig� 16, item 2)�
2) Pivot the lateral heel blocks to the desired position�
INFORMATION: Depending on the position of the footplate, the adjustment range of the lateral heel
blocks may be restricted.
3) Firmly tighten the screw connections on both lateral heel blocks (see Fig� 16, item 2)�
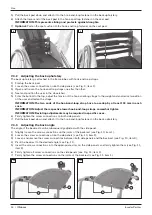
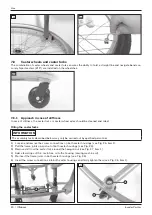
7.7 Rear wheels
CAUTION
Incorrect fitting of the rear wheels
Tipping, falling over of the user due to wheels coming off
f
After each assembly, verify the proper fit of the rear wheels�
f
The quick-release axles must be firmly locked in the wheel attachment�
CAUTION
Reaching into exposed drive parts
Crushing, pinching due to incorrect handling
f
Do not reach between the rear wheel and side panel when driving your wheelchair�
f
Do not reach into the spokes of the rotating rear wheel�
CAUTION
Defective tyres
Accidents/falling due to poor traction, reduced braking force or lack of manoeuvrability
f
Maintain sufficient tyre pressure� The correct tyre pressure is printed on the tyre sidewall�
f
Ensure that the pressure is the same in both tyres�
f
Replace damaged tyres promptly and in pairs�
CAUTION
Heat development when braking with push rings
Burns due to insufficient hand protection
f
Wear wheelchair gloves when travelling at high speeds�
The wheelchair is moved, steered, braked and stopped with the help of the push rings on the rear wheels�
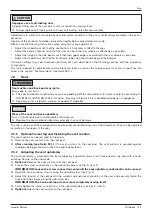
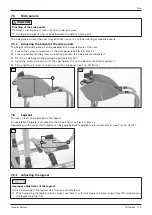
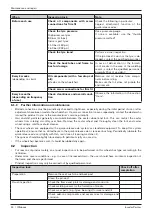
7.7.1 Removing/attaching the rear wheels
CAUTION
Incorrect removal/attachment of the wheels
Tipping, falling due to incorrect installation
f
For changing wheels, set the wheelchair onto a solid surface�
f
To change the wheels, secure the wheelchair against tipping over or rolling away�
f
If the rear wheel does not lock securely or has too much sideways play, contact the qualified personnel prompt-
ly�
1) Grip the area between the spokes near the hub with your fingers�
2) Use your thumb to press the push-button on the quick-release axle (see Fig� 18)�
3) Pull off/push on the rear wheel� The quick-release axles must not be removable after releasing the push-button�
Содержание Invader Pointer
Страница 1: ...Invader Pointer Instructions for use 3...
Страница 2: ...Invader Pointer 2 Ottobock...
Страница 30: ...Invader Pointer 30 Ottobock...