background image

General Information

Timer / Toast Shade Setting Tip

To set the timer for less than 20 minutes, ALWAYS turn the timer past the 20-minute mark 

to engage timer switch and then turn it back to desired time.


Heating Elements

The top and bottom heating elements will cycle ON and OFF to maintain the desired 

temperature. You may not see the heating elements glowing.


Positioning Rack

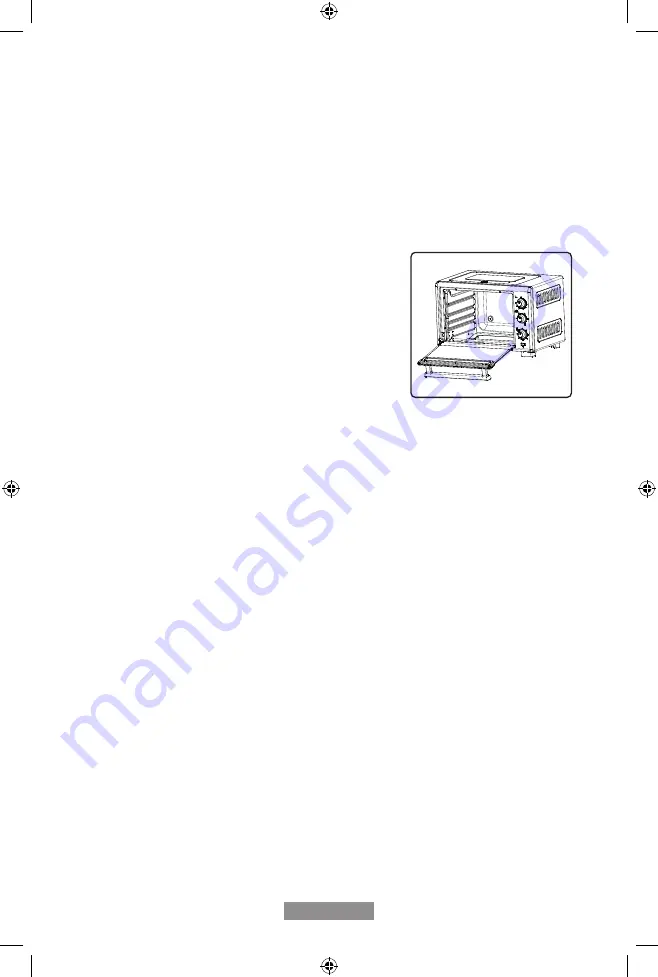
To accommodate a wide variety of foods the oven has  

three rack positions. (See Figure 3)

Positioning of the rack will depend on the size of the  

food and desired browning.

Before removing the rack allow the unit to cool.

The oven rack may tilt downward causing  

food to shift when the rack is pulled out, proceed with 

caution.

PLEASE NOTE:

For best air frying results, position the air frying tray in the top rack position.

For best broiling results, position the baking pan in the top rack position.

For best baking results, position the baking pan in the middle rack position.

For best toast and pizza results, position the rack in the middle rack position.

Preheating the Oven

•   Set to the desired Function.

•  Turn the Temperature Control Knob to the desired temperature.

•   Set the Timer Knob to desired time and allow 5-6 minutes for the oven to preheat.


Removing Food

Always open door fully and remove food carefully with oven mitt.

To Use the Timer Dial

After rotating the Temperature Dial to your desired temperature, select from the following 

options on the Timer Dial.

•   For cooking time longer than 20 minutes, rotate the Timer Dial clockwise to 

your desired time. After cooking completes at the sound of the bell, the oven will 

automatically turn “Off.”

•   For cooking time less than 20 minutes, rotate the Timer Dial clockwise past the 20 

minute mark to activate the timer, then rotate back counterclockwise to your desired 

cooking time. 

Figure 3

English - 5

TSSTTVLS25_TSSTTVLS35_21SEM1 (LA).indd   5

TSSTTVLS25_TSSTTVLS35_21SEM1 (LA).indd   5

4/21/2021   3:39:54 PM

4/21/2021   3:39:54 PM

Содержание TSSTTVLS25

Страница 1: ...ONES ANTES DE USAR ESTE APARATO Instruction Manual COUNTERTOP OVEN WITH AIR FRYER READ ALL INSTRUCTIONS BEFORE USING THIS APPLIANCE MODELOS MODELS TSSTTVLS25 TSSTTVLS35 TSSTTVLS25_TSSTTVLS35_21SEM1 LA indd 1 TSSTTVLS25_TSSTTVLS35_21SEM1 LA indd 1 4 21 2021 3 39 50 PM 4 21 2021 3 39 50 PM ...

Страница 2: ...r parte del fabricante del artefacto puede causar lesiones 9 No use este artefacto en ambientes exteriores o con fines comerciales 10 No deje que el cable cuelgue sobre el borde de la mesa o mostrador ni toque superficies calientes 11 No coloque el artefacto sobre o cerca de superficies húmedas o fuentes de calor como un quemador de gas o eléctrico o un horno de mostrador caliente 12 Se debe tener...

Страница 3: ...no desatendido por largo tiempo mientras esté funcionando CONSERVE ESTAS INSTRUCCIONES SÓLO PARA USO DOMÉSTICO INSTRUCCIONES PARA EL CABLE DE ALIMENTACIÓN Se proporciona un cable eléctrico corto o un cable de alimentación removible para evitar los riesgos derivados de enredarse o tropezar con un cable más largo Los cables de alimentación removibles más largos o los cables de extensión están dispon...

Страница 4: ...r Puerta de vidrio Le permite ver la comida cocinándose Posición para el Temporizador Ajusta la perilla al tiempo deseado Posición de temperatura Ajusta la perilla del termostato a la temperatura deseada Posición de función Seleccione la función de cocción girando la perilla a la posición deseada Bandeja de hornear La bandeja de hornear puede ser utilizada para acomodar una gran variedad de alimen...

Страница 5: ...horno de mostrador Deberá ubicarse en un área abierta sobre una mesa en la que el enchufe llegue hasta el tomacorriente Enchufe el horno de mostrador en un tomacorriente de 120 voltios CA ADVERTENCIA Cuando el horno esté en uso o se esté enfriando asegúrese de que haya un espacio de 6 pulgadas 152 mm entre el horno y cualquier otra superficie incluyendo los cables Asegúrese de que el cable no esté...

Страница 6: ...sultados de horneado coloque la bandeja de hornear en la posición de rejilla central Para los mejores resultados de tostado y pizza coloque la rejilla en la posición de rejilla central Precalentando el Horno Fije a la función deseada Gire la perilla de control de temperatura a la posición deseada Fije la perilla del marcador de tiempo al tiempo deseado y deje 5 a 6 minutos hasta que el horno preca...

Страница 7: ... aceite antes de colocarlos en el horno ADVERTENCIA Los alimentos cocinados la rejilla de metal y la puerta pueden estar muy calientes maneje con cuidado No deje desatendida la unidad Preguntas Frecuentes sobre la Función Air Fry freír con aire caliente Debo revolver mis alimentos en el aceite RESPUESTA No todos los alimentos se beneficiarán al revolverlos en aceite antes de freírlos Los alimentos...

Страница 8: ... metal y la puerta pueden estar muy calientes manipule con cuidado No deje el horno de mostrador sin supervisión Uso de la Función de Horneado Acomode la comida sobre la rejilla de metal o sobre la bandeja de hornear Fije la perilla a la función BAKE Cuando el horno esté en el modo de horneado ambos elementos de calefacción superiores e inferiores funcionarán una vez que el contador de tiempo haya...

Страница 9: ...eje el horno de mostrador sin supervisión Preguntas Frequentes acerca de la Función Convection Bake Horneado por Convección Qué es horneado por convección Respuesta Dentro de su horno de mostrador existe un ventilador construido internamente que circula el aire caliente en la cámara del horno para calentar la comida mejor Cómo ajusto el tiempo de cocción para la función Convection Bake horneado po...

Страница 10: ...nderán y apagarán para mantener la temperatura deseada ADVERTENCIA Los alimentos cocinados la rejilla de metal y la puerta pueden estar muy calientes maneje con cuidado No deje desatendida la unidad Uso de la Función de Calentar Entibiar NOTA La función de Calentar Entibiar es para calentar y mantener la comida caliente después de la cocción Acomode la comida sobre la rejilla de metal la bandeja d...

Страница 11: ... artefacto no cuenta con piezas reparables por el usuario Cualquier servicio más allá de lo descrito en la Sección de Limpieza debe ser realizado solamente por un Representante de Servicio Autorizado Refiérase a la sección de Garantía Almacenando su Horno de Mostrador Deje que el aparato se enfríe por completo antes de almacenar Si guarda su horno por un largo tiempo asegúrese de que el horno esté...

Страница 12: ...re 200 grados 30 35 minutos No Bistec 900g FreirconAire 200 grados 16 20 minutos No Chuletas de puerco 450g FreirconAire 200 grados 18 20 minutos No Hamburguesa 450g FreirconAire 200 grados 15 20 minutos No Pechuga de pollo empanizada 450g FreirconAire 170 grados 10 minutos No Pescado empanizado 450g FreirconAire 200 grados 10 minutos No Tocino 225g FreirconAire 200 grados 10 12 minutos No BOCADIL...

Страница 13: ...del horno en los elementos calentadores o en la bandeja de migas Consulte la sección Cómo limpiar el horno de mostrador en la página 6 del texto español El horno no se enciende El aparato está desenchufado Enchufe el horno de mostrador en un tomacorriente de 120 voltios de CA El contador de tiempo no se giró pasando la marca de 20 minutos Gire la perilla del contador de tiempo y la perilla de temp...

Страница 14: ...may cause injuries 9 Do not use outdoors or for commercial purposes 10 Do not let cord hang over edge of table or counter or touch hot surfaces 11 Do not place on or near wet surfaces or heat sources such as a hot gas or electric burner or in a heated oven 12 Extreme caution must be used when moving an appliance or removing a pan containing hot oil or other hot liquids Always protect your hands wi...

Страница 15: ...ord or detachable power supply cord is provided to reduce risks resulting from becoming entangled in or tripping over a longer cord Longer detachable power supply cords or extension cords are available and may be used if care is exercised in their use If a long detachable power supply cord or extension cord is used a The marked electrical rating of the cord set or extension cord should be at least...

Страница 16: ...the dial thermostat to the desired temperature Wire Rack Use for toasting baking and broiling needs Function Setting Adjust the dial to the desired cooking function Baking Pan The baking pan can be used to accommodate a wide variety of foods Mesh Air Frying Tray Position on top of baking pan for all your air frying needs Function Setting Temperature Setting Timer Setting Power Light TSSTTVLS25_TSS...

Страница 17: ...or the Countertop Oven The location should be in an open area on a flat counter where the plug will reach an outlet Plug the Countertop Oven into a 120 Volt AC electrical outlet WARNING When Countertop Oven is in use or cooling down please be sure there is a 6 inch clearance between the Countertop Oven and any other surface including cords Be sure the cord is not resting against the back of the Co...

Страница 18: ...n For best baking results position the baking pan in the middle rack position For best toast and pizza results position the rack in the middle rack position Preheating the Oven Set to the desired Function Turn the Temperature Control Knob to the desired temperature Set the Timer Knob to desired time and allow 5 6 minutes for the oven to preheat Removing Food Always open door fully and remove food ...

Страница 19: ...d air fry tray baking pan and door can be very hot handle with care Do not leave the unit unattended Faqs About Air Frying Should I toss my food in oil ANSWER Not all foods will benefit from being tossed in oil prior to being air fried Frozen foods and foods with a high fat content such as chicken wings or bacon do not require oil To achieve crispy and browned results on foods such as hand cut fri...

Страница 20: ... Cooked food metal rack and door can be very hot handle with care Do not leave the unit unattended To Use The Bake Function Arrange food on the wire rack or in the baking pan Set function to BAKE When in Bake mode both the top and bottom heating elements will operate once the timer has been set Turn the Temperature Control Knob to the desired temperature Turn the Timer Knob to the desired time NOT...

Отзывы: