


Live Preview Introduction
User Manual
42
5.4 Emergency Live-View:
In some cases you will have to go back to the live-view interface as soon as possible. Doesn’t
matter where you are in the system or what you are currently doing. The “Emergency
Live-View” was designed just for that.
From any place in the system, click on the middle mouse button to activate the “Emergency
Live-View”. This will take you back to the last live view display you were viewing.
Please note: Using the “Emergency Live-View” during configuration will exit the
configuration window and discard any unsaved changed you have made.
5.5 Image Configuration
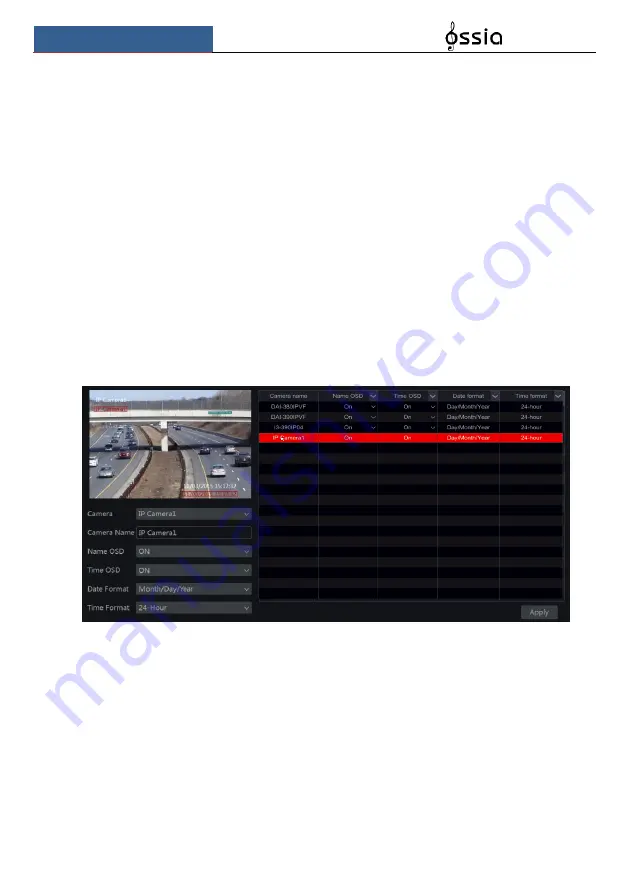
5.5.1 OSD Settings
Click Start
Settings
Camera
Image
OSD Settings to go to the interface shown below.
Select the camera, input the camera name (or double click the camera name in the camera list
to edit the camera’s name), enable or disable the name and time OSD (if enabled, drag the red
name and time OSDs in the image view area to change the OSDs’ display position) and select
the date and time formats. Click “Apply” to save the settings.
5.5.2 Image Settings (Setting Interface)
Click Start
Settings
Camera
Image
Image Settings.
Select the camera and set the image brightness, contrast, saturation and hue. For advanced
settings you click on the arrow under the “Advanced” tab. Only cameras connected by
“Provision-ISR” protocol will support advanced features.
You can click “Default” button to restore the image settings to the default factory settings.
Содержание NVR5 Series
Страница 1: ...1 ...
Страница 31: ...Live Preview Introduction User Manual 30 ...
Страница 113: ...FAQ User Manual 112 Fig 11 1 Fig 11 2 ...


