-34-
7
Firmware Update
Camera firmware update is available through camera Aux connector by using the camera accessory
“P
rogramming cable
”. This cable allows an USB connection to a PC
and must be used together with Optronis
Windows
update software “UCXP_flash.exe”.
Before updating camera firmware, please check product website page (download tab) to
be sure that you have:
•
The Last Firmware Version
•
The Last Firmware Update Software Version (Setup_UCXP_Flash_vx.y.z.exe)
Update
process is described in “ReadMe.pdf” file generated when installing UCXP Flash.exe. Please check this
file to get the last up to date firmware update process description. Default folder is:
C:\Program Files (x86)\Optronis\UCXP_Flash_vx.x.x\Documentation\
Please find below a quick description of the updating process:
1)
If your software is out of date or if this is the first use:
Execute last version of “Setup_UCXP_Flash_v
x.y.z
.exe” to install
Firmware Update Software and
Programming cable Drivers.
Restart computer.
2)
Connect USB cable to PC and camera Aux input.
Use PC rear USB ports as front ports are often not working.
3)
Power cycle the camera.
4)
Start UCXP_Flash.exe
5)
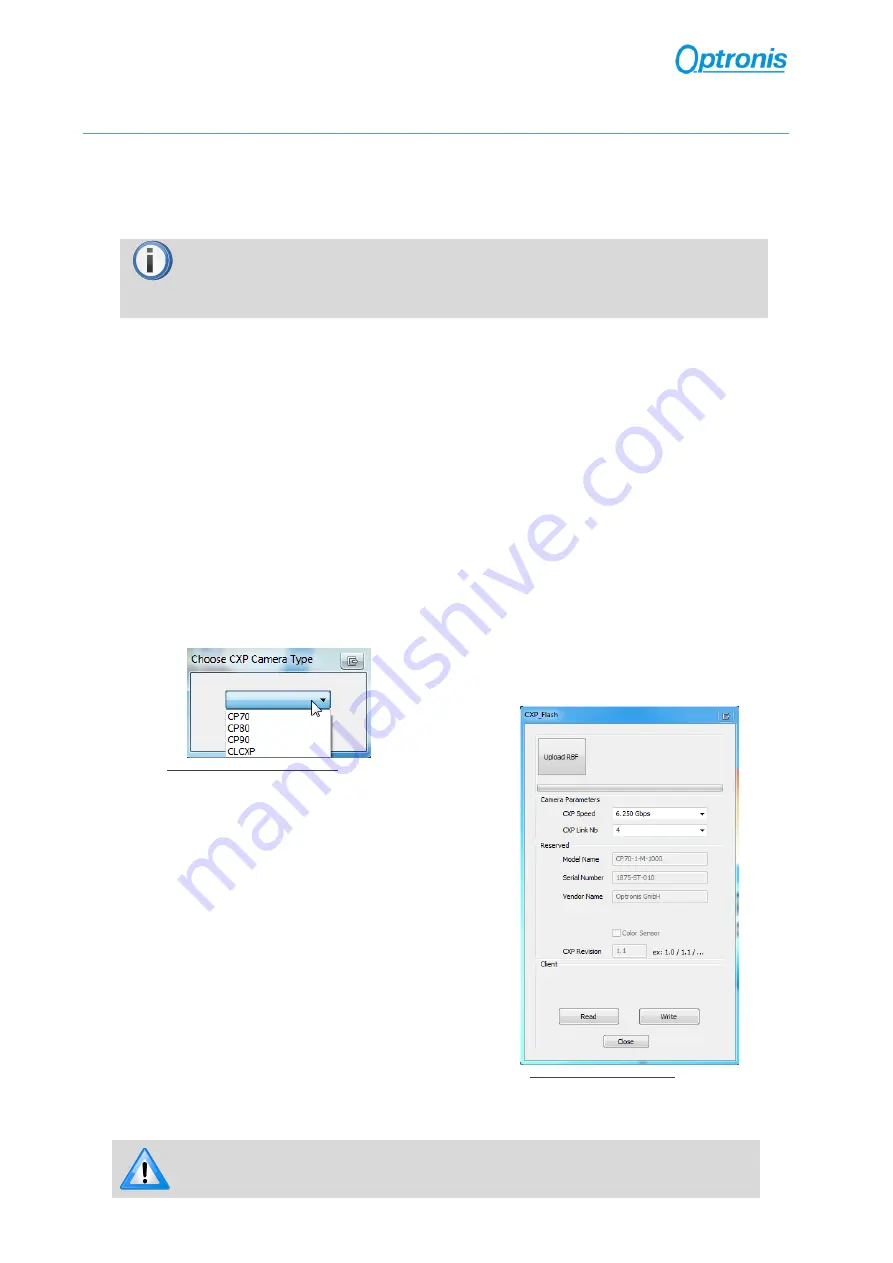
Select your camera series
Figure 16: Camera Series Selection
6)
When UCXP_flash.exe is connected to the
camera, camera LEDs become solid RED.
Click on “Upload R
B
F” button and select the
new firmware (.rbf file)
Figure 17: Software Interface
7)
Wait end of process (10 to 20 minutes, depending on camera and firmware size)
Power cycle camera when programming is finished.
If remaining time is higher than 20min, it often means that the cable is not well
detected. Close software and end “UCXP_flash” process if
it is still running.
Choose another USB port, power cycle camera and restart software.


