Prepare the BeamSquared for Operation
2.3
This section covers installation for the BeamSquared hardware. For manual mode installation see
Chapter 9.
Mount the Optical Train
2.3.1
1.
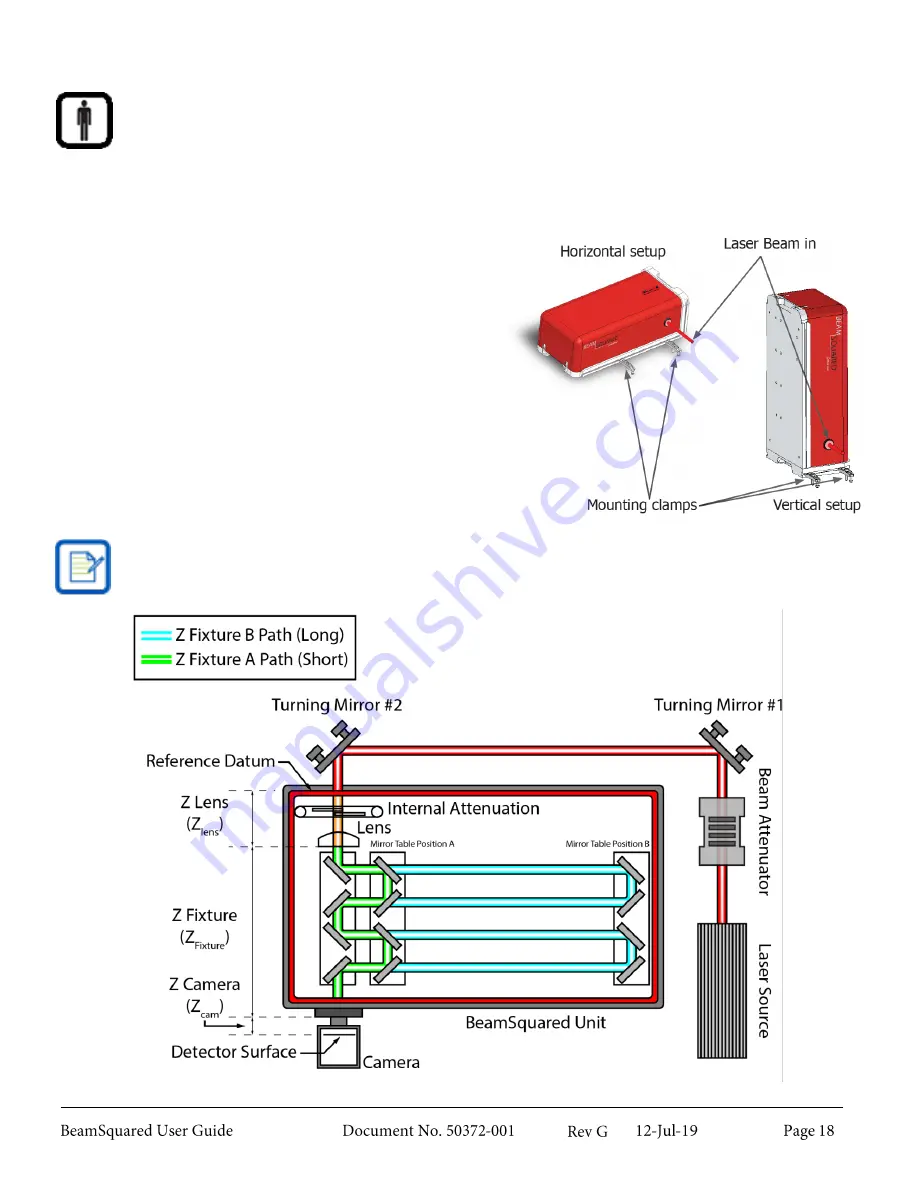
The optical train can be mounted either vertically or
horizontally depending on the system needs.
2.
Place the input aperture on the same plane as the
laser beam.
3.
Allow enough space around the BeamSquared
hardware to direct the laser beam through the input
aperture.
4.
Secure the optical train to the optical table with the
provided mounting clamps.
An example of a typical setup can be seen below. The
turning mirrors shown are optional accessories that are
critical to alignment.
The center of the input aperture is 3.212” (81.58mm) high when mounted in either orientation.
Содержание BeamSquared
Страница 10: ......
Страница 15: ...BeamSquared Optical Train Dimensions 1 4 ...
Страница 75: ...400mm Focal Length Lens M2 1 500mm Focal Length Lens M2 1 ...
Страница 87: ......


