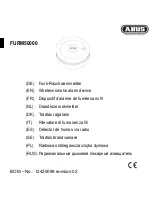
background image


rotating the product on the anti-clockwise direction.


2

Take out the 9V battery from battery compartment, remove the insulation film from the battery, 

connect the battery to battery buckle and put it back to battery compartment.


3

Depress(keep  depressing  and  release  till  finish  the  testing)  the  test/hush  button

the  RED 

LED flashes  quickly  and  in  the meanwhile  the  detector  sounds,  which means  the the  detector 
works  well.  At  the  same  time  the  product  goes  into  low  sensitivity  detection  mode,  round  10 
minutes later the product goes into standard sensitivity detection mode again. 
 

Installation 


1

Choose a right place to install the smoke alarm. 

The alarm may not be mounted In: 

A)a room in which the temperature can reach below 4 and above 40oC. 

B)in damp spaces 

C)just in front of doors or windows and not near a ventilator or radiator 

D)Maintain a distance of at least 50 cm from fluorescent lights or low-energy bulb. 


2

Fix two plastic screw base into ceiling according to installation hole position of smoke alarm 

base 
3

Fix the installation base on ceiling via screws at pre-installed screw base. 

4

Make sure the battery is installed and well connected to the smoke alarm (you may use the 

test  button  function  to  check)  and  fasten  the  smoke  alarm  to  pre-installed  base  via  clockwise 
rotation. 
4

Use the test button again to make a final check 

5


Maintain and use 

1

Test  the  smoke  alarm  weekly  and  after  battery  replacement.Test  the  alarm  for  normal 

operation using the test facility when the battery is replaced. 
2

If the product does not work properly, please check the product according to Failure Analysis 

and  Troubleshooting  part  as  below.If  the  product  still  can  not  work  please  contact  your  local 
dealer and do not open the product by yourself. 

9V Battery 

Connector to base 

TEST/HUSH BUTTON


Buzzer 

LED

red


Screw position hole


Содержание ATN062

Страница 1: ...User Manual Smoke alarm ATN062 English Finnish Swedish Norwegian Estonian Polish Latvian Lithuanian Russia...

Страница 2: ...EL 6LR61 PAIRDEER 6LR61 FORTE ER9V EVE CR 9V ULTRALIFE ULVL J FANSO ER9V Current Quiescent Current 12uA Alarming Current 20mA Alarming Decibel 85dB 3m HUSH Status LED flashes every 10S Standby status...

Страница 3: ...lator or radiator D Maintain a distance of at least 50 cm from fluorescent lights or low energy bulb 2 Fix two plastic screw base into ceiling according to installation hole position of smoke alarm ba...

Страница 4: ...e product may also be destroyed because of this This marking indicates that this product should not be disposed with other household wastes throughout the EU To prevent possible harm to the environmen...

Страница 5: ...i ole oikein paikallaan h lytin ei v ltt m tt toimi oikein ja se voi vahingoittua Savuh lytin toimii oikein kun punainen merkkivalo v l ht aina kerran noin 43 sekunnin v lein 3 Ota h lytin pakkauksest...

Страница 6: ...yttimen toiminnan painamalla TESTAUS painiketta Kiinnit savuh lytin kiinnityspohjaan kiert m ll h lytint my t p iv n 9 Tarkista viel TESTAUS painikkeella laitteen oikea toiminta 10 K ytt ja huolto 3 T...

Страница 7: ...usj tteen seassa Vastuuton j tteiden h vitys aiheuttaa vahinkoa ymp rist lle ja ihmisille Kierr t t m laite vastuullisesti jotta sen sis lt m t materiaalit voidaan k ytt uudelleen Vie laite kierr tysp...

Страница 8: ...och h ll kvar sl pp knappen n r testet r slutf rt den R DA lysdioden blinkar snabbt och samtidigt ljuder larmsignalen det betyder att brandvarnaren fungerar korrekt Samtidigt tr der brandvarnaren in i...

Страница 9: ...produkt p platser med h g fuktighet mycket damm eller h g temperatur s som k k eller badrum 8 N r du installerar brandvarnaren s s kerst ll att det inte finns n gra hinder som blockerar IR sensorn ell...

Страница 10: ...m igjen aktiverer alarmen Form og st rrelse Tekniske parameter Arbeidsspenning 9V DC anbefalt batteri 6F22 GP 1604S GP 1604A PAIRDEER 6F22 OSEL 6LR61 PAIRDEER 6LR61 FORTE ER9V EVE CR 9V ULTRALIFE ULVL...

Страница 11: ...faller ned til under 4o C eller stiger til over 40o C B I fuktige rom C Rett foran d rer eller vinduer eller i n rheten av ventilatorer eller radiatorer D Er n rmere enn 50 cm fra lysr r eller sparep...

Страница 12: ...kan ogs f re til skade p produktet Denne merking indikerer at dette produktet innenfor EU ikke skal kastes sammen med annet husholdingsavfall For forhindre skade p milj et og menneskelig helse ved un...

Страница 13: ...patarei ei ole korralikult paigaldatud siis andur ei t ta ja v ib olla kahjustatud Kui andur t tab probleemideta siis punane LED indikaator vilgub umbes iga 43 sekundi j rel 9 V tke toode pakendist v...

Страница 14: ...va p rates 10 Kasutage uuesti testnuppu et sooritada l plik testimine 11 Hooldus ja kasutamine 9 Testige suitsuandurit kord n dalas ja p rast patareivahetust P rast patarei vahetust testige anduri t k...

Страница 15: ...dades materjalide taaskasutamist Kasutatud seadme k rvaldamiseks kasutage oma piirkonnas olevaid tagastus ja kogumiss steeme v i v tke hendust edasim jaga kellelt toode on ostetud Nemad saavad korrald...

Страница 16: ...ma przycisk testu wyciszenia a czerwona dioda LED zacznie miga oraz us ysze b dzie mo na d wi k alarmu co oznacza e wykrywacz dzia a prawid owo Urz dzenie przechodzi nast pnie do trybu niskiej czu o c...

Страница 17: ...9V Wymieni bateri VII Uwagi 1 Nie zaleca si monta u produktu w wilgotnych zakurzonych lub wysokotemperaturowych pomieszczeniach jak np kuchnia czy azienka 2 Podczas monta u nale y upewni si e miganie...

Страница 18: ...aliz ciju Forma un izm rs Tehniskie parametri Darb bas spriegums 9V DC ieteicam baterija 6F22 GP 1604S GP 1604A PAIRDEER 6F22 OSEL 6LR61 PAIRDEER 6LR61 FORTE ER9V EVE CR 9V ULTRALIFE ULVL J FANSO ER9V...

Страница 19: ...re m Uzst d ana 23 Izv lieties pareizo vietu kur uzst d t d mu detektoru Detektoru nedr kst uzst d t A istab kur temperat ra var nokrist zem 4 C un uzk pt virs 40 C B mitr s viet s C tie i priek durv...

Страница 20: ...rliecinieties ka nek di trauc k i nevar apkl t mirgojo o gaismu vai signaliz cijas ska u no d mu detektora 18 D mu detektors nevar darboties ja baterija nav ieliekta pareizi iev rojot polarit ti turk...

Страница 21: ...iks Detektoriui veikiant taisyklingai Raudona LED viesa mirks s kas 43S 1 I imkite produkt i pakuot s nuimkite montavimo pagrind nuo prietaiso korpuso sukant prie inga laikrod io rodyklei kryptimi 9 I...

Страница 22: ...ikia 6 Prie i ra ir naudojimas 29 Tikrinkite d m jutiklio veikim kas savait ir kas kart po baterijos pakeitimo Patikrinkite ar prietaisas veikia tinkamai naudojant testavimo mygtuk 30 Jeigu prietaisas...

Страница 23: ...ta atitinkam poli pus se Taip pat d l ios prie asties produkt galima sugadinti is ant gaminio jo pried arba pakuot s esantis enklas rei kia kad io gaminio negalima i mesti kartu su prastomis buitin mi...

Страница 24: ...ULVL J FANSO ER9V 12m 20 mA 85 3 HUSH LED 10 LED 43 43 LED LED 7 35 10 40 95 3 LED 43 1 2 9B 3 HUSH LED 10 4 1 A 14 40 B C D 50 2 3 4 5 6...

Страница 25: ...5 1 2 1 6 1 9 43 1 2 3 9 HUSH r LED...

Страница 26: ......

Отзывы: