background image

9

English

Français

Italiano

Español

Ру

сский

Deutsche

English

Danke, dass Sie uns gewählt haben!

Wir hoffen, dass Sie mit dem Kauf zufrieden sind. Wenn Sie unser Produkt mögen, 

lassen Sie bitte Ihr Feedback.
Wenn Sie irgendwelche Fragen oder Probleme haben, dann können Sie uns jederzeit 

kontaktieren und wir werden Ihnen helfen:

USA: [email protected] / +13159682278 
Europa:  [email protected] / +494029996807 
Russland: [email protected] / +78007772176 
Lesen Sie diese vollständige Anleitung, bevor Sie mit der Montage und Installation 

beginnen. Wenn Sie Fragen zu Montage oder Warnungen haben, wenden Sie sich 

bitte an unseren Kundendienst.

ACHTUNG

Die Verwendung des Produkts mit Geräten, die das zulässige Gewicht überschreiten, 

kann zu einem instabilen Betrieb des Produkts, seinem vollständigen Ausfall und zu 

Verletzungen geführt werden.

• 

Das Produkt muss gemäß dieser Anleitung zusammengebaut werden. 

Eine falsche Installation kann die Gesundheit des Benutzers erheblich 

beeinträchtigen.

• 

Es ist notwendig, persönliche Schutzausrüstung und die richtigen Werkzeuge 

zu verwenden. Das Produkt muss von einem Fachmann montiert und installiert 

werden.

• 

Stellen Sie sicher, dass die Arbeitsfläche das Gesamtgewicht des verwendeten 

Produkts, des verwendeten Geräts und aller optionalen Komponenten tragen 

kann.

• 

Verwenden Sie die Schrauben aus dem mitgelieferten Kit und ZIEHEN Sie sie 

nicht während der Montage und Installation.

• 

Das Produkt enthält kleine Teile, die beim Verschlucken zu Erstickungsgefahr 

führen können. Bewahren Sie Sie außerhalb der Reichweite von Kindern auf.

• 

Unsachgemäße Verwendung des Produkts kann zu Produktschäden und 

Verletzungen geführt werden.

• 

Stellen Sie sicher, dass dieses Modell vom Produkt unterstützt wird, bevor Sie 

den Bildschirm installieren. Überprüfen Sie die VESA-Normen, das Gewicht des 

Bildschirms und seine Diagonale.

• 

Die Installation eines nicht unterstützten Bildschirms kann zu Produktschäden 

und Verletzungen geführt werden.

WICHTIG

Stellen Sie vor Beginn der Montage sicher, dass Sie alle für die Montage 

erforderlichen Teile erhalten haben. Überprüfen Sie die Stückliste. Wenn Teile fehlen 

oder defekt sind, wenden Sie sich bitte an unseren Kundendienst.

BEDIENUNG

Überprüfen Sie das Produkt regelmäßig auf Sicherheit (mindestens einmal pro drei 

Monate).

GARANTIE

Braucht nicht Pflichtzertifizierung. Lebensdauer ist unbergrenzt. 5 JAHRE GARANTIE.

Содержание G70

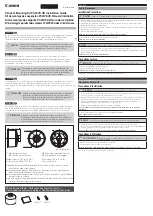
Страница 1: ... monitor desk mount with gas lift Настольный кронштейн для одного монитора с системой газлифт Monitor Tischhalterung für einen Monitor mit Gaslift System Support de bureau à ressort à gaz pour un moniteur Soporte de escritorio brazo móvil con el resorte de gas para monitor individual Supporto per monitor da scrivania con molla a gas ...

Страница 2: ...d be installed only by professionals Make sure that working surface will safely support combined weight of the equipment and all attached hardware and components Use mounting screws provided in the kit and DO NOT OVERTIGHTEN any screws during assembly of the product This product contains small items that may cause choking if swallowed Keep these items away from children Using the product improperl...

Страница 3: ...tact with our service department Check the list CONTENT PAGE Assembly kit 3 1 Choose how you want to install the desk mount 4 a C Clamp installation on the edge of the desk 4 b Installation with a grommet hole in the desk 5 2 Mounting arm assembly 6 3 VESA panel installation 7 4 Screen mounting 7 5 Mounting arm adjustment 8 6 Organize cables of the screen as shown on the picture 8 ...

Страница 4: ...ickness is 1 3 3 1 35 80mm use two lower holes if 0 3 1 7 10 45mm use two upper holes Put plastic cover C onto C Clamp B as shown Attach the tube E to the C Clamp B using three bolts H Key K is needed Install the whole construction onto the table and tighten the clamp by spinning the knob Key L may be used Make sure it is securely fixed on the table 35 80mm 1 3 3 1 H 10 45mm 1 3 3 1 ...

Страница 5: ...shown on the picture Attach part J to the tube E using one bolt H Plastic cover C must be installed too Put the clamp screw from disassembled part B through part I and through the hole in the desk and then twist it in the tube E by spinning the knob Key L may be used Make sure it is securely fixed on the table 0 75mm 2 95 Clamp screw ...

Страница 6: ...6 2 Mounting arm assembly Put cable holder F on the tube E Install mounting arm A on the tube E at the desired height and tighten bolts using key L ...

Страница 7: ... plate D on your screen by using suitable bolts You need to make sure the panel is securely fixed if needed you can use different bolts washer rings M E and plastic washers M F Refer to the picture 4 Screen mounting Hang your screen onto the mounting arm and fix VESA plate D with bolt G UP UP ...

Страница 8: ...tighten or loosen gas lift mechanism Move the screen up and down to check if it is stable in any position you choose The arm must be adjusted for each screen individually Adjust tilting bolt if necessary 6 Organize cables of the screen as shown on the picture ...

Страница 9: ... einem Fachmann montiert und installiert werden Stellen Sie sicher dass die Arbeitsfläche das Gesamtgewicht des verwendeten Produkts des verwendeten Geräts und aller optionalen Komponenten tragen kann Verwenden Sie die Schrauben aus dem mitgelieferten Kit und ZIEHEN Sie sie nicht während der Montage und Installation Das Produkt enthält kleine Teile die beim Verschlucken zu Erstickungsgefahr führen...

Страница 10: ...ie die Stückliste INHALT SEITE BAUSATZ 10 1 Wählen Sie die Installationsmethode für die Halterung 11 a Installation an der Tischkante mit einer Klammer 11 b Installation durch Loch in den Tisch 12 2 Montage den Halterungsarm 13 3 InstallationdieVESA PlatteaufdenBildschirm 14 4 Installation den Bildschirm 14 5 Einstellung des Halterungsarms 15 6 Verlegen Sie die Kabel Ihres Bildschirms wie abgebild...

Страница 11: ...ren Löcher wenn 10 45 mm 0 3 1 7 die beiden oberen sind Befestigen Sie die Kunststoffabdeckung C wie in der Abbildung gezeigt ist an der Klammer B Befestigen Sie dann das Rohr der Halterung E mit den drei Schrauben H an der Klammer B Verwenden Sie den Schlüssel K Setzen Sie die gesamte Konstruktion auf den Tisch und ziehen Sie die Klammer fest indem Sie die Fingerschraube drehen Sie können den Sch...

Страница 12: ...erung E Montieren Sie die Kunststoffabdeckung C Stecken Sie die Klemmschraube aus der zerlegten Klammer B durch die Platte I hinein und durch das Loch im Tisch und schrauben Sie dann die Klemmschraube in das Rohr der Halterung E Sie können den Schlüssel L verwenden Stellen Sie sicher dass die Konstruktion sicher auf dem Tisch befestigt ist 0 75mm 2 95 Sie die Klemm schraube ...

Страница 13: ...o Español Русский Deutsche 2 Montage den Halterungsarm Setzen Sie den Kabelhalter F auf das Rohr der Halterung E auf Am Rohr E den Arm des Halters A auf die gewünschte Höhe bringen und die Schrauben mit dem Schlüssel L festziehen ...

Страница 14: ...n Sie sicher dass das VESA Panel sitzt fest Weitere Schrauben Unterlegscheiben M E und Kunststoffdichtungen M F können bei Bedarf verwendet werden Betrachten Sie die folgende Abbildung sorgfältig 4 Installation den Bildschirm Befestigen Sie den Bildschirm an die Halterung A und befestigen Sie das VESA Panel D mit der Schraube G UP UP ODER ...

Страница 15: ...es Mechanismus verstärken oder schwächen Heben und senken Sie den Bildschirm um die Spannung zu überprüfen Der Bildschirm muss in einer der von Ihnen ausgewählten Positionen sicher einrasten Gaslift muss für jeden Bildschirm individuell eingestellt werden Passen Sie die Kippschraube bei Bedarf an 6 Verlegen Sie die Kabel Ihres Bildschirms wie abgebildet ...

Страница 16: ...iduelle et d outils appropriés est nécessaire Le produit doit être assemblé et installé par une personne compétente Assurez vous que le poids de votre écran et de tout l équipement audiovisuel supplémentaires ne dépassent pas le poids maximum admissible du produit Utilisez les boulons du kit fourni et NE les SERREZ pas trop fort lors de l assemblage et de l installation Le produit contient de peti...

Страница 17: ... après vente Consultez la liste CONTENU PAGE Lecontenudukitinstallation 17 1 Choisissezletyped installationdusupport 18 a L installationenborduredetableàl aidedepincesdetable 18 b IL installationàtraversletroudanslatable 19 2 Assemblagedebrasdesupport 20 3 L installationdelaplaqueVESAsurl écran 21 4 L installation de l écran 21 5 L ajustementdubrasdesupport 22 6 Placezvoscâblesderrièrelespanneauxd...

Страница 18: ...ux trous inférieurs si de 10 à 45 mm 0 3 1 7 utilisez les trous supérieurs Fixez le panneau décoratif en plastique C sur la pince B comme l indique l image Ensuite fixez le tuyau de support E sur la pince B utilisant trois boulons H Utilisez la clé K Installez toute la structure sur la table et serrez la pince en tordant la valve Vous pouvez utiliser la clé L Assurez vous que la construction est b...

Страница 19: ...u de support E à l aide d un seul boulon H Installez le panneau décoratif en plastique C Faites glisser la vis de serrage de la pince B démontée a travers la plaque I et dans le trou de la table puis vissez la vis de serrage dans le tuyau du support E Vous pouvez utiliser la clé L Assurez vous que la structure est bien fixée sur la table 35 80mm 1 3 3 1 0 75mm 2 95 la vis de serrage ...

Страница 20: ...20 2 Assemblage de bras de support Placez le clip de câble F sur le tuyau du support E Puis installez le bras de support A à la hauteur souhaitée et serrez les boulons avec la clé L ...

Страница 21: ...sant les boulons appropriés Assurez vous que la plaque VESA est bien fixée D autres boulons rondelles M E et joints en plastique m F peuvent être utilisés si nécessaire Consultez attentivement l image ci dessous 4 L installation de l écran Accrochez l écran sur le bras du support A et fixez la plaque VESA D avec un boulon G o Vers le haut Vers le haut ...

Страница 22: ...tension Soulevez et abaissez votre écran pour vérifier la tension L écran doit être solidement fixé dans n importe quelle position intermédiaire Le ressort à gaz doit être ajusté individuellement pour chaque écran Ajustez le boulon d inclinaison si nécessaire 6 Placez vos câbles derrière les panneaux décoratifs comme l indique l image ...

Страница 23: ...to deve essere assemblato e installato da un professionista Assicurarsi che il piano di lavoro possa supportare il peso totale prodotto dispositivo utilizzato ed eventuali componenti aggiuntivi Utilizzare i bulloni del kit in dotazione e NON SERRARE ECCESSIVAMENTE durante tempo di montaggio e installazione Il prodotto contiene piccole parti che possono causare soffocamento quando deglutizione Tene...

Страница 24: ...Kit di montaggio 24 1 Scegli come installare la staffa 25 a Installazione sul bordo del tavolo con un morsetto 25 b Installazione attraverso un foro nel tavolo 26 2 Montaggio del braccio della staffa 27 3 Installazione del pannello VESA sullo schermo 28 4 Installazione dello schermo 28 5 Regolazione del braccio della staffa 29 6 Instradare i cavi dello schermo come mostrato in immagine 29 ...

Страница 25: ... utilizza i due fori inferiori se 10 45 mm 0 3 1 7 i primi due Attaccare la striscia di plastica C a morsetto B come mostrato Collegare il tubo della staffa E a morsetto B utilizzando tre bulloni H Usa KEY K Posizionare l intera struttura sul tavolo e serrare il morsetto serrando la vite a testa zigrinata Encaje la construcción entera en la mesa y apriete la abrazadera con la llave L Asegúrese de ...

Страница 26: ...ilizzando un bullone H Installa la copertura di plastica C Far scorrere la vite di fermo dal morsetto smontato B attraverso piastra I e attraverso il foro nel tavolo quindi avvitare la vite di fissaggio nel tubo di staffa E È possibile utilizzare il TASTO L Assicurati che la staffa fissata saldamente sul tavolo 35 80mm 1 3 3 1 0 75mm 2 95 la vite di fissaggio ...

Страница 27: ... Français Español Русский Italiano 2 Montaggio del braccio della staffa Far scorrere il portacavo F sul tubo della staffa E Posizionare sul tubo E il braccio A in all altezza desiderata e serrare i bulloni con la chiave L ...

Страница 28: ...ppropriate Assicurarsi che il pannello VESA sia fissato saldamente Se necessario puoi usare altri bulloni rondelle M E e rondelle di plastica M F Accuratamente considera la seguente immagine 4 Installazione dello schermo Appendere lo schermo al braccio della staffa A e fissare il pannello VESA D con bullone G o SU SU ...

Страница 29: ...ntando la tensione del meccanismo Alza e abbassa lo schermo per controllare la tensione Lo schermo dovrebbe essere fissato saldamente in una qualsiasi delle posizioni scelte Gaslift deve essere regolato individualmente per ogni schermo Può regolare il bullone di inclinazione se necessario 6 Instradare i cavi dello schermo come mostrato in immagine ...

Страница 30: ...producto debe ser realizada por el profesional Asegúrese de que el superficie del montaje puede apoyar la carga sumaria del producto dispositivo instalado y todo el equípo adicional Utilice los tornillos que ya estan incluidos junto con el producto y no les aprieten demasiado fuerte durante el montaje e instalación El producto tiene partes pequeñas que pueden ser tragadas y causar el asfixia Guárd...

Страница 31: ...atención al cliente Compruébese con la ilustración CONTENIDO PÁGINA El juego de herramienta 31 1 Elige el tipo de instalación a la mesa 32 a Fijación al borde del tablero con una abrazadera C clamp 32 b Instalación a escritorio por orificio Grommet 33 2 Ensamblaje de la parte central del sopote 34 3 Montaje de la placa VESA 35 4 La montura de la pantalla 35 5 El ajuste del brazo del soporte 36 6 R...

Страница 32: ...orio es menos de 1 3 3 1 35 80mm utilice los ojales inferiores Si el grosor del tablero de su escritorio es más de 0 3 1 7 10 45mm utilice los ojales superiores Pone el tapón plástico sobre la abrazadera C clamp como esta enseñado en el manual Coloque el tubo E en la abrazadera C clamp fijándolo con tres tornillos y la llave K Encaje la construcción entera en la mesa y apriete la abrazadera con la...

Страница 33: ... según la ilustración Une el detalle J al tubo E con el tornillo H Tambien hay que instalar el tapón plastico C Pase el tornillo de apriete lateral por el detalle I y el ojal en el tablero de la mesa entornillándola al tubo E Se puede usar la llave L Asegúrese de que esta fijado firmemente 35 80mm 1 3 3 1 0 75mm 2 95 tornillo de apriete ...

Страница 34: ...34 2 Ensamblaje de la parte central del sopote Coloque el anillo de sujeción para los cables por el tubo E Encaje el brazo articulado en el tubo E a la altura deseable entornillándola con la llave L ...

Страница 35: ...teral de la pantalla usando los tornillos adecuados Asegúrese de que la construcсión este fijado firmemente en caso de que sea necesario utilice los anillos de arandela M E o arandelas de plástico M F Consulte la ilustración 4 La montura de la pantalla Une la pantalla con el brazo del soporte con la llave G o SU SU ...

Страница 36: ...ión del brazo apretando el resorte de gas a o aliviándolo a Mueve la pantalla por arriba o por abajo para verificar la estabilidad en cualquiera posición Cada monitor requiere el ajusto individual 6 Refiere la ilustración para organizar los cables de la pantalla ...

Страница 37: ...и правильных инструментов Продукт должен быть собран и установлен профессионалом Убедитесь что рабочая поверхность способна выдержать суммарный вес продукта используемого устройства и всех дополнительных компонентов Используйте болты из поставленного комплекта и НЕ ПЕРЕТЯГИВАЙТЕ их во время сборки и установки Продукт содержит мелкие детали которые могут вызвать удушение при проглатывании Храните и...

Страница 38: ...ерьтесь со списком СОДЕРЖАНИЕ СТРАНИЦА Комплектсборки 38 1 Выберите способ установки кронштейна 39 a Установка на край стола с помощью струбцины 39 b Установкачерезотверстиевстоле 40 2 Сборка руки кронштейна 41 3 Установка VESA панели на экран 42 4 Установка экрана 42 5 Регулировка руки кронштейна 43 6 Проложите кабели вашего экрана как показано на рисунке 43 ...

Страница 39: ...1 3 3 1 используйте два нижних отверстия если 10 45 мм 0 3 1 7 два верхних Присоедините пластиковую накладку C на струбцину B как показано на рисунке Затем присоедините трубу кронштейна E к струбцине B используя три болта H Воспользуйтесь ключом K Установите всю конструкцию на стол и затяните струбцину закручивая барашек Можете воспользоваться ключом L Убедитесь что конструкция надежно зафиксирова...

Страница 40: ... E используя один болт H Установите пластиковую накладку C Просуньте зажимной винт из разобранной струбцины B через пластину I и через отверстие в столе а затем вкрутите зажимной винт в трубу кронштейна E Можете воспользоваться ключом L Убедитесь что конструкция надежно зафиксирована на столе 35 80mm 1 3 3 1 0 75mm 2 95 Зажимной винт ...

Страница 41: ...e English Français Italiano Español Русский 2 Сборка руки кронштейна Наденьте держатель кабеля F на трубу кронштейна E На трубу E установите руку кронштейна A на желаемой высоте и затяните болты с помощью ключа L ...

Страница 42: ... Убедитесь что VESA панель надежно закреплена При необходимости можно воспользоваться другими болтами шайбами M E и пластмассовыми прокладками M F Внимательно рассмотрите рисунок ниже 4 Установка экрана Навесьте экран на руку кронштейна A и зафиксируйте VESA панель D с помощью болта G или ВВЕРХ ВВЕРХ ...

Страница 43: ... или ослабляя натяжение механизма Поднимайте и опускайте экран для проверки натяжения Экран должен быть надежно зафиксирован в любом из выбранных вами положений Газлифт необходимо регулировать под каждый экран индивидуально Отрегулируйте наклоняющий болт если необходимо 6 Проложите кабели вашего экрана как показано на рисунке ...

Страница 44: ...44 For notes Для заметок Für NotizenPour les notes Para notas Per le note 201005 onkron com ...

Отзывы: