background image

7

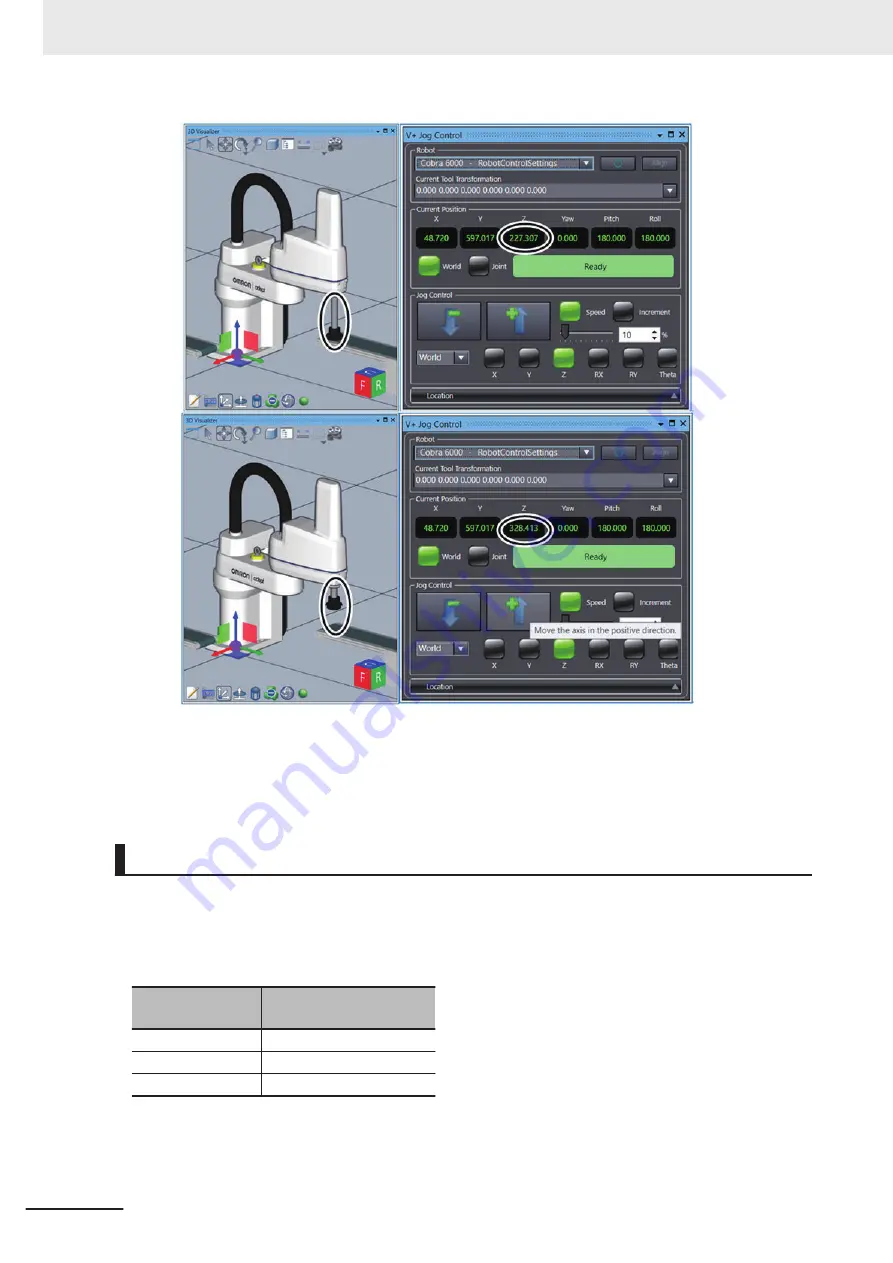
Take step 4 to 6 again to move the robot to the position and posture you want to specify.

Now the robot position has been configured.

Saving Current Positions to Variables

The current positions of the robot set by teaching must be saved in the V+ variables.
The procedure to save the current position of the robot to the already created V+ variable is described
below.
V+ position variables that need to be saved are listed in the table below.

Name of position

(Name of variable)

Description

gl.wait

Robot wait position

gl.pick

Workpiece pick-up position

gl.place

Workpiece place position

Save a current position to the variable 

gl.wait

 as an example. Save current positions to two other vari-

ables in the same manner.

3 Implementation Example of Static Pick-and-place Equipment

3-64

NJ-series Robot Integrated System Startup Guide (O049)

Содержание RL4 Series

Страница 1: ...Machine Automation Controller NJ series Robot Integrated System Startup Guide NJ501 R AC1 152000 RL4 O049 E1 01 ...

Страница 2: ...rademarks of Mi crosoft Corporation in the United States and other countries EtherCAT is registered trademark and patented technology licensed by Beckhoff Automation GmbH Germany ODVA CIP CompoNet DeviceNet and EtherNet IP are trademarks of ODVA The SD and SDHC logos are trademarks of SD 3C LLC Other company names and product names in this document are the trademarks or registered trade marks of t...

Страница 3: ...ended for the following personnel who must also have knowledge of electrical sys tems an electrical engineer or the equivalent Personnel in charge of introducing FA systems Personnel in charge of designing FA systems Personnel in charge of installing and maintaining FA systems Personnel in charge of managing FA systems and facilities Also this manual is intended for the personnel who understand th...

Страница 4: ...AC1 152000 Introduction 2 NJ series Robot Integrated System Startup Guide O049 ...

Страница 5: ...Built in EtherCAT Port User s Manual NJ NX series CPU Unit Built in EtherNet IP Port User s Manual NJ series Robot Integrated CPU Unit User s Manual eV 3 User s Manual eV 3 Keyword Reference Manual NJ series NJ Robotics CPU Unit User s Manual NJ NX series Troubleshooting Manual Introduction to NJ series Controllers Setting devices and hardware Using motion control Using EtherCAT Using EtherNet IP ...

Страница 6: ...t User s Manual eV 3 User s Manual eV 3 Keyword Reference Manual NJ series NJ Robotics CPU Unit User s Manual NJ NX series Troubleshooting Manual Learning about error management functions and corrections 1 r r r r Maintenance Using motion control Using EtherCAT Using EtherNet IP 1 Refer to the NJ NX series Troubleshooting Manual Cat No W503 for the error management concepts and the error items How...

Страница 7: ...s shown below until they click into place Precautions for Correct Use Precautions for Correct Use 4 3 1 Connecting Controller Components Connector Hook Hook holes Slider Lock Release Move the sliders toward the back until they lock into place Level 1 heading Level 2 heading Level 3 heading Level 2 heading A step in a procedure Manual name Special information Level 3 heading Page tab Gives the curr...

Страница 8: ...ifications and functionality for Controller with different unit versions and for different versions of the Sysmac Studio is given Precaution on Terminology In this manual download refers to transferring data from the Sysmac Studio to the physical Control ler and upload refers to transferring data from the physical Controller to the Sysmac Studio For the Sysmac Studio synchronization is used to bot...

Страница 9: ...ns in this Manual 1 2 3 A 1 2 3 Appendicies Implementation Example of Static Pick and place Equipment Before You Begin Overview A Sections in this Manual 7 NJ series Robot Integrated System Startup Guide O049 ...

Страница 10: ...rrect Use 17 Regulations and Standards 18 Versions 19 Checking Versions 19 Related Manuals 22 Relevant Technical Guides 25 Terminology 26 Revision History 27 Section 1 Overview 1 1 Features of Robot Integrated System 1 2 1 1 1 Features of the NJ series Robot Integrated CPU Unit 1 2 1 1 2 Features of the EtherCAT compatible OMRON robots 1 2 1 1 3 Features of the Sysmac Studio Automation Software 1 ...

Страница 11: ...Program 3 3 3 1 2 When Operations are Controlled with V Program 3 11 3 2 Basic Startup Procedures 3 17 3 3 Programming and Simulation Procedures 3 18 3 3 1 Creating a Project File 3 18 3 3 2 Creating the EtherCAT Network Configuration 3 19 3 3 3 Creating a Sequence Control Program 3 22 3 3 4 Creating V Programs 3 28 3 3 5 Placing 3D Shape Data 3 34 3 3 6 Starting Simulation 3 56 3 3 7 Teaching Pos...

Страница 12: ...A 3 Using Troubleshooting Functions A 22 CONTENTS 10 NJ series Robot Integrated System Startup Guide O049 ...

Страница 13: ...n complying Product or iii repay or credit Buyer an amount equal to the purchase price of the non complying Product provided that in no event shall Omron be re sponsible for warranty repair indemnity or any other claims or expenses regarding the Products unless Omron s analysis confirms that the Products were properly handled stored installed and maintained and not subject to contamination abuse m...

Страница 14: ...DUCT FOR AN APPLICATION INVOLVING SERIOUS RISK TO LIFE OR PROPERTY OR IN LARGE QUANTITIES WITHOUT ENSURING THAT THE SYSTEM AS A WHOLE HAS BEEN DESIGNED TO ADDRESS THE RISKS AND THAT THE OMRON PRODUCT S IS PROPERLY RATED AND INSTALLED FOR THE INTENDED USE WITHIN THE OVERALL EQUIP MENT OR SYSTEM Programmable Products Omron Companies shall not be responsible for the user s programming of a programmab...

Страница 15: ...epresentative at any time to confirm actual specifications of purchased Product Errors and Omissions Information presented by Omron Companies has been checked and is believed to be accurate how ever no responsibility is assumed for clerical typographical or proofreading errors or omissions Terms and Conditions Agreement 13 NJ series Robot Integrated System Startup Guide O049 ...

Страница 16: ...ge WARNING Caution Symbols The circle and slash symbol indicates operations that you must not do The specific operation is shown in the circle and explained in text This example indicates that disassembly is prohibited The triangle symbol indicates precautions including warnings The specific operation is shown in the triangle and explained in text This example indicates a precaution for electric s...

Страница 17: ... NJ series Robot Integrated CPU Unit User s Manual Cat No O037 Cautions Caution Refer to the following manuals for cautions NJ series CPU Unit Hardware User s Manual Cat No W500 NJ series Robot Integrated CPU Unit User s Manual Cat No O037 Safety Precautions 15 NJ series Robot Integrated System Startup Guide O049 ...

Страница 18: ...llowing manuals for precautions for safe use NJ series CPU Unit Hardware User s Manual Cat No W500 NJ series Robot Integrated CPU Unit User s Manual Cat No O037 Precautions for Safe Use 16 NJ series Robot Integrated System Startup Guide O049 ...

Страница 19: ...lowing manuals for precautions for correct use NJ series CPU Unit Hardware User s Manual Cat No W500 NJ series Robot Integrated CPU Unit User s Manual Cat No O037 Precautions for Correct Use 17 NJ series Robot Integrated System Startup Guide O049 ...

Страница 20: ...nformation The Robot Integrated CPU Unit is not a robot control device that is defined in ISO 10208 1 Therefore the Robot Integrated CPU Unit does not comply with the robot regulations and standards Refer to the OMRON robot manuals for information on the OMRON robot itself Regulations and Standards 18 NJ series Robot Integrated System Startup Guide O049 ...

Страница 21: ... the ID information indications or with the Sysmac Studio Checking Unit Versions on ID Information Indications The unit version is given on the ID information indication on the side of the product NJ501 R 00 The ID information on the NJ series NJ501 R300 CPU Unit is shown below ID information indication NJ501 Ver 1 PORT1 MAC ADDRESS PORT2 MAC ADDRESS Lot No DDMYY xxxx Unit model Lot number Serial ...

Страница 22: ...g Box is displayed Changing Information Displayed in Production Information Dialog Box 1 Click the Show Detail or Show Outline Button at the lower right of the Production Information Dialog Box The view will change between the production information details and outline Outline View Detailed View The information that is displayed is different for the Outline View and Detail View The Detail View dis...

Страница 23: ...Outline View Detailed View Versions 21 NJ series Robot Integrated System Startup Guide O049 ...

Страница 24: ...n the instruction set IEC 61131 3 specifications are described NJ NX series CPU Unit Motion Control User s Manual W507 NX701 NX102 NX1P2 NJ501 NJ301 NJ101 Learning about mo tion control settings and programming concepts The settings and operation of the CPU Unit and programming concepts for mo tion control are described NJ NX series Motion Control Instructions Reference Manual W508 NX701 NX102 NX1...

Страница 25: ...a 600 and 800 Robot with EtherCAT User s Guide I653 RL4 Using the eCobra Describes the eCobra Viper 650 and 850 Robot with EtherCAT User s Guide I654 RL6 Using the Viper Describes the Viper Robot Safety Guide I590 RL4 RL6 Learning how to use the OMRON robot safely Describes how to use the OMRON robot safely Teaching Pendant T20 User s Manual I601 10046 010 Operating the OM RON robot with a teachin...

Страница 26: ...unica tions I621 R88M 1AL 1AM R88D 1SAN ECT AC Servomotors Servo Drives G5 Series with Built in EtherCAT Communi cations User s Manual I576 R88M K R88D KN ECT Learning how to use the AC Servomotors Servo Drives with built in EtherCAT Communications Describes the hardware setup methods and functions of the AC Servomotors Servo Drives with built in EtherCAT Com munications The Linear Motor Type mode...

Страница 27: ...nit and the basic operating procedure of the Sysmac Studio on an example of simple sequence control Machine Automation Controller Startup Guide for Motion Con trol W514 Learning about the basics of the motion control functions of the NJ series CPU Unit Describes the startup procedures and Sysmac Studio operating procedures for someone that will use NJ series motion control func tions for the first...

Страница 28: ... consists of the robot amplifier and the robot arm connected to the robot ampli fier shared variable A variable that can be shared between the sequence control program and V program sequence control program A control program written in IEC 61131 3 language including the motion control hardware servo A servo system built into the robot amplifier user program A generic term for the collection of pro...

Страница 29: ...s a suffix to the catalog number on the front and back covers of the manual O049 E1 01 Revision code Cat No Revision code Date Revised content 01 August 2020 Original production Revision History 27 NJ series Robot Integrated System Startup Guide O049 ...

Страница 30: ...Revision History 28 NJ series Robot Integrated System Startup Guide O049 ...

Страница 31: ...oftware 1 2 1 2 System Configuration for Static Pick and place Equipment 1 3 1 3 Operations of Static Pick and place Equipment 1 5 1 3 1 Operating Specifications 1 5 1 3 2 Operating Modes for Equipment 1 6 1 4 Hardware 1 7 1 5 Software 1 8 1 5 1 Sysmac Studio 1 8 1 6 User Program 1 9 1 6 1 Types of Method to Create User Program 1 9 1 6 2 Proper Use of Sequence Control Program and V Program 1 9 1 6...

Страница 32: ...e sequence control and robot control and reduce the design time and the adjustment time at startup 1 1 2 Features of the EtherCAT compatible OMRON robots The robots and peripheral devices can connect to the same EtherCAT network The operations for the robots and the peripheral devices can be handled in the same time axis with the synchronization func tion of the EtherCAT so wait time for asynchron...

Страница 33: ... in the following figure is a wiring to the safety circuits Refer to A 1 Designing Example of the Safety Functions for the Pick and place Equipment on page A 2 and design the safety circuits re quired for the actual equipments P G C B A S E D R O N M Q F H J I L K 100 to 240 VAC 85 to 264VAC 6 5A Single phase AC200 to 240VAC 10A XMCP XFP XUSR 1 The parts that are used in the system configuration a...

Страница 34: ...ant 10046 010 3 0 0 1 J T20 Adapter Cable K Front Panel 90356 10358 L Front Panel Cable M XSYSTEM Cable Assembly Incudes in the RL4 2166000 N AC Power Cable 04118 000 O DC Power Cable 04120 000 P 24 VDC Power Supply 150 W S8FS G15024CD Q Solenoid valve Selects depending on the workpiece R Vacuum pad S Vacuum ejector 1 Use a twisted pair cable double shielding with aluminum tape and braiding of cat...

Страница 35: ...int P2 in joint interpola tion operation 2 Move from the workpiece pick up approach point P2 to the workpiece pick up position P3 in linear interpolation operation 3 Move from the workpiece pick up position P3 to workpiece pick up approach point P2 in linear in terpolation operation 4 Move from the workpiece pick up approach point P2 to the workpiece place approach point P4 in joint interpolation ...

Страница 36: ...ng specifications of actual equipments 1 3 2 Operating Modes for Equipment Assume that this equipment have two operating modes manual operation and automatic operation Perform teaching in manual operation and execute the actual pick and place operations in automatic operation 1 Overview 1 6 NJ series Robot Integrated System Startup Guide O049 ...

Страница 37: ...ble the high power and make a emergency stop T20 Pendant 10046 010 A teaching pendant for a robot Use the pendant for teaching coordi nates It has the built in E Stop button and built in enable switch as safety functions Safety circuits The safety circuits that consist of safety I O devices a Safety Control ler etc Refer to A 1 Designing Example of the Safety Functions for the Pick and place Equip...

Страница 38: ...ation Controller To use this function you need a license for the Standard Edition SYSMAC SE2 L 3D simulation function A function to perform a 3D simulation including robots and peripheral devices To use this function you need a license with the 3D Simulation Option SYSMAC SA4 L 64 Refer to the Sysmac Studio Robot Integrated System Building Function with Robot Integrated CPU Unit Operation Manual C...

Страница 39: ...er This program is suitable for using various robot control 1 6 2 Proper Use of Sequence Control Program and V Program The following shows proper use of the sequence control program and V program The sequence control program manages the status errors and interlocks of the entire system in cluding sequence control and robot control The robot control is performed with a combination of the sequence c...

Страница 40: ...t Integrated CPU Unit User s Manual Cat No O037 for detailed informa tion when a robot is controlled with a sequence control program Refer to the eV 3 User s Manual Cat No I651 and eV 3 Keyword Reference Manual Cat No I652 for detailed information when a robot is controlled with a V program 1 6 3 Command and Data Flow This section describes the flow of commands and data for the the sequence contro...

Страница 41: ...ram etc OMRON robot V keywords Signal numbers V variables Refer to the NJ series Robot Integrated CPU Unit User s Manual Cat No O037 for details on the robot control function and shared variables in the sequence control program Refer to the eV 3 User s Manual Cat No I651 and eV 3 Keyword Reference Manual Cat No I652 for details on the robot control function in the V program 1 Overview 1 11 NJ seri...

Страница 42: ...1 Overview 1 12 NJ series Robot Integrated System Startup Guide O049 ...

Страница 43: ...igital I O Terminal 2 3 2 2 2 Setting the Node Address of the EtherCAT Digital I O Terminal 2 4 2 2 3 Wiring the EtherCAT Digital I O Terminal and the Robot 2 4 2 2 4 Setting the EtherCAT Node Address of the Robot 2 5 2 2 5 Wiring the Robot Integrated CPU Unit and the Computer 2 5 2 2 6 Wiring the Robot T20 Pendant and the Front Panel 2 5 2 2 7 Wiring the EtherCAT Digital I O Terminal and the Sole...

Страница 44: ...nd then click the OK button The Sysmac Studio Setup Wizard is started 3 Follow the instructions given by the Setup Wizard to complete the installation 4 Restart the computer when the installation is completed Additional Information Refer to the Sysmac Studio Robot Integrated System Building Function with Robot Integrated CPU Unit Operation Manual Cat No W595 for information on the system requireme...

Страница 45: ...6 5A Single phase AC200 to 240VAC 10A XMCP XFP XUSR 1 Refer to 1 2 System Configuration for Static Pick and place Equipment on page 1 3 for information on the parts used in the system configuration Refer to the manual for the specific product for details on power lines not covered in the colored area as well as for ducting from the robot 2 2 1 Wiring the Robot Integrated CPU Unit and the EtherCAT ...

Страница 46: ... switch to 0 and the x1 switch to 1 Node address setting 10 Node address setting 1 0 1 2 3 4 5 6 7 8 9 0 1 2 3 4 5 6 7 8 9 2 2 3 Wiring the EtherCAT Digital I O Terminal and the Robot You must wire the EtherCAT Digital I O Terminal and the robot 1 Connect the EtherCAT OUT port of the EtherCAT Digital I O Terminal and the EtherCAT IN port on the interface panel of the robot with an Ethernet cable 2...

Страница 47: ...t the node address 2 2 5 Wiring the Robot Integrated CPU Unit and the Computer You must wire the Robot Integrated CPU Unit and the computer 1 Connect the built in EtherNet IP port of the Robot Integrated CPU Unit and the computer with an Ethernet cable 2 2 6 Wiring the Robot T20 Pendant and the Front Panel You must wire the robot and the T20 pendant as well as the robot and the front panel Use an ...

Страница 48: ...ter ca ble 3 Connect the T20 adapter cable to the T20 pendant 4 Connect the XFP connector Green of the XSYSTEM cable assembly and the front panel ca ble 5 Connect the front panel cable and the front panel 2 Before You Begin 2 6 NJ series Robot Integrated System Startup Guide O049 ...

Страница 49: ...dance with the wiring diagrams and specifica tions 1 Make the cable so that the solenoid valve will behave as shown in the table below Output value of Digital I O Terminal Solenoid valve behavior FALSE Duct is closed TRUE Duct is open 2 Wire the EtherCAT Digital I O Terminal and the solenoid valve Solenoid valve 2 Before You Begin 2 7 NJ series Robot Integrated System Startup Guide O049 2 2 Instal...

Страница 50: ...2 Before You Begin 2 8 NJ series Robot Integrated System Startup Guide O049 ...

Страница 51: ...trolled with V Program 3 11 3 2 Basic Startup Procedures 3 17 3 3 Programming and Simulation Procedures 3 18 3 3 1 Creating a Project File 3 18 3 3 2 Creating the EtherCAT Network Configuration 3 19 3 3 3 Creating a Sequence Control Program 3 22 3 3 4 Creating V Programs 3 28 3 3 5 Placing 3D Shape Data 3 34 3 3 6 Starting Simulation 3 56 3 3 7 Teaching Positions 3 57 3 3 8 Setting up Automatic Lo...

Страница 52: ...low Refer to 1 3 1 Operating Specifications on page 1 5 for infor mation on the positions of P1 to P5 in the flow chart Robot calibration Attach a robot Move to P1 Stop vacuuming Wait for a certain time Move to P4 Move to P1 Detach the robot Start End Move to P2 Move to P3 Start vacuuming Move to P5 Move the robot to the height of P1 Wait for a certain time Move to P2 Move to P4 3 Implementation E...

Страница 53: ...EAL Use the variable to send the robot place position from the V pro gram to the sequence control program 3 eLoc_Pick ARRAY 0 5 OF LREAL Use the variable to send the robot pick up position from the V pro gram to the sequence control program 4 eBool_Exe BOOL Use the variable to check that the execution of a V task is started in the sequence control program Sequence Control Program This section desc...

Страница 54: ...device for details on variables No Variable name Description 1 _EC_PDSlavTbl 1 Check that the communications of the EtherCAT Digital I O Termi nal are established 2 _RC_RBT 0 DrvStatus Run Mode Check that the communications between the Robot Integrated CPU Unit and the robot are established 3 Implementation Example of Static Pick and place Equipment 3 4 NJ series Robot Integrated System Startup Gu...

Страница 55: ...anual mode 6 _RC_RBT 0 DrvStatus Power Enabled Check that the robot high power is enabled A program is described below Operating Program Run operating program is used to operate a robot A program is described below 3 Implementation Example of Static Pick and place Equipment 3 5 NJ series Robot Integrated System Startup Guide O049 3 1 Program Specifications for Static Pick and place Equipment 3 3 1...

Страница 56: ...3 Implementation Example of Static Pick and place Equipment 3 6 NJ series Robot Integrated System Startup Guide O049 ...

Страница 57: ...e of Static Pick and place Equipment 3 7 NJ series Robot Integrated System Startup Guide O049 3 1 Program Specifications for Static Pick and place Equipment 3 3 1 1 When Operations are Controlled with Sequence Control Program ...

Страница 58: ...3 Implementation Example of Static Pick and place Equipment 3 8 NJ series Robot Integrated System Startup Guide O049 ...

Страница 59: ...e of Static Pick and place Equipment 3 9 NJ series Robot Integrated System Startup Guide O049 3 1 Program Specifications for Static Pick and place Equipment 3 3 1 1 When Operations are Controlled with Sequence Control Program ...

Страница 60: ...is described below The V program is used to register global variables and create two programs loccopy variable copy program and auto read program Global Variables Register the global variables that are used in the V program 3 Implementation Example of Static Pick and place Equipment 3 10 NJ series Robot Integrated System Startup Guide O049 ...

Страница 61: ...f V Programs and Variables at Power ON on page 3 67 for information on auto read program 3 1 2 When Operations are Controlled with V Program The program specifications when operations of static pick and place equipment are controlled with the V program are described below The program consists of the following programs Program name Language Description Main Sequence control program Ladder diagram M...

Страница 62: ...used to register global variables and create Main a main program that monitors the status of peripheral devices and determines whether the automatic operation can start Global Variables Register the global variables that are used in the sequence control program Main Program Main main program is used to monitor the following status of the robot and EtherCAT Digital I O Terminal and determine whethe...

Страница 63: ...DrvStatus Power Enabled Check that the robot high power is enabled A program is described below 3 Implementation Example of Static Pick and place Equipment 3 13 NJ series Robot Integrated System Startup Guide O049 3 1 Program Specifications for Static Pick and place Equipment 3 3 1 2 When Operations are Controlled with V Program ...

Страница 64: ...global variables and create three programs run robot com mands send program run checkmode V program stop program and auto read program Global Variables Register the global variables that are used in the V program 3 Implementation Example of Static Pick and place Equipment 3 14 NJ series Robot Integrated System Startup Guide O049 ...

Страница 65: ...te and set temporary destination DECOMPOSE ar loc HERE SET al safe TRANS ar loc 0 ar loc 1 DZ gl wait ar loc 3 ar loc 4 ar loc 5 Prepare robot motion ready CALIBRATE ATTACH SPEED ar speed ar speed ALWAYS ACCEL ar accel ar accel Approrch Move to wait position MOVES al safe MOVE gl wait BREAK Approrch Move to pick position APPRO gl pick ar dist MOVES gl pick BREAK Suctioning on and waiting SIGNAL 40...

Страница 66: ...EXTERNAL ebool_exet1 ebool_reset ebool_exet1 TRUE WHILE TRUE DO Check NJ mode and reset button IF ebool_mode FALSE OR ebool_reset TRUE THEN Abort current robot motion BRAKE Terminate run program task ABORT 0 Wait until run program task has stoppped CYCLE END 0 Clear a program execution stack KILL 0 END Wait next robot control period WAIT END END Read Program auto read program is used to read the V...

Страница 67: ...rting simulation Activate the simulation function and start to simulate the robot motion page 3 56 6 Teaching Simula tion Use the simulation function of the Sysmac Studio for teaching the positions page 3 57 7 Running the pro gram Simulation Run the sequence control program on the simulator of the Sysmac Studio page 3 70 8 Setup Procedure for Ac tual System Going online Place the Sysmac Studio onl...

Страница 68: ...ect File Create a project in the Sysmac Studio 1 Start the Sysmac Studio and click New Project in the Start page The Project Properties dialog box is displayed 2 In the Project Properties dialog box enter the Project name Author and Comment and select the Category Device and Version as shown in the figure below 3 Select the Open in Emulation Mode check box and click the Create button 3 Implementat...

Страница 69: ... a robot on the network 1 Click Configurations and Setup in the Multiview Explorer Setting items are displayed under Configurations and Setup in the tree 3 Implementation Example of Static Pick and place Equipment 3 19 NJ series Robot Integrated System Startup Guide O049 3 3 Programming and Simulation Procedures 3 3 3 2 Creating the EtherCAT Network Configuration ...

Страница 70: ...enu The EtherCAT Master is displayed in the EtherCAT tab page 3 From the Toolbox select the group of Digital I O 4 Click and drag the digital I O to use and drop it on the EtherCAT Master in the EtherCAT tab page In this example select GX MD3218 3 Implementation Example of Static Pick and place Equipment 3 20 NJ series Robot Integrated System Startup Guide O049 ...

Страница 71: ...nd drop it on the GX MD3218 in the EthercAT tab page Here select Cobra 600 Pro A Cobra 600 Pro is added under the GX MD3218 3 Implementation Example of Static Pick and place Equipment 3 21 NJ series Robot Integrated System Startup Guide O049 3 3 Programming and Simulation Procedures 3 3 3 2 Creating the EtherCAT Network Configuration ...

Страница 72: ...s You need to create device variables to use sequence control programs for controlling static pick and place operation This setting is not required if you use V programs for controlling the operation 1 Double click I O Map under Configurations and Setup in the Multiview Explorer The I O Map tab page is displayed 2 Tap the icon to the left of GX MD3218 The I O ports of the GX MD3218 are displayed 3...

Страница 73: ...n the sequence control program 1 Double click Global Variables under Programming Data in the Multiview Explorer Or right click Global Variables under Programming Data and select Edit from the menu The global variable table is displayed 3 Implementation Example of Static Pick and place Equipment 3 23 NJ series Robot Integrated System Startup Guide O049 3 3 Programming and Simulation Procedures 3 3 ...

Страница 74: ...press the Enter key The global variable is registered Creating Ladder Diagram Programs This section describes how to create the ladder diagram programs 1 Right click Program0 under Programming POUs Programs in the Multiview Explorer and select Rename from the menu 3 Implementation Example of Static Pick and place Equipment 3 24 NJ series Robot Integrated System Startup Guide O049 ...

Страница 75: ...l and external variables are automatically regis tered when they are entered in the program To create more than one sequence control program perform the following steps 5 Right click Programs under Programming POUs in the Multiview Explorer and then select Add Ladder from the menu Program0 is added under Programs 3 Implementation Example of Static Pick and place Equipment 3 25 NJ series Robot Inte...

Страница 76: ...e used to control the static pick and place equip ment so it is necessary to assign the programs to tasks When the equipment is controlled by the V Program only one ladder diagram program is used and you do not need to perform the steps in this section 1 Double click Task Settings under Configurations and Setup in the Multiview Explorer The Task Settings tab page is displayed 2 Click the Program A...

Страница 77: ...am to use from the list of the Program name The name of the selected program is displayed 3 Implementation Example of Static Pick and place Equipment 3 27 NJ series Robot Integrated System Startup Guide O049 3 3 Programming and Simulation Procedures 3 3 3 3 Creating a Sequence Control Program ...

Страница 78: ...ol the operation of the static pick and place equipment with the V pro gram If you use sequence control programs for controlling the operation this setting is unnecessary 1 In the Multiview Explorer select new_Controller_0 from the device list 2 Click the icon to the left of Robot Control Setup in the Multiview Explorer The setting items are displayed in the tree view as shown below 3 Double click...

Страница 79: ... Click the drop down list for Device in the newly added row and then select Node 1 GX MD3218 E001 6 Click the drop down list for Port in the same row and select Out Bit00 3 Implementation Example of Static Pick and place Equipment 3 29 NJ series Robot Integrated System Startup Guide O049 3 3 Programming and Simulation Procedures 3 3 3 4 Creating V Programs ...

Страница 80: ...hen Operations are Controlled with Sequence Control Program on page 3 3 1 In the Multiview Explorer select RobotControlSettings from the device list 2 Double click Variables under Programming in the Multiview Explorer A tab page to edit variables is displayed in the Edit Pane so that you can register variables 3 Click the button 3 Implementation Example of Static Pick and place Equipment 3 30 NJ s...

Страница 81: ... Locations from the list of variable types 6 For Robot select Cobra 6000 from the list 3 Implementation Example of Static Pick and place Equipment 3 31 NJ series Robot Integrated System Startup Guide O049 3 3 Programming and Simulation Procedures 3 3 3 4 Creating V Programs ...

Страница 82: ...e to create V programs 1 In the Multiview Explorer select RobotControlSettings from the device list 2 Right click V Modules under Programming in the Multiview Explorer and select Add New Module from the menu 3 Implementation Example of Static Pick and place Equipment 3 32 NJ series Robot Integrated System Startup Guide O049 ...

Страница 83: ... name of the V program The name of the V program is changed 4 Double click the program to edit A tab page to edit the V program is displayed in the Edit Pane 3 Implementation Example of Static Pick and place Equipment 3 33 NJ series Robot Integrated System Startup Guide O049 3 3 Programming and Simulation Procedures 3 3 3 4 Creating V Programs ...

Страница 84: ...zer Making the operating range visible makes it easier to set the position of the robot 1 Select 3D Visualizer from the View menu on the main window of the Sysmac Studio 2 In the 3D Visualizer click the Scene Graph icon The Scene Graph dialog box is displayed 3 Implementation Example of Static Pick and place Equipment 3 34 NJ series Robot Integrated System Startup Guide O049 ...

Страница 85: ...The 3D Visualizer illustrates the robot s operating range in gray 4 Click the Close button on the Scene Graph dialog box 3 Implementation Example of Static Pick and place Equipment 3 35 NJ series Robot Integrated System Startup Guide O049 3 3 Programming and Simulation Procedures 3 3 3 5 Placing 3D Shape Data ...

Страница 86: ... place Equipment on page 1 5 1 Select Application Manager from the Insert menu on the main window of the Sysmac Studio The Add Device dialog box is displayed 2 Select Category Device and Version as shown in the figure below and then click the OK button ApplicationManager0 is added to the drop down list at the top of the Multiview Explorer 3 Implementation Example of Static Pick and place Equipment...

Страница 87: ...etting items are displayed under Configurations and Setup in the tree 4 Right click 3D Visualization The menu commands are displayed 5 From the menu select Add CAD Data The Import CAD File wizard starts 3 Implementation Example of Static Pick and place Equipment 3 37 NJ series Robot Integrated System Startup Guide O049 3 3 Programming and Simulation Procedures 3 3 3 5 Placing 3D Shape Data ...

Страница 88: ... own CAD file 7 Click the Next button 8 Click the Open File button The Open dialog box is displayed 3 Implementation Example of Static Pick and place Equipment 3 38 NJ series Robot Integrated System Startup Guide O049 ...

Страница 89: ... CAD data with the file name extension stp The Open dialog box is closed and import of 3D CAD data starts automatically When the import completes the assemblies of the import 3D CAD data is displayed in the Import CAD File wizard 3 Implementation Example of Static Pick and place Equipment 3 39 NJ series Robot Integrated System Startup Guide O049 3 3 Programming and Simulation Procedures 3 3 3 5 Pl...

Страница 90: ...n of the conveyor 10Click the buttons in the following order 90 Yaw 90 Pitch 90 Yaw 90 Pitch and 90 Pitch The conveyor top comes to the U face 11 Select the parts to add for simulation and click the Next button 3 Implementation Example of Static Pick and place Equipment 3 40 NJ series Robot Integrated System Startup Guide O049 ...

Страница 91: ...veyor A and Conveyor B are now imported Placing 3D Shape Data on the 3D Visualizer Place the imported 3D shape data in the appropriate position on the 3D Visualizer When 3D shape data is imported the 3D shape data is positioned so that it has the same coordinate origin as the robot coordinate system Therefore it is necessary to move the 3D shape data to the appropriate position 3 Implementation Ex...

Страница 92: ...ct 3D Visualizer from the View menu on the main window of the Sysmac Studio The 3D Visualizer is displayed on the right side of the main window 2 In the 3D Visualizer select the imported 3D shape data with the mouse cursor and right click it The menu commands are displayed Additional Information When you move the mouse cursor on the 3D shape data in the 3D Visualizer the name of the 3D shape data ...

Страница 93: ... axis respectively The red face shows the YZ plane the green face shows the ZX plane and the blue face shows the XY plane You can drag an arrow to move the 3D shape data along the axis Or use the face icon to move the 3D shape data on the corresponding plane You can also move the 3D shape data independently from the axis direction by dragging the purple circle 3 Implementation Example of Static Pi...

Страница 94: ...er The menu commands are displayed 6 Select Edit Workspace Position from the menu to clear the selection 7 Right click the 3D shape data in the 3D Visualizer The menu commands are displayed 8 Select Edit Workspace Orientation from the menu 3 Implementation Example of Static Pick and place Equipment 3 44 NJ series Robot Integrated System Startup Guide O049 ...

Страница 95: ...tation around the X axis Y axis and Z axis respectively 10Right click the 3D shape data to adjust the orientation in the 3D Visualizer The menu commands are displayed 11 Select Edit Workspace Orientation from the menu to clear the selection 3 Implementation Example of Static Pick and place Equipment 3 45 NJ series Robot Integrated System Startup Guide O049 3 3 Programming and Simulation Procedures...

Страница 96: ...nu The input fields for editing the position of the 3D shape data is displayed 14Enter values in mm in the X Y and Z fields to move the 3D shape data to an appropriate posi tion The position of the 3D shape data changes according to the input values 3 Implementation Example of Static Pick and place Equipment 3 46 NJ series Robot Integrated System Startup Guide O049 ...

Страница 97: ...ion of the 3D shape data changes according to the input values 17In the 3D Visualizer right click the 3D shape data that you adjusted the position and orienta tion The menu commands are displayed 18Select Direct Position Edit from the menu to clear the selection 3 Implementation Example of Static Pick and place Equipment 3 47 NJ series Robot Integrated System Startup Guide O049 3 3 Programming and...

Страница 98: ...robot or the 3D shape data or modify the movement of the robot In this section the setting procedure to detect a contact between the robot Conveyor A and Conveyor B is given Because the collision detection function checks whether 3D shape data may conflict be tween groups you create two groups Group 0 which includes the robot and Group 1 which includes Conveyor A and Conveyor B Precautions for Cor...

Страница 99: ...n the right side of the main window 2 In the 3D Visualizer click the Scene Graph icon The Scene Graph dialog box is displayed 3 Implementation Example of Static Pick and place Equipment 3 49 NJ series Robot Integrated System Startup Guide O049 3 3 Programming and Simulation Procedures 3 3 3 5 Placing 3D Shape Data ...

Страница 100: ...lter Group Items column for the Collision Filter Group A new row with the Collision Filter Group Name set as Group0 is added on the Scene Graph dialog box 3 Implementation Example of Static Pick and place Equipment 3 50 NJ series Robot Integrated System Startup Guide O049 ...

Страница 101: ...lick the button in the Collision Filter Group Items column for Group0 0 The Select a collision filter group item dialog box is displayed 3 Implementation Example of Static Pick and place Equipment 3 51 NJ series Robot Integrated System Startup Guide O049 3 3 Programming and Simulation Procedures 3 3 3 5 Placing 3D Shape Data ...

Страница 102: ...ect button The Select a collision filter group item dialog box closes and the Scene Graph dialog box is displayed again Entire Robot is registered as the Collision Filter Group Items for Group0 0 3 Implementation Example of Static Pick and place Equipment 3 52 NJ series Robot Integrated System Startup Guide O049 ...

Страница 103: ...ilter group item dialog box is displayed 9 Select ApplicationManager0 3D Visualization CAD Data0 from the tree and then click the Select button 3 Implementation Example of Static Pick and place Equipment 3 53 NJ series Robot Integrated System Startup Guide O049 3 3 Programming and Simulation Procedures 3 3 3 5 Placing 3D Shape Data ...

Страница 104: ... Items column for Group1 0 10Check that the Valid check boxes are all selected If there is a check box not selected click it to select 11 Click the button in the Collision Filter Group Items column for Group1 A new row for 1 is added under Group1 3 Implementation Example of Static Pick and place Equipment 3 54 NJ series Robot Integrated System Startup Guide O049 ...

Страница 105: ...ick the Close button in the Scene Graph dialog box Now the settings for checking the conflict between the robot Conveyor A and Conveyor B have been completed 3 Implementation Example of Static Pick and place Equipment 3 55 NJ series Robot Integrated System Startup Guide O049 3 3 Programming and Simulation Procedures 3 3 3 5 Placing 3D Shape Data ...

Страница 106: ...ou see Emulation Mode Access Level Engineer on the status bar the project is opened in EMULATION mode If the project is opened in a different mode click the Enable emulation mode icon on the toolbar to change to EMULATION mode 1 Select Run from the Simulation menu The screen below is displayed while the simulator is starting After this screen is closed the lower part of the toolbar in the main win...

Страница 107: ... during the simulation in either of the following two ways Select one of the following depending on the positioning accuracy required for operation and movement Manipulate the tool center point of the robot with the mouse in the 3D Visualizer Manipulate each axis of the robot in V Jog Control pane Additional Information To move the robot to its approximate position it is convenient to use the mous...

Страница 108: ...pulating the Robot with the Mouse in the 3D Visualizer This section describes the procedure to manipulate the tool center point of the robot with the mouse in the 3D Visualizer This operation is suitable for determining rough position and posture because the tool center point of the robot moves to follow the mouse cursor enabling intuitive robotic operation 1 Select 3D Visualizer from the View men...

Страница 109: ...line of the robot is highlighted with black lines 3 Drag the mouse cursor The tool center point moves to follow the mouse cursor 3 Implementation Example of Static Pick and place Equipment 3 59 NJ series Robot Integrated System Startup Guide O049 3 3 Programming and Simulation Procedures 3 3 3 7 Teaching Positions ...

Страница 110: ... of the robot proceed to Saving Current Positions to Variables on page 3 64 If you need to specify a more precise position or want to specify a position along the axis of the robot coordinate system or each joint axis proceed to Manipulating the Robot in the V Jog Control Pane on page 3 60 for the next step Manipulating the Robot in the V Jog Control Pane This section describes the procedure to ma...

Страница 111: ...tiview Explorer 3 Select V Jog Control from the View menu on the main window The V Jog Control pane appears on the right side of the main window 3 Implementation Example of Static Pick and place Equipment 3 61 NJ series Robot Integrated System Startup Guide O049 3 3 Programming and Simulation Procedures 3 3 3 7 Teaching Positions ...

Страница 112: ...oordinate system of the joint Select Tool for specifying the position in the coordinate system of the tool center point In this example select World 5 Click one of the lamps of Jog Control in the V Jog Control pane The lamp clicked turns green The robot can be moved along the coordinate axis of the illumi nated lamp Select the Z lamp in this example 3 Implementation Example of Static Pick and plac...

Страница 113: ...tem For example the arrow in the figure below indicates positive direction in the robot coordinate system While the arrow button is kept pressed the robot moves along the specified axis of the coordi nate system 3 Implementation Example of Static Pick and place Equipment 3 63 NJ series Robot Integrated System Startup Guide O049 3 3 Programming and Simulation Procedures 3 3 3 7 Teaching Positions ...

Страница 114: ...to the already created V variable is described below V position variables that need to be saved are listed in the table below Name of position Name of variable Description gl wait Robot wait position gl pick Workpiece pick up position gl place Workpiece place position Save a current position to the variable gl wait as an example Save current positions to two other vari ables in the same manner 3 I...

Страница 115: ...cts a variable that you want to set the current position or an element of the array variable from the drop down list 3 Implementation Example of Static Pick and place Equipment 3 65 NJ series Robot Integrated System Startup Guide O049 3 3 Programming and Simulation Procedures 3 3 3 7 Teaching Positions ...

Страница 116: ... selected variable are displayed Select the variable gl wait 3 Click the Here button of Location in the V Jog Control pane 3 Implementation Example of Static Pick and place Equipment 3 66 NJ series Robot Integrated System Startup Guide O049 ...

Страница 117: ... se quence control program 3 3 8 Setting up Automatic Loading of V Programs and Variables at Power ON The V programs that you created and V global variables are not automatically loaded to the Robot Integrated CPU Unit by default settings of the project when power to the Robot Integrated CPU Unit is turned ON 3 Implementation Example of Static Pick and place Equipment 3 67 NJ series Robot Integrat...

Страница 118: ...tings from the device list in the Multiview Explorer 2 Click Configurations and Setup in the Multiview Explorer Setting items are displayed under Configurations and Setup in the tree 3 Double click Save Configuration The Save Configuration tab page is displayed in the Edit Pane 3 Implementation Example of Static Pick and place Equipment 3 68 NJ series Robot Integrated System Startup Guide O049 ...

Страница 119: ...page In the tree of the Multiview Explorer V Modules auto are added under Programming 5 Select Save from the File menu 3 Implementation Example of Static Pick and place Equipment 3 69 NJ series Robot Integrated System Startup Guide O049 3 3 Programming and Simulation Procedures 3 3 3 8 Setting up Automatic Loading of V Programs and Variables at Power ON ...

Страница 120: ... page 3 22 You can run the program by changing the global variable gStart in the sequence control program from FALSE to TRUE in the Watch Tab Page The V program is called from the sequence control program executed in this procedure Precautions for Correct Use When you perform this procedure check that the project file has been opened in EMULATION mode Refer to Enabling Robot Simulation Function on...

Страница 121: ...e The color of the power button changes from green to red 4 Click the power button again in the Task Status Control pane 3 Implementation Example of Static Pick and place Equipment 3 71 NJ series Robot Integrated System Startup Guide O049 3 3 Programming and Simulation Procedures 3 3 3 9 Running the Program and Checking Operation ...

Страница 122: ...on the main window of the Sysmac Studio The 3D Visualizer is displayed on the right side of the main window 7 Select Watch Tab Page from the View menu on the main window The Watch Project 1 tab page appears at the bottom of the main window 3 Implementation Example of Static Pick and place Equipment 3 72 NJ series Robot Integrated System Startup Guide O049 ...

Страница 123: ... move and pauses at the workpiece pick up position in the 3D Visualizer The robot moves to workpiece pick up position and pauses After that the robot restarts operation from the workpiece pick up position moves to the robot wait position via the workpiece place position and stops 3 Implementation Example of Static Pick and place Equipment 3 73 NJ series Robot Integrated System Startup Guide O049 3...

Страница 124: ...ch other In that case refer to Manipulating the Robot in the V Jog Control Pane on page 3 60 and move the workpiece pick up approach point or the work piece place approach point to a higher position by teaching If the highlight color of the robot turns gray during transportation the robot and conveyor are in contact Please review the lifting distance Now you can run the sequence control program on...

Страница 125: ...t Refer to the eCobra 600 and 800 Robot with EtherCAT User s Guide Cat No I653 for details 3 4 1 Connecting Online The computer and the Robot Integrated CPU Unit are connected online 1 Turn ON the power supplies to the Robot Integrated CPU Unit and the robot 2 Click new_Controller_0 from the device list in the Multiview Explorer of the Sysmac Studio 3 Select Controller Communications Setup from th...

Страница 126: ... Sysmac Studio returns to the menu screen 7 Select Controller Online from the menu bar Precautions for Correct Use Depending on the status of the connected Robot Integrated CPU Unit the dialog box for writing the CPU Unit name or checking the serial ID is displayed Refer to the Sysmac Studio Version 1 Operation Manual Cat No W504 for details When it is online the yellow line is displayed on the to...

Страница 127: ...ar on the Sysmac Studio The comparison of the user program and parameter settings between the Sysmac Studio and the Controller is started When the comparison is completed the Synchronization dialog box is displayed 3 Implementation Example of Static Pick and place Equipment 3 77 NJ series Robot Integrated System Startup Guide O049 3 4 Setup Procedure for Actual System 3 3 4 2 Transferring Settings...

Страница 128: ...tion process successfully finished is diaplayed and then click the Close button 4 Select RobotControlSettings from the device list in the Multiview Explorer 3 Implementation Example of Static Pick and place Equipment 3 78 NJ series Robot Integrated System Startup Guide O049 ...

Страница 129: ...n ERROR indicator Not lit NET RUN Lit green NET ERR Not lit LINK ACT Flashing Built in EtherCAT port 7 Confirm that the robot is turned ON normally The status of indicators for normal operation is given below Indicators Status RUN indicator Lit green ERR indicator Not lit 3 Implementation Example of Static Pick and place Equipment 3 79 NJ series Robot Integrated System Startup Guide O049 3 4 Setup...

Страница 130: ...e you plan to pick it up before performing the teaching operation Precautions for Correct Use When you operate the robot in MANUAL mode with the T20 pendant you must plug the iCS Commissioning Jumper into the XBELTIO connector and change the setting for the Teach Re strict Refer to the eCobra 600 and 800 Robot with EtherCAT User s Guide Cat No I653 for details Turning Robot High Power ON The robot...

Страница 131: ... the simulation operation is adjusted to match the actual place position The robot actually moves to the teaching position set in the simulation opera tion and correct the position if there are differences between teaching position and expected position Use the following procedure to adjust position according to the travel route of the robot You must ad just the wait position and approach position...

Страница 132: ...nded travel route and contact to the equipments such as a conveyor and then the devices may be damaged 1 Confirm that the T20 pendant displays the HOME1 screen 2 Press the F4 button Next twice The HOME3 screen is displayed 3 Press the F1 button Maint 3 Implementation Example of Static Pick and place Equipment 3 82 NJ series Robot Integrated System Startup Guide O049 ...

Страница 133: ...ed 4 Press the up or down arrow button to select Approach Dist field 3 Implementation Example of Static Pick and place Equipment 3 83 NJ series Robot Integrated System Startup Guide O049 3 4 Setup Procedure for Actual System 3 3 4 3 Teaching ...

Страница 134: ... Dist field You can select the height to rise and fall in the range of 1 to 200 mm Assume that the value of height to rise and fall is 40 in this step 7 Press the OK button 3 Implementation Example of Static Pick and place Equipment 3 84 NJ series Robot Integrated System Startup Guide O049 ...

Страница 135: ...een 9 Press the F2 button Loc The AVAILABLE LOCATIONS screen is displayed 3 Implementation Example of Static Pick and place Equipment 3 85 NJ series Robot Integrated System Startup Guide O049 3 4 Setup Procedure for Actual System 3 3 4 3 Teaching ...

Страница 136: ...tions 11 Press the F4 button Next The display for the soft keys changes on the bottom of the screen 12If the variable selected in step 10 is gl pick or gl place press and hold the F2 button Appro 3 Implementation Example of Static Pick and place Equipment 3 86 NJ series Robot Integrated System Startup Guide O049 ...

Страница 137: ...ease the F1 button JogTo If there is no problem with the position and posture after the move proceed to step 20 If you adjust the position and posture perform step 15 and later 15Press the F4 button Next and then F2 button Teach 3 Implementation Example of Static Pick and place Equipment 3 87 NJ series Robot Integrated System Startup Guide O049 3 4 Setup Procedure for Actual System 3 3 4 3 Teachin...

Страница 138: ...WORLD is displayed 17Press the JOINT AXIS CONTROL button to move the robot to the desired position and pos ture The following table shows the relationship between coordinate axes in World Mode and JOINT AXIS CONTROL button Letter Description JOINT AXIS CONTROL button A X X direction X B Y Y direction Y C Z Z direction Z D RZ CCW RZ rotation RZ 3 Implementation Example of Static Pick and place Equi...

Страница 139: ...t position 19Press the F2 Loc button and then F4 button Next The AVAILABLE LOCATIONS screen is displayed again 3 Implementation Example of Static Pick and place Equipment 3 89 NJ series Robot Integrated System Startup Guide O049 3 4 Setup Procedure for Actual System 3 3 4 3 Teaching ...

Страница 140: ...tegrated CPU Unit is turned OFF Precautions for Correct Use If the power supply to the Robot Integrated CPU Unit turned OFF without saving position data in the SD Memory Card the adjusted position data is lost and then the robot may perform unin tended operations the next time that the CPU Unit is started Perform this procedure if you per form teaching on the actual system 1 Click RobotControlSett...

Страница 141: ... Click File Save from the menu bar 3 4 4 Executing Program to Check Operation The robot operation before the automatic operation is checked according to the program 1 Change the operating mode switch on the front panel to Auto Mode 3 Implementation Example of Static Pick and place Equipment 3 91 NJ series Robot Integrated System Startup Guide O049 3 4 Setup Procedure for Actual System 3 3 4 4 Exec...

Страница 142: ...conds the ROBOT POWER button lights ROBOT POWER button 3 Select View Watch Tab Page from the menu bar in the main window of the Sysmac Studio on the computer The Watch tab page is displayed under the main window 3 Implementation Example of Static Pick and place Equipment 3 92 NJ series Robot Integrated System Startup Guide O049 ...

Страница 143: ...e operating mode of the Robot Integrat ed CPU Unit is switched from RUN mode to PROGRAM mode and then to RUN mode again press the ROBOT POWER button on the front panel to make sure that the light of the button is OFF and then press the button again to confirm that it is lit before executing the above proce dure 3 Implementation Example of Static Pick and place Equipment 3 93 NJ series Robot Integr...

Страница 144: ...3 Implementation Example of Static Pick and place Equipment 3 94 NJ series Robot Integrated System Startup Guide O049 ...

Страница 145: ...azards A 4 A 1 3 Protective Measure A 4 A 1 4 Safety Functions A 4 A 1 5 Safety System Configuration and Devices A 5 A 1 6 Installation and Wiring A 7 A 1 7 Settings and Programming A 13 A 2 Setting Items on the Sysmac Studio and the Setting Targets A 21 A 3 Using Troubleshooting Functions A 22 A 1 NJ series Robot Integrated System Startup Guide O049 A ...

Страница 146: ...fety measures based on the Robot Safety Guide Cat No I590 and risk assessment In addition it is necessary to consider the performance level and safety distances of the equipment while it conforms to the safety standards A 1 1 Pick and place Equipment Configuration The configuration of the pick and place equipment inclusive of the safety devices is shown in the table below Appendices A 2 NJ series ...

Страница 147: ...M L O Front Back K J I H Appendices A 3 NJ series Robot Integrated System Startup Guide O049 A 1 Designing Example of the Safety Functions for the Pick and place Equipment A A 1 1 Pick and place Equipment Configuration ...

Страница 148: ...wn in the table below Equipment side Approached case Safeguarding Safety device Back Fixed guard Front Adjustment maintenance Movable guard Safety door switch Loading side Loading Opto electronic protective device Safety light curtain Unload side Unloading Opto electronic protective device Safety light curtain In addition to the safeguarding the emergency stop switches as the complementary protect...

Страница 149: ...fety functions when the operating mode of the OMRON robot is in Manual mode as shown in the table below Safety device Safety function Recovery Emergency stop pushbutton switch 1 Stop the robot when pressed Reset Emergency stop pushbutton switch 2 Stop the robot when pressed Reset Safety light curtain 1 Safety light curtain 2 Safety door switch 1 Safety door switch 2 E STOP button on front panel St...

Страница 150: ...top switches OMRON robot XFP Front panel XMCP XUSR Safety light curtains T20 Pendant Safety relays Unit power supply 24 VDC I O power supply 24 VDC Configuration Devices The safety system configuration in this guide uses the devices shown in the table below Appendices A 6 NJ series Robot Integrated System Startup Guide O049 ...

Страница 151: ...wer Supply S8VK OMRON A 24 VDC power supply This control power supply is for the EtherNet IP Coupler Units and the NX Units I O Power Supply S8VK OMRON A 24 VDC power supply This power supply is for the I O cir cuits of the NX Units and the connected external devices A 1 6 Installation and Wiring This section describes the installation and wiring related to the safety functions for the pick and pl...

Страница 152: ... supply 5 to 24 VDC Ground of 100 W or less Connect the terminal 24 VDC of the Unit power supply to A1 or B1 Connect the terminal 0 VDC of the Unit power supply to A3 or B3 Connect the terminal 5 to 24 VDC of the I O power supply to A5 Connect the terminal 0 VDC of the I O power supply to B5 Connect the ground line to A7 or B7 Appendices A 8 NJ series Robot Integrated System Startup Guide O049 ...

Страница 153: ... Blue Black White White Black Blue Blue Emitter Receiver Emitter Receiver Safety light curtain Control output 1 OSSD 1 Control output 2 OSSD 2 Control output 1 OSSD 1 Control output 2 OSSD 2 Safety light curtain Si3 Si2 Si1 Si0 0 V 24 VDC Wiring the Safety Door Switch Connect the non contact door switch to the I O power supply and Safety Input Unit N4 Appendices A 9 NJ series Robot Integrated Syst...

Страница 154: ...hite Wiring the Reset Switch Connect the reset switch to the Safety Input Unit N5 NX SIH400 N5 Si0 T0 Wiring the Robot Connect the robot to the Safety Output Unit N6 Safety Input Unit N5 and safety relays The outputs of the Safety Output Unit N6 and the inputs of the robot cannot be directly connected therefore they are connected through the safety relays Use the contact a of each safety relay L1 ...

Страница 155: ...CH1 User emergency stop CH2 XUSR 3 XUSR 16 XUSR 4 XUSR 17 XUSR 5 XUSR 18 XUSR 6 XUSR 19 XUSR 1 XUSR 14 XUSR 2 XUSR 15 So0 L1 L2 L3 L4 G So1 G So2 G So3 G Appendices A 11 NJ series Robot Integrated System Startup Guide O049 A 1 Designing Example of the Safety Functions for the Pick and place Equipment A A 1 6 Installation and Wiring ...

Страница 156: ... auto status command XUSR 9 XUSR 22 Manual auto status command XUSR 10 XUSR 23 Si1 T1 Wiring the Safety Relays for Operation Check Connect the contact b of each safety relay L1 to L4 to the Safety Input Unit N5 for checking the oper ation of each contact a Appendices A 12 NJ series Robot Integrated System Startup Guide O049 ...

Страница 157: ...ions for the Safety CPU Unit Refer to the NX series Safety Control Unit User s Manual Cat No Z930 for information on the speci fications and how to configure the Safety Control Units Setting Safety I O Unit Use the Sysmac Studio and set the safety functions of each safety I O terminal Set the Safety Input Unit N2 as shown below Appendices A 13 NJ series Robot Integrated System Startup Guide O049 A...

Страница 158: ...Set the Safety Input Unit N3 as shown below Set the Safety Input Unit N4 as shown below Set the Safety Input Unit N5 as shown below Appendices A 14 NJ series Robot Integrated System Startup Guide O049 ...

Страница 159: ...Variables Use the Sysmac Studio and set the device variables of each Safety I O Unit Appendices A 15 NJ series Robot Integrated System Startup Guide O049 A 1 Designing Example of the Safety Functions for the Pick and place Equipment A A 1 7 Settings and Programming ...

Страница 160: ...Safety Programs Use the Sysmac Studio to create variables and programs as shown below Create variables as shown below Appendices A 16 NJ series Robot Integrated System Startup Guide O049 ...

Страница 161: ...e programs as shown below Appendices A 17 NJ series Robot Integrated System Startup Guide O049 A 1 Designing Example of the Safety Functions for the Pick and place Equipment A A 1 7 Settings and Programming ...

Страница 162: ...Appendices A 18 NJ series Robot Integrated System Startup Guide O049 ...

Страница 163: ...Appendices A 19 NJ series Robot Integrated System Startup Guide O049 A 1 Designing Example of the Safety Functions for the Pick and place Equipment A A 1 7 Settings and Programming ...

Страница 164: ...Appendices A 20 NJ series Robot Integrated System Startup Guide O049 ...

Страница 165: ...f a Robot Integrated CPU Unit and if you select RobotControlSettings the settings for a V program of a Robot Integrated CPU Unit are made Refer to the manual for the specific product for details Robot Integrated CPU Unit Sequence control program V program Robot control parameters Robot setting files Sysmac Studio Setting items in the MultiView Explorer Setting target Appendices A 21 NJ series Robo...

Страница 166: ...tudio Robot Integrated System Building Function with Robot Integrated CPU Unit Operation Manual Cat No W595 for the operation procedure of the troubleshooting functions on the Sysmac Studio Appendices A 22 NJ series Robot Integrated System Startup Guide O049 ...

Страница 167: ......

Страница 168: ... 60169 U S A Tel 1 847 843 7900 Fax 1 847 843 7787 Regional Headquarters OMRON EUROPE B V Wegalaan 67 69 2132 JD Hoofddorp The Netherlands Tel 31 2356 81 300 Fax 31 2356 81 388 Contact www ia omron com Kyoto JAPAN OMRON ASIA PACIFIC PTE LTD No 438A Alexandra Road 05 05 08 Lobby 2 Alexandra Technopark Singapore 119967 Tel 65 6835 3011 Fax 65 6835 2711 OMRON CHINA CO LTD Room 2211 Bank of China Towe...

Отзывы: