background image

156

One-to-one PC Link I/O Response Time

Section 7-4

Maximum Response Time 
(Except for the Online Editing of DM 6144 to DM 6655)

Interrupt ON delay:

50 

µ

s

Interrupt mask standby time:

150 

µ

s

+

Change-to-interrupt processing:

10 

µ

s

Maximum response time:

210 

µ

s

In addition to the response time shown above, the time required for executing
the interrupt processing routine itself and a return time of 10 

µ

s must also be

accounted for when returning to the process that was interrupted.

7-4

One-to-one PC Link I/O Response Time

When two CPM2C-S PCs are linked 1:1, the I/O response time is the time
required for an input executed at one of the PCs to be output to the other PC
by means of 1:1 PC Link communications.

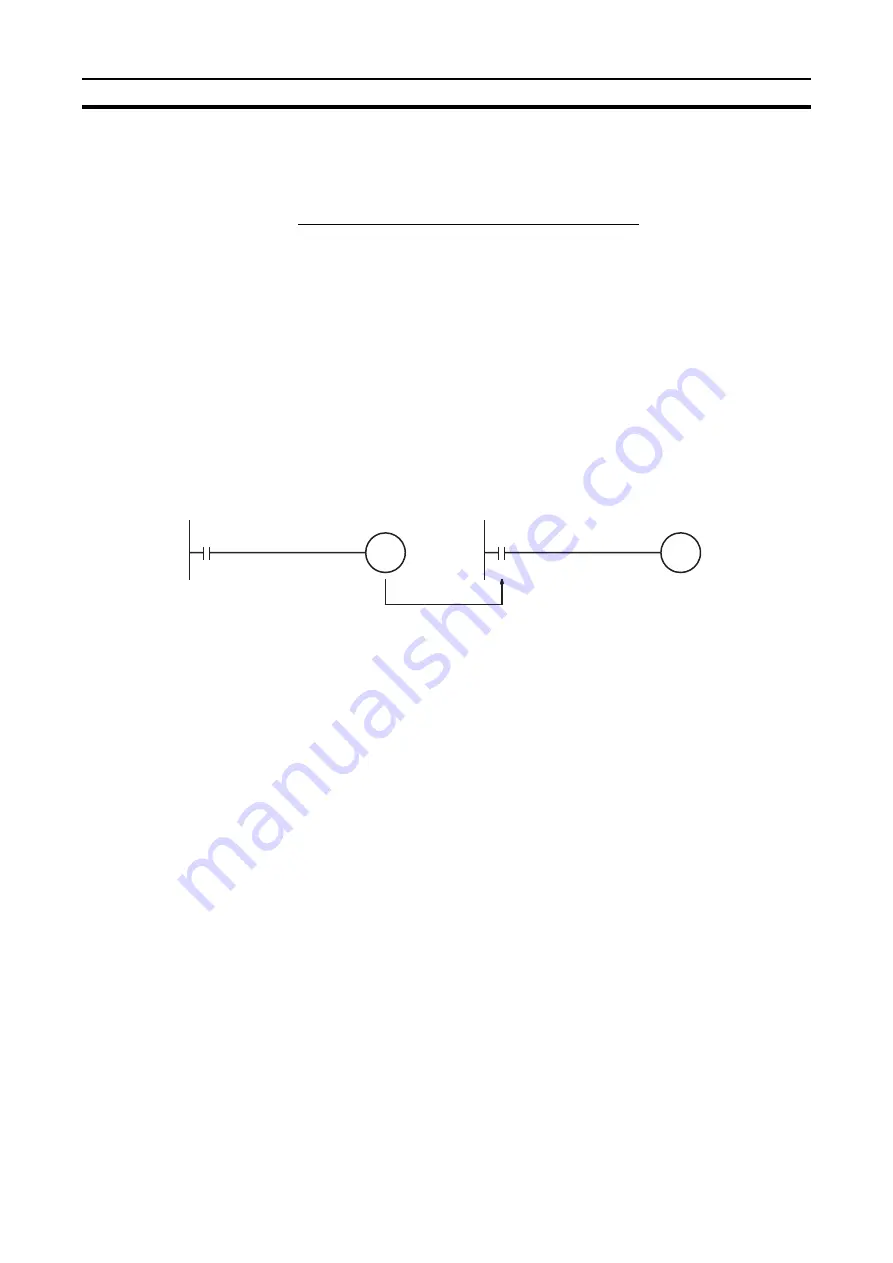
The minimum and maximum I/O response times are shown here, using as an
example the following instructions executed at the master and the slave. In
this example, communications proceed from the master to the slave.

The following conditions are taken as examples for calculating the I/O
response times. In CPM2C-S PCs, LR area words LR 00 to LR 15 are used in
1:1 data links and the transmission time is fixed at 12 ms.

Input ON delay:

10 ms (input time constant: default setting)

Master cycle time:

10 ms

Slave cycle time:

15 ms

Output ON delay:

15 ms

Minimum I/O Response 
Time

The CPM2C-S responds most quickly under the following circumstances:

1,2,3...

1.

The CPM2C-S receives an input signal just prior to the input refresh phase
of the cycle.

2.

The Master’s communications servicing occurs just as the Master-to-Slave
transmission begins.

3.

The Slave’s communications servicing occurs just after the transmission is
completed.

Input

Output (LR)

Input 
(LR)

Output

Master

Slave

Содержание CPM2C-S100C

Страница 1: ...Cat No W377 E1 04 Programmable Controller SYSMAC CPM2C S CPM2C S100C S110C S100C DRT S110C DRT OPERATION MANUAL ...

Страница 2: ......

Страница 3: ...CPM2C S Programmable Controller Operation Manual Revised September 2009 ...

Страница 4: ...iv ...

Страница 5: ...ans word and is abbreviated Wd in documentation in this sense The abbreviation PC means Programmable Controller and is not used as an abbreviation for anything else Visual Aids The following headings appear in the left column of the manual to help you locate different types of information Note Indicates information of particular interest for efficient and convenient opera tion of the product 1 2 3...

Страница 6: ...vi ...

Страница 7: ... Operation 31 SECTION 2 Unit Components and Specifications 33 2 1 Specifications 34 2 2 Unit Components 43 SECTION 3 Installation and Wiring 53 3 1 Design Precautions 54 3 2 Selecting an Installation Site 55 3 3 Installing the CPM2C S 57 3 4 Wiring and Connections 60 SECTION 4 Memory Areas 83 4 1 Allocation of Word and Bit Addresses 84 4 2 I O Allocation for CPM2C S PCs 89 4 3 I O Allocation to Co...

Страница 8: ...1 Using a Programming Console 160 8 2 Programming Console Operations 166 8 3 Programming Example 193 SECTION 9 Test Runs and Error Processing 201 9 1 Initial System Checks and Test Run Procedure 202 9 2 Self diagnostic Functions 203 9 3 Programming Console Operation Errors 206 9 4 Programming Errors 207 9 5 Troubleshooting Flowcharts 208 9 6 Maintenance Inspections 216 9 7 Battery Replacement 217 ...

Страница 9: ...PM2C S shows the possible system configurations and outlines the steps required before operation Read this section first when using the CPM2C S for the first time Section 2 provides the technical specifications of the CPM2C S CPU Unit Adapter Units and AC Power Supply Unit and describes the main components of these Units Section 3 provides information on installing and wiring a CPM2C S PC Be sure ...

Страница 10: ......

Страница 11: ...AS DETERMINED THAT THE PRODUCTS WILL SUITABLY MEET THE REQUIREMENTS OF THEIR INTENDED USE OMRON DISCLAIMS ALL OTHER WARRANTIES EXPRESS OR IMPLIED LIMITATIONS OF LIABILITY OMRON SHALL NOT BE RESPONSIBLE FOR SPECIAL INDIRECT OR CONSEQUENTIAL DAMAGES LOSS OF PROFITS OR COMMERCIAL LOSS IN ANY WAY CONNECTED WITH THE PRODUCTS WHETHER SUCH CLAIM IS BASED ON CONTRACT WARRANTY NEGLIGENCE OR STRICT LIABILIT...

Страница 12: ... that the uses listed may be suitable for the products Outdoor use uses involving potential chemical contamination or electrical interference or conditions or uses not described in this manual Nuclear energy control systems combustion systems railroad systems aviation systems medical equipment amusement machines vehicles safety equipment and installations subject to separate industry or government...

Страница 13: ...confirm actual specifications of purchased products DIMENSIONS AND WEIGHTS Dimensions and weights are nominal and are not to be used for manufacturing purposes even when tolerances are shown PERFORMANCE DATA Performance data given in this manual is provided as a guide for the user in determining suitability and does not constitute a warranty It may represent the result of OMRON s test conditions a...

Страница 14: ...xiv ...

Страница 15: ...nd reliable application of the Programmable Controller You must read this section and understand the information contained before attempting to set up or operate a PC system 1 Intended Audience xvi 2 General Precautions xvi 3 Safety Precautions xvi 4 Operating Environment Precautions xviii 5 Application Precautions xviii 6 EC Directives xx 7 3 tier Communications with CX Programmer xxi ...

Страница 16: ...nd operating the Unit Be sure to read this manual before attempting to use the Unit and keep this man ual close at hand for reference during operation WARNING It is extremely important that a PC and all PC Units be used for the specified purpose and under the specified conditions especially in applications that can directly or indirectly affect human life You must consult with your OMRON represent...

Страница 17: ...ding 100 C or throw into fire Otherwise the Battery may explode catch fire or leak fluid WARNING When transferring programs to other nodes or when making changes to I O memory confirm the safety of the destination node before transfer Not doing so may result in injury Caution Execute online edit only after confirming that no adverse effects will be caused by extending the cycle time Otherwise the ...

Страница 18: ...System can have a large effect on the longevity and reliability of the system Improper operating environments can lead to malfunction failure and other unforeseeable problems with the PC System Be sure that the operating environment is within the specified condi tions at installation and remains within the specified conditions during the life of the system 5 Application Precautions Observe the fol...

Страница 19: ...s are connected in the speci fied direction with the correct polarity Not doing so may result in malfunc tion Use the Unit with the battery housing cover in place to prevent dust or for eign matter from entering inside the Unit Not doing so may result in mal function Install the expansion I O connector cover to the last Unit Expansion Unit or Expansion I O Unit to prevent dust or foreign matter fr...

Страница 20: ... resuming operation Not doing so may result in an unexpected operation When handling the battery never short circuit recharge disassemble heat excessively incinerate or subject the battery to excessive force Subjecting the battery to excessive forces such as dropping the battery on the floor can cause the battery to leak Install the Unit properly as specified in the operation manual Improper insta...

Страница 21: ...n which the CPM2C S PC is used complies with EC Directives the PC must be installed as follows 1 2 3 1 The CPM2C S PC must be installed within a control panel 2 Reinforced insulation or double insulation must be used for the DC power supplies used for the communications and I O power supplies 3 CPM2C S PCs complying with EC Directives also conform to the Common Emission Standard EN61000 6 4 Radiat...

Страница 22: ... use this feature Supported Communications DeviceNet systems A CS CJ series DeviceNet Unit must be mounted on CS CJ series CPU Racks connected to the CPM2C S FA networks Controller Link SYSMAC LINK Office networks Ethernet Reference FINS commands such as CMND SEND and RECV cannot be sent to or received from the CPM2C S Factory code A to Z or blank Year For example 2000 0 2001 1 and 2002 2 Month Ja...

Страница 23: ...Functions 2 1 1 1 CPM2C S Features 2 1 1 2 Overview of CPM2C S Functions 8 1 2 System Configurations 10 1 2 1 CPU Units and AC Power Supply Units 10 1 2 2 CompoBus S Interface 11 1 2 3 CPU Unit Expansion Units and Expansion I O Units 12 1 2 4 DeviceNet Interface 15 1 2 5 Adapter Units 16 1 3 CPM2C S Structure and Operation 17 1 3 1 CPM2C S Structure 17 1 3 2 Operating Modes 18 1 3 3 Operating Mode...

Страница 24: ...connection with a host PC The CPM2C S itself can handle a wide range of machine control applica tions In addition the CPM2C S is capable of communications with devices such as personal computers and OMRON Programmable Termi nals so it is ideal to use to expand or upgrade existing systems The CPM2C S CPU Unit has a total of 10 I O points 6 inputs and 4 tran sistor outputs Up to 3 CPM2C series Expan...

Страница 25: ...and output areas used in the I O Link can be allocated independently and the data areas starting addresses and size of these Read Write areas can be specified freely The Read Write areas can be set in the PC Setup or using the DeviceNet Configurator Explicit message communications can be initiated from the Master to read or write data in any data area in the CPM2C S Example System Configuration CS...

Страница 26: ...SMAC Support Software can also be used Built in Motor Control Capability Synchronized Pulse Control Synchronized pulse control provides an easy way to synchronize the opera tion of a peripheral piece of equipment with the main equipment The output pulse frequency can be controlled as some multiple of the input pulse fre quency allowing the speed of a peripheral piece of equipment such as a sup ply...

Страница 27: ... noise can be reduced by increasing the input time constant Analog I O Supported by Expansion Units and CompoBus S Master Functions Analog I O Units Up to 3 optional Analog I O Units can be connected to the CPM2C S For each Analog I O Unit mounted to the Unit 2 analog input points and 1 analog output point are available By mounting 3 Analog I O Units a maximum of 6 analog input points and 3 analog...

Страница 28: ...ime can be adjusted by rounding up or down to the nearest minute Long term Timer TIML is a long term timer that accommodates set values up to 99 990 seconds 27 hours 46 minutes 30 seconds When combined with the SEC ONDS TO HOURS conversion instruction HMS the long term timer pro vides an easy way to control equipment scheduling Expansion Memory Unit The CPM1 EMU01 V1 Expansion Memory Unit is a pro...

Страница 29: ... exchange data with standard serial devices For example data can be received from a bar code reader or transmitted to a serial printer The serial devices can be connected to the communications port as a RS 232C or peripheral port High speed 1 1 NT Link Communications In a 1 1 NT Link an OMRON Programmable Terminal PT can be connected directly to the CPM2C S The PT must be connected to the communic...

Страница 30: ... The Master s I O can be allocated to the following data areas IR 000 to IR 049 IR 200 to IR 227 DM 0000 to DM 2047 LR 00 to LR 15 HR 00 to HR 19 AR 00 to AR 23 CPM2C Master read only TC 000 to TC 255 Explicit message communications are supported Any CPM2C S data area can be accessed from the DeviceNet Master The communications speed can be set to 500 kbps total network length 100 m max 250 kbps t...

Страница 31: ...nts 4 inputs in CPU Units with 20 I O points Minimum input signal width 50 µs Input time constant Determines the input time constant for all inputs Settings 1 2 3 5 10 20 40 or 80 ms Calendar Clock Shows the current year month day of the week day of the month hour minute and second Expansion Unit functions Analog I O functions using CPM2C MAD11 Analog I O Unit Two analog inputs Input range of 0 to...

Страница 32: ...M2C S110C CPM2C S100C DRT CPM2C S110C DRT Name Inputs Outputs Model CPU Unit with CompoBus S Master Functions 6 24 VDC inputs 4 sinking transistor outputs CPM2C S100C 4 sourcing transistor outputs CPM2C S110C CPU Unit with CompoBus S Master and DeviceNet Slave Functions 4 sinking transistor outputs CPM2C S100C DRT 4 sourcing transistor outputs CPM2C S110C DRT AC Power Supply Unit Name Ratings Mode...

Страница 33: ...t the commu nications response time as well as the communications distance and communications speed CompoBus S Communications Response Time Communications Distance Communications mode Max number of Slaves Communications response time High speed mode 16 0 5 ms 32 0 8 ms Long distance mode 16 4 0 ms 32 6 0 ms Cable Mode Main line length Branch line length Total branch line length 2 conductor VCTF ca...

Страница 34: ...can be assembled by connecting three 32 point Expansion I O Units to a CPU Unit Expansion I O Units Units with Relay Outputs via Terminal Block Special Flat Cable High speed Commu nications Mode 30 m max See note 3 m max See note 30 m max See note Long distance Com munications Mode Flexibly branched provided that the total length of cable is a maximum of 200 m Cable Mode Main line length Branch li...

Страница 35: ... 16 transistor outputs sinking CPM2C 16ETC 16 transistor outputs sourcing CPM2C 16ET1C 8 Output Points 16 Input Points 16 Output Points 8 Input Points 32 I O Points 24 I O Points Unit I O Inputs Outputs Model 24 I O points 16 inputs 24 VDC 8 transistor outputs sinking CPM2C 24EDTM 8 transistor outputs sourcing CPM2C 24EDT1M 32 I O points 16 inputs 24 VDC 16 transistor outputs sinking CPM2C 32EDTM ...

Страница 36: ...points 2 words allocated 1 point 1 word allo cated CPM2C MAD11 Temperature Sen sor Unit 2 thermocouple inputs 4 2 points 2 words allocated CPM2C TS001 2 platinum resis tance thermometer inputs 2 points 2 words allocated CPM2C TS101 CompoBus S I O Link Unit 8 input points and 8 output points for the built in outputs and inputs of the Master Unit 5 8 points 1 word allocated Inputs from the Master 8 ...

Страница 37: ... be set in the PC Setup or using the DeviceNet Configurator Explicit message communications can be initiated from the Master to read or write data in any data area in the CPM2C S Note Refer to the DeviceNet Masters Operation Manual W379 for more details on OMRON DeviceNet Masters CS1 C200HX HG HE Z CVM1 or CV series PC DeviceNet Unit Master DeviceNet Slave As a DeviceNet Slave the CPM2C S supports...

Страница 38: ...232C port on the CPM2C CN111 simultaneously If an attempt is made to use both ports si multaneously it may be impossible to communicate normally and equip ment malfunction may result Peripheral RS 232C Adapter Unit RS 422 RS 232C Adapter Unit Unit Conversion Model Peripheral RS 232C Adapter Unit CPU Unit s communications port Peripheral port RS 232C port CPM2C CIF01 V1 RS 422 RS 232C Adapter Unit ...

Страница 39: ...are executed only when the corresponding interrupt is generated PC Setup The PC Setup contains various startup and operating parameters The PC Setup parameters can be changed from a Programming Device only they cannot be changed from the program Some parameters are accessed only when PC s power supply is turned ON and others are accessed regularly while the power is ON It will be necessary to turn...

Страница 40: ...om a Programming Device or DeviceNet unless it is safe to do so MONITOR Mode The program is executed in MONITOR mode and the following operations can be performed from a Programming Device In general MONITOR mode is used to debug the program test operation and make adjustments Online editing Monitoring I O memory during operation Force setting force resetting I O bits changing set values and chang...

Страница 41: ...y voltage system configura tion and ambient temperature and the program contents Power OFF Operation Minimum Power Supply Voltage The PC will stop and all outputs will be turned OFF if the power supply voltage falls below 85 of the rated value Momentary Power Interruption A power interruption will not be detected and CPU Unit operation will continue if the power interruption lasts less than 2 ms A...

Страница 42: ...eated stopping and starting will cause problems with the controlled system set up a protective cir cuit such as a circuit that shuts OFF the power supply to sensitive equipment until the power supply voltage returns to the rated value 85 of rated voltage Program execution CPU reset signal Detection of we po r interruption Executing Stopped 1 Minimum time 2 Additional time CPU Unit operation will c...

Страница 43: ...tup settings Check for battery error Preset the watch maximum cycle time Check program memory Refresh bits for expansion functions Execute the program Refer to the Programming Manual W353 for details on cycle time and I O response times Wait for minimum cycle time if a minimum cycle time has been set in the PC Setup DM 6619 Calculate cycle time Read input data from input bits Write output data to ...

Страница 44: ...nimum cycle time has been set CPU operation is paused after pro gram execution until the minimum cycle time is reached CPU operation will not be paused if the actual cycle time is longer than the minimum cycle time set in DM 6619 Note A fatal error will occur and PC operation will stop if a maximum cycle time has been set in the PC Setup DM 6618 and the actual cycle time exceeds that setting The d...

Страница 45: ...program The specified range of I O words will be refreshed when IORF 97 is executed The normal cycle time is extended by the time required for execution of the interrupt program Refer to SECTION 7 Cycle Time and I O Response Time for more details and precautions on the cycle time Caution Although IORF 97 can be used in interrupt subroutines you must be careful of the interval between IORF 97 execu...

Страница 46: ...refreshed when IORF 97 is executed IORF 97 can be used to refresh I O from the main program or the interrupt program When IORF 97 is used the cycle time is extended by the time required to refresh the specified I O words Cycle time Overseeing processes Main program I O refreshing RS 232C port servicing Peripheral port servicing IORF 97 executed Immediate refreshing I O refreshing ...

Страница 47: ...when an input goes ON For example operating a cutter when an inter rupt input is received from a Proximity Switch or Photoelectric Switch Interrupt input interrupt input mode W353 Count input ON pulses and execute a special process very quickly when the count reaches the preset value For example stopping the supply feed when a preset number of workpieces have passed through the system Interrupt in...

Страница 48: ...er of power interruptions is stored in AR 23 Set the startup operating mode Set the startup operating mode in the PC Setup DM 6600 Page 100 Usage Function Refer to Read write I O memory data and change the operating mode from a host computer Host Link communications Set the communications mode to Host Link in the PC Setup W353 Connect to a serial device such as a bar code reader or serial printer ...

Страница 49: ...its SR 22800 to SR 25515 448 bits SR 22800 to SR 25515 TR Temporary Relay area 8 bits TR0 to TR7 8 bits TR0 to TR7 HR Holding Relay area 320 bits HR 0000 to HR 1915 320 bits HR 0000 to HR 1915 AR Auxiliary Relay area 384 bits AR 0000 to AR 2315 384 bits AR 0000 to AR 2315 LR Link Relay area 256 bits LR 0000 to LR 1515 256 bits LR 0000 to LR 1515 Timer Counter area 256 bits TIM CNT 000 to TIM CNT 2...

Страница 50: ...nt mode Max counter frequency 5 kHz in differential phase up down mode 20 kHz in pulse plus direction mode up down pulse mode and increment mode 5 kHz in differential phase up down mode 20 kHz in pulse plus direction mode up down pulse mode and increment mode Counter PV range 8 388 608 to 8 388 607 in differential phase up down mode pulse plus direction mode and up down pulse mode 0 to 16 777 215 ...

Страница 51: ...t Pulse output completed Pulse output status Item CPM2C S CPM2C CPM2A Item CPM2C S CPM2C Analog controls None None Clock function Internal Internal or none Words containing time info AR 17 to AR 21 AR 17 to AR 21 Analog I O Analog I O Units can be connected Analog I O Units can be connected Temperature monitoring The CPU Unit can receive temperature sensor input from either thermocouples or platin...

Страница 52: ... Link with Slave initiated communications No protocol Programming Console Set with Communications Switch Peripheral bus Set with Communications Switch Host Link with Slave initiated communications No protocol RS 232C port via communications port Peripheral bus Set with Communications Switch Host Link No protocol 1 1 PC LInk 1 1 NT Link Peripheral bus Set with Communications Switch Host Link No pro...

Страница 53: ... Refer to 3 4 Wiring and Connections 8 1 Using a Programming Console for details 4 Initial Settings Set the DeviceNet node number and communications speed with the rotary and DIP switches on the front of the CPU Unit Set the Communications Switches on the front of the CPU Unit if nec essary The switches must be set when a device other than the Pro gramming Console is connected or the standard comm...

Страница 54: ...ation for details 5 Create Ladder Program Create a ladder program to control the system Refer to SECTION 8 Using Programming Devices and the Programming Manual for details 6 Write Ladder Program in PC Write the ladder program in the PC with the Programming Console or transfer the program to the PC from the Support Software Refer to SECTION 8 Using Programming Devices 7 Test Run Check I O wiring in...

Страница 55: ... O Units and refer to the CPM1 CPM1A CPM2A CPM2C SRM1 V2 Programmable Controllers Programming Manual W353 for descriptions of the specifications and installation of Expansion Units 2 1 Specifications 34 2 1 1 General Specifications 34 2 1 2 Characteristics 34 2 1 3 I O Specifications 37 2 1 4 AC Power Supply Unit Specifications 42 2 2 Unit Components 43 2 2 1 CPU Unit Components 43 2 2 2 Expansion...

Страница 56: ...5 C Storage 20 to 75 C except for the battery Humidity 10 to 90 with no condensation Atmosphere Must be free from corrosive gas Power interrupt time 2 ms min Item Specifications Control method Stored program method I O control method Cyclic scan with direct output Immediate refreshing can be performed with IORF 97 Programming language Ladder diagram Instruction length 1 step per instruction 1 to 5...

Страница 57: ...se inputs Pulse output 2 points with no acceleration deceleration 10 Hz to 10 kHz each and no direction control One point with trapezoid acceleration deceleration 10 Hz to 10 kHz and direction control Two points with variable duty ratio outputs Pulse outputs can be used with transistor outputs only they cannot be used with relay outputs Synchronized pulse control 1 point A pulse output can be crea...

Страница 58: ...a has been changed in any of these areas write the new values to flash memory by switching the CPM2C S to MONITOR or RUN mode or by turning the power OFF and then ON again 3 Changes made while in MONITOR mode using for example online edit ing are written to flash memory in real time Memory backup See notes 1 and 2 Flash memory Program read only DM area and PC Setup Memory backup The read write DM ...

Страница 59: ...0 to IN00001 8 mA typical IN00002 to IN00004 6 mA typical IN00005 5 mA typical ON voltage current IN00000 to IN00001 17 VDC min 5 mA IN00002 and up 14 4 VDC min 3 5 mA OFF voltage current All 5 0 VDC max 1 1 mA ON delay All 1 to 80 ms max Default 10 ms See note OFF delay All 1 to 80 ms max Default 10 ms See note Circuit configuration IN00000 to IN00001 IN00002 to IN00004 IN00005 1 kΩ IN COM 2 7 kΩ...

Страница 60: ...e inputs The mini mum pulse width for these inputs is 50 µs Inputs IN00003 and IN00004 can be used as interrupt inputs Input Function Differential phase mode Pulse plus direction input mode Up down input mode Increment mode IN00000 A phase pulse input Pulse input Increment pulse input Increment pulse input IN00001 B phase pulse input Direction input Decrement pulse input Normal input IN00002 Z pha...

Страница 61: ...he load current is below 10 mA the ON OFF response time will be longer and high speed pulses will not be output The transistor will heat if used at 150 mA or higher possibly damaging elements Min switching capacity 0 5 mA Max inrush current 0 9 A for 10 ms charging and discharging waveform Leakage current 0 1 mA max Residual voltage 0 8 V max ON delay OUT01000 and OUT01001 20 µs max OUT01002 and u...

Страница 62: ...uit configuration Item Specification Sinking Outputs COM Sourcing Outputs Output LED OUT OUT 24 VDC OUT OUT 0 VDC Output LED OUT OUT COM OUT OUT 1 A 1 A 1 A Internal circuits Internal circuits 1 A Load Load Load Load Load Load Load Load ...

Страница 63: ...damage to the product or fire Caution Check that wiring has been performed correctly before supplying power Sup plying power with incorrect wiring may result in damage to internal circuits Expansion I O Unit I O Specifications Note Refer to the CPM2C Programmable Controller Operation Manual W356 for the I O specifications of the Expansion I O Units Output current mA Output voltage V 300 40 4 5 20 ...

Страница 64: ...old time 10 ms at input voltage of 100 VAC or 200 VAC and the rated output Overcurrent protection Self resetting operates at 105 to 350 of the rated current suspended and independent operation Overvoltage protection None Ambient operating temperature 0 to 55 C Ambient storage temperature 20 to 75 C Ambient operating humidity 10 to 90 no condensation Dielectric strength 2 000 V for 1 min between al...

Страница 65: ...CompoBus S transmission line 4 DeviceNet Communications Connector 8 Communications port 9 DIP switch 6 Input indicators 7 Output indicators 2 I O connector 5 PC status indicators Front View CPM2C S100C and CPM2C S110C Front View CPM2C S100C DRT and CPM2C S110C DRT 12 Low battery detection switch 11 Battery Top View Bottom View 1 Power supply connector 13 Expansion I O connector output connector Ri...

Страница 66: ...eceived via CompoBus S ERC red Flashing A CompoBus S communications error occurred OFF A CompoBus S communications error hasn t occurred COMM yellow Flashing Data is being transferred via the communications port peripheral or RS 232C OFF Data isn t being transferred via communications port Indicator Color Status Meaning MS Green ON Normal status Flashing Incomplete settings reading switch settings...

Страница 67: ...ing Cable CPM2C CN111 CS1W CN114 or CS1W CN118 Note a A CQM1H PRO01 E Programming Console can be connected di rectly to the PC b A C200H PRO27 E Programming Console can be connected di rectly to the PC with a CS1W CN224 CN624 Connecting Cable c Use a CPM2C CN111 or CS1W CN114 Connecting Cable to con nect to the communications port as a peripheral port The commu nications port can be used simultane...

Страница 68: ...ault setting will be changed so that a low battery is detected If you connect the optional CPM2C BAT01 Battery also be sure to change the setting to detect a low battery 13 Expansion I O Connector Connects the PC s CPU Unit to an Expansion I O Unit or Expansion Unit Up to 3 Expansion I O Units and Expansion Units can be connected to a CPU Unit A cover for the expansion I O connector is included wi...

Страница 69: ...us S Terminal Block Configuration DeviceNet Communications Connector Configuration I O pin allocation CPM2C S with sinking outputs CPM2C S with sourcing outputs CPM2C S V CAN L Shield CAN H V XW4B 05C1 H1 D DeviceNet Communications Connector included with the CPM2C S ...

Страница 70: ... 600 mA 2 2 4 CPM2C CIF01 V1 Peripheral RS 232C Adapter Unit 1 2 3 1 Peripheral Port Used to connect to Programming Devices including Programming Con soles host computers or general purpose external devices Use a spe cial connecting cable CS1W CN114 CS1W CN118 for connections With the CPM2C CIF01 V1 the cable switch SW1 can be turned ON to Front View Bottom Side 1 Terminal block 2 LED indicator 3 ...

Страница 71: ...onal computer or Pro grammable Terminal operator interface 4 Connector Connects to the communications port on the CPU Unit SW1 ON OFF Peripheral port on CPM2C CIF01 V1 Signal conversion Outputs signals from the CPU Unit s CMOS interface without conversion or converts CMOS level CPU Unit side to RS 232C connected device side Function Host Link peripheral bus no protocol or Programming Console conne...

Страница 72: ...standard external devices Note The maximum line length is 500 m 2 RS 232C Port Used to connect to the RS 232C interface of a personal computer or Pro grammable Terminal operator interface Front View Right Side 1 RS 422 485 port 3 Terminating resistance switch 2 RS 232C port 5 Connector 4 RS 485 interface switch Terminal Arrangement Receive data input Send data output RDA RDB SDA SDB NC Connector P...

Страница 73: ...ated using DC DC converter or photocoupler Function Host Link peripheral bus or no protocol connec tions RS 232C port on CPM2C CIF11 Signal conversion Outputs signals from the CPU Unit s CMOS interface without conversion Function Host Link no protocol 1 1 Link or 1 1 NT Link con nections RS 422 485 Connection Example Shield Connector hood Internal Configuration CPM2C CIF11 CPM2C S CPU Unit RS 422 ...

Страница 74: ...and SW2 4 to OFF when performing RS 485 2 wire communications 5 Connector Connects to the communications port on the CPU Unit SW2 Status SW2 1 SW2 2 SW2 1 OFF ON SW2 2 OFF 4 wire commu nications Setting not possible ON Setting not possible 2 wire commu nications SW2 3 SW2 4 SW2 3 OFF ON SW2 4 OFF Setting not possible Data can be received at any time ON RS control possible for CPU Unit Setting not ...

Страница 75: ...mit Circuits 54 3 2 Selecting an Installation Site 55 3 2 1 Installation Site Conditions 55 3 2 2 Panel Cabinet Installation 55 3 3 Installing the CPM2C S 57 3 3 1 Connecting Units 57 3 3 2 CPM2C S Installation 58 3 4 Wiring and Connections 60 3 4 1 General Precautions for Wiring 60 3 4 2 Power Supply Wiring 61 3 4 3 Using the AC Power Supply Unit 62 3 4 4 Removing and Wiring I O Connectors 64 3 4...

Страница 76: ... voltage Be sure to adhere to safety precau tions such as providing breakers to prevent short circuits in external wiring When conducting any of the following operations turn OFF the power to the PC Electrocution product damage and malfunction may result Connecting or disconnecting Expansion I O Units Expansion Units and CPU Units Assembling Units Connecting cables and wiring Connecting or disconn...

Страница 77: ...bration Locations subject to exposure to water oil or chemicals Be sure that the conditions at the installation site conform to the CPM2C S general specifications Refer to 2 1 1 General Specifications for details Note Provide proper shielding when installing in the following locations Locations subject to static electricity or other sources of noise Locations subject to strong electromagnetic fiel...

Страница 78: ...unt ed The ambient operating temperature range is 0 to 55 C When a PC is installed in any other way Power Supply Units Expan sion I O Units and Expansion Units cannot be mounted and the ambi ent operating temperature range is 0 to 50 C Electrical Noise Power lines and high voltage equipment can cause electrical noise in the PC Do not install the CPM2C S in a panel or cabinet with high voltage equi...

Страница 79: ... for dimen sions of the Expansion I O Units and Expansion Units 3 3 1 Connecting Units Up to 3 Expansion I O Units and Expansion Units can be connected to a CPM2C S CPU Unit Use the following procedure when connecting an Expansion I O Unit or Expansion Unit 1 2 3 1 Remove the cover from the CPU Unit s or the last Expansion I O Unit s or Expansion Unit s expansion I O connector If the cover is diff...

Страница 80: ...them 3 Lock the Units together by closing the locks top and bottom on the CPU Unit or previous Expansion I O Unit or Expansion Unit Place the cover included with the CPU Unit on the last Unit s expansion I O connector 3 3 2 CPM2C S Installation The CPM2C S can be installed on a 35 mm DIN track Expansion I O connector cover Slide to lock Units together End Plates PFP M DIN Track PFP 100N 1 m PFP 50...

Страница 81: ...til the lock snaps into place Caution Be sure that the DIN Track is installed horizontally Installing the Track verti cally will inhibit the airflow that cools the CPM2C S and could cause overheat ing Removal Pry the lock down with a flat blade screwdriver and pivot the PC upward to remove it 4 Lock 1 Pull down 2 Insert onto track 3 Push in on the Unit Screwdriver ...

Страница 82: ...ng I O Line Noise Do not run CPM2C S I O lines in the same duct or conduit as power lines Caution If flat cables are connected for more than one CompoBus S network interfer ence between the flat cables can cause unstable operation If you are using more than one network be sure the flat cables are separated by at least 5 mm Hanging Ducts Leave at least 300 mm between the power cables and the I O or...

Страница 83: ...ring The following procedure explains how to connect the CPU Unit to the AC Power Supply Unit CPM2C PA201 with the power supply connector included to provide a 24 VDC power supply 200 mm min Metal plate iron CPM2C S I O lines Control cables and CPM2C S power lines Power cables CompoBus S and DeviceNet communications cables CPM2C S I O lines Control cables and CPM2C S power lines Power cables Compo...

Страница 84: ...n the equipment must conform to the EC Directives Low voltage Di rectives use a power supply with double insulation or reinforced insula tion 3 4 3 Using the AC Power Supply Unit Crimp Terminals Use round crimp terminals for wiring AC power supply to the AC Power Sup ply Unit CPM2C PA201 Use either crimp terminals or solid wires for wiring to the ground terminal or the service power supply termina...

Страница 85: ...d separately in order to prevent circuit breaker malfunctions and voltage drops due to inrush current Twist power supply lines to prevent noise from the power supply lines Noise can further be prevented by wiring via a 1 1 isolation transformer Use wires at least 1 25 mm2 thick in order to allow for voltage drops and to keep the current within the allowable level WARNING Tighten the screws on the ...

Страница 86: ...an AC power supply is mistakenly connected to these terminals the internal circuitry will be damaged 3 4 4 Removing and Wiring I O Connectors The following tables provide specifications of compatible I O connectors Compatible Connector Specifications OMRON Connector Specifications Fujitsu I O connectors Connector Specifications Model number 24 pin soldered connector and cover Connector Fujitsu FCN...

Страница 87: ...ed terminals FCN 367J024 AG F Pressure jack with open end cover 24 pin gold plated terminals FCN 367J024 AU H 24 pin silver plated terminals FCN 367J024 AG H Pressing tools Hand press General purpose FCN 707T T101 H Cable cutter General purpose FCN 707T T001 H Locator plate For the 360 series connectors FCN 367T T012 H Connector cover Not compatible with the closed end cover pressure jack Thin sla...

Страница 88: ...e when wiring and assembling a soldered connec tor OMRON C500 CE241 1 2 3 1 Slide heat shrink tubing over the power supply wires and solder the wires to the appropriate pins on the socket 2 After soldering all of the pins slide the heat shrink tubing over the soldered power supply pins and shrink the tubing by heating it with a heat gun Phillips screwdriver Heat shrink tubing Connector Power suppl...

Страница 89: ...g I O Devices for details on I O wiring Note The allowable current for the XW2Z A is 1 A Do not allow the current on the common terminal to exceed 1 A 3 4 6 Connecting I O Devices Wire inputs and outputs to the CPM2C S CPU Unit as shown in the following diagrams Connector cover Socket Nuts 3 Nuts 2 Connector screws Small screws 2 Cable clamp Small screws 3 I O XW2Z A Cable Terminal Blocks XW2B 20G...

Страница 90: ...er supply with double insulation or reinforced insulation Caution Check that wiring has been performed correctly before supplying power Sup plying power with incorrect wiring may result in damage to internal circuits I O Configuration The following diagrams show the I O configurations CPM2C S100C and CPM2C S100C DRT Sinking Transistor Outputs Don t exceed the output capacity or the maximum common ...

Страница 91: ...following table Wiring the CPM2C S to an Input Terminal Wire the inputs as shown in the following diagram when using an Input Termi nal Use an XW2B 20G4 or XW2B 20G5 Terminal Block and an XW2Z A Connecting Cable Item Specification Output capacity 300 mA at 24 VDC Maximum common current capacity 1 2 A common I O connector Load 24 VDC Load Load Load 24 VDC 24 VDC 24 VDC Sinking Sourcing 01003 01003 ...

Страница 92: ...en collector NPN current output PNP current output Voltage output IN COM 5 mA 6 mA 8 mA CPM2C S IN COM Sensor power supply Output 5 mA 6 mA 8 mA CPM2C S 0 V Use the same power supply for the input and sensor CPM2C S IN COM Output 5 mA 6 mA 8 mA 0 V Constant current circuit Sensor power supply COM 0 V IN Output 5 mA 6 mA 8 mA CPM2C S Sensor power supply IN COM 0 V Output CPM2C S Output Sensor power...

Страница 93: ...erential Phase Mode Count frequency 5 kHz Encoder 24 VDC 00000 A phase input 00001 B phase input COM 00002 Z phase input Pulse Plus Direction Input Mode Count frequency 20 kHz Encoder 24 VDC 00000 Pulse input 00001 Direction input COM 00002 Reset input Sensor or switch Sensor or switch Up Down Mode Count frequency 20 kHz 24 VDC 00000 CW input 00001 CCW input COM 00002 Reset input Increment Mode Co...

Страница 94: ... speed counter inputs Used as inputs for synchro nized pulse control IR 00001 IR 00002 Used as a normal input Bit address Bits in DM 6628 PC Setup setting in DM 6628 0 Hex 1 Hex 2 Hex IR 00003 00 to 03 Used as normal inputs Used as interrupt inputs including counter mode Used as quick response inputs IR 00004 04 to 07 Differential Phase Mode Count frequency 5 kHz E6B2 CWZ6C Encoder NPN open col le...

Страница 95: ...tage must be at least 3 times the load voltage 2 Average rectified current must be 1 A R CPM2C S Input power supply Bleeder resistor 2 wire sensor etc I Device s leakage current mA R Bleeder resistance kΩ W Bleeder resistor s power rating W The equations above were derived from the following equations LC CPM2C S input impedance kΩ IC CPM2C S input current mA EC CPM2C S OFF voltage V 5 0 V Refer to...

Страница 96: ...damaged when the load connected to an output is short circuited so it is recommended to install a protective fuse in each output circuit Inductive Loads When connecting an inductive load to an input connect a surge protector or diode in parallel with the load CPM2C S Single phase pulse output Fixed duty ratio Motor driver Pulse output 0 01000 CPM2C S Pulse output 1 01001 COM Motor driver Single ph...

Страница 97: ...the transmission lines that connect the nodes in the CompoBus S I O Link Special flat cables 2 core VCTF cables and 4 core VCTF cables cannot be used in the same system Use only one type of cable in the same system Use the following procedure to wire the CompoBus S communications cables 1 2 3 1 Strip off the length of wire insulation recommended for the crimp connec tors being used and tightly twi...

Страница 98: ...ranch lines and total transmission line length depend on the communications mode and the kind of transmission line flat cable or VCTF cable being used The maximum lengths are further restricted if flat cable is being used with more than 16 Slaves Secure the cable sheathing with electrical tape or heat shrink tubing Weidmüller 046290 Sleeve Signal wire Item Max length in high speed mode Max length ...

Страница 99: ...ti drop connections with thick cable 2 Phoenix Contact connectors can be purchased through OMRON Tsufo Service Company Use the following OMRON screwdriver when wiring DeviceNet connectors XW4B 05C1 H1 D Connector included with the CPM2C S V black CAN L blue Shield V red CAN H white XW4B 05C4 TF D Multi drop Connector Connector Appearance OMRON XW4B 05C1 H1 D Connector with securing screws included...

Страница 100: ...onnecting cables shown in the following diagram to connect a personal computer with Support Software to the CPM2C S RS 232C port for 1 1 Host Link communications or no protocol serial communications CQM1 PRO01 E with attached 2 m cable C200H PRO27 E Main cable 2 m CQM1H PRO01 E with attached 2 m cable Main cable 2 m C200H CN222 2 m C200H CN422 4 m CS1W CN224 2 m CS1W CN624 6 m CS1W CN114 0 05 m Pe...

Страница 101: ...or Peripheral Port Connection A personal computer can be connected to the CPU Unit s communications port through a CQM1 CIF02 RS 232C Adapter The CQM1 CIF02 RS 232C Adapter has a 9 pin connector CPM2C CIF11 RS 232C port D sub 9 pin CPM2C CN111 0 15 m Connecting Cable XW2Z 200S V 2 m XW2Z 500S V 5 m CS1W CN118 0 1 m IBM PC AT or compatible computer CPM2C CIF01 V1 Peripheral port CPM2C CN111 0 15 m ...

Страница 102: ...wer supply is not necessary 2 The B500 AL004 requires an external AC power supply 110 VAC or 220 VAC 3 Be sure that the power supply requirements of the CPU Unit Expansion Units and Expansion I O Units do not exceed the available capacity Also take into account the power consumption of the NT AL001 Adapter when an NT AL001 Adapter is connected to the RS 232C port Connecting Cable XW2Z 200S V 2 m X...

Страница 103: ... be connected directly to a Programmable Terminal The direct connection with a Programmable Terminal is possible by using the communications as a RS 232C port only not as a peripheral port A Programmable Terminal can also be connected by a Host Link connection Either the RS 232C port or peripheral port connection can be used for the Host Link Note The Programmable Terminal cannot be connected usin...

Страница 104: ...n the CPM2C CIF01 can output RS 232C this port cannot be used for one to one link communications CPM2C CN111 0 1 m CS1W CN118 0 1 m CS1W CN118 0 1 m 1 1 Link Master CPM2C S CPU Unit Connecting Cable XW2Z 200T 2 m XW2Z 500T 5 m RS 232C port D sub 9 pin CPM2C CN111 0 1 m RS 232C port D sub 9 pin 1 1 Link Slave CPM2C S CPU Unit OMRON PC CQM1H CQM1 CPM1 CPM1A CPM2A CPM2C SRM1 V2 C200HS or C200HX HG HE...

Страница 105: ... 89 4 2 3 I O Allocation Examples 90 4 3 I O Allocation to CompoBus S Slaves 91 4 4 SR Area 92 4 5 AR Area 95 4 6 PC Setup 99 4 6 1 Overview 99 4 6 2 PC Setup Settings 100 4 7 Basic PC Operation and I O Processes 105 4 7 1 Startup Mode 105 4 7 2 Hold Bit Status 106 4 7 3 Program Memory Write protection 106 4 7 4 RS 232C Port Servicing Time 107 4 7 5 Peripheral Port Servicing Time 107 4 7 6 Cycle M...

Страница 106: ... used as work words CompoBus S output area IR 030 to IR 037 8 words IR 03000 to IR 03715 128 bits Work area IR 028 and IR 029 IR 038 to IR 049 IR 200 to IR 227 42 words IR 02800 to IR 02915 IR 03800 to IR 04915 IR 20000 to IR 22715 672 bits Work bits can be freely used within the program SR area SR 228 to SR 255 28 words SR 22800 to SR 25515 448 bits These bits serve specific functions such as fla...

Страница 107: ... PC Setup Special functions for input bits IR 00000 through IR 00002 are set in DM 6642 Special functions for input bits IR 00003 and IR 00004 are set in DM 6628 DM area Read write1 DM 0000 to DM 1999 DM 2022 to DM 2047 2 026 words DM area data can be accessed in word units only Word values are retained when the power is turned off or operation started or stopped Read write areas can be read and w...

Страница 108: ...evice Examples showing the use of TR bits in programming are provided in the CPM1 CPM1A CPM2A CPM2C SRM1 V2 Programming Manual W353 HR Area These bits retain their ON OFF status even after the PC power supply has been turned off or when operation begins or stops They are used in the same way as work bits AR Area These bits mainly serve as flags related to PC operation These bits retain their statu...

Страница 109: ...are retained even after the PC power supply has been turned off or when opera tion begins or stops DM words DM 0000 through DM 1999 and DM 2022 through DM 2047 can be used freely in the program other DM words are allocated specific functions described below DM 2000 through DM 2021 contain the error log information Refer to Section 9 Troubleshooting for details on the error log Note DM 6600 through...

Страница 110: ...lear Clear Clear Hold OK CompoBus S input area IR 020 to IR 027 No Clear Hold Hold Hold Clear Hold Clear Clear Clear Hold OK CompoBus S output area IR 030 to IR 037 No Clear Hold Hold Hold Clear Hold Clear Clear Clear Hold OK Work areas IR 028 IR 029 IR 030 to IR 049 IR 220 to IR 227 No Clear Hold Hold Hold Clear Hold Clear Clear Clear Hold OK SR area SR 228 to SR 255 No HR area HR 00 to HR 19 No ...

Страница 111: ...ord allocated to the CPU Unit or to the previ ous Expansion Unit or Expansion I O Unit if one is already connected n n denotes the last output word allocated to the CPU Unit or to the previ ous Expansion Unit or Expansion I O Unit if one is already connected Inputs Outputs IR 000 IR 010 15 14 13 12 11 10 09 08 07 06 05 04 03 02 01 00 Do not use 6 inputs IR 00000 to IR 00005 4 outputs IR 01000 to I...

Страница 112: ...Output bits are not allocated to the Input Unit and input bits are not allocated to the Output Unit Note Refer to the CPM2C Programmable Controller Operation Manual W356 for more examples showing the bits allocated to Expansion I O Units Inputs IR 000 IR 001 15 14 13 12 11 10 09 08 07 06 05 04 03 02 01 00 Outputs Do not use IR 010 IR 011 Bits Expansion I O Unit 8 input points 8 inputs IR 00100 to ...

Страница 113: ...t Terminals 2 When the maximum number of CompoBus S nodes is set to 16 IN8 to IN15 and OUT8 to OUT15 can be used as work bits 3 CompoBus S Terminals with 8 points or less are allocated I O bits in byte units beginning from bit 00 or bit 08 4 Only even addresses can be specified for 16 point CompoBus S Termi nals I O Bit address IR word Bit number 15 14 13 12 11 10 9 8 7 6 5 4 3 2 1 0 Input area 02...

Страница 114: ...on Input Area Contains the input operands for MCRO 99 Can be used as work bits when MCRO 99 is not used Read write SR 236 to SR 239 00 to 15 Macro Function Output Area Contains the output operands for MCRO 99 Can be used as work bits when MCRO 99 is not used SR 240 00 to 15 Interrupt Input 00003 Counter Mode SV SV when interrupt input 00003 is used in counter mode 4 digits hexadecimal Can be used ...

Страница 115: ... Only effective if the PC is in PROGRAM mode 11 Forced Status Hold Bit See note OFF The forced status of bits that are forced set reset is cleared when switching between PROGRAM mode and MONITOR mode ON The status of bits that are forced set reset are maintained when switching between PROGRAM mode and MONITOR mode The PC Setup can be set to maintain the status of this bit when the PC is turned off...

Страница 116: ...ock pulse 0 01 second ON 0 01 second OFF 02 Negative N Flag 03 Not used 04 Overflow OF Flag Turns ON when an overflow occurs in a signed binary calculation Read only 05 Underflow UF Flag Turns ON when an underflow occurs in a signed binary calculation 06 Differential Monitor Complete Flag Turns ON when differential monitoring is completed 07 STEP 08 Execution Flag Turns ON for 1 cycle only at the ...

Страница 117: ...I O Link in progress ON when the I O Link is operating otherwise OFF AR 01 00 to 15 Reserved for the system These bits cannot be used AR 02 00 Expansion Unit Error Flag for 1st Unit These flags turn ON when there is an error in the corresponding Unit 01 Expansion Unit Error Flag for 2nd Unit 02 Expansion Unit Error Flag for 3rd Unit 03 to 07 Not used 08 to 11 Number of Expansion Units and Expansio...

Страница 118: ...rror Code 0 Normal completion 1 Parity error 2 Frame error 3 Overrun error 12 Peripheral Port Communications Error Flag Turns ON when a peripheral port communications error occurs 13 Peripheral Port Transmit Ready Flag Turns ON when the PC is ready to transmit data No protocol and Host Link only 14 Peripheral Port Reception Completed Flag Turns ON when the PC has completed reading data No protocol...

Страница 119: ... Status ON Pulse output 0 is accelerating or decelerating OFF Pulse output 0 is operating at a constant rate 12 Pulse Output 0 Overflow Underflow Flag ON An overflow or underflow occurred OFF Normal operation 13 Pulse Output 0 Pulse Quantity Set Flag ON Pulse quantity has been set OFF Pulse quantity has not been set 14 Pulse Output 0 Pulse Output Completed Flag ON Completed OFF Not completed 15 Pu...

Страница 120: ...r default settings 14 Data Save Error Flag Turns ON if data could not be retained with the backup battery The following words are normally backed up by the battery DM read write words DM 0000 to DM 1999 and DM 2022 to DM 2047 Error Log DM 2000 to DM 2021 HR area counter area SR 25511 SR 25512 if DM 6601 is set to hold I O memory at startup AR 23 operating mode if DM 6600 is set to use the previous...

Страница 121: ...f PC operation The CPU Unit timing is as follows DM 6600 to DM 6614 Read once when the PC is turned ON DM 6615 to DM 6644 Read once at the start of program execution DM 6645 to DM 6655 Read regularly while the PC is ON PC Setup Errors If there is an error in the PC Setup settings a non fatal error error code 9B will be generated when the CPU Unit accesses that part of the PC Setup The PC Setup Err...

Страница 122: ...t settings 1 Hex User assignments 12 to 15 Not used DM 6603 00 to 03 Maximum number of CompoBus S nodes 0 Hex 256 point mode 32 nodes 1 Hex 128 point mode 16 nodes 04 to 07 CompoBus S communications mode 0 Hex High speed mode 1 Hex Long distance mode 08 to 15 Not used DM 6604 00 to 07 00 Hex A memory error will not be generated if data could not be retained by the battery 01 Hex A memory error wil...

Страница 123: ...ngs are read by the CPU when program execution is started DM 6615 00 to 15 Not used DM 6616 00 to 07 Servicing time for RS 232C port Effective when bits 08 to 15 are set to 01 00 to 99 BCD Percentage of cycle time used to service RS 232C port 08 to 15 RS 232C port servicing setting enable 00 Hex 5 of the cycle time 01 Hex Use time in bits 00 to 07 DM 6617 00 to 07 Servicing time for peripheral por...

Страница 124: ...ed DM 6626 to DM 6627 00 to 15 Not used DM 6628 00 to 03 Function selection for input bit IR 00003 0 Hex Used as a normal input 1 Hex Used as an interrupt input including counter mode 2 Hex Used as a quick response input 04 to 07 Function selection for input bit IR 00004 Setting same as for IR 00003 08 to 15 Not used DM 6629 00 to 03 PV coordinate system for pulse output 0 0 Hex Relative coordinat...

Страница 125: ...ts Even 04 Hex 1 bit 7 bits 2 bits Odd 05 Hex 1 bit 7 bits 2 bits None 06 Hex 1 bit 8 bits 1 bit Even 07 Hex 1 bit 8 bits 1 bit Odd 08 Hex 1 bit 8 bits 1 bit None 09 Hex 1 bit 8 bits 2 bits Even 10 Hex 1 bit 8 bits 2 bits Odd 11 Hex 1 bit 8 bits 2 bits None Any other setting specifies standard settings 1 start bit 7 data bits even parity 2 stop bits 9 600 bps causes a non fatal error and turns ON ...

Страница 126: ...ts 1 bit None 03 Hex 1 bit 7 bits 2 bits Even 04 Hex 1 bit 7 bits 2 bits Odd 05 Hex 1 bit 7 bits 2 bits None 06 Hex 1 bit 8 bits 1 bit Even 07 Hex 1 bit 8 bits 1 bit Odd 08 Hex 1 bit 8 bits 1 bit None 09 Hex 1 bit 8 bits 2 bits Even 10 Hex 1 bit 8 bits 2 bits Odd 11 Hex 1 bit 8 bits 2 bits None Any other setting specifies standard settings 1 start bit 7 data bits even parity 2 stop bits 9 600 bps ...

Страница 127: ...he setting on pin 4 of the CPM2C S CPU Unit s DIP switch Refer to 1 3 3 Operating Mode at Startup for complete details Error Log Settings DM 6655 The following settings are read regularly by the CPU while the PC is ON DM 6655 00 to 03 Style 0 Hex Shift after 7 records have been stored 1 Hex Store only first 7 records no shifting 2 to F Hex Do not store records 04 to 07 Not used 08 to 11 Cycle time...

Страница 128: ...rted and stopped 4 7 3 Program Memory Write protection In CPM2C S PCs the program memory can be protected by setting bits 00 to 03 of DM 6602 to 1 Bits 04 to 07 determine whether Programming Console messages are displayed in English or Japanese Note DM 6602 itself can still be changed after the program memory has been write protected by setting bits 04 to 07 of DM 6602 to 1 15 0 0 0 Bit DM6601 SR ...

Страница 129: ...ll be 0 34 ms minimum The entire servicing time will not be used unless processing requests exist 4 7 6 Cycle Monitor Time 15 0 Bit Servicing time setting enable 00 Hex Disabled 5 used 01 Hex Enabled setting in bits 00 to 07 used Servicing time valid with bits 08 to 15 are 01 00 to 99 BCD two digits Default 5 of cycle time DM6616 15 0 Bit Servicing time setting enable 00 Hex Disabled 5 used 01 Hex...

Страница 130: ...he cycle time exceeds 100 ms unless detection of long cycle times is disabled using the set ting in DM 6655 4 7 7 Minimum Cycle Time Make the settings shown below to standardize the cycle time and to eliminate variations in I O response time by setting a minimum cycle time If the actual cycle time is shorter than the minimum cycle time execution will wait until the minimum time has expired If the ...

Страница 131: ...the error log 15 0 Bit Not used Time constant for IR 00005 1 digit BCD see below Time constant for IR 00003 to IR 00004 1 digit BCD see below Time constant for IR 00000 to IR 00002 1 digit BCD see below Default 0000 8 ms for each DM 6620 15 0 Bit DM 6621 IR 001 and IR 002 DM 6622 IR 003 and IR 004 DM 6623 IR 005 and IR 006 DM 6624 IR 007 and IR 008 DM 6625 IR 009 Time constant for IR 002 IR 004 IR...

Страница 132: ...cord record 0 is lost whenever a new record is generated 2 Set 1 in bits 00 to 03 of DM 6655 This method stores only the first 7 error log records and ignores any sub sequent errors beyond those 7 3 Set another value other than 0 or 1 in bits 00 to 03 of DM 6655 A setting other than 0 or 1 disables the log so that no records are stored Clearing the Error Log To clear the entire error log turn ON S...

Страница 133: ...g the CPM2C S as a CompoBus S Master Read this section when using CompoBus S I O link communications 5 1 Initial Settings 112 5 1 1 Setting the Maximum Number of Nodes 112 5 1 2 Setting the CompoBus S Communications Mode 112 5 2 Remote I O Communications 113 5 2 1 Slaves 113 5 2 2 I O Allocation 114 5 3 Communications Status 115 ...

Страница 134: ...the maximum number of Slaves in DM 6603 of the PC Setup as shown in the following table Note Always turn the power OFF and ON again after changing this setting CompoBus S communications path Terminator Slave Slave Slave 16 or 32 Slaves max Word Bits Function Settings Default DM 6603 00 to 03 Sets the max number of Compo Bus S Slaves to 16 or 32 0 Hex 32 Slaves 1 Hex 16 Slaves 0 or 1 0 32 Slaves Co...

Страница 135: ...SRT1 ID04 1 SRT1 ID08 SRT1 ID08 1 SRT1 ID16 SRT1 ID16 1 Not available Not available SRT1 OD04 SRT1 OD04 1 SRT1 OD08 SRT1 OD08 1 SRT1 OD16 SRT1 OD16 1 Not available Not available Not available Not available Connector Terminals Transistor SRT2 VID08S SRT2 VID08S 1 SRT2 VID16ML SRT2 VID16ML 1 SRT2 ID32ML SRT2 ID32ML 1 SRT2 VOD08S SRT2 VOD08S 1 SRT2 VOD16ML SRT2 VOD16ML 1 SRT2 OD32ML SRT2 OD32ML 1 SRT...

Страница 136: ...poBus S Terminals with less than 8 points are allocated bit addresses from either 0 or 8 filling up from the lowest available word 3 CompoBus S Terminals with 16 points can be set for only even number ad dresses Bit chain Terminal Not available SRT1 B1T Environment Resistive Terminals SRT2 ID04CL SRT2 ID04CL 1 SRT2 ID08 SRT2 ID08CL 1 SRT2 OD04CL SRT2 OD04CL 1 SRT2 OD08CL SRT2 OD08CL 1 Not availabl...

Страница 137: ... was participating in the network is separated from the network The bit is turned OFF when the Slave re enters the network 5 An error is not generated at the CPM2C S if there are duplicated node ad dress settings for Slaves or if there is a communications error such as communications failure or a disconnection Therefore use the above sta tus flags in the ladder program to confirm whether or not no...

Страница 138: ...e in the status of the actual input will not be detected CompoBus S communications path Disconnection 2 IR 000 Bits 00 to 07 IR 001 Bits 00 to 07 IR 000 Bits 00 to 07 Slave 3 Node 0 IN0 Slave 2 Node 2 IN2 Slave 1 Node 0 IN0 Node address duplication 1 CPM2C S 20000 00000 20100 00100 Slave 1 input Slave 2 input 02800 AR0500 IN0 s Error Flag IN0 s Active Flag AR0508 Slave 1 communications normal 2000...

Страница 139: ...Settings 118 6 1 1 Setting the Node Number 118 6 1 2 Setting the Communications Speed 118 6 1 3 Attaching Status Information 118 6 2 Remote I O Communications 118 6 3 Explicit Message Communications 121 6 3 1 DeviceNet Explicit Message Functions 121 6 3 2 Command and Response Formats 122 6 3 3 Examples of DeviceNet Explicit Messages 128 6 4 Status Information 135 6 4 1 LED Indicators 135 6 4 2 AR ...

Страница 140: ...or details on the status information 6 2 Remote I O Communications Allocate the DeviceNet read and write areas to specify what part of the PC s data area will be used to read and write data from the DeviceNet Master Unit Specify the PC data area starting word address and number of bytes Up to 64 bytes can be allocated for DeviceNet remote I O Allocating Read Write Areas with the PC Setup Switch th...

Страница 141: ...iately before the error In this case also monitor the status at the master and do not read the data Word Bits Function Default DM 6605 00 to 03 DeviceNet Read Write area setting 0 Hex Read IN IR 020 to IR 027 Write OUT IR 030 to IR 037 1 Hex Use settings in DM 6606 to DM 6609 0 Hex 04 to 07 Transmission of CPM2C S status to the DeviceNet Master 0 Hex Attach status information ahead of data 1 Hex D...

Страница 142: ...r than 2 0 The version can be displayed in the Configurator s Help menu 1 2 3 1 Connect the DeviceNet Configurator to the DeviceNet network and switch to online operation 2 Turn ON the CPM2C S power supply and put the PC in PROGRAM mode 3 Click the Upload Button 4 Double click the CPM2C S to be set on the DeviceNet Configurator s de vice list 5 The DeviceNet Parameters Window will be displayed to ...

Страница 143: ...ed click the Download Button 8 After the download has been completed click the OK Button to return to the list display 6 3 Explicit Message Communications 6 3 1 DeviceNet Explicit Message Functions Explicit message communications use a command response protocol The CPM2C S returns responses to commands sent from the Master allowing CPM2C S data areas to be read or written from the Master DeviceNet...

Страница 144: ...at one time Command Format Explicit message Function Page READ BYTE DATA Reads the specified node s data in byte units from the DeviceNet Master When word data is being read the leftmost byte is read before the rightmost byte Up to 200 bytes can be read at one time 122 WRITE BYTE DATA Writes data from the DeviceNet Master to the speci fied node s data area in byte units When word data is being wri...

Страница 145: ...2 digit hexadecimal The allowed range is 01 to C8 Hex which is equivalent to 1 to 200 decimal Number of bytes received response Indicates the number of bytes of data in hexadecimal from the source node number on Source node number response Indicates the node number in hexadecimal of the CPM2C S that returned the response Read data response Contains the desired data read from the specified data are...

Страница 146: ...code is turned ON in the response so 9E Hex is returned Class ID command Always 2F Hex Instance ID command Specify the data area where data will be written Specify one of the codes listed in the following table in 1 byte 2 digit hexadecimal Address L and Address H command Specify the starting word address where data will be written Specify the address in hexadecimal as follows Address L The rightm...

Страница 147: ...ress H and write data parameters must not exceed the range of the CPM2C S data area READ WORD DATA Reads the specified node s data in word units two byte units from the DeviceNet Master When word data is being read the leftmost byte is read before the rightmost byte Up to 100 words can be read at one time Command Format Response Format Parameters Destination node number command Specify the node nu...

Страница 148: ...ponse Contains the desired data read from the specified data area Word data is returned with the leftmost byte bits 8 to 15 preceding the rightmost byte bits 0 to 7 Precautions The range of data specified by the data area instance ID starting address Address L and Address H and number of words parameters must not exceed the range of the CPM2C S data area WRITE WORD DATA Writes data from the Device...

Страница 149: ...ting address Address H The leftmost two digits of the 4 digit starting address Write data command Contains the data that will be written in the specified data area Input word data with the leftmost byte bits 8 to 15 preceding the rightmost byte bits 0 to 7 Number of bytes received response Indicates the number of bytes of data in hexadecimal from the source node number on Source node number respon...

Страница 150: ...CS CJ Series DeviceNet Units Operation Manual W380 for CS CJ series PCs and refer to the DeviceNet Operation Manual W267 for CVM1 and CV series PCs For details on CMND 194 refer to the CS Series Programmable Controllers Operation Manual W339 for CS series PCs and refer to the CVM1 CV Series CV500 CV1000 CV2000 CVM1 Programmable Controllers Operation Manual Ladder Diagrams W202 for CVM1 and CV seri...

Страница 151: ...ies data area S 4 0A 00 Starting read address 000A Hex specifies IR 010 Address L 0A Hex Address H 00 Hex S 5 28 00 Number of bytes 28 Hex specifies 40 bytes The rightmost byte of S 5 is not used Word Contents Hex Function D 28 01 EXPLICIT MESSAGE SEND command code 2801 Hex D 1 00 00 Normal completion code 0000 Hex D 2 00 2A Number of bytes received 2A Hex indicates 42 bytes This is the number of ...

Страница 152: ...MRON Master the bytes are written to the Slave in the same order HH LL in which they appear in the Master Word Contents Hex Function D 28 01 EXPLICIT MESSAGE SEND command code 2801 Hex D 1 00 00 Normal completion code 0000 Hex D 2 00 02 Number of bytes received 02 Hex indicates 2 bytes This is the number of bytes from D 3 to the end D 3 02 9C Slave s node number 02 Hex WRITE BYTE DATA response ser...

Страница 153: ...D0 00 S 2 00 64 Response monitoring time 64 Hex specifies 10 0 seconds S 3 00 0B Number of bytes of command data beginning with word S 4 0B Hex specifies 11 bytes S 4 28 01 EXPLICIT MESSAGE SEND command code 2801 Hex S 5 02 1C Slave node number 02 Hex READ BYTE DATA command service code 1C Hex S 6 00 2F Class ID 002F Hex S 7 00 01 Instance ID 0001 Hex specifies data area S 8 0A 00 Starting read ad...

Страница 154: ...details S 1 D0 00 S 2 00 64 Response monitoring time 64 Hex specifies 10 0 seconds S 3 00 0B Number of bytes of command data beginning with word S 4 32 Hex specifies 50 bytes S 4 28 01 EXPLICIT MESSAGE SEND command code 2801 Hex S 5 02 1E Slave node number 02 Hex WRITE BYTE DATA command service code 1E Hex S 6 00 2F Class ID 002F Hex S 7 00 01 Instance ID 0001 Hex specifies data area S 8 0A 00 Sta...

Страница 155: ...D0 00 S 2 00 64 Response monitoring time 10 0 seconds S 3 00 0B Number of bytes of command data beginning with word S 4 0B Hex specifies 11 bytes S 4 28 01 EXPLICIT MESSAGE SEND command code 2801 Hex S 5 02 1C Slave node number 02 Hex READ BYTE DATA command service code 1C Hex S 6 00 2F Class ID 002F Hex S 7 00 01 Instance ID 0001 Hex specifies data area S 8 0A 00 Starting read address 000A Hex sp...

Страница 156: ...tails S 1 D0 00 S 2 00 64 Response monitoring time 10 0 seconds S 3 00 32 Number of bytes of command data beginning with word S 4 32 Hex specifies 50 bytes S 4 28 01 EXPLICIT MESSAGE SEND command code 2801 Hex S 5 02 1E Slave node number 02 Hex WRITE BYTE DATA command service code 1E Hex S 6 00 2F Class ID 002F Hex S 7 00 02 Instance ID 0002 Hex specifies data area 2 S 8 C8 00 Starting write addre...

Страница 157: ...og timer error Flashing Non fatal error Error such as incorrect switch settings Not lit Power is not being supplied Power is not being supplied Waiting for initialization to start Reset in progress NS Green Lit Online Communications established Normal network status when communica tions have been established Flashing Online Communications not established Normal network status when communica tions ...

Страница 158: ...lication or Bus off error ON when an error occurred OFF when normal 02 DeviceNet network power supply error ON when an error occurred OFF when normal 03 DeviceNet communications error ON when an error occurred OFF when normal 04 to 06 Not used 07 DeviceNet status error ON when an error occurred OFF when normal 08 Explicit Connection Flag ON The connection has been established OFF The connection ha...

Страница 159: ...is output 08 and 09 CPM2C operating mode Bit 09 08 PROGRAM mode 0 0 MONITOR mode 1 0 RUN mode 1 1 10 Not used 11 UM area write protection Mirrors the status of PC Setup setting in DM 6602 bits 00 to 03 OFF UM writable ON UM write protected 12 Not used 13 CompoBus S communications error See note 1 OFF Communications normal or not part of network ON Disconnected from communications This bit will aut...

Страница 160: ... Status Information Section 6 4 When a fatal error occurs at a slave the master may read data from immedi ately before the error In this case also monitor the status at the master and do not read the data ...

Страница 161: ...tion and reduce response delays 7 1 Cycle Time 140 7 1 1 Cyclic Operation and Interrupts 140 7 1 2 Cycle Time and Operations 142 7 1 3 Cycle Time Example 142 7 1 4 Instruction Execution Times 143 7 2 I O Response Time 153 7 2 1 CPM2C S I O Response Time 153 7 2 2 I O Response Time between CompoBus S Slaves 154 7 3 Interrupt Processing Time 155 7 4 One to one PC Link I O Response Time 156 ...

Страница 162: ...mory Refresh bits for expansion functions Execute the program Refer to the Programming Manual W353 for details on cycle time and I O response times Wait for minimum cycle time if a minimum cycle time has been set in the PC Setup DM 6619 Calculate cycle time Read input data from input bits Write output data to output bits Perform RS 232C port communications processing Can be changed in DM 6616 Perf...

Страница 163: ...t refreshing Read input data from CompoBus S Master ASIC 0 02 ms Program execution Execute user program Total time for executing instructions Varies according to content of user s program Cycle time calculation Wait until minimum cycle time has elapsed if a minimum cycle time is set in DM 6619 of PC Setup Calculate of cycle time Negligible except for the delay itself when required CompoBus S outpu...

Страница 164: ...h TC 003 or TC 008 through TC 255 are used operation will be normal for TC 004 through TC 007 10 ms or longer TIMH 15 may be inaccurate when TC 004 through TC 255 are used operation will be normal for TC 000 through TC 003 20 ms or longer Programming using the 0 02 second Clock Bit SR 25401 may be inaccurate 100 ms or longer TIM may be inaccurate Programming using the 0 1 second Clock Bit SR 25500...

Страница 165: ...nse time With short cycle times the CompoBus S communications response time will become the minimum cycle time this is especially true when long distance mode is being used 7 1 4 Instruction Execution Times The following table lists the execution times for CPM2C S instructions Basic Instructions Communications mode Max number of nodes setting CompoBus S communications response time High speed mode...

Страница 166: ...6 6 1 9 6 Interrupt execution constant for SV 14 4 14 0 7 5 9 8 Regular execution DM for SV 20 8 20 5 6 1 10 7 Interrupt execution DM for SV 22 2 22 0 7 5 16 WSFT 14 0 With 1 word shift register 2 6 18 6 With 10 word shift register 1 15 ms With 2 048 word shift register using DM 17 ASFT 13 0 Shifting 1 word 2 6 22 9 Shifting 10 words 1 51 ms Shifting 2 048 words via DM 20 CMP 7 0 When comparing a ...

Страница 167: ... word word 35 4 DM DM DM 35 ORW 12 3 Constant V constant word 2 6 13 8 Word V word word 35 4 DM V DM DM 36 XORW 12 3 Constant V constant word 2 6 13 8 Word V word word 35 4 DM V DM DM 37 XNRW 12 3 Constant V constant word 2 6 13 8 Word V word word 35 5 DM V DM DM 38 INC 8 8 When incrementing a word 2 5 15 9 When incrementing DM 39 DEC 8 9 When decrementing a word 2 5 16 1 When decrementing DM 40 S...

Страница 168: ...onverting word data to a word 2 6 33 7 When converting DM to DM 60 CMPL 14 8 Comparing words 2 6 30 6 Comparing DM 61 INI 68 8 Starting high speed counter comparison 2 6 12 0 Stopping high speed counter comparison 43 3 Specifying a constant when changing high speed counter PV 51 8 Specifying DM when changing high speed counter PV 42 8 Specifying increment mode via constant 50 8 Specifying incremen...

Страница 169: ...20 2 Reading high speed counter pulse output status via word 27 4 Reading high speed counter pulse output status via DM 24 4 Reading high speed counter read range com parison results via word 32 4 Reading high speed counter read range com parison results via DM 39 9 Reading pulse output PV via word 47 8 Reading pulse output PV via DM 20 1 Reading interrupt counter PV via word 27 1 Reading interrup...

Страница 170: ...83 4 Only registering a target value comparison table in incrementing decrementing pulse input mode via word 810 3 Only registering a target value comparison table in incrementing decrementing pulse input mode via DM 182 4 Only registering a target value comparison table in incrementing mode via word 776 3 Only registering a target value comparison table in incrementing mode via DM 351 0 Only regi...

Страница 171: ...et timer read 10 6 Stopping timer 70 XFER 21 3 When transferring a constant to a word 2 6 23 8 When transferring a word to a word 1 52 ms When transferring 2 048 words using DM 71 BSET 13 8 When setting a constant to a word 2 6 14 3 When setting a word to a word 971 1 When setting DM to 2 048 words 73 XCHG 14 5 Word word 2 6 29 3 DM DM 74 SLD 12 3 Shifting 1 word 2 6 23 9 Shifting 10 words 2 83 ms...

Страница 172: ...hifting 1 word 2 6 24 3 Shifting 10 words 1 15 ms Shifting 2 048 words using DM 85 TCMP 27 5 Comparing constant to word set table 2 6 28 0 Comparing word to word set table 48 3 Comparing DM to DM set table 86 ASC 19 1 Word word 2 6 52 2 DM DM 89 INT 22 1 Set masks via word 2 6 30 1 Set masks via DM 18 4 Clear interrupts via word 26 4 Clear interrupts via DM 17 2 Read mask status via word 24 1 Read...

Страница 173: ...CW continuous mode and CW CCW mode 65 0 When executing the word designation in CW continuous mode and Feed Dir mode 74 5 When executing the DM designation in CW continuous mode and Feed Dir mode 45 4 When changing the word designation in CW continuous mode and Feed Dir mode 53 5 When changing the DM designation in CW con tinuous mode and Feed Dir mode 65 4 When executing the word designation in CC...

Страница 174: ...39 8 DM specification executed second scan or later SUM 22 8 Word added and output to word 2 6 1 44 ms DM specification 999 bytes added and output to DM SYNC 34 6 Constant ratio specification when executed 2 6 35 3 Word ratio specification when executed 42 5 DM ratio specification when executed 25 3 Word ratio specification when changed 32 6 DM ratio specification when changed TIML Reset IL JMP 12...

Страница 175: ...ion execution time 14 ms Output ON delay 15 ms Communications ports Not used Minimum I O Response Time The CPM2C S responds most quickly when it receives an input signal just prior to I O refreshing as shown in the illustration below Maximum I O Response Time The CPM2C S takes longest to respond when it receives the input signal just after the input refresh phase of the cycle as shown in the illus...

Страница 176: ...cle because it goes ON just after the start of CompoBus S communications processing 1 The input is read during the next CompoBus S communications processing cycle 2 CompoBus S transmission line CompoBus S Slave CPM2C S cycle CompoBus S communications processing Slave input Slave output CompoBus S input refreshing CompoBus S output refreshing CompoBus S communica tions time CompoBus S communica tio...

Страница 177: ...tered in the PC or when an error is being cleared Online editing Operation will stop and interrupts will be masked for up to 600 ms for DM 6144 to DM 6655 when online editing is executed or the settings are changed with STUP during operation The program or PC Setup can be overwritten during that delay In addition to the online editing delay interrupts may be masked for up to 150 µs for system proc...

Страница 178: ...I O response times are shown here using as an example the following instructions executed at the master and the slave In this example communications proceed from the master to the slave The following conditions are taken as examples for calculating the I O response times In CPM2C S PCs LR area words LR 00 to LR 15 are used in 1 1 data links and the transmission time is fixed at 12 ms Input ON dela...

Страница 179: ...cycle time 2 Transmission time 3 Slave s cycle time 2 Output ON response time Output point Master s cycle time 10 ms Program execution Transmission time 12 ms Slave s cycle time 15 ms Min I O response time 10 10 12 15 15 62 ms Input point Input bit I O refresh Overseeing communications servicing etc Input ON delay 10 ms Master to Slave Output ON delay 15 ms Program execution CPU processing CPU pro...

Страница 180: ...158 One to one PC Link I O Response Time Section 7 4 ...

Страница 181: ... 2 8 Setting and Reading a Program Memory Address and Monitoring I O Bit Status 171 8 2 9 Entering or Editing Programs 172 8 2 10 Instruction Search 175 8 2 11 Bit Operand Search 176 8 2 12 Inserting and Deleting Instructions 176 8 2 13 Checking the Program 178 8 2 14 Bit Digit Word Monitor 179 8 2 15 Differentiation Monitor 181 8 2 16 Binary Monitor 182 8 2 17 Three Word Monitor 182 8 2 18 Signed...

Страница 182: ... through the RS 232C port on a CPM2C CN111 Adapter 2 If the Programming Console s cable is disconnected and then reconnected within 2 seconds it won t be necessary to reenter the password and the previous display status will remain In some cases it won t be necessary to reenter the password if the Programming Console s cable is disconnect Peripheral port CPM2C S CPU Unit CPM2C CN111 Connecting Cab...

Страница 183: ...an be used with the CPM2C S The CQM1H PRO01 E CQM1 PRO01 E and the C200H PRO27 E The key func tions for these Programming Consoles are identical Press and hold the Shift Key to input a letter shown in the upper left corner of the key or the upper function of a key that has two functions For example the CQM1 PRO01 E s AR HR Key can specify either the AR or HR Area press and release the Shift Key an...

Страница 184: ...00H PRO27 E LCD display Mode switch Attached Cable 2 m Attached Cable 2 m Operation keys Model Cable length Connection C200H CN222 2 m Connects to the peripheral port on a CPM2C CN111 or CS1W CN114 C200H CN422 4 m CS1W CN224 2 m Connects directly to the CPM2C S CPU Unit s communications port CS1W CN624 6 m Cassette recorded jack Cannot be used with the CPM2C S LCD display Mode switch Operation key...

Страница 185: ...e CPM2C S operating mode The key can be removed when the switch is set to RUN or MONITOR but it cannot be removed when the switch is set to PROGRAM Contrast Control The display contrast can be adjusted with the control on the right side of the Programming Console Buzzer Volume The C200H PRO27 E s buzzer volume can be adjusted with the lever on the right side of the Programming Console The buzzer v...

Страница 186: ...ed in PROGRAM mode Use PROGRAM mode to create and edit the program clear memory or check the program for errors MONITOR Mode The CPM2C S program is executed in MONITOR mode and I O is processed just as it is in RUN mode Use MONITOR mode to test system operations such as monitoring CPM2C S operating status force setting and resetting I O bits changing the SV PV of timers and counters changing word ...

Страница 187: ...ecting the Programming Console for de tails The CPU Unit s Communications Switch setting has no effect on commu nications with the Programming Console 3 Set the mode switch to PROGRAM mode 4 Turn ON the PC 5 Enter the password See 8 1 5 Entering the Password for details 6 Clear All Clear the PC s memory See 8 2 2 Clearing Memory for details 7 Read and clear all errors and messages See 8 2 5 Readin...

Страница 188: ...tion codes assigned to expansion instructions 170 Setting a program memory address Sets the specified program memory address when reading writing insert ing and deleting programs 171 Reading a program memory address Reads the contents of the Program Memory Displays the status of the cur rently displayed bit in PROGRAM and MONITOR modes 171 Instruction search Finds occurrences of the specified inst...

Страница 189: ...one or more of the 3 consecutive words displayed in the 3 Word Monitor operation 184 Changing timer counter SV 1 Changes the SV of a timer or counter 185 Changing timer counter SV 2 Makes fine adjustment changes to the SV of the timer or counter 186 Hexadecimal BCD data modification Changes the BCD or hexadecimal value of a word being monitored 186 Binary data modification Changes the status of a ...

Страница 190: ...123 to specify 123 as the starting program address 5 Press the MONTR Key to clear the specified regions of memory 8 2 3 Clearing All Memory The I O comments function has been enabled for the CPM2C S accompany ing the CX Programmer upgrade from version 1 2 to 2 0 This operation is used when it is necessary to clear the I O comment area along with the rest of memory The contents of the I O comment a...

Страница 191: ...or Processing for troubleshooting information Key Sequence Follow the procedure below to display and clear messages 1 2 3 1 Press the CLR Key to bring up the initial display 2 Press the FUN and then the MONTR Key to begin the operation If there are no messages the following display will appear If there are messages the most serious message will be displayed when the MONTR Key is pressed Pressing M...

Страница 192: ...isplay or change the expansion instructions assigned to expansion instruction function codes The assignments can be displayed in any mode but can be changed in PROGRAM mode only Assign expansion instruction function codes before inputting the program The CPM2C S will not operate properly if expansion instructions aren t assigned correctly An expansion instruction can be assigned to one function co...

Страница 193: ...ogram Memory starting from address 000 Because this address appears when the display is cleared it is not necessary to specify it When inputting a program starting from other than 000 or to read or modify a program that already exists in memory the desired address must be desig nated 1 2 3 1 Press the CLR Key to bring up the initial display 2 Input the desired address It is not necessary to input ...

Страница 194: ...in 3 Input the address where the program will begin and press the Down Arrow Key It is not necessary to input leading zeroes 4 Input the first instruction and operand 5 Press the WRITE Key to write the instruction to Program Memory The next program address will be displayed If a mistake was made inputting the instruction press the Up Arrow Key to return to the previous program address and input th...

Страница 195: ... differentiated version of an instruction press the NOT Key af ter the function code FUN 2 1 NOT The symbol will be displayed next to differentiated instructions Press the NOT Key again to change back the instruction back to a non differentiated instruction The symbol will disappear To change an instruction after it has been entered simply scroll through the program until the desired instruction i...

Страница 196: ... write the instruction to Program Memory Writing an Unsigned Decimal Number 13 The first operand is input as an unsigned integer Input the value of the operand from 0 to 65535 Note If an erroneous input is made press the CLR Key to restore the sta tus prior to the input Then enter the correct input 14 Restore the hexadecimal display Note If an input is made outside of the permissible range a buzze...

Страница 197: ...y mode The ON OFF status of any displayed bit will be shown if the PC is in RUN or MONITOR mode 1 2 3 1 Press the CLR Key to bring up the initial display 2 Input the address from which the search will begin and press the Down Ar row Key It is not necessary to input leading zeroes 3 Input the instruction to be found and press the SRCH Key In this case the search is for OUT 01000 In this case the ne...

Страница 198: ...Press the SRCH Key to search for the next occurrence of the operand bit 5 The search will continue until an END instruction or the end of Program Memory is reached In this case an END instruction was reached 8 2 12 Inserting and Deleting Instructions This operation is used to insert or delete instructions from the program It is possible in PROGRAM mode only SRCH 00397SRCH END 001 00 4KW Indicates ...

Страница 199: ... put the operands and then press the WRITE Key Deletion Follow the procedure below to delete the IR 00103 NO condition at address 00205 1 2 3 1 Press the CLR Key to bring up the initial display 2 Input the address where the NO condition will be deleted and press the Down Arrow Key It is not necessary to input leading zeroes 3 Press the DEL Key 4 Press the Up Arrow Key to delete the specified instr...

Страница 200: ...he errors that may be detected when the program is checked 4 Press the SRCH Key to continue the search The next error will be dis played Continue pressing the SRCH Key to continue the search The search will continue until an END instruction or the end of Program Memory is reached A display like this will appear if the end of Program Memory is reached A display like this will appear if an END instr...

Страница 201: ...s being monitored that word s value can be changed using the Hexadecimal BCD Data Modification operation Refer to 8 2 22 Hexadecimal BCD Data Modification 8 2 23 Binary Data Modification 8 2 24 Signed Decimal Data Modification and 8 2 25 Unsigned Decimal Data Modification for details 4 Press the CLR Key to end monitoring Bit Monitor Follow the procedure below to monitor the status of a particular ...

Страница 202: ...en changing the operating mode Multiple Address Monitoring The status of up to six bits and words can be monitored simultaneously although only three can be shown on the display at any one time 1 2 3 1 Press the CLR Key to bring up the initial display 2 Input the address of the first bit or word and press the MONTR Key 3 Repeat step 2 up to 6 times to display the next addresses to be monitored If ...

Страница 203: ...2 3 1 Monitor the status of the desired bit according to the procedure described in 8 2 14 Bit Digit Word Monitor If 2 or more bits are being monitored the desired bit should be leftmost on the display In this case the differentiation status of LR 00 will be monitored 2 To specify up differentiation monitoring press the SHIFT and then the Up Arrow Key The symbols U will appear To specify down diff...

Страница 204: ... set bits is indicated by R as shown below Note a The status of displayed bits can be changed at this point Refer to 8 2 23 Binary Data Modification for details b The Up or Down Arrow Key can be pressed to display the status of the previous or next word s bits 3 Press the CLR Key to end binary monitoring and return to the normal mon itoring display 8 2 17 Three Word Monitor This operation is used ...

Страница 205: ...g the current monitor dis play by holding down the SHIFT Key and then changing the operating mode 8 2 18 Signed Decimal Monitor This operation converts the contents of the specified word from signed hexa decimal two s complement format to signed decimal for display The opera tion can be executed while using I O monitoring multiple address monitoring or 3 word monitoring 1 2 3 1 Monitor the word th...

Страница 206: ...contents of one or more of the 3 consec utive words displayed in the Three Word Monitor operation It is possible in MONITOR or PROGRAM mode only Caution Before changing the contents of I O memory be sure that the changes will not cause equipment to operate unexpectedly or dangerously In particular take care when changing the status of output bits The PC continues to refresh I O bits even if the PC...

Страница 207: ...er SV can be changed either by inputting a new value or by incrementing or decrementing the current SV Inputting a New SV Constant This operation can be used to input a new SV constant as well as to change an SV from a constant to a word address designation and vice versa The fol lowing examples show how to input a new SV constant and how to change the SV from a constant to an address 1 2 3 1 Pres...

Страница 208: ... in 8 2 14 Bit Digit Word Monitor It is possible in MONITOR or PROGRAM mode only Words SR 253 to SR 255 cannot be changed Caution Before changing the contents of I O memory be sure that the changes will not cause equipment to operate unexpectedly or dangerously In particular take care when changing the status of output bits The PC continues to refresh I O bits even if the PC is in PROGRAM mode so ...

Страница 209: ...ate unexpectedly 1 2 3 1 Monitor the status of the desired word according to the procedure de scribed 8 2 16 Binary Monitor BInary monitor 2 Press the CHG Key to begin binary data modification A flashing cursor will appear over bit 15 The cursor indicates which bit can be changed 3 Three sets of keys are used to move the cursor and change bit status a Use the Up and Down Arrow Keys to move the cur...

Страница 210: ...nected to output points on the CPU Unit Expansion Units or Expansion I O Units may operate unexpectedly 1 2 3 1 Monitor signed decimal the status of the word for which the present value is to be changed Signed decimal monitor 2 Press the CHG Key to begin decimal data modification 3 Input the new PV and press the WRITE Key to change the PV The opera tion will end and the signed decimal monitoring d...

Страница 211: ...press the WRITE Key to change the PV The opera tion will end and the decimal without sign monitoring display will return when the WRITE Key is pressed The PV can be set within a range of 0 to 65 535 If an erroneous input has been made press the CLR Key to restore the sta tus prior to the input Then enter the correct input The buzzer will sound if a value outside the specified range is input allow ...

Страница 212: ...in the following cases a When the PC s operating mode is changed although the forced status will not be cleared when the mode is changed from PROGRAM to MONITOR if SR 25211 is ON b When the PC stops because a fatal error occurred c When the PC stops because of a power interruption d When the Clear Force Set Reset Operation is performed 8 2 27 Clear Force Set Reset This operation is used to restore...

Страница 213: ...time the TR Key is pressed Note 1 A message contained in three words can be displayed by using ASCII dis play in combination with the Three word monitor operation 2 The Hexadecimal BCD Data Modification Operation can be used while displaying ASCII data Input values in 4 digit hexadecimal 8 2 29 Displaying the Cycle Time This operation is used to display the current average cycle time scan time It ...

Страница 214: ...that can be changed will flash If necessary input a new value with the Up and Down Arrow Keys or Numeric Keys Press the CHG Key to move the cursor to the next digit The following table shows the setting ranges for each value 4 Press the WRITE Key to write the new value Press the CLR Key to return to the initial display Operation RUN MONITOR PROGRAM Read clock OK OK OK Set clock No OK OK Year Month...

Страница 215: ... by pressing the CLR SET NOT RESET and then the MONTR Key Press the CLR Key several times if memory errors are displayed 4 Display and clear error messages by pressing the CLR FUN and then the MONTR Key Continue pressing the MONTR Key until all error messages have been cleared 5 Press the CLR Key to bring up the initial programming display program ad dress 00000 The new program can be written at t...

Страница 216: ...00 00000 00004 00007 00010 00014 00017 1 S ON OFF Flicker output 10 counts Self holding bit 1 second timer 2 second timer 10 count counter TIM 001 0010 CP R CNT 000 0010 T002 20000 TIM 002 0020 T002 20000 T001 20000 20000 Start input Address Instruction Data Programming example procedures in 8 3 3 Programming Procedures 00000 LD 00000 1 Self holding bit 00001 OR 20000 00002 AND NOT C 000 00003 OUT...

Страница 217: ...n errors that appear when operating the SSS or SYSMAC CPT Support Software 1 Inputting the Self holding Bit 1 2 3 1 Input the normally open condition IR 00000 It isn t necessary to input leading zeroes 2 Input the OR condition IR 20000 3 Input the normally closed AND condition C000 It isn t necessary to input leading zeroes 4 Input the OUT instruction IR 20000 2 Inputting the One second Timer 1 2 ...

Страница 218: ...ally open condition IR 20000 2 Input the normally closed AND condition T002 It isn t necessary to input leading zeroes 3 Input the 2 second timer T002 4 Input the SV for T002 0020 2 0 s AND NOT TIM C 2 5 AND NOT TIM 002 WRITE 6READ NOP 000 TIM B 1 6 TIM 001 WRITE 6 TIM DATA 0000 B 1 A 0 6 TIM DATA 0010 WRITE 7READ NOP 000 LD C 2 A 0 A 0 A 0 A 0 7 LD 20000 WRITE 8READ NOP 000 AND NOT TIM C 2 8 AND ...

Страница 219: ...ally closed condition IR 20000 4 Input the counter 000 5 Input the SV for counter 000 0010 10 counts 5 Inputting the Flicker Output 1 2 3 1 Input the normally open condition IR 20000 LD C 2 A 0 A 0 A 0 A 0 10 LD 20000 WRITE 11READ NOP 000 AND TIM B 1 11 AND TIM 001 WRITE 12READ NOP 000 LD NOT C 2 A 0 A 0 A 0 A 0 12 LD NOT 20000 WRITE 13READ NOP 000 CNT A 0 13 CNT 000 WRITE 13 CNT DATA 0000 B 1 A 0...

Страница 220: ...e desired check level 3 Input the desired check level 0 1 or 2 The program check will begin when the check level is input and the first error found will be displayed If no errors are found the following display will appear Note Refer to 9 4 Programming Errors for details on check levels and the programming errors that may be displayed during a program check 4 Press the SRCH Key to continue the sea...

Страница 221: ...ay 3 Force set the start input bit IR 00000 from the Programming Console to start the program The cursor in the lower left corner of the display indicates that the force set is in progress The bit will remain ON as long as the Set Key is held down 4 The output indicator for output IR 01000 will flash ten times if the program is operating correctly The indicator should go OFF after ten one second f...

Страница 222: ...200 Programming Example Section 8 3 ...

Страница 223: ... Checks and Test Run Procedure 202 9 1 1 Initial System Checks 202 9 1 2 Flash Memory Precautions 202 9 1 3 CPM2C S Test Run Procedure 202 9 2 Self diagnostic Functions 203 9 2 1 Identifying Errors 203 9 2 2 User defined Errors 204 9 2 3 Non fatal Errors 205 9 2 4 Other Errors 205 9 2 5 Fatal Errors 206 9 3 Programming Console Operation Errors 206 9 4 Programming Errors 207 9 5 Troubleshooting Flo...

Страница 224: ...gh DM 6599 or PC Setup DM 6600 through DM 6655 have been changed star tup processing will take up to 1 200 ms longer than usual Be sure to take this one time startup delay into account if it may affect operations 3 If one of the following three operations is performed in MONITOR or RUN mode the CPM2C S cycle time will be extended by up to 1 200 ms and interrupts will be disabled while the program ...

Страница 225: ...y of self diagnostic functions to help identify and correct errors and reduce down time 9 2 1 Identifying Errors An error can be identified by the error message displayed on a Programming Device error flags in the AR and SR areas and the error code output to SR 253 Fatal and Non fatal Errors PC errors are divided into 2 categories based on the severity of the errors The status of the ERR ALM indic...

Страница 226: ...er ation Not providing proper safety measures may result in serious accidents WARNING The PC will turn OFF all outputs when its self diagnosis function detects any error or when a severe failure alarm FALS instruction is executed External safety measures must be provided to ensure safety in the system Not provid ing proper safety measures may result in serious accidents 9 2 2 User defined Errors T...

Страница 227: ...urned ON Correct the settings in PROGRAM Mode and turn ON the power again AR 1301 ON An incorrect setting was detected in the PC Setup DM 6615 to DM 6644 when switching to RUN or MONITOR mode Correct the settings in PRO GRAM Mode and switch to RUN or MONITOR mode again AR 1302 ON An incorrect setting was detected in the PC Setup DM 6645 to DM 6655 during operation Correct the settings and clear th...

Страница 228: ...any errors detected AR 1313 ON A checksum error has occurred in the expansion instructions data and all function codes have been set the their default values Reset the expansion instructions AR 1314 ON Data was not maintained in an area specified for holding Clear the error check the data in the areas specified for holding and try again AR 1315 ON A CompoBus S Master ASIC error occurred Replace th...

Страница 229: ...program so that the same number is only used once for each SBN UNDEFD An SBN 92 has not been programmed with the same sub routine number as an SBS 91 instruction in the program Correct the program STEP ERR STEP 08 with a section number and STEP 08 without a section number have been used incorrectly Check STEP 08 programming requirements and correct the pro gram B IL ILC ERR IL 02 and ILC 03 are no...

Страница 230: ...ation stopped Check for fatal errors Check for non fatal errors Error Replace the CPU Unit PWR indicator lit RUN indicator lit ERR ALM indicator flashing Is I O sequence normal Operating environment normal Check I O Check operating environment Yes Check power supply No No No No Flashing Yes Yes Not lit Yes see page 209 see page 210 see page 211 see page 212 see page 214 ...

Страница 231: ...s power being supplied Is voltage adequate Are there any discon nected connectors or broken wires Connect power supply Is PWR indicator lit Set supply voltage within acceptable limits Is PWR indicator lit Connect connectors or replace wires End Yes No No Yes Yes No No No Is PWR indicator lit Yes No Yes Yes ...

Страница 232: ...h a Programming Device End RUN indicator not lit Replace the CPU Unit Is PC mode displayed on Programming Device Turn the power supply OFF and then ON again Switch to RUN or MONITOR mode No Yes Is a fatal error displayed Is PC mode displayed on Programming Device No Yes Yes No Is the RUN indicator lit No Yes Yes No Follow the Memory Error Check flowchart if a memory error has occurred ...

Страница 233: ...eck Identify the error eliminate its cause and clear the error ERR ALM indicator flashing Is a non fatal error in dicated Is the ERR ALM indicator flashing Replace the CPU Unit End Determine the cause of the error with a Programming Device No Yes Flashing Not lit ...

Страница 234: ...Programming Device No Is the IR 01003 output indicator operating normally Check the voltage at the IR 01003 terminals Wire correctly Operation OK Is output wiring correct Disconnect the external wires and check the conductivity of each wire No Check output device SOL1 Operation OK Replace the CPU Unit Ex pansion Unit or Expansion I O Unit with the problem Yes No No Operation OK No Yes Yes A To nex...

Страница 235: ...k input devices LS1 and LS2 Operation OK Wire correctly Is input wiring correct Tighten the terminal screws and connect connectors Return to start Are the IR 00002 and IR 00003 input indi cators operating normally Replace the CPU Unit Expansion Unit or Expansion I O Unit Operation OK Yes Yes Yes Yes No No No No No No Check the voltage at the IR 00002 and IR 00003 terminals A From previous page Yes...

Страница 236: ...5 C Is the ambient temperature above 0 C Is noise being controlled Is the installation environment okay Consider using a heater Consider using an air conditioner Install surge protec tors or other noise reducing equipment at noise sources Consider constructing an instrument panel or cabinet End Yes No Yes No No No No Yes Yes Yes Is the ambient humidity between 10 and 85 ...

Страница 237: ...t Check correct backed up data and clear error Check the program correct any errors and clear the error End No Yes No No Yes No Yes AR 1310 to AR 1312 ON Check the error indicated by the flag that is ON correct set tings as required and write data to the flash memory No Turned ON during startup Yes Yes Check the external environment No ...

Страница 238: ...Remarks Power supply Determine whether the voltage fluctuation at the power supply terminals is within specifications Within the voltage variation range see note Tester Environmental con ditions Is the ambient temperature inside the panel appropriate 0 to 55 C Thermometer Is the ambient humidity inside the panel appropriate 10 to 90 RH with no con densation Hygrometer Has dirt or dust collected No...

Страница 239: ...cing the battery write the next date that the battery should be replaced on the label and affix the label in a visible place such as the inside of the communications port cover Be sure to dispose of the old battery in accordance with local laws and regula tions A CPM2C BAT01 Backup Battery is built into CPU Units that are equipped with an internal clock Replace the battery within two years when us...

Страница 240: ...ion of low battery errors slide the Low Battery Detec tion Switch towards the front of the Unit and set bits 12 to 15 of DM 6655 to 0 6 Replace the battery cover 7 Write the next date that the battery should be replaced on the reminder la bel The battery lifetime of the CPU Unit with clock is 2 years at 25 C and that of the CPU Unit without clock is 5 years at 25 C Low Battery Detection Switch Ena...

Страница 241: ...ons and procedures to properly use the Unit 10 1 Overview 220 10 1 1 Memory Areas 220 10 1 2 Precautions 220 10 2 Specifications and Nomenclature 221 10 2 1 Specifications 221 10 2 2 Nomenclature 221 10 3 Handling 222 10 3 1 Mounting Removing EEPROM 222 10 3 2 PC Connections 223 10 3 3 Uploading Programs 224 10 3 4 Downloading Programs 226 ...

Страница 242: ...so may result in malfunction Do not attempt to upload or download data between different types of PC Doing so may result in malfunction Do not download when the PC is in RUN or MONITOR mode If down loading is performed when the PC is running it will automatically switch to PROGRAM mode and operation will stop Do not attempt to disassemble repair or modify the CPM1 EMU01 V1 Any attempt to do so may...

Страница 243: ...pansion instructions 18 instructions Connector Connector compatible with peripheral port of CPM1 CPM1A CPM2A SRM1 V2 and CQM1 PCs For CPM2C CPM2C S and CQM1H PCs connect via CS1W CN114 or CPM2C CN111 Connecting Cable Communications setting 1 start bit 7 data bits even parity 2 stop bits 9 600 bps EEPROM See note 1 256 Kbit EEPROM ATMEL AT28C256 OMRON EEROM JD Current consumption 129 mA max Dimensi...

Страница 244: ...hold down the EEPROM and pull down the lock lever Removing EEPROM Lift up the lock lever and detach the EEPROM CONNECT green ERR red Meaning OFF OFF Not connected to PC power supply OFF ON OFF Connected to a recognized PC Blinking OFF Uploading downloading data ON Blinking Host link communications error retry by user OFF ON PC model and EEPROM data not compatible OFF Blinking One of the following ...

Страница 245: ...ommunications settings CPM1 CPM1A CPM2A CQM1 and SRM1 V2 PCs When connecting to the CPM1 CPM1A CPM2A CQM1 or SRM1 V2 insert the connector into the peripheral port making sure that the connector is ori ented correctly Insert the connector until it securely locks into place Connections are not possible to the RS 232C port or any other port Peripheral Port Communications Settings The peripheral port ...

Страница 246: ...ps screwdriver or other tool with a diameter of 3 0 mm max and a blade length of 10 mm min to press the upload button Uploading is possible even if the PC is in RUN or MONITOR mode Button UPLOAD DM UPLOAD Ladder program and expansion instructions Read from PC to EEPROM Read from PC to EEPROM DM6144 to 6655 Not affected Expansion Memory Unit Indicator UPLOAD DM Button UPLOAD Button EEPROM CPM2C CN1...

Страница 247: ... No See the note above Remove the Expansion Memory Unit from the PC End Mount the EEPROM to the CPM1 EMU01 V1 before connecting to the PC Check the orientation of the connector before connecting the CPM1 EMU01 V1 Note If the indicator is not lit at all lit red or blinks red uploading will not be pos sible In this case check the follow ing items Is the connector properly con nected Is the EEPROM pr...

Страница 248: ...nfirm that the program or other data to be downloaded to the PC is com patible with the PC before downloading 3 For the CQM1 or CQM1H when downloading programs that use user as signed function codes for expansion instructions be sure that pin 4 on the CPU Unit s DIP switch is ON If these programs are downloaded while the pin is OFF the assignments for the expansion instructions will return to thei...

Страница 249: ...PROM to the CPM1 EMU01 V1 before downloading Confirm the safety of the system Note If the indicator is not lit at all lit red or blinks red downloading will not be possible In this case check the fol lowing items Is the connector properly con nected Is the EEPROM properly mounted Are the EEPROM specifications cor rect Are the peripheral port communica tions settings correct Connect the CPM1 EMU01 ...

Страница 250: ......

Страница 251: ... with Terminal Blocks 10 I O points 6 points 24 VDC 4 relay outputs CPM2C 10EDR 20 I O points 12 points 24 VDC 8 relay outputs CPM2C 20EDR 8 output points 8 relay outputs CPM2C 8ER Units with Fujitsu compatible Con nectors 24 I O points 16 points 24 VDC 8 transistor outputs sinking CPM2C 24EDTC 8 transistor outputs sourcing CPM2C 24EDT1C 32 I O points 16 points 24 VDC 16 transistor outputs sinking...

Страница 252: ...PM2C 8ETM 8 transistor outputs sourcing CPM2C 8ET1M 16 outputs points 16 transistor outputs sinking CPM2C 16ETM 16 transistor outputs sourcing CPM2C 16ET1M Connector Description C500 CE241 24 pin soldered connector with cover C500 CE242 24 pin crimp connector with cover C500 CE243 24 pin pressure connector Model Name Specifications CPM2C MAD11 Analog I O Unit 2 analog inputs 1 analog output Model ...

Страница 253: ...ecting Cable Converts the CPM2C S CPU Unit s communications port to an RS 232C port 0 1 m about 2 Name Appearance Model Number Specifications Programming Console CQM1H PRO01 E 2 m Connecting Cable attached The CQM1H PRO01 E can be connected directly to the CPM2C S CQM1 PRO01 E 2 m Connecting Cable attached C200H PRO27 E Hand held w backlight requires one of the Con necting Cables listed below C200...

Страница 254: ...communications port usage Name Appearance Model number Comments Cable length Peripheral RS 232C Adapter CQM1 CIF02 For a 9 pin computer serial port 3 3 m Peripheral RS 232C Adapter Unit CPM2C CIF01 V1 Use for peripheral port to RS 232C conversion RS 232C RS 232C Cable XW2Z 200S For a 25 pin computer serial port 2 m XW2Z 500S 5 m XW2Z 200S V For a 9 pin computer serial port 2 m XW2Z 500S V 5 m RS 2...

Страница 255: ...DC 150 mA power supply which is supplied through the CPM2C S connection Can also be connected to a personal computer but this connection requires an external 5 VDC power supply Link Adapter B500 AL004 Use for personal computer RS 232C port to RS 422A con version Can also be connected to a CPM2C S RS 422 RS 232C Adapter Unit CPM2C CIF11 Use for CPM2C S peripheral port to RS 422 conversion ...

Страница 256: ......

Страница 257: ...s with Connectors Attached Expansion I O Units Note Refer to the CPM2C Programmable Controller Operation Manual W356 for the specifications and dimensions of Expansion I O Units and Expansion Units CPM2C S100C CPM2C S110C CPM2C S100C DRT CPM2C S110C DRT CPU Unit with Crimp Connectors CPU Unit with Soldered Connectors ...

Страница 258: ......

Страница 259: ...settings available offline that are not supported by the CPM2 S Errors will occur if a program containing anything not supported by the CPM2 S is transferred from the SYSMAC CPT Support Software SYSMAC Support Software All versions of SYSMAC Support Software can be used but the CPM2 S cannot be selected as the CPU type and the CQM1 must be selected instead For this reason there will be CQM1 memory...

Страница 260: ...238 Support Software Appendix C ...

Страница 261: ...k levels program checks 207 checking program syntax Programming Console 178 circuit configuration inputs 37 outputs transistor 39 clearing memory areas Programming Console 167 clock reading and setting the clock 192 communications capabilities 26 overview 7 Communications Errors 203 communications mode CompoBus S communications mode 112 communications speed DeviceNet Communications 118 communicati...

Страница 262: ...wnloading programs 226 duct installation 60 E EC Directives precautions xx EEPROM mounting removing 222 specifications 221 electrical noise preventing 56 60 ERR ALM indicator flashing 205 lit 206 error log 110 PC Setup settings 109 errors fatal 206 identifying 203 non fatal 205 programming 207 Programming Console operations 206 reading clearing messages Programming Console 169 user defined errors ...

Страница 263: ... input devices connections 70 input specifications CPU Units 37 Expansion I O Units 41 input time constants PC Setup settings 108 inputs wiring 67 configuration 68 inrush current 34 suppressing 75 inspections 216 installation 58 site selecting 55 instructions execution times 143 inserting and deleting Programming Console 176 searching Programming Console 175 insulation resistance 34 interlocks 54 ...

Страница 264: ... electrical noise 56 60 non fatal errors troubleshooting 211 no protocol communications 81 NPN current output connections 70 NPN open collector connections 70 NT Link connections 81 O operating conditions troubleshooting 214 operating modes 18 operating mode at startup 18 operation preparations 165 output short protection 74 output specifications Expansion I O Units 41 transistor output 39 Output ...

Страница 265: ...61 operation errors 206 operations 166 using 160 Programming Devices connections 78 programs checking check levels 207 downloading 226 entering and editing Programming Console 172 execution in cyclic operation 22 program capacity 34 uploading 224 proximity switches preventing false inputs 73 PT connections 81 pulse control 4 pulse outputs 5 wiring 74 Q R quick response inputs 5 relay outputs conne...

Страница 266: ...perature operating storage 34 Temperature Sensor Units available models 230 See also Expansion Units terminal blocks connections 67 test run example 199 procedure 202 thermocouple 5 timers changing SV Programming Console 185 example of inputting 196 timing basic instructions 143 I O response time 153 instruction execution See also instruction interrupt processing 155 special instructions 144 151 t...

Страница 267: ...rmation deleted or moved to an appendix 03 October 2003 Page xiii Caution added Page 4 Share Programming Devices rewritten Pages 15 131 and 132 Catalog numbers added and manual names cor rected Page 32 Reference to manual deleted Pages 113 133 134 and 159 Catalog number added Pages 128 and 129 CS1 changed to CS CJ or to CS Pages 128 and 129 Manual name corrected two locations Page 166 Two operatio...

Страница 268: ......

Страница 269: ...ONICS LLC One Commerce Drive Schaumburg IL 60173 5302 U S A Tel 1 847 843 7900 Fax 1 847 843 7787 OMRON ASIA PACIFIC PTE LTD No 438A Alexandra Road 05 05 08 Lobby 2 Alexandra Technopark Singapore 119967 Tel 65 6835 3011 Fax 65 6835 2711 OMRON CHINA CO LTD Room 2211 Bank of China Tower 200 Yin Cheng Zhong Road PuDong New Area Shanghai 200120 China Tel 86 21 5037 2222 Fax 86 21 5037 2200 Control Dev...

Отзывы: