


2–18
XR-56-201 5
Viewer 03/18
Viewer
Markers
enables / disables the waveform markers. There are two horizontal and two
vertically markers that can be placed in user-defined positions on the waveform.
This are controlled by the values in the
X1
,
X2
,
Y1
and
Y2
boxes.
When markers are displayed, horizontal measurements are given in pixels and
vertical measurements are given in the currently selected Graticule type.
Cursor
enables / disables the waveform cursors. These cursor placed on the waveform
at the current picture cursor position.
See the "Active Cursors & SMPTE Cursors Control Panels"section for details.
Region of Interest
The waveform display can be expanded either by dragging the region of interest cursor on the Picture
tile or by using the following controls:
H mag
allows the horizontal display to be expanded. The default value of 1 represents
normal horizontal magnification. As this value is increased the waveform is
expanded proportionately and, if
ROI
is enabled, the image in the Picture tile is
masked to show the region of interest.
The current magnification is displayed in the bottom right corner of the tile.
H offset
allows the position within the expanded horizontal display to be changed.
V range
allows the waveform gain to be selected to view the
Maximum
,
Highlights
,
Midtones
,
Shadows
or
User.
Maximum
displays all of the possible waveform levels.
Highlights
,
Midtones
and
Shadows
will display the parts of the waveform determined by the current
settings of the "Waveform " section of the
Configuration
-
Video
menu. User will
use the current settings of the
Minimum
,
Maximum
,
Gain
and
Offset
fields.
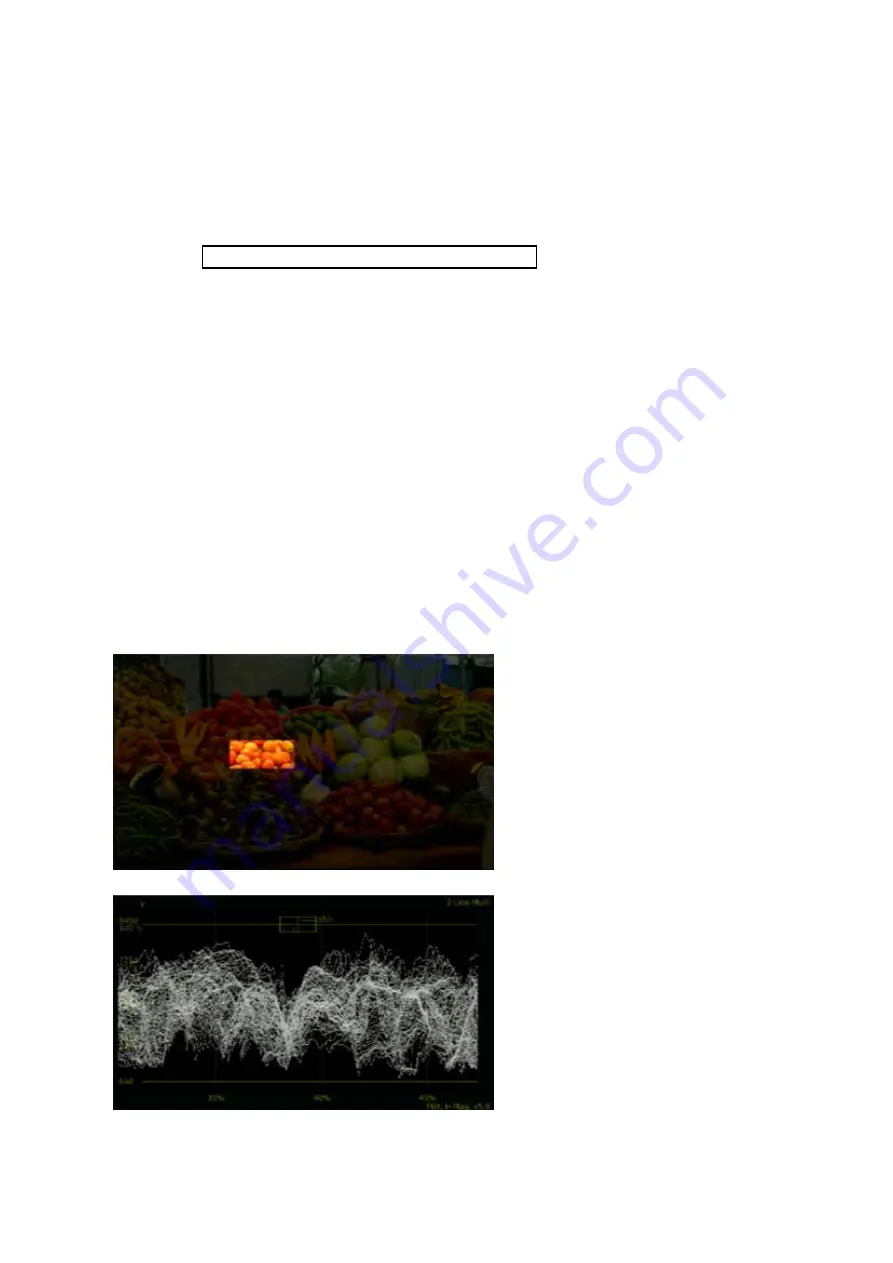
When the
ROI
button is enabled, the
Picture
tile will display cursors to allow
the region of interest to be setup. The
current region of interest is displayed on
the image at normal brightness while the
rest of the image is darkened.
Placing the mouse cursor on the edges
or corners of the region of interest will
display cursors. Dragging on these cursors
allows the region of interest to be set
interactively using the mouse.
The selected region of interest will be
displayed on the
Waveform
monitor,
Vectorscope
and the
CIE Colour Chart
where it can be analysed and measured.
Содержание Ultra XR
Страница 1: ...Copyright Omnitek 2016 18 XR 56 201 5 Ultra XR User Guide Software Release 3 4 58 0 Manual Revision 5...
Страница 13: ...Ultra XR User Guide 1 1 XR 56 201 5 1 Overview...
Страница 14: ...1 2 XR 56 201 5 Overview 03 18 Overview...
Страница 16: ...1 4 XR 56 201 5 Overview 03 18 Overview...
Страница 25: ...Ultra XR User Guide 2 1 XR 56 201 5 2 Viewer...
Страница 26: ...2 2 XR 56 201 5 Viewer 03 18 Viewer...
Страница 38: ...2 14 XR 56 201 5 Viewer 03 18 Viewer...
Страница 56: ...2 32 XR 56 201 5 Viewer 03 18 Viewer...
Страница 64: ...2 40 XR 56 201 5 Viewer 03 18 Viewer...
Страница 76: ...2 52 XR 56 201 5 Viewer 03 18 Viewer...
Страница 80: ...2 56 XR 56 201 5 Viewer 03 18 Viewer...
Страница 85: ...Ultra XR User Guide 3 1 XR 56 201 5 3 Generator...
Страница 86: ...3 2 XR 56 201 5 Generator 03 18 Generator...
Страница 92: ...3 8 XR 56 201 5 Generator 03 18 Generator...
Страница 93: ...Ultra XR User Guide 4 1 XR 56 201 5 4 Configuration...
Страница 94: ...4 2 XR 56 201 5 Configuration 03 18 Configuration...
Страница 108: ...4 16 XR 56 201 5 Configuration 03 18 Configuration...
Страница 120: ...4 28 XR 56 201 5 Configuration 03 18 Configuration...
Страница 121: ...Ultra XR User Guide 5 1 XR 56 201 5 5 Connections...
Страница 122: ...5 2 XR 56 201 5 Connections 03 18 Connections...
Страница 141: ...Ultra XR User Guide A 1 XR 56 201 5 A Glossary...
Страница 142: ...A 2 XR 56 201 5 Glossary 03 18 Glossary...
Страница 150: ...A 10 XR 56 201 5 Glossary 03 18 Glossary...
Страница 151: ...Ultra XR User Guide B 1 XR 56 201 5 B Installation...
Страница 152: ...B 2 XR 56 201 5 Installation 03 18 Installation...
Страница 158: ...B 8 XR 56 201 5 Installation 03 18 Installation...
Страница 162: ...B 12 XR 56 201 5 Installation 03 18 Installation...
Страница 169: ...Ultra XR User Guide C 1 XR 56 201 5 Ultra XR User Guide C 1 XR 56 201 5 C Applications...
Страница 170: ...C 2 XR 56 201 5 Applications 03 18 Applications...
Страница 176: ...C 8 XR 56 201 5 Applications 03 18 Applications...
Страница 184: ...C 16 XR 56 201 5 Applications 03 18 Applications...


