1
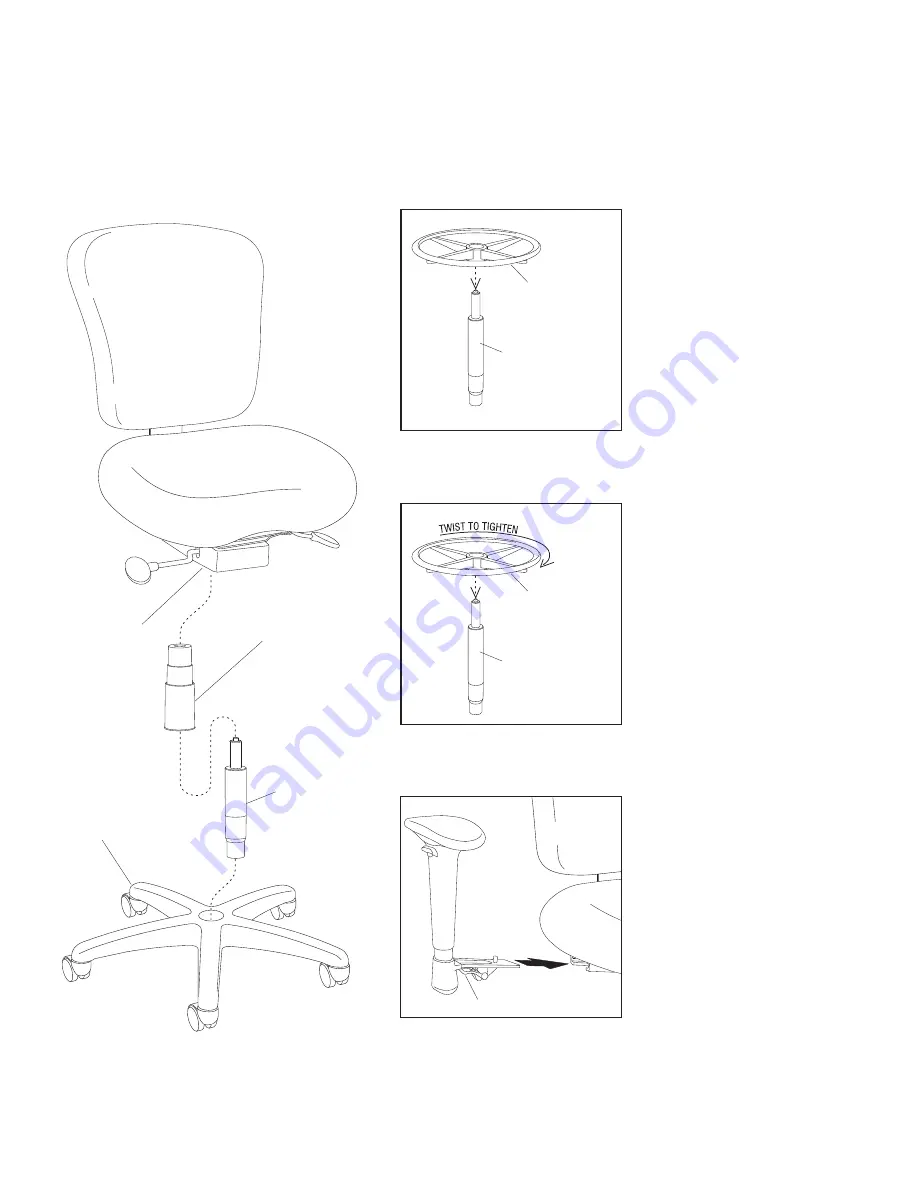
. Carefully unpack all contents from
packaging, then locate and identify
the parts shown in Figure 1.
2. Turn the 5-blade base with casters
to the upright position onto the floor.
Orient the pneumatic cylinder as
shown placing the larger end of the
cylinder into the hole in the center of
the base as illustrated (Figure 1).
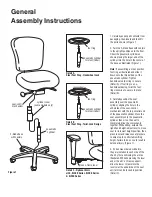
If assembling a stool, position
foot ring as illustrated and
ighten
handwheel on foot ring to secure
(Detail A).
3.
4. I
Note:
slide it
down onto the thicker body of the
pneumatic cylinder. T
Carefully position the seat
assembly over the pneumatic
cylinder, aligning the hole in the
underside of the seat-control
mechanism with the top, smaller end
of the pneumatic cylinder. Press the
seat assembly onto the pneumatic
cylinder, then sit on the seat to
completely drive the components
together. While sitting, actuate the
right-hand height-adjust lever to move
seat to its lowest height position, then
press lever and release seat pressure
to adjust up to comfortable sitting
height. Failure to do so could result in
personal injury (Figure 1).
f chair was ordered with arms,
they are installed to each side of the
chair by first positioning the arm as
illustrated. While depressing the lever
under the arm’s L-frame support,
drive the lower L-frame into the
receiver at the underside of the seat
until arm can be locked in position
(Detail C).
If foot ring is a no-
handwheel desing, twist the foot
ring clockwise to secure in place
(Detail B).
General
Assembly Instructions
5-blade base
with casters
pneumatic cylinder
for stool (taller)
foot ring
seat-control
mechanism
Figure 1
Detail A
Stool Foot Ring - Handwheel Lock
Detail C - Optional Arms
Jr39, Kr200 Series, Kr300 Series
& Kr500 Series
pneumatic
cylinder
press L-frame lever
cylinder cover
(some models only)
pneumatic cylinder
for stool (taller)
foot ring
Detail B
Stool Foot Ring - Twist-Lock Design


