background image

Editing still pictures

79

Playback

6

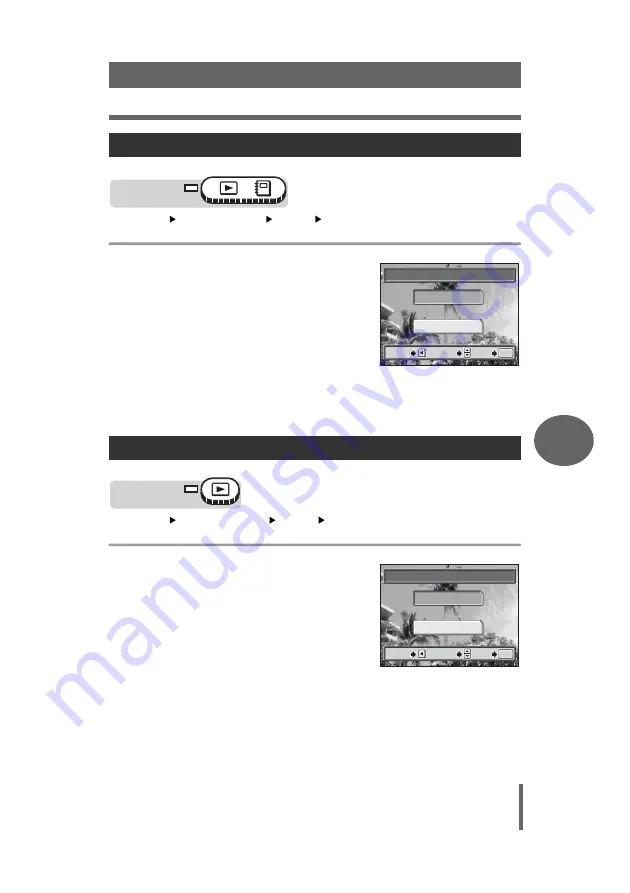
Top menu

[MODE MENU]

[EDIT]

[FISHEYE]

g

“Menus” (P.15)

1

Select [FISHEYE] and 

press 

e

.

• The [BUSY] bar appears and after the 

image is saved, the camera returns to 
the playback mode.

• The fish-eye picture is stored as a 

separate picture from the original.

• To cancel fish-eye, select [CANCEL] 

and press 

e

.

• Creating fish-eye pictures is not 

possible in the following cases.

Movies or when there is insufficient memory space on the card.

Top menu

[MODE MENU] 

[EDIT]

[BLACK & WHITE]

g

“Menus” (P.15)

1

Select [BLACK & WHITE] and 

press 

e

.

• The [BUSY] bar appears and after the 

image is saved, the camera returns to 
the playback mode.

• The black and white picture is stored as 

a separate picture from the original.

• To cancel black and white, select 

[CANCEL] and press 

e

.

• Creating black and white pictures is not 

possible in the following cases.

Movies or when there is insufficient memory space on the card.

Fish-eye

Black and White

Mode dial

SELECT

SELECT

GO

GO

OK

OK

CANCEL

CANCEL

GO

OK

CANCEL

FISHEYE

SELECT

FISHEYE

CANCEL

Mode dial

SELECT

SELECT

GO

GO

OK

OK

CANCEL

CANCEL

GO

OK

CANCEL

BLACK & WHITE

BLACK & WHITE

CANCEL

SELECT

Содержание Stylus 500

Страница 1: ...mend that you take test shots to get accustomed to your camera before taking important photographs In the interest of continually improving products Olympus reserves the right to update or modify info...

Страница 2: ...pictures at a photo shop or on a PictBridge compatible printer Using a computer Using the OLYMPUS Master software on your computer lets you enjoy editing viewing and printing the pictures downloaded...

Страница 3: ...ERA AUTO SPOT OFF ESP DIGITAL ZOOM Using the menus Shooting and playback related functions are set from the menus displayed on the monitor Using the mode dial Use the mode dial to select a shooting or...

Страница 4: ...ntroduces you to the camera s many functions after you have mastered the basics It will help you to use the camera s capabilities to take much more creative pictures with more fun Set the mode dial to...

Страница 5: ...f parts see a list of menus or find what you are looking for Read this part before using the camera Explanation of techniques from basic to advanced giving you an understanding of all the functions re...

Страница 6: ...record modes 25 Movie record modes 26 Card capacity in number of pictures remaining recording time 26 To change the record mode 28 3 Basic shooting functions 29 Selecting a shooting mode according to...

Страница 7: ...Album playback 67 Undo entry 67 Erase album picture 69 Changing the title image 71 Close up playback 72 Index display 73 Selecting the number of pictures 73 Calendar display 74 Slideshow 75 Picture ro...

Страница 8: ...sing the direct printing function 102 Connecting the camera to a printer 103 Flowchart for printing 104 Selecting the print mode 106 Setting the print paper items 107 Selecting pictures you want to pr...

Страница 9: ...on a computer 127 Downloading and saving images 127 Viewing still pictures and movies 129 Printing pictures 130 To download and save images to a computer without using OLYMPUS Master 132 10 Appendix...

Страница 10: ...Table of Contents 10 11 Miscellaneous 151 Menu list 152 List of factory default settings 157 Scene and shooting functions 159 Names of parts 161 Camera 161 Monitor indications 163 Index 167...

Страница 11: ...buttons on your digital camera You can use the advanced functions available on your camera by setting the menu items to adjust the amount of light passing through aperture or altering the focusing ra...

Страница 12: ...ictures n This function allows you to record movies with sound gP 52 Playback modes q This function allows you to view still pictures and movies as well as playback sound gP 64 76 X This function allo...

Страница 13: ...ettings for the shooting conditions for the camera g Selecting a shooting mode according to the situation P 30 d d button In shooting modes press the d button repeatedly to change the setting The sett...

Страница 14: ...ting The setting changes in the following order with each press of the button g Flash shooting P 41 h QUICK VIEW button In shooting modes pressing the QUICK VIEW button displays the last picture taken...

Страница 15: ...menu items that can be used differ depending on the mode About the menus WB MODE MENU K F Top menu Menus are divided into shortcut menus and mode menus Mode menus You can go to each setting s screen d...

Страница 16: ...ting modes K n Playback mode q WB MODE MENU K F gP 47 gP 48 gP 25 Shooting still pictures movies ERASE MODE MENU ALBUM ENTRY m gP 89 gP 64 gP 75 Playback still pictures ERASE MODE MENU ALBUM ENTRY MOV...

Страница 17: ...tab For formatting the memory card SETUP tab For setting basic camera functions and ease of use features ERASE ALBUM MENU UNDO ENTRY m gP 69 gP 67 gP 75 Playback still pictures ERASE ALBUM MENU UNDO...

Страница 18: ...etting basic camera functions and ease of use features TIPS In n mode the mode menu differs in shooting mode and in playback mode For details see Menu list P 152 TIPS For details on mode menu items in...

Страница 19: ...sound 1 Press e in K mode shooting still pictures The top menu is displayed 2 Press d to select MODE MENU 3 Press ac to select the SETUP tab then press d Refer to the arrows on the screen to select a...

Страница 20: ...ow the operation guide at the bottom of the screen and use the arrow pad to select and set a setting Press e unfill the menu closes TIPS In this manual Steps 1 to 5 of how to use the menus are express...

Страница 21: ...subject or adjust the brightness in order to get the picture to come out how you wanted Just knowing which button to press or which setting to change can help you solve these problems Did you know tha...

Страница 22: ...utton is pressed Picture where subject is not clearly defined To prevent the camera from moving hold the camera firmly with both hands while keeping your elbows at your sides When taking pictures with...

Страница 23: ...ject point the camera at an object about the same distance away as the subject 2 Press the shutter button halfway until the green lamp lights When the focus and exposure are locked the green lamp ligh...

Страница 24: ...s lock function by pressing the shutter button halfway then return the camera to the horizontal position while keeping the button pressed halfway and take the picture TIPS Focus on the subject in the...

Страница 25: ...ecreasing the number of pictures that can be saved on a card Increasing the compression rate reduces the file size but makes the pictures appear grainy Normal image modes Image size The number of pixe...

Страница 26: ...Card capacity in number of pictures Image size Using a 32 MB card With sound Without sound SHQ 2560 1920 Low com pression JPEG 8 8 HQ 2560 1920 Normal com pression 25 26 SQ1 2048 1536 39 40 SQ2 1600...

Страница 27: ...ime is displayed on the monitor when a card is inserted in the camera Note The number of storable still pictures and movie recording times listed in the table are approximate The number of storable st...

Страница 28: ...or movies select a record mode from HQ and SQ 2 If you selected SQ2 choose an image size 3 Press e To change the record mode Mode dial For still pictures SHQ SQ1 SQ2 2560 1920 HQ 2560 1920 2048 1536 6...

Страница 29: ...era will adjust the settings for you All you have to do is choose a scene mode whether you are taking a landscape a night scene a portrait style image or whatever and the camera will set the best expo...

Страница 30: ...foreground and the background are in focus Since blues and greens are vividly reproduced in this mode it is excellent for shooting natural scenery k LANDSCAPE PORTRAIT Suitable for taking pictures of...

Страница 31: ...Even fast moving subjects appear to be stationary i BEACH SNOW Suitable for taking pictures at a beach or in snow Lets you take beautiful pictures of scenery with sand or snow j BEHIND GLASS Suitable...

Страница 32: ...For example if you take a picture of a street at night in P mode the lack of brightness will result in a dark picture with only dots of light In the Night Scene shooting mode the true appearance of th...

Страница 33: ...r shooting documents etc Increases contrast between letters and background q CANDLE The optimum mode to take a picture of candles preserving the warm light from fire TIPS NIGHT PORTRAIT shooting makes...

Страница 34: ...SELECT shooting P 36 TIPS To take pictures in the water you need to use an underwater protective case sold separately on the camera While shooting with UNDER WATER WIDE scene mode pressing c Y locks...

Страница 35: ...for what kind of shooting situation is suitable will be displayed Selecting a shooting mode Note Even if you change the record mode or flash mode with a shooting mode other than PROGRAM AUTO they will...

Страница 36: ...SELECT 1 or SHOOT SELECT 2 and press e 3 Take the picture After shooting the screen to select which picture s to erase will appear 4 Select the picture to erase and press a If you want to erase other...

Страница 37: ...om in on a subject you are essentially taking a small area of the picture and making it bigger Therefore the greater the magnification with the digital zoom the grainier the resulting picture will be...

Страница 38: ...M is set to ON a red area appears on the zoom indicator When you reach the limit of the optical zoom the digital zoom is enabled Using the digital zoom Note In n mode the maximum magnification possibl...

Страница 39: ...subject This mode lets you shoot from as close as 7 cm 2 8 to your subject Subjects measuring approximately 2 7 2 0 cm 1 0 0 8 can be captured on the monitor In the mode normal shooting is also possi...

Страница 40: ...ut correctly g ESP Spot metering P 45 Note If you take pictures of your subject at a distance of more than 50 cm 20 in the macro mode the camera will take longer than usual to focus If you take pictur...

Страница 41: ...in a backlight situation or for correcting the color shift produced by artificial lighting especially fluorescent light Flash off The flash does not fire even in low light conditions Use this mode in...

Страница 42: ...he flash will fire lights flash stand by 3 Press the shutter button fully to take the picture TIPS The flash charge indication blinks The flash is charging Wait until turns off Note The flash does not...

Страница 43: ...ting conditions manually and try out different effects For example if it is evening you can add a touch of color to the night sky By setting the white balance to 1 tungsten light you can give the dark...

Страница 44: ...ven when the subject is not in the center of the screen focusing is possible SPOT Focus selection is based on the subject within the AF target mark Top menu MODE MENU CAMERA AF MODE g Menus P 15 1 Sel...

Страница 45: ...surrounding area separately n Exposure is determined by metering within the AF target area In this mode a subject can be shot with optimal exposure regardless of the background light Top menu MODE ME...

Страница 46: ...h a higher ISO setting you can use faster shutter speeds with the same amount of light Top menu MODE MENU CAMERA ISO g Menus P 15 1 Select AUTO 64 100 200 or 400 and press e Note ISO settings are base...

Страница 47: ...up to 2 0 EV in 1 3 EV steps TIPS Often bright subjects such as snow will turn out darker than their natural colors Adjusting toward makes these subjects closer to their real shades For the same reaso...

Страница 48: ...y Suitable for shooting under a cool white fluorescent lamp This type of lamp is generally used in offices etc Top menu WB g Menus P 15 1 Select a white balance setting and press e TIPS You can also...

Страница 49: ...ct enables fine adjustment of the exposure OFF Hides the histogram ON Displays the histogram for every picture When ON is selected in P mode 30 30 30 HQ HQ P o 30 30 30 HQ HQ P o The part indicated in...

Страница 50: ...FF ON g Menus P 15 Note The histogram is not displayed in the following situations even if ON is selected During panorama shooting or composite two pictures shooting The histogram displayed during sho...

Страница 51: ...shooting mode to take a succession of shots of a goal and pick out the best ones later In the country or at a tourist spot Use panorama mode to capture a beautiful mountain range or impressive buildi...

Страница 52: ...displayed on the monitor You can use the zoom button to enlarge your subject 2 Press the shutter button fully to start recording During movie recording N lights red 3 Press the shutter button again to...

Страница 53: ...he flash cannot be used The sound quality deteriorates temporarily if water gets on the microphone or speaker It returns to normal when the water has evaporated Recording will continue until the card...

Страница 54: ...s exposure and white balance are locked at the first frame Top menu MODE MENU CAMERA DRIVE g Menus P 15 1 Select j and press e 2 Take the picture Press the shutter button fully and keep it pressed The...

Страница 55: ...on fully to take the picture Pressing the shutter button halfway locks the focus and exposure The self timer remote control lamp lights for approximately 10 seconds then starts blinking After blinking...

Страница 56: ...g the OLYMPUS Master software Top menu MODE MENU CAMERA PANORAMA g Menus P 15 1 Use the arrow pad to choose at which edge you want to connect the pictures d The next picture is connected at the right...

Страница 57: ...ame on the edge of the screen You have to remember what the part in the frame looked like and take the next picture so it overlaps Compose your shots so that the right edge of the previous picture ove...

Страница 58: ...two different subjects in one picture Top menu MODE MENU CAMERA 2 IN 1 g Menus P 15 1 Take the first shot First picture Second picture Positioned on left Positioned on right Picture during playback 2...

Страница 59: ...shot Once the second picture is taken the monitor automatically returns to the top menu TIPS To cancel shooting in 2 IN 1 mode before taking the first or second picture press the e The first picture t...

Страница 60: ...Select by repeatedly pressing the c Y button If no operation is performed for about 3 seconds the remote control mode is set and the mode selection screen is automatically exited 3 Press the shutter...

Страница 61: ...e remote control mode is not canceled automatically after shooting Go to Step 2 and set the mode to Z OFF Note The camera does not correspond to the switching channel function of the remote control de...

Страница 62: ...During playback sound is output from the speaker The volume can be adjusted g Playback volume P 96 Sound can be added later to still pictures Recorded sound can also be re recorded g Recording sound...

Страница 63: ...e you took several pictures of the same scene because you weren t sure whether they would come out or not That s no way to record important memories With a digital camera you can review your pictures...

Страница 64: ...hem to albums in the card There are 12 albums Each album can have 200 pictures Using the OLYMPUS Master software in the provided CD ROM you can transfer the images from your computer to the album in t...

Страница 65: ...ect the picture you want to enter and press a To select the picture by single frame playback press the T side of the zoom button mark will appear on the selected picture To cancel the selection press...

Страница 66: ...annot enter one picture into several albums With entering into the calendar the picture taken on the same day will be entered on the same day in the calendar If you enter more than 200 pictures with S...

Страница 67: ...he picture press the T side of the zoom button To remove a picture from an album you can use the undo entry function By using the undo entry function you will remove the picture from the album but the...

Страница 68: ...o entry and press a To select the picture by single frame playback press the T side of the zoom button mark will appear on the selected picture To cancel the selection press a again If you want to und...

Страница 69: ...1 Select the method of erasing you want to use SEL IMAGE Allows you to select individual pictures to be erased ALL ERASE Allows you to erase all the pictures within the album all at once Note You can...

Страница 70: ...ed picture To cancel the selection press a again If you want to erase other pictures repeat Step 3 4 When you have selected the picture s to erase press e 5 Select YES and press e Erase all 2 Select A...

Страница 71: ...n the album displayed on the album selection screen Select the album that you want to change Top menu ALBUM MENU SELECT TITLE IMAGE g Menus P 15 1 Select the picture for the title image and press e 2...

Страница 72: ...button the picture is enlarged gradually By using the arrow pad while the enlarged picture is displayed you can shift the picture in the desired direction enabling you to view a different portion To r...

Страница 73: ...side of the zoom button during index display switches to single frame playback g Single frame playback P 64 Use the arrow pad to select a picture b Moves to the previous frame d Moves to the next fra...

Страница 74: ...Zoom button 2005 2 SunMon Tue Wed Thu Fri Sat 30 31 2 1 3 4 6 7 8 9 11 11 10 10 12 12 13 13 14 14 15 15 16 16 17 17 18 18 19 19 20 20 21 21 22 22 23 23 24 24 25 25 26 26 27 27 28 28 5 3 3 1 2 6 7 8 9...

Страница 75: ...p until you cancel it by pressing e Note Months in which no pictures were taken are not displayed If you did not set the date and time with camera or change the date with provided OLYMPUS master the p...

Страница 76: ...ith n and display the top menu Top menu MOVIE PLAYBACK g Menus P 15 The movie is played back When playback ends the camera automatically returns to the beginning of the movie and displays the MOVIE PL...

Страница 77: ...movie c Displays the last frame of the movie d Displays the next frame The movie can be played continuously by holding the button down b Displays the previous frame The movie can be played continuous...

Страница 78: ...ted pictures into sepia tone pictures and store them as new pictures Q This function enables you to change the image size of selected pictures and store them as new pictures This is useful when you wa...

Страница 79: ...enu MODE MENU EDIT BLACK WHITE g Menus P 15 1 Select BLACK WHITE and press e The BUSY bar appears and after the image is saved the camera returns to the playback mode The black and white picture is st...

Страница 80: ...image size and press e The BUSY bar appears and after the image is saved the camera returns to the playback mode The resized picture is stored as a separate picture from the original To cancel resizin...

Страница 81: ...ress e The BUSY bar appears and after the image is saved the camera returns to the playback mode The trimmed picture is stored as a separate picture from the original If you want to trim the picture a...

Страница 82: ...te Trimming is not possible in the following cases Movies or when there is insufficient memory space on the card If a trimmed picture is printed out it may appear grainy Note If the microphone is fart...

Страница 83: ...The index is stored as a new picture To cancel the editing function select CANCEL and press e TIPS The index is stored as a still picture in a different record mode from the original movie Note The in...

Страница 84: ...e arrow pad to select the picture you want to display TIPS You are recommended to use the optional AC adapter when playing back pictures on a TV The close up playback index display and auto playback f...

Страница 85: ...nal type you will not be able to play back the recorded pictures properly on the TV Top menu MODE MENU SETUP VIDEO OUT NTSC PAL g Menus P 15 Top menu ALBUM MENU VIDEO OUT NTSC PAL g Menus P 15 Video o...

Страница 86: ...n INFO is on When INFO is off Note If the picture has been taken with a different camera setting INFO to on in q mode only displays the date and time frame number and battery check indication If u is...

Страница 87: ...shooting mode and playback mode g Histogram P 49 Top menu MODE MENU PLAY u OFF ON g Menus P 15 Note The histogram displayed during shooting may differ from the histogram displayed during playback The...

Страница 88: ...nu ALBUM MENU 0 OFF ON g Menus P 15 To cancel protection select OFF and press e This function erases recorded pictures Pictures can be erased either one at a time or all the pictures on the card Note...

Страница 89: ...the menu is exited To cancel single frame erase select NO and press e This function erases all the pictures on the card Top menu MODE MENU CARD ALL ERASE g Menus P 15 1 Select YES and press e All the...

Страница 90: ...e sure that you save or transfer important data to a computer before formatting the card Top menu MODE MENU CARD FORMAT g Menus P 15 1 Select YES and press e The BUSY bar is displayed while the card i...

Страница 91: ...s displayed when you turn the camera on That s originality for you And if you lend the camera to friends from abroad you can select the appropriate language for on screen display Making use of these f...

Страница 92: ...he camera again it will return to HQ as default setting OFF The settings made before the power is turned off are saved However each setting will return to the factory default setting with a shooting m...

Страница 93: ...the picture you have just taken Pressing the shutter button halfway during Rec View lets you resume shooting immediately OFF The picture being recorded to the card is not displayed This is useful whe...

Страница 94: ...OFF 1 or 2 for SCREEN then press b OFF No picture is displayed 1 A picture is displayed 2 The registered picture is displayed If there is no registered picture nothing is displayed 2 Select OFF LOW or...

Страница 95: ...the currently registered picture and register a new one To register a new picture select RESET and press e If you select KEEP the screen returns to the menu 1 Select the picture you want to register...

Страница 96: ...lume of still pictures or playback volume of movies Top menu MODE MENU SETUP VOLUME OFF LOW HIGH g Menus P 15 Top menu ALBUM MENU VOLUME OFF LOW HIGH g Menus P 15 You can adjust the volume of the came...

Страница 97: ...ct LOW or HIGH and press e This function lets you adjust the brightness of the monitor to make it easier to see the image Top menu MODE MENU SETUP s g Menus P 15 Top menu ALBUM MENU s g Menus P 15 1 A...

Страница 98: ...if a new card is inserted the folder number and file number are retained from the previous card so the same file number is not used on different cards This helps you to manage multiple cards This met...

Страница 99: ...ter taking or viewing pictures to allow for proper performance of the pixel mapping function Top menu MODE MENU SETUP PIXEL MAPPING g Menus P 15 1 Perss d to display START and press e The BUSY bar is...

Страница 100: ...nd time are completely set The time is displayed in the 24 hour format Consequently 2 p m is displayed as 14 00 4 Press e For a more accurate setting press e when the time signal hits 00 seconds Note...

Страница 101: ...pictures you want to print and decide how many prints you want If you print the pictures at home you can either connect the camera directly to the printer or you can connect the camera to a computer...

Страница 102: ...and printing out pictures directly STANDARD All printers that support PictBridge have standard print settings If STANDARD is selected on the settings screens gP 106 to P 108 images are printed accord...

Страница 103: ...s e After ONE MOMENT screen appears the camera and the printer will be connected 4 Select ALL IMAGES or ALBUM and press e ALL IMAGES Select from all pictures in the card and print ALBUM Select the pic...

Страница 104: ...nt paper setting TIPS Operate the print setting following the camera s monitor Go to Flowchart for printing Flowchart for printing PRINT MODE SELECT PRINT ALL PRINT MULTI PRINT ALL INDEX SELECT GO OK...

Страница 105: ...isplayed picture at once or you can make the print reservation and select the other pictures at same time PRINT INFO DATE FILE NAME WITHOUT WITHOUT 1 GO GO OK OK SET SET SELECT SELECT GO OK SET SELECT...

Страница 106: ...n the card Makes split print with a picture inset in each split plane Prints all the pictures stored in the card and makes one print for each picture Prints selected pictures Example of MULTI PRINT PR...

Страница 107: ...nted right away PRINT e Prints the currently displayed picture If there is a picture that SINGLE PRINT reservation has been already applied to only the picture with reservation will be printed SINGLE...

Страница 108: ...re is small enlarging it may result in graininess when printing it Print when you have set the pictures for printing and printing data OK Transfers images you print to the printer CANCEL Cancel printi...

Страница 109: ...ill be lost When you have finished printing disconnect the camera from the printer 1 In the PRINT MODE SELECT screen select b REMOVE USB CABLE is displayed 2 Remove the USB cable from the camera 3 Rem...

Страница 110: ...rinter NO INK The printer has run out of ink Replace the ink cartridge in the printer JAMMED The paper is jammed Remove the jammed paper SETTINGS CHANGED The printer s paper cassette has been removed...

Страница 111: ...is indicated by dpi dots per inch The higher the dpi value the better the printed results Keep in mind however that the dpi of the picture does not change This means that when you print an image with...

Страница 112: ...LECT GO OK CANCEL Select making print reservations for only selected picture s or all the pictures stored on the card g Selecting print reservation mode P 113 Follow the operation guide displayed here...

Страница 113: ...ne Selecting print reservation mode PRINT ORDER 3 3 8 8 SET CANCEL SELECT SELECT GO GO OK OK CANCEL CANCEL SELECT GO OK CANCEL The printing data such as the number of prints will be stored with the pi...

Страница 114: ...l reservation made will be lost To return to the previous setting press b Selecting the picture to print Setting the printing data Completing the print reservation TIPS What happens to the single fram...

Страница 115: ...BUM MENU g Menus P 15 To reset the print reservation data for all the pictures 1 Select RESET and press e 2 Press b to return to the playback menu Press e to exit the menu To reset the print reservati...

Страница 116: ...n data press e 5 Select NO or DATE and TIME and press e The selected items will then be saved with the updated print reservation information 6 Select SET and press e The data will be stored To exit th...

Страница 117: ...hem arrange them by date or category or attach them to e mail and send them over the Internet There are all kinds of ways you can use your pictures with a computer You can run a slideshow post your pi...

Страница 118: ...l on the card If the data cannot be downloaded from the camera using the USB cable Image files may be downloaded using the optional PC card adapter For details visit the Olympus web site at the addres...

Страница 119: ...o the Help guide and OLYMPUS Master reference manual What is OLYMPUS Master Download images from the camera or other media View images and movies You can run a slideshow and play back sound Manage ima...

Страница 120: ...ls 65 536 colors or more Macintosh OS Mac OS X 10 2 or later CPU Power PC G3 500MHz or later RAM 128 MB or more at least 256 MB is recommended Hard disk capacity 300 MB or more Connector USB port Moni...

Страница 121: ...follow the on screen instructions When the QuickTime licensing agreement is displayed read the agreement and click Agree to proceed with the installation The OLYMPUS Master installation screen is dis...

Страница 122: ...asking whether or not you want to install Adobe Reader is displayed Adobe Reader is required to read the OLYMPUS Master instruction manual If this screen is not displayed Adobe Reader is already inst...

Страница 123: ...en the OLYMPUS Master licensing agreement is displayed read the agreement and click Continue and then Agree to proceed with the installation The screen confirming that installation is completed is dis...

Страница 124: ...ed The camera is recognized as a Removable Disk Windows XP When the camera is connected to the computer the screen for selecting an image file operation is displayed As OLYMPUS Master will be used to...

Страница 125: ...menu Follow the prompts and fill in the registration form Macintosh 1 Double click the OLYMPUS Master icon in the OLYMPUS Master folder The main menu is displayed When OLYMPUS Master is started up for...

Страница 126: ...a d Browse Images button Displays the browse window e Print Images button Displays the print menu f Create and Share button Displays the editing menu g Backup Images button Creates backup images h Upg...

Страница 127: ...are displayed 3 Select the image files and click Transfer Images A window indicating that the download is complete is displayed 4 Click Browse images now The downloaded images are displayed in the br...

Страница 128: ...98SE 1 Double click the My Computer icon and right click the Removable Disk icon to display the menu 2 Click Eject on the menu Windows Me 2000 XP 1 Click the Unplug or Eject Hardware icon in the syste...

Страница 129: ...ou want to view The camera switches to view mode and the picture is enlarged To return to the main menu click Menu in the Browse Images window Note Windows Me 2000 XP When you click Unplug or Eject Ha...

Страница 130: ...d calendar menus The explanation below uses the photo menu 1 Click Print Images on the OLYMPUS Master main menu The print menu is displayed Item Description 1 Playback slider Move the slider to select...

Страница 131: ...r settings screen is displayed Make the necessary printer settings 4 Select a layout and size To print the date and time with your image check the box next to Print Date and select between Date and Da...

Страница 132: ...our computer is running Windows 98SE you will need to install the USB driver Before connecting the camera to your computer with the USB cable double click the files from the following folders on the O...

Страница 133: ...OLYMPUS Here you will find what to do when you are stuck or don t understand the meaning of the terms used in this manual Refer to this section for basic troubleshooting camera care and a full glossa...

Страница 134: ...print reservations or editing the still pictures can be recorded Replace the card or erase unwanted pictures Before erasing download important images to a computer g BATTERY EMPTY The battery is empt...

Страница 135: ...Ref page No picture is taken when the shutter button is pressed The battery is exhausted Charge the battery The camera is in the playback mode Set the mode dial to a mode other than q or X P 12 The f...

Страница 136: ...ed the date time setting is canceled Set the date time again P 100 The settings are returned to the factory default settings when the camera is turned off ALL RESET is set to ON Set ALL RESET to OFF i...

Страница 137: ...sh does not fire in the panorama mode P 56 The battery run time is brief You are using the camera in a cold environment Battery performance deteriorates in low temperatures Keep the camera warm by put...

Страница 138: ...requiring use of the flash Set the flash mode to AUTO P 41 The lens was dirty Clean the lens Use a commercially available blower blush and then wipe with a lens cleaner to remove dust Mold may form o...

Страница 139: ...han usual Set DRIVE to o in the mode menu P 54 The center of the subject is too bright If the center of the subject is too bright the image as a whole emerges darker Adjust the exposure compensation t...

Страница 140: ...ure is displayed on the TV when connected to the camera The video output signal is incorrect Set the video output signal according to the region where used P 85 The TV video signal setting is incorrec...

Страница 141: ...s with a commercial blower then wipe gently with a lens cleaner Card battery and charger Wipe gently with a soft dry cloth Storage When storing the camera for extended periods remove the battery AC ad...

Страница 142: ...he battery or connect or disconnect the AC adapter while the camera is turned on Doing so could affect the camera s internal settings or functions The AC adapter can be used within the range of AC100V...

Страница 143: ...into their own eyes or those of another child Accidentally being injured by the moving parts of the camera Do not look at the sun or strong lights with the camera To avoid damaging your eyes never aim...

Страница 144: ...arefully remove the battery Never remove the battery with bare hands which may cause a fire or burn your hands Contact the nearest Olympus service center immediately Do not use the camera with wet han...

Страница 145: ...ug has a faulty contact DANGER This camera uses a lithium ion battery specified by Olympus Charge batteries with the specified charger Do not use any other chargers Never heat or incinerate batteries...

Страница 146: ...t anything other than the recommended battery into the battery compartment Never subject batteries to strong shocks or continuous vibration CAUTION Before loading always inspect the battery carefully...

Страница 147: ...on the lens Before storing the camera for a long period remove the battery Select a cool dry location for storage to prevent condensation or mold from forming inside the camera After storage test the...

Страница 148: ...ect to low temperatures the LCD monitor may take a long time to turn on or its color may change temporarily When using the camera in extremely cold places it is a good idea to occasionally place it in...

Страница 149: ...f the image separately Exposure The amount of light used to capture an image The exposure is determined by the time the shutter is open shutter speed and the amount of light that passes through the le...

Страница 150: ...make up an image Clear large sized printed images require millions of pixels Sleep Mode A mode designed to save battery life The camera automatically enters the sleep mode if you do not operate it fo...

Страница 151: ...and buttons the names and meanings of the icons that are displayed on the monitor and the lists of the top menus and mode menus An index also helps you find the pages where a function or item that yo...

Страница 152: ...OFF ON P 38 AF MODE iESP SPOT P 44 R OFF ON P 62 PANORAMA P 56 2 IN 1 P 58 u OFF ON P 49 CARD FORMAT YES NO P 90 SETUP ALL RESET OFF ON P 92 W 1 P 93 PW ON SETUP SCREEN OFF 1 2 P 94 VOLUME OFF LOW HIG...

Страница 153: ...AMERA ESP 5 ESP 5 P 45 ISO AUTO 64 100 200 400 P 46 DIGITAL ZOOM OFF ON P 38 CARD FORMAT YES NO P 90 SETUP ALL RESET OFF ON P 92 W 1 P 93 PW ON SETUP SCREEN OFF 1 2 P 94 VOLUME OFF LOW HIGH COLOR NORM...

Страница 154: ...78 FISHEYE FISHEYE CANCEL P 79 BLACK WHITE BLACK WHITE CANCEL P 79 SEPIA SEPIA CANCEL P 80 Q 640 480 320 240 CANCEL P 80 P P CANCEL P 81 CARD ALL ERASE YES NO P 89 FORMAT YES NO P 90 SETUP ALL RESET O...

Страница 155: ...INFO OFF ON P 86 EDIT INDEX INDEX CANCEL P 83 CARD ALL ERASE YES NO P 89 FORMAT YES NO P 90 SETUP ALL RESET OFF ON P 92 W 1 P 93 PW ON SETUP SCREEN OFF 1 2 P 94 VOLUME OFF LOW HIGH COLOR NORMAL BLUE G...

Страница 156: ...ctures Top menu Tab Function Setting Ref page ALBUM MENU SEL ALBUM P 67 0 OFF ON P 88 y 2 90 0 90 P 76 SELECT TITLE IMAGE OK CANCEL P 71 2 U P 111 VOLUME OFF LOW HIGH P 96 s P 97 VIDEO OUT NTSC PAL P...

Страница 157: ...ode Playback mode ZOOM WIDE SCENE P OFF B B OFF FLASH K AUTO n K HQ F 0 0 WB AUTO EPS 5 ESP DRIVE o ISO AUTO DIGITAL ZOOM OFF AF MODE SPOT R still pictures OFF u OFF SHUTTER SOUND 1 LOW REC VIEW ON FI...

Страница 158: ...where the camera is sold SEPIA SEPIA Q 640 x 480 P P INDEX INDEX SCREEN SETUP OK VOLUME LOW G 9 UNDO ENTRY SEL IMAGE ERASE SEL IMAGE 0 OFF y 0 SELECT TITLE IMAGE OK ALL ERASE NO FORMAT NO ALL RESET O...

Страница 159: ...9 9 9 9 9 ESP n 9 9 9 9 9 9 9 9 9 ESP j 9 9 9 9 9 9 9 9 9 9 ISO 9 9 9 9 9 9 9 9 9 9 DIGITAL ZOOM 9 9 9 9 9 9 9 9 9 AF MODE 9 9 9 9 9 9 9 9 iESP iESP R 9 9 9 9 9 9 9 9 9 9 PANORAMA 9 9 9 9 9 9 9 9 9 2...

Страница 160: ...9 9 9 3 9 9 6 9 9 F 9 9 9 9 9 9 9 9 9 9 9 WB 9 9 9 9 9 9 9 9 9 9 9 ESP n 9 9 9 9 9 9 9 9 9 9 9 j 9 9 9 9 j j ISO 9 9 9 9 9 9 9 9 9 9 9 DIGITAL ZOOM 9 9 9 9 9 9 9 9 9 9 9 AF MODE 9 9 9 9 9 9 9 9 9 9 R...

Страница 161: ...s Names of parts Camera Remote control receiver gP 60 POWER switch Lens Self timer Remote control lamp gP 55 60 DC IN jack gP 142 Flash gP 41 Shutter button Multi connector gP 84 103 124 Microphone gP...

Страница 162: ...P 12 Speaker LampgP 128 Monitor gP 97 164 Connector cover gP 84 103 124 Zoom button W T GU gP 37 72 73 Arrow pad The Arrow pad can be used to set the macro mode flash mode and other settings It can al...

Страница 163: ...to display on the screen Screens with the information display set to ON are shown below g Information display P 86 Shooting modes Monitor indications Still picture Movie ISO100 ISO100 30 30 30 2560 19...

Страница 164: ...ts Blinks P 42 6 Macro mode Super macro mode P 39 7 Flash mode P 41 8 Drive o j P 54 9 Self timer Remote control Y P 55 P 60 10 Sound record R P 62 11 Record mode SHQ HQ SQ1 SQ2 SQ P 25 12 Image size...

Страница 165: ...icture Movie 05 05 02 02 16 15 16 15 30 30 100 100 0030 0030 HQ HQ 10 10 30 30 2 0 2 0 ISO ISO400 400 2560 2560 1920 1920 SIZE SIZE 5 00 00 00 00 00 00 36 36 7 7 100 100 0030 0030 HQ HQ 320 320 240 24...

Страница 166: ...Exposure compensation 2 0 2 0 P 47 9 White balance 5 3 1 w x y P 48 10 ISO ISO64 ISO100 ISO200 ISO400 P 46 11 Date and time 05 2 16 15 30 P 100 12 Frame number Playing time Total recording time 30 00...

Страница 167: ...ovement warning 164 CANDLE q 33 Card 26 147 CCD 99 149 Close up playback U 72 Cloudy day 3 48 Creating an index 83 CUISINE o 33 D Date and time X 100 DCF 149 DIGITAL ZOOM 37 Direct printing 102 DOCUME...

Страница 168: ...rogram auto P 30 Protect 0 88 PW ON SETUP 94 R REC VIEW 93 Record mode K 25 28 Recording sound R 62 82 Recording sound with still pictures R 62 Recording time 77 Red eye reduction flash 14 41 Remainin...

Страница 169: ...81 108 Tungsten light 1 48 U UNDER WATER MACRO s 34 UNDER WATER WIDE r 34 UNDO ENTRY ALBUM 68 USB cable 103 124 132 USB driver 120 132 V VIDEO OUT 85 VOLUME 96 W White balance WB 48 X xD Picture Card...

Страница 170: ...40 23 07 61 Goods delivery Bredowstrasse 20 22113 Hamburg Germany Letters Postfach 10 49 08 20034 Hamburg Germany European Technical Customer Support Please visit our homepage http www olympus europa...

Отзывы: