82
5
Click the [OK] button.
The Printer Settings are complete.
●
Automatic Compensation Settings
Using Exif Print (Exif 2.2) or PRINT Image Matching, you can print with automatic image compensation.
When you shoot with a digital camera that supports the Exif Print function, extra data such as information about
the scene is recorded with the image. Using this extra data allows you to compensate the print image for the
best results.
With a combination of a digital camera and printer that both support the PRINT Image Matching function, you
can easily print using the PRINT Image Matching function. PRINT Image Matching is a new technology that
connects the digital camera and printer. A digital camera equipped with this function includes printer
commands together with the image files, allowing the digital camera to determine the ideal color settings for
printing.
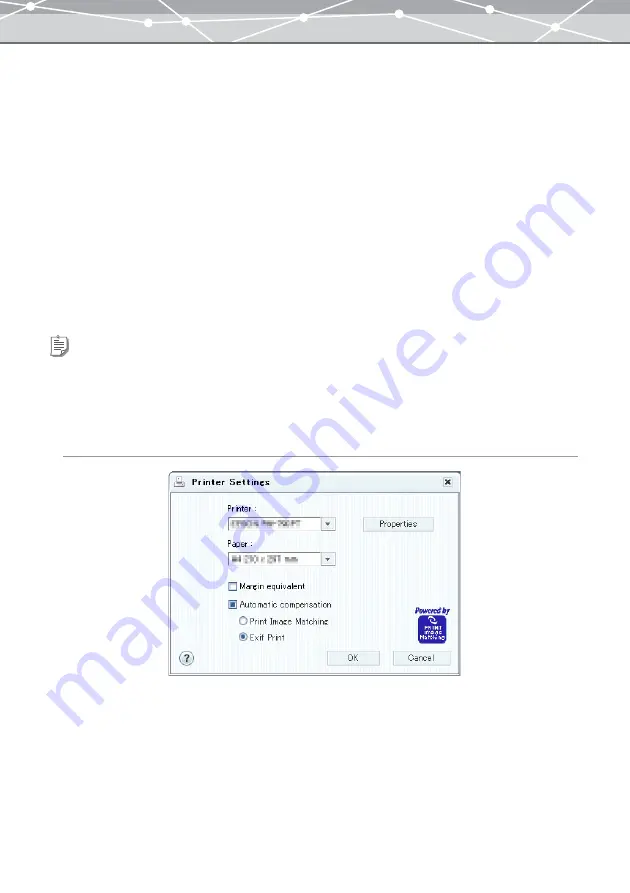
To perform automatic compensation, follow the procedure below.
For Windows
1
In any print window, select [Printer Settings] from the [File] menu, or click
[Settings] on the toolbar.
The [Printer Settings] dialog box appears.
Tips
•
You can select [PRINT Image Matching] only for a printer that supports it. Further, depending on the printer, carrying out
automatic correction may require you to make detailed settings, such as changing the paper type.
•
The automatic compensation can be applied only to the photo, index, and contact sheet printing.
•
You cannot apply automatic compensation to the edited images in each print window.
Содержание Master 1.1 Plus
Страница 1: ...Software for Editing and Managing Images Operating Instructions OLYMPUS Master 1 1 Plus ...
Страница 30: ...30 Main Menu The main menu has the following components ...
Страница 94: ...94 5 Click the OK button The shooting date and time is changed ...
Страница 109: ...109 4 Click the Find button Searching starts The search results are displayed in the image display area ...
Страница 136: ...136 6 Click the Transfer button The selected files are transferred to the camera album ...
Страница 163: ...163 3 Click the OK button The settings are applied to the calendar you created ...
Страница 245: ...245 5 Click the Save button The Save As dialog box appears g page 246 ...
Страница 255: ...255 Create button Launches the CD DVD writing software No Item Description ...
Страница 321: ...321 4 Click the Apply button The image in the image display area is resized ...
Страница 323: ...323 3 Click the Apply button The image in the image display area is cropped ...
Страница 332: ...332 5 Click the Apply button The hue saturation and lightness of the image in the image display area are adjusted ...
Страница 338: ...338 4 Click the Apply button The corrected image appears in the image display area ...
Страница 351: ...351 3 Click the Apply button The movie in the movie display area rotates according to the setting you made ...
Страница 355: ...355 6 Click the Apply button The specified section is removed from the movie ...
Страница 382: ...382 Wallpaper 209 Work file 168 176 Z Zoom In 308 Zoom Out 308 ...
Страница 383: ...VE898801 ...


