Margin Alignment
Where
special
advertising
letters,
circulars
or
other
documents
require
the
right-hand
margin
to
be
as
even
as
the
lett-hand
margin,
a
rough
draft
of
such
work
should
be
typed
first,
to
calculate
the
number
of letters to be levelled
out
on each line.
The shortest,
or
another
line
of
average
length
can
be
taken
as
the
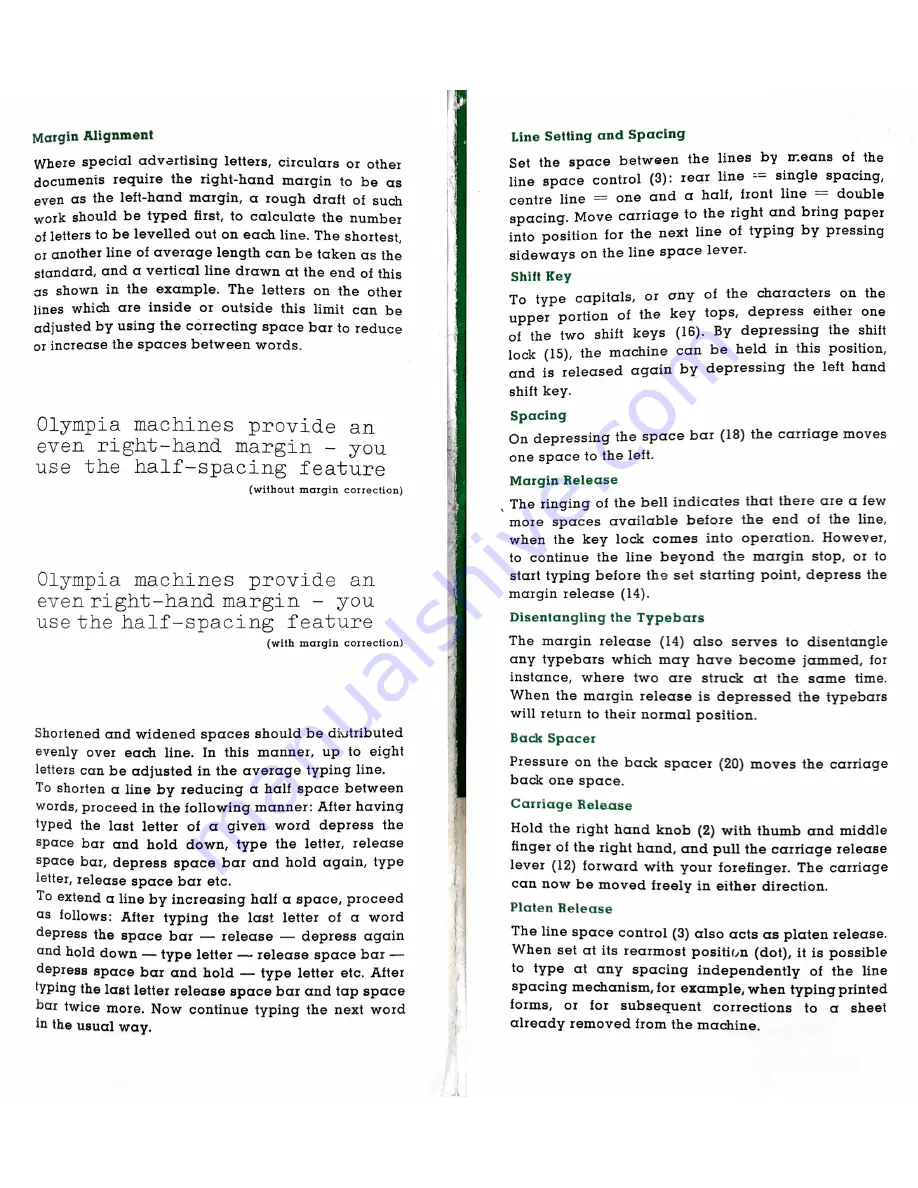
standard, and a vertical line drawn at the end of this
as
shown
in
the
example.
The
letters
on
the
other
lines
which
are
inside
or
outside
this
limit
can
be
adjusted by using the correcting space bar to reduce
or
increase
the
spaces
between
words.
Olympia
machines
provide
an
even
right—hand
margin
—
you
use
the
half—spacing
feature
(without
margin
correction)
Olympia
machines
provide
an
evenxight—handgmargin
—
you
usethe_half~spacing
feature
(with
maxgin
correction)
Shortened and widened spaces should be diutributed
evenly
over
each
line.
In
this
manner,
up
to
eight
letters
can be
adjusted in the
average
typing line.
To
shorten
a
line
by
reducing
a
half
space
between
words, proceed in the following manner: After having
Wped
the
last
letter
of
a
given
word
depress
the
Space
bar
and
hold
down,
type
the
letter,
release
Space
bar,
depress
space
bar
and
hold
again,
type
letter, release space bar etc.
To
extend a line by increasing
half
a space,
proceed
as
iollows:
After
typing
the
last
letter
of
a
word
dePress the space bar — release — depress
again
and
hold
down — type
letter —-
release
space
bar —
depress space bar and hold — type letter etc. After
tYping the last letter release space bar and tap space
Par twice more. Now continue typing the next word
In
the
usual
way.
Line
Setting and Spacing
Set
the
space
between
the
lines
by
means
of
the
line
space
control
rear
line
==
single
spacing,
centre
line
=
one
and
a
half,
front
line
=
double
spacing. Move carriage to the right and bring paper
into
position
for
the
next
line
of
typing
by
pressing
sideways on the line space lever.
Shift
Key
To
type
capitals,
or
any
of
the
characters
on
the
upper
portion
of
the
key
tops,
depress
either
one
of
the
two
shift
keys
By
depressing
the
shift
lock
the
machine
can
be
held
in
this
position,
and
is
released
again
by
depressing
the
left
hand
shift
key.
Spacing
On
depressing
the
space
bar
(18)
the
carriage
moves
one
space
to
the
left.
Margin Release
The
ringing
of
the
bell
indicates
that
there
are
a
few
more
spaces
available
before
the
end
of
the
line,
when
the
key
lock
comes
into
operation.
HoweVer,
to
continue
the
line
beyond
the
margin
stop,
or
to
start
typing
before
the
set
starting
point,
depress
the
margin release
Disentangling the Typebars
The
margin
release
(14)
also
serves
to
disentangle
any
typebars
which
may
have
become
jammed,
for
instance,
where
two
are
struck
at
the
same
time.
When
the
margin
release
is
depressed
the
typebars
will
return
to
their
normal
position.
Back
Spacer
Pressure
on
the
back
spacer
(20)
moves
the
carriage
back
one
space.
Caniage Release
Hold
the
right
hand
knob
(2)
with
thumb
and
middle
finger of the right hand, and pull the carriage release
lever
(12)
forward
with
your
forefinger.
The
carriage
can
now
be
moved
freely
in
either
direction.
Ptaten
Release
The line space
control
(3)
also
acts
as platen release.
When
set
at
its
rearmost
position
(dot),
it
is
possible
to
type
at
any
spacing
independently
of
the
line
spacing mechanism,ior example, when typing printed
forms,
or
for
subsequent
corrections
to
a
sheet
already removed from the machine.


