background image

38

P

RINT


HEAD


PRECAUTIONS

This fax machine may use either a 

monochrome

 (black) or 

color

print head:

monochrome

, for use as a 

fax machine

 or 

black & white

printer

;

color

, for use as a 

color printer

.

notE

If you have installed the color print head, the documents
received 

will not be printed immediately

 but saved in the

memory of the fax machine. As, once its memory is full, the fax
machine will not receive any more documents, 

always re-

member 

to reinstall the monochrome print head whenever

current use of the fax machine is restored.

As you will change the print head frequently according to the current
use of the fax machine, take the following precautions:

avoid touching or resting 

the print head on its nozzles or

electrical contacts;

do not try to refill 

the print head: you could damage the print

head or the fax machine;

always 

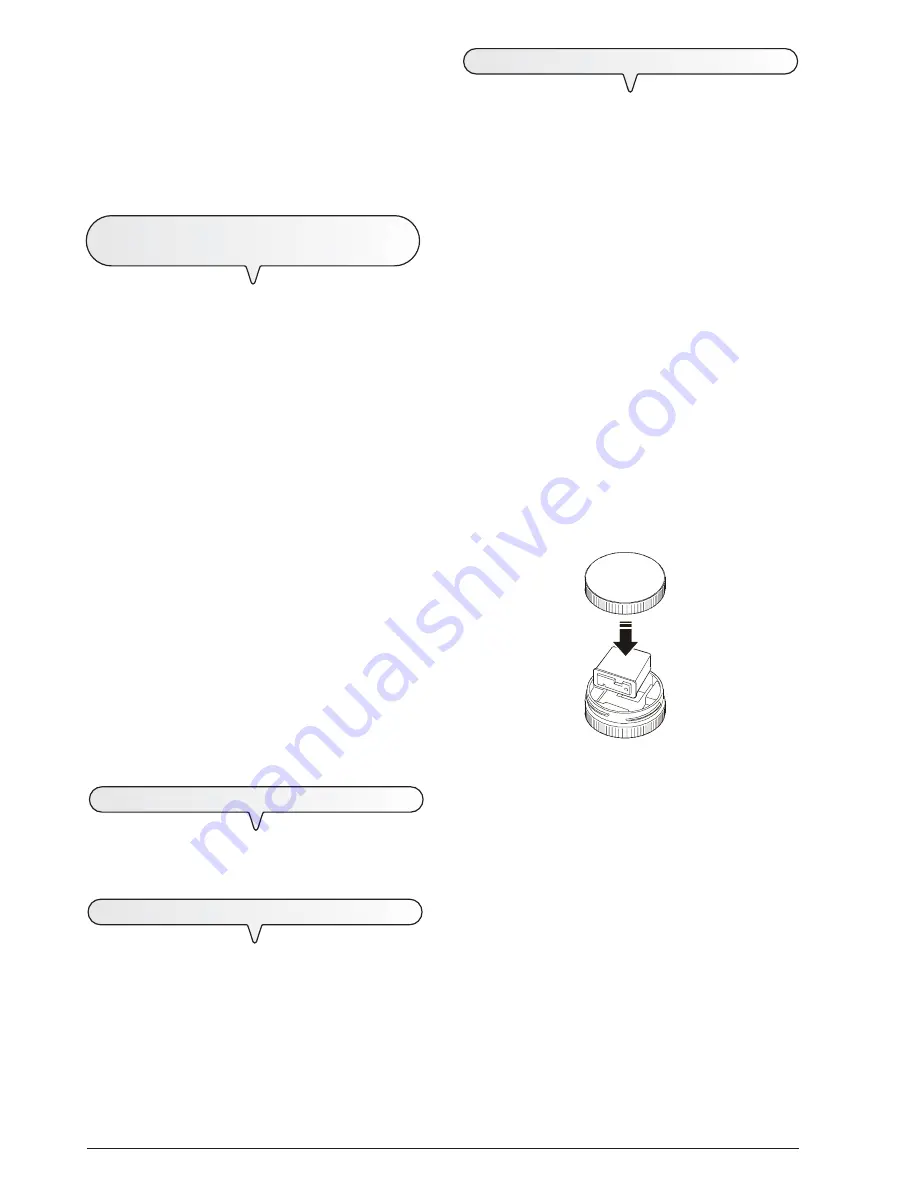
put the print head that is not being used back

 in its

box

:

in this way, you will prolong the life of the print head and get lasting
printing quality.

notE

The fax machine automatically recognizes the type of print
head installed and controls ink consumption by means of a
special internal mechanism, so that the 

INK OUT

 message

will appear at the appropriate moment on the display.
To ensure that the ink level detected reflects the actual level in
the print head,

 never install the print heads of your fax

machine onto other fax machines or an ink jet printer

.

note

If you have not installed any 

e-mail

 application with a 

Simple

MAPI

 interface, the 

Internet LinkFax

 icon will not appear at the

bottom of the screen. In addition, whenever the system is restarted,
a message will appear to inform you that there is no e-mail
application installed.
The 

Internet LinkFax

 icon will be automatically restored once

an e-mail application has been installed and set up.

T

O


UNINSTALL


THE

 "

LINKFAX


PRO

"

SOFTWARE

The uninstallation procedure (valid for all four Windows environments)
described below will enable you to completely and correctly remove
all the files loaded from the CD and/or created on the PC during the
software installation procedure.

Click on the Windows 

START

 button in the bottom left-hand corner

of the screen.

Select "

Settings

" and then "

Control Panel

".

Double click on "

Add programs

".

Select 

LinkFax Pro 

from the "

Add/Remove

" dialog box.

Click on the "

Add/Remove

" button.

Follow carefully the instructions that appear on the screen until the
uninstallation procedure has been completed.

important

Before uninstalling the 

LinkFax Pro

 software, make sure

that all the software applications are closed. To close the

Internet Linkfax

 application, click the right mouse button on

the 

Internet Linkfax

 icon in the bottom right-hand corner of

the screen and select the "Exit" item.

note

To uninstall the 

LinkFax Pro

 printer, never remove the device

from the 

Printers

 folder of Windows 

Control Panel

. Always

carry out the uninstallation procedure described above.

T

ROUBLESHOOTING


GUIDE

If problems arise during installation or use of the 

LinkFax Pro  

software,

see the "readme.txt" file on the CD.

A

CCESSING


THE


ON

-

LINE


DOCUMENTATION

The installation procedure loads not only the software but also the

on-line documentation 

files that provide further information about

the multi-functional characteristics of the fax machine.

In all four Windows environments: 98 Second Edition/ME/
2000/XP

To access the on-line documentation, click on the icon of the rel-
evant function on the 

Start/Programs/LinkFax Pro

 menu.

Содержание Jet-Lab 490

Страница 1: ...INSTRUCTIONS Ink Jet Fax Fax Lab 450 Jet Lab 490...

Страница 2: ...s certified by the application of the mark to the product Networkcompatibilitydeclaration This product has been designed and developed to operate in the networks of all European Community countries an...

Страница 3: ...567890123456789012123456789012345678901234567890121234567890123456789012345678901 12345678901234567890123456789012123456789012345678901234567890121234567890123456789012345678901 1234567890123456789012...

Страница 4: ...7890123456789012345678901212345678901234 12345678901234567890123456789012123456789012345678901234567890121234567890123456789012345678901212345678901234 123456789012345678901234567890121234567890123456...

Страница 5: ...INGA SEARCH IN THE PHONEBOOK 21 TO REDIAL ONE OF THE LAST 20 INCOMING NUMBERS OR ONE OF THE LAST 10 OUTGOING NUMBERS 22 TO MAKE A COPY 23 WHATDOCUMENTS CAN BE COPIED 23 TO MAKEACOPY 23 MORE SOPHISTICA...

Страница 6: ......

Страница 7: ...surface free of vibrations to prevent it from falling and getting damaged or causing injury to people Keep the fax machine in a dust free place away from sources of water steam or excessive heat Do no...

Страница 8: ...er end of the cable into the wall telephone line socket see diagrams case 1 case 2 or case 3 CONNECTING THE EXTERNAL ANSWERING MACHINE AND EMERGENCY TELEPHONE Case 1 connection 1 Place the fax machine...

Страница 9: ...ONNECTION GERMANY CORD FAX EMERGENCY TELEPHONE OR EXTERNAL ANSWERING MACHINE Connection sockets OTHER DEVICES CASE 3 CONNECTION AUSTRIA CORD FAX EMERGENCY TELEPHONE OR EXTERNAL ANSWERING MACHINE Conne...

Страница 10: ...u can move on to set the date and time directly TO SET THE LANGUAGE AND THE COUNTRY OF DESTINATION The display shows the language in which the messages are displayed For example ITALIANO To select the...

Страница 11: ...f you have chosen the 12 hour time format the display will show the letter p post meridiem or the letter a ante meridiem To switch from one letter to another move the cursor to the letter to be change...

Страница 12: ...lines present set 0 to clean the nozzles again if the new print test continues to be unsatisfactory repeat the procedure another time If the print test result is satisfactory press the button to exit...

Страница 13: ...remain unchanged until they are intentionally changed and will be printed on each page received by your correspondent s fax machine Until the display shows INSTALLATION The display shows TEL LINE SET...

Страница 14: ...the fax machine If in doubt about the choice to be made ask the company that manages your private telephone network Set the output mode area code or flash to access the public telephone network from t...

Страница 15: ...to the following paper sizes A4 Letter and Legal Maximum capacity 100 sheets 80gr m2 Automatic feeder for original docu ments to be sent and copied ADF Maximum capacity 20 sheets A4 80gr m2 Operator c...

Страница 16: ...tes that the memory con tains documents that have not been printed Off indicates that the memory is empty With tone dialling they send a tone down the line for special network serv ices They scroll ba...

Страница 17: ...one numbers dialled outgoing calls or the last 20 numbers from which calls have been received incoming calls irrespective of whether or not a document was present in the ADF Scroll backwards through t...

Страница 18: ...hese cases photocopy the document and send the copy TO PLACE THE DOCUMENT IN THE ADF 1 Insert the automatic document feeder in the slot until it clicks into position Insert the document without forcin...

Страница 19: ...ed consists of more than one sheet before pressing to unload the first remove all the others by hand TO HEAR THE DIALLING TONE WHEN SENDING A DOCUMENT Place the document in the ADF The display shows o...

Страница 20: ...ast transmission setting by remov ing the document from the ADF or pressing the key note If there is a power failure the broadcast transmission will be cancelled TO CHANGE DELETE A BROADCAST TRANSMISS...

Страница 21: ...N FROM THE MEMORY THAT IS ALREADY SET Until the display shows MEMORY TX The display shows ALREADY ENTERED The display shows PRINT SETTING To view the other available options CHANGE PARAM or CANCEL SET...

Страница 22: ...achine connects to the telephone line and you hear the dialling tone press the key and then hang up RECEPTION WITH TELEPHONE ANSWERING DEVICE TAD FAX If you connect an external telephone answering de...

Страница 23: ...and name of the correspondent are set note If you want you can print the information saved on the 8 one touch dialling keys and 52 speed dialling codes see chapter To print reports and lists TO CHANG...

Страница 24: ...mission and can be printed once programmed always and automatically after each transmission or on request at the desired moment Failed transmission report also contains information about the last tran...

Страница 25: ...ENABLE DISABLE THE AUTOMATIC PRINTING OF THE TRANSMISSION AND FAILED TRANSMISSION REPORT Until the display shows FAX SET UP The display shows DATE AND TIME The display shows VARIOUS SETTINGS Until th...

Страница 26: ...STALLATION PARAMETERS AND THE BLACK LIST NUMBERS Until the display shows INSTALLATION The display shows TEL LINE SET UP Until the display shows PRINT INSTALL The display shows PRINT INSTALL To view th...

Страница 27: ...rner NOTe If you want to activate the handsfree function having raised the handset press the key The display shows REPLACE HANDSET CASE 2 Do not place the document in the ADF Lift the handset to engag...

Страница 28: ...the length of the call in minutes and seconds in the top right hand corner The display shows INCOMING CALLS To display the other available option OUTGOING CALLS To confirm your choice To find the tel...

Страница 29: ...MAL The display shows the default copy size contrast and reso lution settings 100 NORMAL and TEXT respectively The display shows COPY HIGH QUAL To view the other available option COPY NORMAL To confi...

Страница 30: ...viding the surplus exceeds 12 mm If you choose the SURPLUS ON setting the fax machine will always print the surplus text on another sheet If you choose the SURPLUS OFF setting the fax machine will not...

Страница 31: ...to display it as follows Until the display shows INSTALLATION The display shows TEL LINE SETU UP The display shows ENHANCED FEATUR Until the display shows CALLER ID ON To view the other available opt...

Страница 32: ...SILENCE LAPSE 6 To view the other available values 3 4 8 10 or OFF For exemple 4 To confirm your choice To return the fax machine to the initial stand by mode TO ENABLE DISABLE RECOGNITION OF THE RING...

Страница 33: ...onfirm and the key to return the fax machine to the initial stand by mode nOTE If you are connected to a private line follow the same proce dure until the display shows PUBL LINE PSTN press the keys t...

Страница 34: ...To confirm your choice To return the fax machine to the initial stand by mode TO REDUCE THE TRANSMISSION SPEED The fax machine transmits regularly at a speed of 14400 bps bits per second A transmissi...

Страница 35: ...y on the numeric keypad or using the one touch keys or speed dialling codes To confirm the setting The fax machine shows the message POLL SET for a few seconds and then returns automati cally to the i...

Страница 36: ...not completed due to errors on the line or fax machine the error LED lights up and a short beep is emitted in this case the fax machine automatically prints the transmission report see To print repor...

Страница 37: ...found Resume transmission of the pages indicated in the report 07 DOCUMENT TOO LONG The document to be sent is too long The time taken to send it exceeds the allowed limits Split up the document to be...

Страница 38: ...e document copying phase prevent ing it from being printed check the type of fault on the display and correct it COVER OPEN You forgot to close the print head compartment cover close it DOC IN MEMORY...

Страница 39: ...rted the document in the ADF correctly LIFT HANDSET The correspondent has made a talk request lift the handset to start the conversation LINE ON HOLD PRESS HOLD You have put a telephone call on hold b...

Страница 40: ...g out the result of the diagnostic test Examine the diagnostic test result with reference to To install the print head chapter Opera tions essential for correct operation If you replaced the print hea...

Страница 41: ...rint head carriage with a slightly damp cloth and then having reinserted the print head close the print head compartment cover and the operator console TO CLEAN THE NOZZLES OF THE PRINT HEAD Only for...

Страница 42: ...1 Open the operator console and remove the document from the ADF 2 Close the operator console TO REMOVE JAMMED SHEETS OF PAPER If the paper used to print the documents received or to copy docu ments g...

Страница 43: ...of the dialog boxes that appear and that only the CD ROM drive box is selected in another dialog box If the language selection dialog box does not appear at the end of the USB driver installation pro...

Страница 44: ...ar to inform you that there is no e mail application installed The Internet LinkFax icon will be automatically restored once an e mail application has been installed and set up TO UNINSTALL THE LINKFA...

Страница 45: ...ad is used Transport from 15o C to 45o C Short and long term storage from 0o C to 45o C Relative humidity Operating short and long term storage 15 85 Transport 5 95 CHARACTERISTICS OF OPTICAL READER S...

Страница 46: ......

Страница 47: ...Monochrome print head part number Single block print head P N B0336F Colour print head part number Single block print head P N B0380Q...

Страница 48: ...255933Y...

Отзывы: