Repair information
4-9
Top cover assembly removal
1.
Remove the flatbed assembly. Go to
“Flatbed removal” on page 4-72
.
2.
Remove the AIO toner cover. Go to
“AIO toner cover” on page 4-97
3.
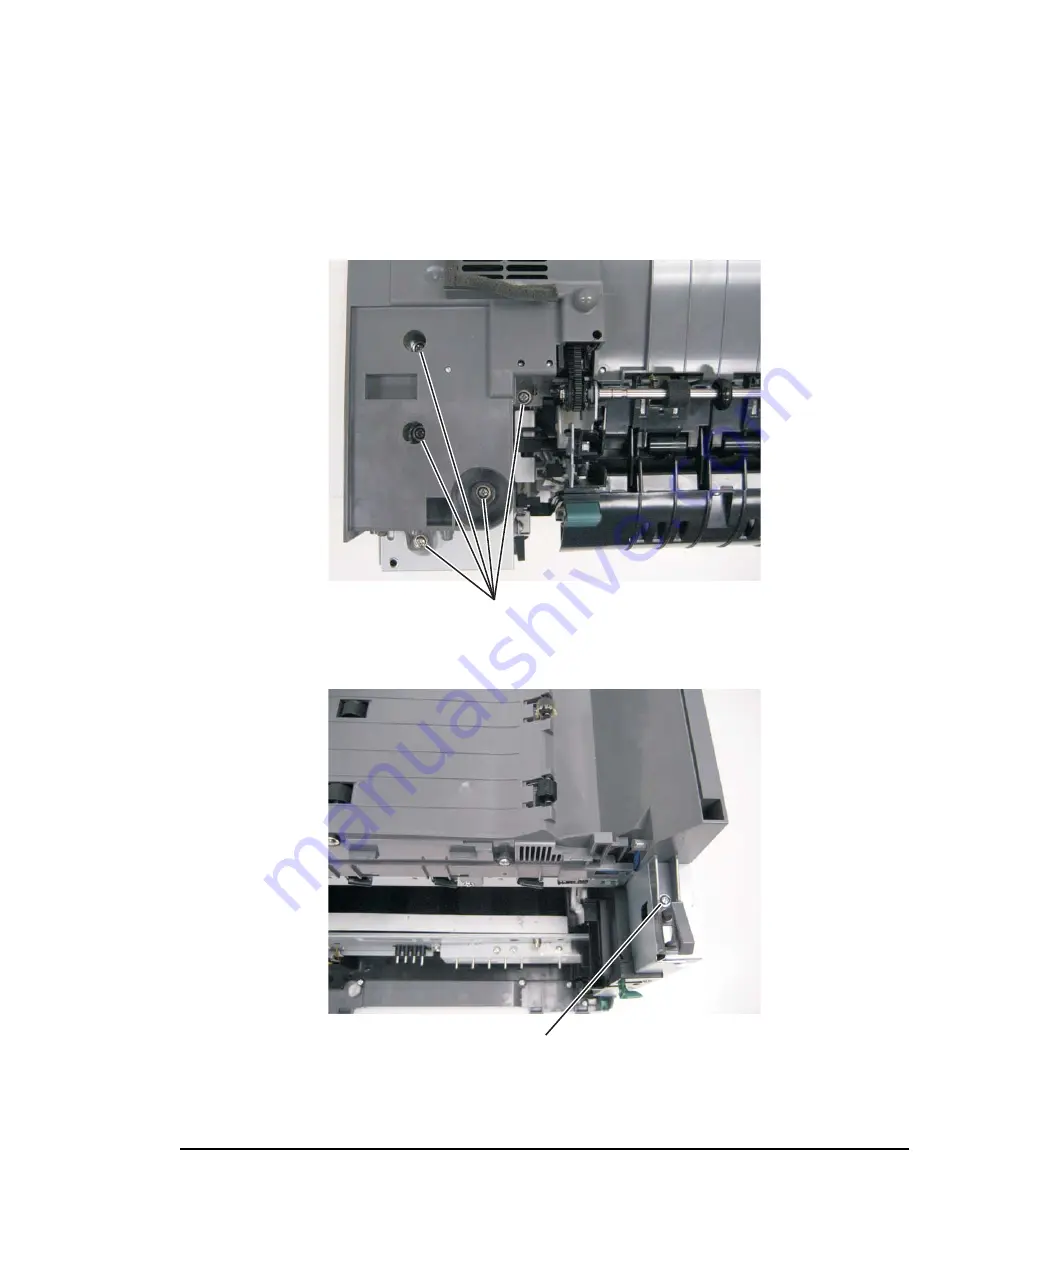
Remove the five screws (A) from the left front side.
4.
Remove one screw (B) from the top right side of the cover.
A
B
Y112730-2
Содержание d-Color MF920
Страница 1: ...SERVICE MANUAL Copiatrici Copiers d Color MF920 d Color MF923 Code Y112730 2...
Страница 10: ...x Service Manual Y112730 2...
Страница 15: ...Notices and safety information xv Y112730 2...
Страница 16: ...xvi Service Manual Y112730 2...
Страница 18: ...xviii Service Manual Y112730 2...
Страница 22: ...xxii Service Manual Y112730 2...
Страница 124: ...2 80 Service Manual Y112730 2...
Страница 198: ...3 74 Service Manual Y112730 2...
Страница 203: ...Repair information 4 5 4 Remove the three screws A on the rear side of the left cover A Y112730 2...
Страница 211: ...Repair information 4 13 9 Remove the two springs D 10 Remove the two screws E on the bottom Y112730 2...
Страница 234: ...4 36 Service Manual 4 Snap the new gear onto the shaft D The installation is the same as the old gear Y112730 2...
Страница 288: ...4 90 Service Manual 6 While holding the op panel mounting assembly remove the op panel bezel cover Y112730 2...
Страница 302: ...4 104 Service Manual Y112730 2...
Страница 305: ...Locations 5 3 Interior view Y112730 2...
Страница 306: ...5 4 Service Manual Printer boards Controller Board Y112730 2...
Страница 317: ...Locations 5 15 HVPS Y112730 2...
Страница 319: ...Locations 5 17 LVPS Y112730 2...
Страница 324: ...6 2 Service Manual Y112730 2...
Страница 331: ...Index I 7 Y112730 2...
Страница 332: ...UPDATINGSTATUS DATE UPDATEDPAGES PAGES CODE 09 2010 1ST EDITION 332 Y112730 2...


