INSTRUCTIONS FOR INSTALLATION AND USE
| +358 3 733 1234 | [email protected]
The package includes two (2) identical pieces that form the XCLIP holder when attached to the stem of the
forearm crutch.
INSTALLING THE XCLIP
1.
The XCLIP is installed on the smooth surface of the forearm
crutch, above the length adjustment
holes.
2.
Wipe the crutch stem clean of any dirt.
3.
Sit on a chair, and put the other crutch on your lap with the
handle facing towards you.
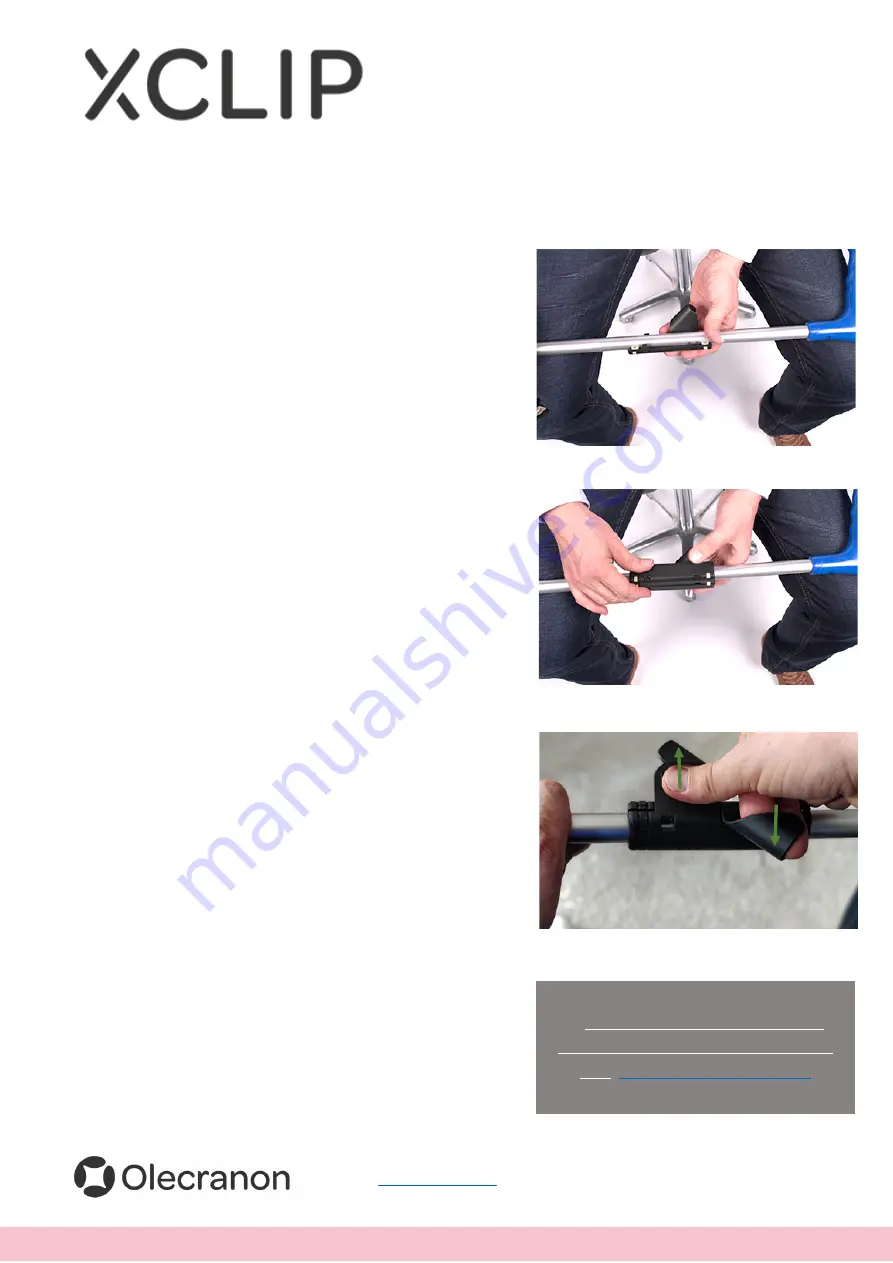
4.
Place the other half of the XCLIP below the stem
with the wing facing towards you
5.
Press the stem onto the bottom of the piece.
6.
Place the other piece above the stem with the wing facing
towards you.
7.
Press the latches together at both ends on the knuckle
side of the holder.
8.
Turn the crutch around (so that the wings are facing away
from you) and press the latches together at both ends on the
wing side. If necessary, you can turn the wings in opposite
directions to lock the latches.
9.
Ensure that
each of the four
latches are securely locked and
there are no gaps between the pieces. The XCLIP is now
ready for use.
If you cannot grip the crutch hard enough, you can use a tool
to install the XCLIP *) or carefully warm up the gasket inside
with a hairdryer, for instance.
Please note
that the XCLIP attachment is designed to allow
you to turn the crutch attached to it. This enables you to to
climb stairs, for instance. *)
So, don’t worry if the attachment seems ‘loose’
– practice
makes perfect!
*) To watch the XCLIP installation
videos and get tips on how to use it,
visit:
Instruction 4–5
Instruction 6–7
Instruction 8


