background image

Содержание 2003 Bravada

Страница 1: ...0 0...

Страница 2: ...v a c a _ L 3 r u o o I a m a r o o m L _ a gg L L a s 5 3 0 S P f m a m m L 7 7 7 c n x o s o J s o E a L I L a E f v...

Страница 3: ...sell the vehicle please leave this manual in it so the new owner can use it Litho in U S A Part No S2338A First Edition You can obtain a French copy of this manual from your dealer or from Helm Incorp...

Страница 4: ...ng These mean there is something that could hurt you or other people In the caution area we tell you what the hazard is Then we tell you what to do to help avoid or reduce the hazard Please read these...

Страница 5: ...bels on your vehicle They use the same words CAUTION or NOTICE Vehicle Symbols Your vehicle has components and labels that use symbols instead of text Symbols used on your vehicle are shown along with...

Страница 6: ...AlTACHlNG MOVE SEAT FULLY REARWARD z SECURE CHILD SEAT PULL BELT COMPLETELY THEN SECURE CHILD SEAT n DO NOT INSTALL A REAR FACING CHILD RESTRAINT INTHIS SEATING POSITION DO NOT INSTALL A FORWARD FACIN...

Страница 7: ......

Страница 8: ...s and Young Children 1 29 Child Restraint Systems 1 32 Where to Put the Restraint 1 35 Top Strap 1 36 Top Strap Anchor Location 1 37 Lower Anchorages and Top Tethers for Children LATCH System 1 38 Sec...

Страница 9: ...ide the To recline the seatback press the vertical control rearward To raise the seatback press the vertical control forward seat control forward or rearward Power Lumbar Your vehicle may have this fe...

Страница 10: ...two for medium and one for low The low setting warms the seatback and cushion until the seat temperature is near body temperature The medium and high settings heat the seatback and seat cushion to a...

Страница 11: ...der belt can t doits job In a crash you could go into it receiving neck or other injuries The lap belt can t do its job either In a crash the belt could go up over your abdomen The belt forces would b...

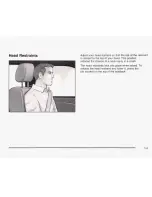
Страница 12: ...of the restraint is closest to the top of your head This position I reduces the chance of a neck injury in a crash The head restraints lock into place when raised To release the head restraint and low...

Страница 13: ...Rear Seats Pull up on the loop located where the seat cushion meets theseatback to fold the seat cushion up and out of the way This will allow the seatback to fold flat and increase the cargo area 1 6...

Страница 14: ...0 y c...

Страница 15: ...ehicle or be ejected fromit You can be seriously injured or killed In the same crash you might not be if you are buckled up Always fasten your safety belt and check that your passengers belts are fast...

Страница 16: ...most states and in all Canadian provinces the law says to wear safety belts Here s why They work You never know if you ll be in a crash If you do have a crash you don t know if it will be a bad one I...

Страница 17: ...Put someone on it Get it up to speed Then stop the vehicle The rider doesn t stop 1 10...

Страница 18: ......

Страница 19: ...pside down And your chance of being conscious during and after an accident so you can unbuckle and get out is much greater if you are belted Q If my vehicle has air bags why should I have to wear safe...

Страница 20: ...tspeeds of less than 40 mph 65 km h Safety belts are for everyone How to Wear Safety Belts Properly This part is only for people of adult size Be aware that there are special things to know about safe...

Страница 21: ...buckle until it clicks Pull up on the latch plate to make sure it is secure If the belt isn t long enough see Safety Belt Extender on page 1 26 Make sure the release button on the buckle is positione...

Страница 22: ...er the lap belt If you slid under it the belt would apply force at your abdomen This could cause serious or even fatal injuries The shoulder belt should go over the shoulder and across the chest These...

Страница 23: ...y hurt if yo shouLr belt is too loose In a crash you would move forward too much which could increase injury The shoulder belt should fit against your body A The shoulder belt is too loose It won t gi...

Страница 24: ...led in the wrong place likethis In a crash the belt would go up over your abdomen The belt forces would be there not at the pelvic bones This could cause serious internal injuries Always buckle your b...

Страница 25: ...forward which would increase the chance of head and neck injury Also the belt would apply too much force to the ribs which aren t as strong as shoulder bones You could also severely injure internal o...

Страница 26: ...ly injured by a twisted belt In a crash you wouldn t have the full width of the belt to spread impact forces If a belt is twisted make it straight so it can work properly or ask your dealer to fix it...

Страница 27: ...s To unlatch the belt just push the button on the buckle The belt should go back out o f the way Before you close the door be sure the belt is out of the way If you slam the door on it you can damage...

Страница 28: ...y as the driver s safety belt except for one thing If you ever pull the shoulder portion of the belt out all the way you will engage the child restraint locking feature If this happens just let the be...

Страница 29: ...long enough see Safety Belt Extender on page 1 26 Make sure the release button on the buckle is positioned so you would be able to unbuckle the safety belt quickly if you ever had to 1 Pick up the la...

Страница 30: ...r it the belt would apply force at your abdomen This could cause serious or even fatal injuries The shoulder belt should go over the shoulder and across the chest These parts of the body are best able...

Страница 31: ...dealer Rear shoulder belt comfort guides provide added safety belt comfort for older children who have outgrown booster seats and for small adults When attached to a shoulder belt the comfort guide be...

Страница 32: ...de the guide under and past the belt The elastic cord must be under the belt Then place the guide over the belt and insert the two edges of the belt into the slots of the guide 3 Be sure that the belt...

Страница 33: ...t for the seat in your vehicle that you choose Don t let someone else use it and use it only for the seat it is made to fit To wear it just attach it to the regular safety belt 4 Buckle position and r...

Страница 34: ...ps just touching the top of the thighs It should never be worn over the abdomen which could cause severe even fatal internal injuries in a crash Accident statistics show that children are safer if the...

Страница 35: ...CAUTION Continued II A If the child is sitting in a seat next to a window move the child toward the center of the vehicle If the child is sitting in the center rear seat passenger position move the c...

Страница 36: ...the child s pelvic bones in a crash Infants and Young Children Everyone in a vehicle needs protection This includes infants and all other children Neither the distance traveled nor the age and size o...

Страница 37: ...uch until a crash During a crash a baby will become so heavy it is not possible to hold CAUTION Continued it r or example in a crash at only 5 mph 40 km h a 12 lb 5 5 kg baby will suddenly become a 24...

Страница 38: ...which it will be used For most basic types of child restraints there are many different models available When purchasing a child restraint be sure it is designed to be used in a motor vehicle if it is...

Страница 39: ...ttle up around the child s abdomen In a crash the belt would apply force ona body area that s unprotected by any bony structure This alone could cause serious or fatal injuries Young children always s...

Страница 40: ...1...

Страница 41: ...hild restraints have used the adult belt system in the vehicle To help reduce the chance of injury the child also has to be secured within the restraint The vehicle s belt system secures the add on ch...

Страница 42: ...ecommend that child restraints be secured in a rear outside seat position including an infant riding in a rear facing infant seat a child riding in a fonvard facing child seat and an older child ridin...

Страница 43: ...low the instructions for your child restraint If yours requires that the top strap be anchored don t use the restraint unless it is anchored properly If the child restraint does not have a top strap o...

Страница 44: ...p strap under it See Head Restraints on page 1 5 Top Strap Anchor Location Once you have the top strap anchored you ll be ready to secure the child restraint itself Tighten the top strap when and as t...

Страница 45: ...ing the lower anchors for this child restraint system each seating position with the LATCH system will have two metal tabs where the seat cushion meets the seatback In order to use the system you need...

Страница 46: ...t won t be able to protect the child correctly In a crash the child could be seriously injured or killed Make sure that a LATCH type child restraint is properly installed using the anchorage points or...

Страница 47: ...hild restraint in different To remove the child restraint simply unhook the top strap from the top tether anchor and then disconnect the anchor points Securing a Child Restraint in a Rear Outside Seat...

Страница 48: ...elt Make sure the release button is positioned so you would be able to unbuckle the safety belt quickly if you ever had to 4 Pull the rest of the shoulder belt all the way out of the retractor to set...

Страница 49: ...d pull the child restraint in different directions to be sure it is secure To remove the child restraint just unbuckle the vehicle s safety belt and let it go back all the way The safety belt will mov...

Страница 50: ...r belt See Top Strap on page 7 36if the child restraint has one Be sure to follow the instructions that came with the child restraint Secure the child in the child restraint when and as the instructio...

Страница 51: ...int You may find it helpful to use your knee to push down on the child restraint as you tighten the belt 7 Push and pull the child restraint in different directions to be sure it is secure T o remove...

Страница 52: ...Center Seat Position Don t use child restraints in this position The restraints won t work properly 1 45...

Страница 53: ...mpact air bag for the driver the words AIR BAG willappear on the air bag covering on the side of the driver s seatback closest to the door If your vehicle has a side impact air bag for the right front...

Страница 54: ...o severe frontal and near frontal crashes They aren tdesigned to inflate at all in rollover rear or low speed frontal crashes or in many side crashes And for some unrestrained occupants frontal air ba...

Страница 55: ...inflates can be seriously injured or killed Air bags plus lap shoulder CAUTION Continued I r __ _ s o le st pro tic for adults but not for young children and infants Neither the vehicle s safety belt...

Страница 56: ...6P L...

Страница 57: ...os c...

Страница 58: ...cle goes straight into a wall that doesn t move or deform the threshold level for the reduced deployment is about 12 to 16 mph 19 to 26 km h and the threshoid levei for a full deployment is about 16 t...

Страница 59: ...les with side impact air bags the air bag modules are located in the seatback closest to the driver s and or right front passenger s door How Does an Air Bag Restrain In moderate to severe frontal or...

Страница 60: ...ir bag inflation doesn t prevent the driver from seeing or being able to steer the vehicle nor does it stop people from leaving the vehicle When an air bag inflates there is dust in the air This dust...

Страница 61: ...and diagnostic module which records information about the frontal air bag system The module records information about the readiness of the system when the system commands air bag inflation and driver...

Страница 62: ...Setvice Publications Ordering Information on page 7 IO For up to 10 seconds after the ignition key is turned off and the battery is disconnected an air bag can still inflate during improper service Y...

Страница 63: ...or broken air bag covers and have them repaired or replaced The air bag system does not need regular maintenance Replacing Restraint System Parts After a Crash A crash can damage the restraint systems...

Страница 64: ...mage also may mean you will need to have LATCH system safety belt or seat parts repaired or replaced New parts and repairs may be necessary even if the belt or LATCH system wasn t being used at the ti...

Страница 65: ......

Страница 66: ...hicle 2 18 New Vehicle Break In 2 18 Ignition Positions 2 18 Starting Your Engine 2 19 Engine Coolant Heater 2 20 Automatic Transmission Operation 2 22 All Wheel Drive 2 24 Parking Brake 2 25 Shifting...

Страница 67: ...Storage Areas 2 41 Sunroof 2 46 Glove Box 2 41 Vehicle Personalization 2 47 Overhead Console 2 41 Memory Seat 2 47 Front Storage Area 2 42 Luggage Carrier 2 42 Rear Floor Storage Lid 2 43 Convenience...

Страница 68: ...the ignition key is dangerous for many reasons A child or others could be badly injured or even killed They could operate the powerwindows or other controls or even make the vehicle move Don t leave...

Страница 69: ...our vehicle to get in So be sure youhave spare keys If you ever do get locked out of your vehicle call the GM Roadside Assistance Center See Roadside Assistance Program on page 7 5 If your vehicle is...

Страница 70: ...need to stand closer during rainy or snowy weather Check the location Other vehicles or objects may be blocking the signal Take a few steps to the left or right hold the transmitter higher and try ag...

Страница 71: ...ealer When the dealer matches the replacement transmitter to your vehicle any remaining transmitters must also be matched Once your dealer has coded the new transmitter the lost transmitter will not u...

Страница 72: ...a thin coin in the slot between the covers of the transmitter housing Gently pry the transmitter apart 2 Remove and replace the battery with a three volt CR2032 or equivalent battery positive side dow...

Страница 73: ...o wear safety belts properly and lock the doors whenever you drive vehicles may be unable to get out A child can be overcome by extreme heat and can suffer permanent injuries or even death from heat s...

Страница 74: ...mmediately by using the power door lock switch or the optional remote keyless entry transmitter a second time If the key is inserted in the ignition this feature will not lock the doors The lockout pr...

Страница 75: ...ction lever toward you and hold it there while you perform the next step Turn the key to RUN and LOCK twice Then with the key in LOCK release theturn signaVmultifunction lever Once you do this you wil...

Страница 76: ...K twice Then with the key in LOCK release the turn signal multifunction lever Once you do this you will hear the lock switch lock and unlock the horn will chirp twice and a 30 second program timer wil...

Страница 77: ...inside when this feature is in use If you want to open the rear door when the security lock is on unlock the door and open the door from the outside Lockout Protection This feature stops the power do...

Страница 78: ...or under the instrument panel open them all theway See Engine Exhaust in the Index Liftgate Release To unlock the liftgate you may use the power door locks or the keyless entry system described earlie...

Страница 79: ...he winc v s closed is dangerous A child can be overcome by the extreme heat and can suffer permanent injuries or even death from heat stroke Never leave a child alone in a vehicle especially with the...

Страница 80: ...switch down briefly to activate the express down feature Lightly tap the switch to open the window slightly The express down feature can be interrupted at any time by pressing the top of the switch W...

Страница 81: ...nd parking lamps will flash for two minutes and the horn will sound for 30 seconds then will turn off to save the battery power Remember the theft deterrent system won t activate if you lock the doors...

Страница 82: ...Passiock is a passive theit deterrent system Passlock enables fuel if the ignition lock cylinder is turned with a valid key If a correct key is not used or the ignition lock cylinder is tampered with...

Страница 83: ...the first 200 miles 322 km orso During this time your new brake linings aren t yet broken in Hard stops with new linings can mean premature wear and earlier replacement Followthis breaking in guideli...

Страница 84: ...Once the key is turned from RUN to LOCK these features will continue to work for up to 20 minutes or until a door is opened Starting Your Engine Move your shift lever to PARK P or NEUTRAL N Your engin...

Страница 85: ...same thing but this time keep the pedal down for five or six seconds This clears the extra gasoline from the engine Notice Your engine is designed to work with the electronics in your vehicle If you a...

Страница 86: ...ounded CAUTION Continued three prong 110 volt AC o et If the cc won t reach use a heavy duty three prong extension cord rated for at least15 amps 4 Before starting the engine be sure to unplug and sto...

Страница 87: ...re pulling a trailer see Towing a Trailer in the Index Ensure the shift lever is fully in PARK P before starting the engine Your vehicle has an automatic transmission shift lock control system You ha...

Страница 88: ...r normal driving If you need more power for passing and you re Going less than about 35 mph 55 km h push the 0 Going about 35 mph 55 km h or more push the You ll shift down to the next gear and have m...

Страница 89: ...s equipped with a shift lock release system If your vehicle has a dead battery and you need to have your vehicle towed there is a shift lock release lever that will allow you to move the shift lever o...

Страница 90: ...ting Into Park P To release the parking brake hold the regular brake pedal down Pull the parking brake lever up until you can press in the button at the end of the lever Hold the button in as you move...

Страница 91: ...ot fully in PARK P with the parking brake firmlyset And if you leave the vehicle with the engine running it could overheat and even catch fire You or others could be injured Don t leave your vehicle w...

Страница 92: ...pressure from the parking pawl in the transmission so you can pull the shift lever out of PARK P Shifting Out of Park P Your vehicle has an automatic transmission shift lock control system You have to...

Страница 93: ...and death You might have exhaust coming in if Your exhaust system sounds strange or Your vehicle gets rusty underneath Your vehicle was damaged in a collision Your vehicle was damaged when driving ove...

Страница 94: ...h the engine running Another closed in place can be a blizzard See Winter Driving in the Index It can be dangerous to get out of your vehicle if the shift lever is not fully in PARK P with the parking...

Страница 95: ...mation about the services Onstar provides When turned on this mirror automatically dims to the proper level to minimize glare from any headlamps behind you after dark The automatic dimming feature is...

Страница 96: ...sate for compass variance if you live outside zone eight Under certain circumstances such as during a long distance cross country trip it will be necessary to adjust for compass variance If not adjust...

Страница 97: ...the 3 Adjust the mirror in all four directions adjust mirror to go 4 After you are satisfied with the position of the mirror twist the control to the center position or twist it to the other mirror t...

Страница 98: ...h Curb View Assist If your vehicle has this feature the driver s and or Passenger s outside mirror will adjust to a preset tilt losition while the vehicle is in REVERSE R gear Curb view assist may be...

Страница 99: ...y 4 Adjust the passenger s side and then the driver s T o change the tilt position adjust themirrorwhilethe side outside mirrors to the desired tilt positions vehicle is in REVERSE R gear with the eng...

Страница 100: ...needs A complete Onstar user s guide and the terms and conditions of the Onstar Subscription Service Agreement are included in your Onstar equipped vehicle s glove box literature For more information...

Страница 101: ...NSTAR 1 888 466 7827 Onstar Virtual Advisor With Onstar Virtual Advisor you can listen to your favorite news entertainment and information topics such as traffic and weather reports stock quotes and s...

Страница 102: ...ce and 2 this device must accept any interference received including interference that may cause undesired operation of the device Changes and modifications to this system by other than an authorized...

Страница 103: ...4 The indicator light will flash slowly at first and then rapidly after HomeLink successfully receives the frequency signal from the hand held transmitter Release both buttons 3 Simultaneously press a...

Страница 104: ...ing HomeLink procedures regardless of where you live replace Step 3 under Programming HomeLink with the following Continue to press and hold the HomeLink button while you press and release every two s...

Страница 105: ...ile still holding the HomeLinkO button proceed with Step 2 under Programming HomeLinka Resetting Defaults To reset HomeLink to default settings do the following 1 Hold down the two outside buttons for...

Страница 106: ...er and a travel note recorder if equipped Sunglasses Storage Compartment To open the sunglasses storage compartment in the overhead console press the release button Then pull the compartment down Trav...

Страница 107: ...to reveal a coinholder and additional storage Luggage Carrier If you try to carry somett g on top of your vehicle that is longer or wider than the luggage carrier like paneling plywood a mattress and...

Страница 108: ...lace the crossrails at the following positions for wind noise reduction Place one crossrail at the rear most point of the vehicle and the other crossrail above the opening of the rear door Rear Floor...

Страница 109: ...ng the label should be in the upper passenger s side corner visible from the rear of the vehicle 2 Attach the lower hooks to the rear cargo tie downs on the floor Cargo Cover If your vehicle has a car...

Страница 110: ...can remove the shade from the vehicle A improperlystored cargo cover couldbe thrown about the vehicle during a collision or sudden maneuver You or others could be injured If you remove the cover alwa...

Страница 111: ...must be active Press and release the back of the button in the overhead console to open the sunroof Press the front of the button to close the sunroof Once the sunroof is closed press the forward sid...

Страница 112: ...river and pressing button 2 for three seconds Each time button 1 or 2 is pressed and released while the vehicle is in PARK P a single chime will sound and the memory position will be recalled If you u...

Страница 113: ...the exit button The mirrors power lumbar and recline positions will not be stored or recalled for the exit positions If no exit position is stored the default is all the way rearward Further programmi...

Страница 114: ...er 3 30 Tachometer 3 30 Safety Belt Reminder Light 3 30 Air Bag Readiness Light 3 31 Charging System Light 3 32 Voltmeter Gage 3 32 Anti Lock Brake System Warning Light 3 34 Engine Coolant Temperature...

Страница 115: ...8 Theft Deterrent Feature 3 88 Audio Steering Wheel Controls 3 89 DVD Distortion 3 89 Understanding Radio Reception 3 89 Care of Your Cassette Tape Player 3 90 Care of Your CDs and DVDs 3 91 Care of Y...

Страница 116: ...3 m...

Страница 117: ...instrument Panel Overview 3 4...

Страница 118: ...eering Wheel Controls G Ignition Switch H AudioSystem I Climate Controls J Hood Release K Driver Information Center DIC Steering Wheel Controls L RearWindow Washermiper M Lighter N AccessoryPowerOutle...

Страница 119: ...shers are on the turn signals won t work Other Warning Devices If you carry reflective triangles you can set one up at the side of the road about 300 feet I00 m behind your vehicle Tilt Wheel You shou...

Страница 120: ...ger Flash to Pass Feature Windshield Wipers 6 Windshield Washer Cruise Control If Equipped To signal a lane change just raise or lower the lever until the arrow starts to flash Hold it there until you...

Страница 121: ...the turn signal lever to the off position Headlamp High Low Beam Changer To change the headlamps from low to high beam push the lever toward the instrument panel To return to low beam headlamps pull t...

Страница 122: ...windshield carefully loosen or thaw them If your blades do become worn or damaged get new blades or blade inserts RainsenseTM Wipers Your vehicle may be equipped with RainsenseTM windshield wipers Wh...

Страница 123: ...trol is located to the right of the steering wheel on the instrument panel To turn the rear wiper on turn the control to either 1 2 or 3 For delayed wiping turn the control to 1 or 2 For steady wiping...

Страница 124: ...rol does not work at speeds below about 25 mph 40 km h If you apply your brakes the cruise control will shut off Cruise control can be dangerous where you can t drive safely at a steady speed So don t...

Страница 125: ...brake This of course shuts off the cruise control But you don t need to reset it Once you re going about 25 mph 40 km h or more you can move the cruise control switch briefly from on to resume acceler...

Страница 126: ...out 1 mph 1 6 km h slower Passing Another Vehicle While Using Cruise Control Using Cruise Control on Hills How well your cruise control will work on hills depends upon your speed load and the steepnes...

Страница 127: ...te when the position is selected Automatic DRUAHL Turning the knob to this symbol puts the system into automatic headlamp mode An indicator will illuminate when the position is selected coo Parking La...

Страница 128: ...es a change in lighting lasting longer than the delay If you start your vehicle in a dark garage the automatic headlamp system will come on immediately Once you leave the garage it will take approxima...

Страница 129: ...transmission is not in PARK P headlamp mode When the DRL are on only your headlamps will be on The taillamps sidemarker and other lamps won t be on The instrument panel won t be lit up either When it...

Страница 130: ...ion when you re not using it Dome Lamp Override The dome override button is located below the exterior lamps knob To turn the dome lamps off press the button The dome lamps will remain off when a door...

Страница 131: ...ting the interior lamps will come on when you remove the key from the ignition to help you see while exiting the vehicle With the dome override button in the out position these lights will stay on for...

Страница 132: ...er on the instrument panel The second outlet is located on the rear of the center console Remove the cover from the outlet to use the outlet Be sure to put the cover back on when not using the accesso...

Страница 133: ...uld ignite them causing a damaging fire To remove the front ashtray pull the covered bin out of the cupholder To use the lighter press it in all the way and let go When it s ready it will pop back out...

Страница 134: ...nob clockwise or counterclockwise to manually raise or lower the temperature on the driver s side of the vehicle The display will show the temperature setting decreasing or increasing and the word DRI...

Страница 135: ...in at the maximum cooling setting If you choose the temperature setting of 90 F 32 C the system will remain at the maximum heat setting Choosing either maximum setting may not cause the vehicle to hea...

Страница 136: ...u select air conditioning off while in front defrost or defog mode the air conditioning off symbol will flash to let you know this is not allowed You may notice a slight change in engine performance w...

Страница 137: ...vehicle license tape a decal or anything similar to the defogger grid Do not attach a temporary vehicle license tape a decal or anything similar to the defogger grid Outlet Adjustment Use the air out...

Страница 138: ...throughout your vehicle Adding outside equipment to the front of your vehicle such as hood air deflectors may affect the performance of the heating and air conditioning system Check withyour dealer be...

Страница 139: ...ecting any air delivery mode and any fan speed Move the control in the center of each outlet side to side to direct the air from the outlet Use the thumbwheel under the outlet to close the louvers For...

Страница 140: ...de and fan speed for two different drivers The personal choice settings recalled are determined by the transmitter used to enter the vehicle After the button with the unlock symbol on a remote keyless...

Страница 141: ...you know they re working If you are familiar with this section you should not be alarmed when this happens Gages can indicate when there may be or is a problem with one of your vehicle s functions Oft...

Страница 142: ...s designed to let you know at a glance how your vehicle is running You ll know how fast you re going about how much fuel you ve used and many other things you ll need to know to drive safely and econo...

Страница 143: ...r is part of the Driver Information Center DIC For vehicles without a DIC press the stem located on the instrument panel cluster to display the trip odometer Press and hold the stem to reset the trip...

Страница 144: ...our vehicle and it will flash for a few seconds Then the light should go out This means the system is ready If the air bag readiness light stays on after you start the vehicle or comes on when you are...

Страница 145: ...drive belt or another electrical problem Have it checked right away Driving while this light is on could drain your battery a If you must drive a short distance with the light on be certain to turn of...

Страница 146: ...soon as possible Your vehicle s hydraulic brake system is divided into two parts If one part isn t working the other part can still work and stop you For good braking though you need both parts worki...

Страница 147: ...ing Light With the anti lock brake system this light will come on when you start your engine and may stay on for several seconds That s normal A chime may also sound when the light comes on If the lig...

Страница 148: ...gage pointer moves into the red area the engine coolant has overheated If you have been operating your vehicle under normal driving conditions you should pull off the road stop your vehicle and turn o...

Страница 149: ...eria TPC can affect your vehicle s emission controls and may cause this light to come on Modifications to these systems could lead to costly repairs not covered by your warranty This may also result i...

Страница 150: ...drive through a deep puddle of water Have you recently changed brands of fuel If so be sure to fuel your vehicle with quality fuel See Gasoline Octane on page 5 5 Poor fuel quality will cause your en...

Страница 151: ...happen if you have recently replaced your battery or if your battery has run down The diagnostic system is designed to evaluate critical emission control systems during normal driving This may take s...

Страница 152: ...the CHANGE ENG OIL light must be reset Until it is reset the light will be displayed when the engine is on Security Light United States Canada This light will come on briefly when you turn the key tow...

Страница 153: ...s performance may occur The vehicle may be driven at a reduced speed when the reduced engine power light is on but acceleration and speed may be reduced The performance may be reduced until the next...

Страница 154: ...cated by the system before any problem is apparent which may prevent serious damage to the vehicle This system is also designed to assist your service technician in correctly diagnosing a malfunction...

Страница 155: ...uts off before the gage reads full It takes a little more or less fuel to fill up than the gage indicated For example the gage may have indicated the tank was half full but it actually took a little m...

Страница 156: ...lable on your vehicle turns off or acknowledges messages on the DIC A Trip Information This button will display the odometer trip odometer and the timer DIC Operation and Displays The DIC comes on whe...

Страница 157: ...et the trip odometers with the reset stem on the cluster If you press and hold the reset stem for four seconds the display will show the distance traveled since the last ignition cycle The DIC can be...

Страница 158: ...ed each time you drive Press the fuel information button until INST appears in the display Instant fuel economy is how many miles per gallon your vehicle is at the particular moment in time The instan...

Страница 159: ...d on the driver s door Alarm Warning Type Press the personalization button until ALARM WARNING TYPE appears in the display To select your personalization for alarm warning type press the select button...

Страница 160: ...appears in the display To select your personalization for automatic unlocking press the select button while AUTOMATIC UNLOCKING is displayed on the DIC Pressing the select button will scroll through t...

Страница 161: ...ALL ON REMOTE If you choose seat recall off the memory seat position you saved will only be recalled when the memory button lor 2 is pressed If you choose seat recall at key in the memory seat positio...

Страница 162: ...press the button with the lock symbol on the remote keyless entry transmitter Choose one of the four options and press the personalization button while it is displayed on the DIC to select it and mov...

Страница 163: ...EADLAMPDELAY OFF The amount of time you choose will be the amount of time that the headlamps stay on after you turn off the vehicle If you choose off the headlamps will turn off as soon as you turn of...

Страница 164: ...off no seat exit recall will occur Choose one of the two options and press the personalization button while it is displayed on the DIC to select it and move on to the next feature Display Units ENG ME...

Страница 165: ...each personalization menu For example this button will reset the trip odometers turn off the FUEL LEVEL LOW message and toggle through the languages you can select the DIC to display information in D...

Страница 166: ...clear it from the DIC display SERVICE BRAKE SYSTEM If a problem occurs with the brake system this message will appear on the DIC If this message appears stop as soon as possible and turn off the vehi...

Страница 167: ...evel the message will clear Pressing the select button will acknowledge this message and clear it from the DIC display If the driver s door is not fully closed this message will appear on the display...

Страница 168: ...ill appear on the DIC The battery needs hear a chime Stop and turn off the vehicle check the to be replaced in the transmitter Pressing the select doorforobstacles and close the door again Check butto...

Страница 169: ...out of the advancedengineering that went intoit Your vehicle has a feature called Retained Accessory Power RAP With RAP you can play your audio system even after the ignition is turned off See Retaine...

Страница 170: ...d The volume level should always sound the same to you as you drive If you don t want to use SCV select OFF If your vehicle has the Bose radio your audio system monitors the noise in your vehicle Then...

Страница 171: ...scanning presets The radio will scan only to stations that are in the selected band and only to those with a strong signal Setting Preset Stations The six numbered pushbuttonslet you return to your f...

Страница 172: ...ing gives the driver the best sound quality NORMAL This setting enhances the stereo effects AUTO EQ NORMAL Automatic Equalization This setting will provide the best overall Bose performance The radio...

Страница 173: ...or current programming and the name of the program being broadcast Finding a PTY Station To select and find a desired PTY perform the following 1 Press the P TYPE button PTY will be displayed 2 Select...

Страница 174: ...the steps for each pushbutton RDS Messages ALERT Alert warns of local or national emergencies When an alert announcement comes on the current radio station ALERT will appear on the display You will h...

Страница 175: ...the traffic announcement is over the radio will resume play of the cassette or CD If no station is found NO TRAF will appear on the display Playing a Cassette Tape Your tape player is built to work be...

Страница 176: ...us selection on the tape You can skip as many as nine selections up or down on the tape Choose how many selections you want to skip then press the right or left SEEK arrows that many times The number...

Страница 177: ...f an error can t be corrected contact your dealer If your radio displays an error message write it down and provide it to your dealer when reporting the problem Playing a Compact Disc With the ignitio...

Страница 178: ...isplay will now be the default While elapsed time is showing EL TM will appear on the display BAND Press this button to listen to the radio when a CD is playing TP CD Tape Press this button to play a...

Страница 179: ...see the display you want then hold the knob for two seconds The radio will produce one beep Playing the Radio and selected display will now be the default PWR Power Push this knob to turn the system o...

Страница 180: ...presets The radio will scan only to stations that are in the selected band and only to those with a strong signal Setting Preset Stations The six numbered pushbuttons let you return to your favorite s...

Страница 181: ...manual mode CUSTOM press the AUTO EQ button until CUSTOM appears on the display Then you will be able to manually adjust the bass midrange and treble using the AUDIO knob Adjusting the Speakers Balanc...

Страница 182: ...ast Finding a PTY Station To select and find a desired PTY perform the following 1 Press the P TYPE button P TYPE and the last selected PTY will be displayed on the screen 2 Select a category by turni...

Страница 183: ...splay The radio may switch to stronger stations Press and hold AM FM again for two seconds to turn alternate frequency off AF OFF will appear on the display The radio will not switch to other stations...

Страница 184: ...e INFO button until a new message is received or a different station is tuned to TRAF Traffic TRAF will appear on the display if the tuned station broadcasts traffic announcements To receive the traff...

Страница 185: ...will hear a beep and the light located to the right of the slot will begin to flash 3 Once the light stops flashing and turns green load a disc Insert the disc partway into the slot label side up The...

Страница 186: ...several times before stopping Do not repeatedly press the CD eject side of the LOAD CD eject button to eject a disc after you have tried to push it in manually The receivers 25 second eject timer will...

Страница 187: ...econds have passed Press the right arrow to go to the next track If you press the button more than once the player will continue moving backward or forward through the disc I SCAN I To scan onedisc pr...

Страница 188: ...has been saved 5 Repeat Steps 3 and 4 for saving other selections If you attempt to save more than 20 selections S LIST FULL will appear on the display To play the song list press the SONG LIST button...

Страница 189: ...air is very humid If so wait about an hour and try again If the CD is not playing correctly for any other reason try a known good CD If any error occurs repeatedly or if an error can t be corrected c...

Страница 190: ...es in heat or direct sunlight This could damage the headphones and would not be covered by your warranty Keep the headphones stored in a cool place To change the batteries do the following 1 Loosen th...

Страница 191: ...Each press of the AUX button on the remote control will switch the system between disc and auxiliary input The wired headphone volume control will only operate when the DVD player power is turned on a...

Страница 192: ...anada Puerto Rico Bermuda the Virgin Islands and some islands in the Pacific On some DVD jackets you will see the region displayed Regular audio CDs can also be played by the DVD player The video scre...

Страница 193: ...which is mounted vertically above the driver s right shoulder Press this button while a DVD is playing to freeze the video and mute the audio to the headphones It will also disable all other button op...

Страница 194: ...the function of the remote control Objects blocking the line of sight may also affect the function of the remote control Remote Control Buttons Notice Do not store the remote control in heat or direct...

Страница 195: ...right or the previews MENU Press this button to view the media menu The media menu is different on every disc Use the up and down and the right and the left arrow buttons to move the cursor around the...

Страница 196: ...tton can also be found on the video screen q LIGHT Pressthis button to illuminate the keypad for about eight seconds Setup Menu To access the setup menu ensure a DVD is in the player and the video is...

Страница 197: ...r this Problem The picture does not fill the screen There are black borders on the top and bottom or on both sides or it looks stretched out I ejected the disc and tried to take it out but it was pull...

Страница 198: ...e DVDs main menu Then follow the prompts Problem Recommended Action After stopping the player I Press the STOP button on push PLAY 6ut sometimes the DVD starts where I left off and sometimes at the be...

Страница 199: ...ing for DVDs will not always work or perform the same function for audio CDs or games Problem My disc is stuck in the player The EJECT LOAD button does not work Recommended Action Press the EJECT LOAD...

Страница 200: ...hrough the front speakers The rear seat passengers have control of the volume for each set of headphones The front seat audio controls always override the rear seat audio controls PWR Power Press this...

Страница 201: ...he front radio or the CD changer is in use Radio Personalization If your vehicle has this feature it allows the driver to return to the last used audio source radio cassette or CD using the remote key...

Страница 202: ...xperience audio distortion in the IR headphones when operating cellular phones scanners CB radios Global Positioning Systems GPS two way radios mobile fax or walkie talkies It may be necessary to turn...

Страница 203: ...pe head as the hubs of the cleaner cassette turn The recommended cleaning cassette is available through your dealership The cut tape detection feature of your cassette tape player may identify the cle...

Страница 204: ...ay directly onto the screen and do not press too hard or too long on the video screen Fixed Mast Antenna The fixed mast antenna can withstand most car washes without being damaged If the mast should e...

Страница 205: ......

Страница 206: ...perating Your All Wheel Drive Vehicle Off Paved Roads 4 15 Driving in Rain and on Wet Roads 4 28 Driving at Night 4 27 City Driving 4 31 Freeway Driving 4 32 Before Leaving on a Long Trip 4 33 Highway...

Страница 207: ...driving task Anything that distracts from the driving task such as concentrating on a cellular telephone call reading or reaching for something on the floor makes proper defensive driving more diffic...

Страница 208: ...king depends upon four things e Theamount of alcohol consumed The drinker s body weight during drinking consume the alcohol The amount of food that is consumed before and The length of time it has tak...

Страница 209: ...ected well below a BAC of 0 10 percent Research shows that the driving skills of many people are impaired at a BAC approaching 0 05 percent and that the effects are worse at night All drivers are impa...

Страница 210: ...by even a small amount of alcohol You can have a serious or even fatal collision if you drive after drinking Please don t drink and drive or ride with a driver who has been drinking Ride home in a ca...

Страница 211: ...ther it s pavement or gravel the condition of the road wet dry icy tire tread the condition of your brakes the weight of the vehicle and the amount of brake force applied Avoid needless heavy braking...

Страница 212: ...4 Along with ABS your vehicle has a Dynamic Rear Proportioning DRP system If there s a DRP problem both the brake and ABS warning lights will come on accompanied by a IO second chime The lights and ch...

Страница 213: ...brake pedal or always decrease stopping distance If you get too close to the vehicle in front of you you won t have time to apply your brakes if that vehicle suddenly slows or stops Always leave enou...

Страница 214: ...use it again you may re engage the cruise control See Cruise ControlLight on page 3 40 When the TRAC OFF light on the button is on the TAS is off and will not limit wheel spin Adjust your driving acc...

Страница 215: ...hold it down for at least six seconds 4 Release theTAS button and both pedals The next time you start your vehicle the TAS will not automatically come on You can restore the automatic feature by usin...

Страница 216: ...up on the accelerator pedal steer the vehicle the way you want it to go and slow down Speed limit signs near curves warn that you should adjust your speed Of course the posted speeds are based on good...

Страница 217: ...d reason to practice defensive driving at all times and wear safety belts properly Off Road Recovery You mayfind that your right wheels have dropped off the edge of a road onto the shoulder while you...

Страница 218: ...it s all right to pass providing the road ahead is clear Never cross a solid line on your side of the lane or a double solid line even if the road seems empty of approaching traffic Do not get too cl...

Страница 219: ...ked In any emergency don t give up Keep trying to steer and constantly seek an escape route or area of less danger Skidding In a skid a driver can lose control of the vehicle Defensive drivers avoid m...

Страница 220: ...sponsive on paved roads during poor weather conditions features like the locking rear axle and all wheel drive help make it much better suited for off road use than a conventional passenger car Its hi...

Страница 221: ...your rear axle Put heavier items as far forward as you can Be sure the load is secured properly so driving on the off road terrain doesn t toss things around m 0 Largo on the load floor piled h rer th...

Страница 222: ...dry grass or other combustible materials that could catch fire form the heat of the vehicle s exhaust system Traveling to Remote Areas It makes sense to plan your trip especially when going to a remo...

Страница 223: ...terrain You need to be familiar with the terrain and its many different features Here are somethings to consider Surface Conditions Off roadingcan take you over hard packed dirt gravel rocks grass san...

Страница 224: ...ol You could have a serious or even fatal accident if you drink and drive or ride with a driver who has been drinking See Drunken Driving on page 4 2 Driving on Off Road Hills Off road driving often t...

Страница 225: ...drive up the hill you need to take some special steps Use a low gear and get a firm grip on the steering wheel Get a smooth start up the hill and try to maintain your speed Don t use more power than...

Страница 226: ...he hill as straight as possible in REVERSE R As you are backing down the hill put your left hand on the steering wheel at the 12 o clock position This way you ll be able to tell if your wheels are str...

Страница 227: ...keep your vehicle headed straight down and use a low gear This way engine drag can help your brakes and they won t have to do all the work Descend slowly keeping your vehicle under control at all time...

Страница 228: ...or down a hill the length of the wheel base the distance from the front wheels to the rear wheels reduces the likelihood the vehicle will tumble end over end But when you drive across an incline the m...

Страница 229: ...ome loose gravel and start to slide downhill What should I do A If you feel your vehicle starting to slide sideways turn downhill This should help straighten out the vehicle and prevent the side slipp...

Страница 230: ...hange in wheel traction But it will depend upon how loosely packed the sand is On loosely packed sand as on beaches or sand dunes your tires will tend to sink into the sand This has an effect on steer...

Страница 231: ...be dangerous Deep water can sweep your vehicle downstream and you and your passengers CAUTION Continued 1 coula arowr r it s y snallo Mater can still wash away the ground from under your tires and yo...

Страница 232: ...ad ahead In remote areas watch for animals If you re tired pull off the road in a safe place and rest No one can see as well at night as in the daytime But as we get older these differences increase A...

Страница 233: ...82 P...

Страница 234: ...signs of streaking or missing areas on the windshield or when strips of rubber start to separate from the inserts Driving too fast through large water puddles or even going through some car washes ca...

Страница 235: ...ive too quickly through deep puddles or standing water water can come in through your engine s air intake and badly damage your engine Never drive through water that is slightly lower than the underbo...

Страница 236: ...map and plan your trip into an unknown part of the city just as you would for a cross country trip most large cities You ll save time and energy See Freeway Driving on page 4 32 Treat a green light a...

Страница 237: ...ave a clear view of the freeway as you drive along the entrance ramp you should begin to check traffic Try to determine where you expect to blendwith the flow Try to merge into the gap at closeto the...

Страница 238: ...Wear comfortable clothing and shoes you can easily drive in I s your vehicle ready for a long trip If you keep it serviced and maintained it s ready to go If it needs service have it done before star...

Страница 239: ...eave the road in less than a second and you could crash and be injured What can you do about highway hypnosis First be aware that it can happen Then here are some tips Make sure your vehicle is well v...

Страница 240: ...downhill slope Coasting downhill in NEU RAL N or with the ignition off is dangerous Your brakes will have to doall the work of slowing down They could get so hot that they wouldn t work well You would...

Страница 241: ...tive warning triangles And if you will be driving under severe conditions include a small bag of sand a piece of old carpet or a couple of burlap bags to help provide traction Be sure you properly sec...

Страница 242: ...have traction assist keep the system on It will improve your ability to accelerate when driving on a slippery road But you can turn the traction system off if your vehicle ever gets stuck in sand mud...

Страница 243: ...buildings or under bridges Sometimes the surface of a curve or anoverpass may remain icy when the surrounding roads are clear If you see a patch of ice ahead of you brake before you are on it Try not...

Страница 244: ...vehicle Clear away snow from around the base of your vehicle especially any that is blocking your exhaust pipe And check around again from time to time to be sure snow doesn t collect there Open a wi...

Страница 245: ...Continued I 1 When you re stuc sp wneels as little as possible Don t spin the wheels above35 mph 55 km h as shown on the speedometer Notice Spinning your wheels can destroy parts of your vehicle as w...

Страница 246: ...knownas dinghy towing towing your vehicle with all four wheelson the ground and dolly towing towingyour vehicle with two wheels on the ground and two wheels up ona device known as a dolly Your vehicl...

Страница 247: ...ratings Ask your dealer to help you load your vehiclethe right way Notice Your warranty does not cover parts or components that fail becauseo f overloading If you put things inside your vehicle like s...

Страница 248: ...il the system cools down During this time the indicator light on the air inflator system will be flashing The ignition has to be on for the system to inflate in order to raise the vehicle to the stand...

Страница 249: ...mount of overload This will continue each time the ignition is turned on until the rear axle load is reduced below GAWR The indicator light on the inflator switch in the rear passenger compartment als...

Страница 250: ...ealer for important information about towing a trailer with your vehicle Additional rear axle maintenance is required for a vehicle used to tow a trailer See Scheduled Maintenance Services in the Inde...

Страница 251: ...controls Don t tow a trailer at all during the first 500 miles 800 km your new vehicle is driven Your engine axle or other parts could be damaged Then during the first 500 miles 800 km that you tow a...

Страница 252: ...iler are all important And it can also depend on any special equipment that you have on your vehicle You can ask your dealer for our trailering information or advice or you can write us at Oldsmobile...

Страница 253: ...ing a weight carrying or a weight distributing hitch the trailer tongue weight A should be 10 percent to 15 percent of the total loaded trailer weight B Do not exceed the maximum allowable tongue weig...

Страница 254: ...the hitch Instructionsabout safetychains may be provided by the hitch manufactureror bythe trailer manufacturer Follow the manufacturer s recommendationfor attaching safety chains and do not attach th...

Страница 255: ...urself with the feel of handling and braking with the added weight of the trailer And always keep in mind that the vehicle you are driving is now a good deal longer and not nearly as responsive as you...

Страница 256: ...your instrument panel will flash for turns even if the bulbs on the trailer are burned out Thus you may think drivers behind you are seeing your signal when they are not It s important to check occas...

Страница 257: ...en apply your regular brakes until the chocks absorb the load parking brake and then shift into PARK P 5 Release the regular brakes startyour engine shift into a gear and release the parking brake 2 L...

Страница 258: ...ound Light Green Back up Lamps Red Battery Feed Dark Blue Electric Brakes If you need to tow a light duty trailer with a standard four way round pin connector an adapter connector is available from yo...

Страница 259: ...P cn P...

Страница 260: ...gine Overheating 5 24 Cooling System 5 26 Engine Fan Noise 5 32 Power Steering Fluid 5 33 Additives 5 6 Fuels in Foreign Countries 5 6 Windshield Washer Fluid 5 33 Brakes 5 34 Battery 5 38 Jump Starti...

Страница 261: ...M Vehicle CarelAppearance Materials 5 83 Vehicle Identification 5 85 Vehicle Identification Number VIN 5 85 Service Parts Identification Label 5 85 Cleaning the Outside of Your Vehicle 5 80 Electrical...

Страница 262: ...you to be happy with it We hope you ll go to your dealer for all your service needs You ll get genuine GM parts and GM trained and supported service people We hope you ll want to keep your GM vehicle...

Страница 263: ...nce lcord on page 6 19 __ Jre you have s __ nowle e experience the proper replacement parts and tools before you attempt any vehicle maintenance task Be sure to use the proper nuts bolts and other fas...

Страница 264: ...does not indicate a problem exists or that a higher octane fuel is necessary If you are using 87 octane or higher octane fuel and hear heavy knocking your engine needs service Gasoline Specifications...

Страница 265: ...air General Motors recommends that you use these gasolines particularly if they comply with the specifications described earlier 5 6 Notice Your vehicle wasnotdesignedforfuelthat contains methanol Do...

Страница 266: ...t burns violently and that can cause very bad injuries Don t smoke if you re near fuel or refueling your vehicle Keep sparks flames and smoking materials away from fuel The fuel cap is located behind...

Страница 267: ...g ignites it you could be badly burned Fuel can spray out on you if you open the fuel cap too quickly This spray can happenif your tank is nearly full and is more likely in hotweather Open the fuelcap...

Страница 268: ...damage your fuel tank and emissions system See Malfunction lndicator Lamp in the Index Filling a Portable Fuel Container NeveL I1 a portable f l container while it is in your vehicle Static electrici...

Страница 269: ...el oil coolant brake fluid windshield washer and other fluids and plastic or rubber You or others could be burned Be careful not to drop or spill things that will burn onto a hot engine Hood Release T...

Страница 270: ...2 Then go to the front of the vehicle and release the secondary hood release 3 Lift the hood release the hood prop from its retainer and put the hood prop into the slot in the hood 5 11...

Страница 271: ...Engine Compartment Overview When you open the hood you ll see the following 5 12...

Страница 272: ...Marked GND K BrakeMasterCylinder L Battery M EngineCompartment Fuse Block Before closing the hood be sure all filler caps are on properly Then lift the hood to relieve pressure on the hood prop Remov...

Страница 273: ...e engine compartment toward the passenger s side of the vehicle See Engine Compartment Overview on page 5 12for more information on location Turn off the engine and give the oil several minutes to dra...

Страница 274: ...h oil If your engine has so much oil that the oil level gets above the F mark that shows the proper operating range your engine could be damaged SAE5W 30 a The engine oil fill cap is located in the en...

Страница 275: ...sure the oil you use has the starburst symbol on the front of the oil container If you have your oil changed for you be sure the oil put into your engine is American Petroleum Institute certified for...

Страница 276: ...ol are all you will need for good performance and engine protection When to Change Engine Oil GM Oil Life System Your vehicle has a computer system that lets YO when to change the engine oil and filte...

Страница 277: ...er Don t let used oil stay on your skin for very long Clean your skin and nails with soap and water or a good hand cleaner Wash or properly dispose of clothing or rags containing used engine oil See t...

Страница 278: ...ace the engine air cleaner filter To check or replace the engine air cleaner filter do the following 1 Remove the three screws on the engine air 2 Twist out the old engine air cleaner filter and 3 Rei...

Страница 279: ...ifficult you may choose to have this done at the dealership service department If you do it yourself be sure to follow all the instructions here or you could get a false reading on the dipstick Notice...

Страница 280: ...le as follows 0 Parkyourvehicleon a level place Keep the engine running With the parking brake applied place the shift lever in PARK P With your foot on the brake pedal move the shift lever through ea...

Страница 281: ...olant The cooling system in your vehicle is filled with DEX COOL engine coolant This coolant is designed to remain in your vehicle for 5 years or 150 000 miles 240 000 km whichever occurs first if you...

Страница 282: ...improper coolant mixture your engine could overheat and be badly damaged The repair cost wouldn t be covered by your warranty Too much water in the mixture can freeze and crack the engine radiator he...

Страница 283: ...can be burned if you SI coolant on hot engine parts Coolant contains ethylene glycol and it will burn if the engine partsare hot enough Don t spill coolant on a hotengine Occasionally check the coolan...

Страница 284: ...can catch fire You or others could be badly burned Stop your engine if it overheats and get out of the vehicle until the engine is cool Notice If your engine catches fire because you keep driving wit...

Страница 285: ...hicle right away 2 Turn on your heater to full hot at the highest fan If there s still no sign of steam you can push down the accelerator until the engine speed is about twice as fast as normal idle s...

Страница 286: ...be no leak start the engine again The engine cooling fan speed should increase when idle speed is doubled by pushing the accelerator pedal down If it doesn t your vehicle needs service Turn off the en...

Страница 287: ...er coolant mixture With plain watero r the wrong mixture your engine could get too hot but you wouldn t get the overheat warning Your engine could catch fire and you or others could be burned Use a50...

Страница 288: ...eam and scalding liquids from a hot cooling system can blow out and burn you badly They are under pressure and if you turn the radiator pressure cap even a little they can come out at high speed Never...

Страница 289: ...em including the radiator pressure cap and upper radiator hose is no longer hot Turn the pressure cap slowly counterclockwise about one full turn If you hear a hiss wait for that to stop A hiss means...

Страница 290: ...the base of the filler neck See Engine Coolant on page 5 22for more information about the proper coolant mixture 4 Then fill the coolant recovery tank to the FULL COLD mark 5 Put the cap back on the...

Страница 291: ...s vehicle has a clutched engine cooling fan When the clutch is engaged the fan spins faster to provide more air to cool the engine In most everyday driving conditions the clutch is not engaged This im...

Страница 292: ...wipe the dipstick with a clean rag Replace the cap and completely tighten it Then remove the cap again and look at the fluid level on the dipstick The level should be at the C cold mark If necessary a...

Страница 293: ...This allows for expansion if freezing occurs which could damage the tank ifit is completely full Don t use engine coolant antifreeze in your windshield washer It can damage your washer system and pain...

Страница 294: ...draulic sys n Checking Brake Fluid You can check the brake fluid without taking off the cap If you have too much brake fluid it can spill on the engine The fluid will burn if the engine is hot enough...

Страница 295: ...ts For example just afew drops of mineral based oil such as engine oil in your brake system can damage brake system parts so badly that they ll haveto be replaced Don t let someone put in the wrong ki...

Страница 296: ...the brake pedal does not return to normal height or if there is a rapid increase in pedal travel This could be a sign of brake trouble Brake Adjustment Every time you make a brake stop your disc brak...

Страница 297: ...of California to cause cancer and reproductive harm Wash hands after handling Vehicle Storage If you re not going to drive your vehicle for 25 days or more remove the black negative cable from the ba...

Страница 298: ...enough so the jumper cables can reach but be sure the vehicles aren t touching each other If they are it could cause a ground connection you don t want You wouldn t be able to start your vehicle and t...

Страница 299: ...urt doing this and some have been blinded Use a flashlight if you need more light Be sure the battery has enough water You don t need to addwater to the ACDelco battery installed in your new vehicle B...

Страница 300: ...ve to negative or you ll get a short that would damage the battery and maybe other parts too And don t connect the negative cable to the negative terminal on the dead battery because this can cause sp...

Страница 301: ...the other end of the negative cable to 1 the remote negative terminal on the vehicle with the dead battery 10 Now start the vehicle with the good battery and run the engine for a while 1 1 Try to star...

Страница 302: ...ive Terminals To disconnect the jumper cables from both vehicles do the following 1 Disconnect the black negative cable from the vehicle that had the dead battery 2 Disconnect the black negative cable...

Страница 303: ...e reading the vehicle should be on a level surface If the level is below the bottom of the filler plug hole you ll need to add some lubricant Add enough lubricant to raise the level to the bottom of t...

Страница 304: ...differential is cold add enough lubricant to raise the level to 1 2 inch 12 mm below the filler plug hole When the differential is at operating temperature warm add enough lubricant to raise the leve...

Страница 305: ...ck Lubricant To get an accurate reading the vehicle should be on a level surface The proper level is from 0 to 3 8 inch 0 to 10 mm below the bottom of the filler plug hole What to Use Refer to the Mai...

Страница 306: ...en the liftgate 3 Pull the assembly away from the vehicle 2 Remove from the the two screws lamp assembly 4 5 6 7 8 Unclip the wiring harness A and remove the three socket retaining screws B Remove the...

Страница 307: ...rness 10 Reinstall the lamp assembly and tighten the screws 11 Close the liftgate Replacement Bulbs Exterior Lamp 3157 Taillamps Bulb Number Rear Turn Signal Lamps I 3157 For any bulb not listed here...

Страница 308: ...age 5 94 for the proper type of replacement blade Notice Use care whenremoving or installing a blade assembly Accidental bumping can cause the arm to fall back and strike the windshield 1 To remove th...

Страница 309: ...At the notched end pull the insert from the blade assembly 0 I W 4 To install the new wiper insert slide the insert D notched end last into the end with two blade claws A Slide the insert all the way...

Страница 310: ...efully lower the wiper arm and blade assembly onto the windshield Backglass Wiper Blade Replacement See Windshield Wiper Blade Replacement on page 5 49 in this section for instructions on how to chang...

Страница 311: ...and a serious accident See Loading Your Vehicle in the Index CAUTION Continued Underinflated tires pose the same danger as overloaded tires The resulting accident could cause serious injury Check all...

Страница 312: ...your tires once a month or more Also check the tire pressure of the spare tire Use a good quality pocket type gage to check tire pressure You can t tell if your tires are properly inflated simply by...

Страница 313: ...ficationnire label Make certain that all wheel nuts are properly tightened See Wheel Nut Torque under Capacities and Specifications on page 5 93 Rust c dirt or wheel or on the parts to which it is fas...

Страница 314: ...r indicators You need a new tire if any of the following statements are true You can see the indicators at three or more places 0 You can see cord orfabric showing through the tire s rubber The tread...

Страница 315: ...d by an MS for mud and snow If you ever replace your tires with those not having a TPC Spec number make sure they are the same size load range speed rating and construction type bias bias belted or ra...

Страница 316: ...requirements and additional General Motors Tire Performance Criteria TPC standards Treadwear The treadwear grade is a comparative rating based on the wear rate of the tire when tested under controlle...

Страница 317: ...parately or in combination can cause heat buildup and possible tire failure Wheel Alignment and Tire Balance The wheels on your vehicle were aligned and balanced carefully at the factory to give you t...

Страница 318: ...e a collision in which you or others could be injured Always use the correct wheel wheel bolts and wheel nuts for replacement Notice The wrong wheel can also cause problems with bearing life brake coo...

Страница 319: ...s To help avoid damage to your vehicle drive slowly readjust or remove the device if it s contacting your vehicle and don t spin yourwheels If you do find traction devices that will fit install them o...

Страница 320: ...n with the inflator hose attached to the inflator outlet See Electronically Controlled Air Suspension System in the Index To reinstall the cover line up the tabs at the back of the cover put it in pla...

Страница 321: ...ge a flat tire safely Changing a Flat Tire If a tire goes flat avoid further tire and wheel damage by driving slowly to a level place Turn on your hazard warning flashers Cha ing a tire can ca e an in...

Страница 322: ...l you how to use the jack and change a tire The jacking equipment you will need is stored under the rear seat on the passenger s side of the vehicle See Rear SeatOperationon page 1 6for more informati...

Страница 323: ...to a storage position under the vehicle while the vehicle is supported by a jack Always tighten the tire fully against the underside of the vehicle when restowing f 1 To remove the underbody mounteds...

Страница 324: ...hen the tire has been completely lowered tilt the retainer at the endof the cable and pull it through the wheel opening Pull the tire out from under the vehicle Notice To help avoid vehicle damage do...

Страница 325: ...ols for instructions on storing the spare or flat tire correctly Before beginning this procedure read all the instructions Failure to read and follow the instructions could damage the hoist assembly a...

Страница 326: ...with Step 2 of Removing the Spare Tire and Tools earlier in this section approximately 6 inches 15 cm of cable is exposed 5 Turn the wrench counterclockwise until 6 Attach the jack handle extension an...

Страница 327: ...andle extension and wheel wrench into the hoist shaft hole in the bumper on an angle and turn the wheel wrench counterclockwiseto lower the spare the rest of the way 11 Tilt the retainer at the end of...

Страница 328: ...g the Spare Tire 1 Using the wheel wrench loosen all thewheel nuts Don t remove them yet Front 2 Turn the jack adjusting knob clockwise by hand to 3 Place the handle extension and wheel wrench onto ra...

Страница 329: ...If the vehicle slips off the jack you could be badly injured or killed Never get under a vehicle when it is supported only by a jack Raising your vehicle with the jack improperly positioned can damag...

Страница 330: ...ke the wheel nuts become loose after a time The wheel could come off and cause an accident When you CAUTION Continued change a wheel remove any rust or dirt from the places where the wheel attachesto...

Страница 331: ......

Страница 332: ...ment wheel nuts I CAUTION Continued Stop somewhere as soon as you can and have the nuts tightened with a torque wrench to the proper torque specification See Capacities and Specifications in the Index...

Страница 333: ...CAUTION Continued CAUTION Continued and suddenly fall from your vehicle If this happened when your vehicle was being driven the tire might contact a person or another vehicle causing injury and of cou...

Страница 334: ...re fully against the underside of the vehicle by turning the wheel wrench clockwise until you hear two clicks or feel it skip twice The spare tire hoist cannot be overtightened PUSH PULL 5 Make sure t...

Страница 335: ...L 9 0 7 i...

Страница 336: ...cetone PaintThinner Turpentine LacquerThinner 0 Nail Polish Remover They can all be hazardous some more than others and they can all damage your vehicle too Don t use any of these unless this manual s...

Страница 337: ...ction use a sponge to remove any excess cleaner 6 Wipe cleaned area with a clean water dampened towel or cloth Special Fabric Cleaning Problems Stains caused by such things as catsup coffee black egg...

Страница 338: ...ather Soiledorstained leather should be cleaned immediately If dirt is allowed to work into the finish it can harm the leather Top of the Instrument Panel Use only mild soap and water to clean the top...

Страница 339: ...s finish is to keep it clean by washing it often with lukewarm or cold water Don t wash your vehicle in the direct rays of the sun Use a car washing soap Don t use strong soaps or chemical detergents...

Страница 340: ...er a period of years You can help to keep the paint finish looking new by keeping your vehicle garaged or covered whenever possible Protecting Exterior Bright Metal Parts Bright metal parts should be...

Страница 341: ...plying a tire dressing always take care to wipe off any overspray or splash from all painted surfaces on the body or wheels of the vehicle Petroleum basedproducts may damage the paint finish and tires...

Страница 342: ...er or an underbody car washing system can do this for you Chemical Paint Spotting Some weather and atmospheric conditions can create a chemical fallout Airborne pollutants can fall upon and attack pai...

Страница 343: ...rints and surface contaminants Spray on wipe off Swirl Remover Polish Removes swirl marks fine scratches and other light surface Icontamination GNI Vehicle Care Appearance Materials cont d Description...

Страница 344: ...s labels and the certificates of title and registration Engine Identification The 8th character in your VIN is the engine code This code will help you identify your engine specifications and replaceme...

Страница 345: ...e motor cools If the overload is caused by some electrical problem be sure to get it fixed Power Windows and Other Power Options Circuit breakers protect the power windows and other power accessories...

Страница 346: ...hood in the engine compartment on the driver s side of the vehicle See Engine Compartment Overview on page 5 72 for more information on location Remove the primary cover by pressing the two locking ta...

Страница 347: ...n i u L t n S tn D P O C P I C I I P I CD 9 3 c v U v CD 3 g 3 1 8 1 1 6 1 m m 1 8 rn m m m m m 1 8 2 1 Ig lpcl m mP 4 m 0 EID...

Страница 348: ...ontrol System Engine 1 Back up Powertrain Control Module 1 Oxygen Sensor Air Conditioning Truck Body Controller Fuses 32 33 34 35 36 50 51 52 Relays 37 38 39 40 41 42 43 44 45 46 47 Usage Trailer Anti...

Страница 349: ...Rear Underseat Fuse Block The rear underseat fuse block is located under the rear seat on the driver s side of the vehicle 7 OHBAll CONSTAR3 PARKLP 0 5 90...

Страница 350: ...nk Driver Door Module Amplifier Passenger Door Module Rear Climate Controls Left Rear Parking Lamps Auxiliary Power 2 Vehicle Center High Mounted Stop Lamp Fuses 17 18 19 20 21 23 24 25 26 27 29 30 31...

Страница 351: ...n Signal Heat Ventilation Air Conditioning 1 Truck Body Controller 4 Radio Trailer Park Right Turn Signal Heat Ventilation Air Conditioning Fuses 45 46 47 48 49 50 51 52 Usage Rear Fog Lamps Auxiliary...

Страница 352: ...Capacities and Specifications VORTECTM 4200 L6 S M30 0 042 inches 1 07 mm 1 5 3 6 2 4 ransmlsslon Differential Fluid Rear 4 0 pints I 1 9 L 5 93...

Страница 353: ...No 24200796 Automatic Transmission Filter Kit A201 4C Engine Air Cleaner PF58 Engine Oil Filter Number Spark Plugs ACDelco part number 14 0 inches 35 6 em Backglass Wiper Blade 20 0 inches 50 8 cm Win...

Страница 354: ...east Once a Month 6 10 At Least Twice a Year 6 11 Your Vehicle and the Environment 6 2 At Least Once a Year 6 12 Part C Periodic Maintenance Inspections 6 15 Boot and Seal Inspection 6 15 Exhaust Syst...

Страница 355: ...missions from your vehicle To help protect our environment and to keep your vehicle in good condition please maintain your vehicle properly Maintenance Requirements Maintenance intervals checks inspec...

Страница 356: ...If you want to get the service information see Service Publications Ordering Informationon page7 10 Part B Owner Checks and Services tells you what should be checked and when It also explains what you...

Страница 357: ...following and note how you drive If you have any questions on how to keep your vehicle in good condition see your dealer This part tells you the maintenance services you should have done and when you...

Страница 358: ...know when to change the engine oil and filter This is based on engine revolutions and engine temperature and not on mileage Based on driving conditions the mileage at which an oil change will be indi...

Страница 359: ...ck readfront axle fluid level and add fluid as needed Check constant velocity joints and axle seals for leaking 0 Rotate tires See Tire Inspection and Rotation on page 5 53 for proper rotation pattern...

Страница 360: ...change thefluid and filter at 100 000miles 166 000 km 0 Change transfer case fluid 52 500 Miles 87 500 km 0 Check readfront axle fluid level and add fluid as needed Check constant velocity joints and...

Страница 361: ...tation pattern and additional information See footnote 0 Rotate tires See Tire Inspection and Rotation on 90 000 Miles 150 000 km c1 Replace fuel filter An Emission Control Service See Footnote t 0 Re...

Страница 362: ...ervice 0 If you haven t used your vehicle under severe service conditions listed previously and therefore haven t changed your automatic transmission fluid change both the fluid and filter U Change tr...

Страница 363: ...proper oil if necessary See Engine Oil on page 5 13 for further details Engine Coolant Level Check Check the engine coolant level and add DEX COOL coolant mixture if necessary See Engine Coolant on p...

Страница 364: ...turn the tire If it moves use the wheel wrenchhatchet to tighten the cable See Changing a Flat Tire on page5 62 Engine Air Cleaner Filter Restriction Indicator Check Your vehicle may be equipped with...

Страница 365: ...hat to use More frequent lubrication may be required when exposed to a corrosive environment When you are doing this check the vehicle could move suddenly If it does you or others could be injured Fol...

Страница 366: ...h the engine off turn the key to the RUN position but don t start the engine Without applying the regular brake try to move the shift lever out of PARK P with normal effort If the shift lever moves ou...

Страница 367: ...ansmission in NEUTRAL N slowly remove foot pressure from the regular brake pedal Do this until the vehicle is held by the parking brake only To check the PARK P mechanism s holding ability With the en...

Страница 368: ...eaks cracks chafing etc Clean and then inspect the drive axle boot seals for damage tears or leakage Replace seals if necessary Exhaust System Inspection Inspect the complete exhaust system Inspect th...

Страница 369: ...t transfer case for kinks and proper installation Brake System Inspection Inspect the complete system Inspect brake lines and hoses for proper hook up binding leaks cracks chafing etc Inspect disc bra...

Страница 370: ...valent Usage Fluid Lubricant Chassis Lubricant GM Part No U S 12377985 in Canada Parking Brake meeting requirements of NLGI 2 CableGuides 88901242 or equivalent or lubricant ICateqow LB or GC LB GM Po...

Страница 371: ...briplate Lubricant Aerosol GM Part No U S 12346293 in Canada 992723 or equivalent or lubricant meeting requirements of NLGl 2 Category LB or GC LB Multi Purpose Lubricant Superlube GM Part No U S 1234...

Страница 372: ...erformed record the date odometer reading and who performed the service and any additional information from Owner Checks and Services or Periodic Maintenance on the following record pages Also you sho...

Страница 373: ...MaintenanceRecord cont d...

Страница 374: ...MaintenanceRecord cont d 6 21...

Страница 375: ...MaintenanceRecord cont d...

Страница 376: ...ilities 7 5 Roadside Assistance Program 7 5 Courtesy Transportation 7 7 Customer Assistance for Text Telephone GMMobilityProgramfor Persons with Reporting Safety Defects 7 9 Government 7 9 Government...

Страница 377: ...stomer Communication Centre in Oshawa by calling 1 800 263 3777 English or 1 800 263 7854 French We encourage you to call the toll free number in order to give your inquiry prompt attention Please hav...

Страница 378: ...Suite 800 Arlington VA 22203 1804 Telephone 1 800 955 5100 This program is available in all 50 states and the District of Columbia Eligibility is limited by vehicle age mileage and other factors Gene...

Страница 379: ...For Text Telephone devices TTYs Roadside Assistance 1 800 442 OLDS 6537 Fax Number 313 381 0022 From Puerto Rico 1 800 496 9992 English 1 800 496 9993 Spanish 7 4 1 800 442 6537 Fax Number 313 381 002...

Страница 380: ...etails or call the GM Mobility Assistance Center at 1 800 323 9935 Text telephone TTY users call 1 800 833 9935 GMof Canada also has a Mobility Program Call 1 800 GM DRIVE 463 7483 for details All TTY...

Страница 381: ...tances mechanical failures are covered under Oldsmobile s comprehensive warranty However when other services are utilized our Roadside Assistance Representatives will explain any payment obligations y...

Страница 382: ...st an appointment By scheduling a service appointment and advising your service consultant of your transportation needs your dealer can help minimize your inconvenience If your vehicle cannot be sched...

Страница 383: ...r rental usage beyond the completion of the repair Generally it is not possible to provide a like vehicle as a courtesy rental Additional Program Information Courtesy Transportation is available durin...

Страница 384: ...SA U S Department of Transportation Washington D C 20590 You can also obtain other information about motor vehicle safety from the hotline Reporting Safety Defects to the Canadian Government If you li...

Страница 385: ...formation needed to knowledgeably service General Motors cars and trucks Each bulletin contains instructions to assist in the diagnosis and service of your vehicle In Canada information pertaining to...

Страница 386: ...OO PM Eastern Time For Credit Card Orders Only VISA Mastercard Discover visit Helm Inc on the World Wide Web at www helminc com Or you can write to Helm Incorporated P 0 Box 07130 Detroit MI 48207 Pr...

Страница 387: ...7 12...

Страница 388: ...ls 5 82 AM 3 89 Antenna Fixed Mast 3 91 Anti lock Brake System 4 7 Anti Lock Brake System Warning Light 3 34 Appearance Care 5 77 Care of Safety Belts 5 80 Chemical Paint Spotting 5 83 Gleaning the In...

Страница 389: ...ke Wear 5 36 Brakes 5 34 Braking 4 6 Backing Up 4 51 BATTERY NOT CHARGING 3 53 Braking in Emergencies 4 8 Break ln NewVehicle 2 18 Bulb Replacement 5 47 Replacement Bulbs 5 48 Buying New Tires 5 56 Ta...

Страница 390: ...e Lighter 3 20 Cleaning Inside ofYourVehicle 5 77 Outside ofYourVehicle 5 80 Underbody Maintenance 5 83 Video Screen 3 91 Cleaning cont Weatherstrips 5 80 Cleaning Exterior Lamps Lenses 5 80 Climate C...

Страница 391: ...elt 1 13 Driver Information Center DIC 3 43 Locks 2 8 Driver DRIVER DOOR AJAR 3 54 Driver Information Center DIC cont DIC Operation and Displays 3 43 DIC Warnings and Messages 3 52 At Night 4 27 Defen...

Страница 392: ...ing 5 24 ReducedPowerLight 3 40 Starting 2 19 CoolantTemperature Gage 3 35 Engine Air Cleaner Filter Restriction Indicator Check 6 11 Engine Compartment Fuse Block 5 87 Engine Coolant Level Check 6 10...

Страница 393: ...3 54 Fuses Fuses and Circuit Breakers 5 86 Filling a Portable Fuel Container 5 9 G Gage Check Gages Warning Light 3 41 Engine Coolant Temperature 3 35 Fuel 3 42 Oil Pressure 3 38 Speedometer 3 30 Tach...

Страница 394: ...ine 5 25 If Steam Is Coming From Your Engine 5 25 If the Light Is On Steady 3 37 Ifthe Light Is Flashing 3 36 If YouAre Stuck in Sand Mud Ice orSnow 4 40 If You Do Decide To Pull A Trailer 4 46 IfYou...

Страница 395: ...ing a Child Restraint Designed forthe Lockout Protection 2 12 LATCH System Loading Your Vehicle for Off Road Driving 4 16 LATCHSystem 1 40 Locks Leather 5 79 Leaving Your Vehicle 2 12 Leaving YourVehi...

Страница 396: ...Suspension and Front Drive Axle Boot and Seal Inspection 6 15 TransferCase and FrontAxle All Wheel Drive Inspection 6 16 Using Your 6 4 YourVehicle and the Environment 6 2 Maintenance When Trailer To...

Страница 397: ...41 Owners Canadian ii Owner s Information 7 10 P Park P Parking Shifting Out of 2 27 Brake 2 25 Over Things That Burn 2 28 Park P Mechanism Check 6 14 Parking Brake and AutomaticTransmission Parking o...

Страница 398: ...udio 3 87 Radios cont Setting the Time 3 56 Theft Deterrent 3 88 Understanding Reception 3 89 RainsenseTMWipers 3 9 RDS Messages 3 61 3 71 Reading Lamps 3 18 REAR ACCESS OPEN 3 53 Rear Axle 5 46 Locki...

Страница 399: ...ety Belts 1 21 RIGHT REARDOORAJAR 3 55 Roadside Assistance Program 7 5 Rocking YourVehicle To Get It Out 4 40 Running Your Engine While You Are Parked 2 29 S 3 30 Safety Belt Safety Belts Reminder Lig...

Страница 400: ...ark P 2 25 Shifting Out of Park P 2 27 Skidding 4 14 SnowPlow 4 44 SomeOtherRainyWeather Tips 4 30 orCheckEngine Light in Canada 3 35 Spare TireCheck 6 11 Specifications Capacities 5 93 Stalling on an...

Страница 401: ...ter 2 21 Top of the Instrument Panel 5 79 Top Strap 1 36 Top Strap Anchor Location 1 37 TorqueLock 2 27 TotalWeighton YourVehicle sTires 4 48 Towing Recreational Vehicle 4 41 Towing a Trailer 4 45 You...

Страница 402: ...Gages and Indicators 3 28 Warnings DICWarnings and Messages 3 52 HazardWarning Flashers 3 5 OtherWarningDevices 3 6 Safety andSymbols III VehicleDamage iv Washing Your Vehicle 5 80 Weatherstrip Lubric...

Страница 403: ...Blades WindshieldWasher Fluid WindshieldWasher Fluid Level Check WindshieldWiper Blade Replacement 1 9 2 15 2 14 2 15 5 81 3 10 5 33 6 10 Windshield Wiper cont Fuses 5 86 Windshield Wipers 3 9 Winter...

Страница 404: ......

Страница 405: ...JED NOTES...

Страница 406: ......

Страница 407: ......

Страница 408: ......

Страница 409: ......

Страница 410: ......

Отзывы: