- 67 -
Scanning to Shared Folder
4
Scanning
Step 2-3 Configuring the
Computer for Scan to Shared
Folder
With the Setup Information Form, create an
account and shared folder for the machine in the
computer.
Memo
● If the computer is in a domain, the procedure for adding a
user account may differ from the procedure below. Refer
to the Microsoft Windows manual.
For Windows 8, Windows Server
2012, Windows 7, Windows Server
2008 R2, Windows 2008 and
Windows Vista
1
Click [Start] > [Control Panel].
2
Select [Add or remove user
accounts].
3
Select [Create a new account].
4
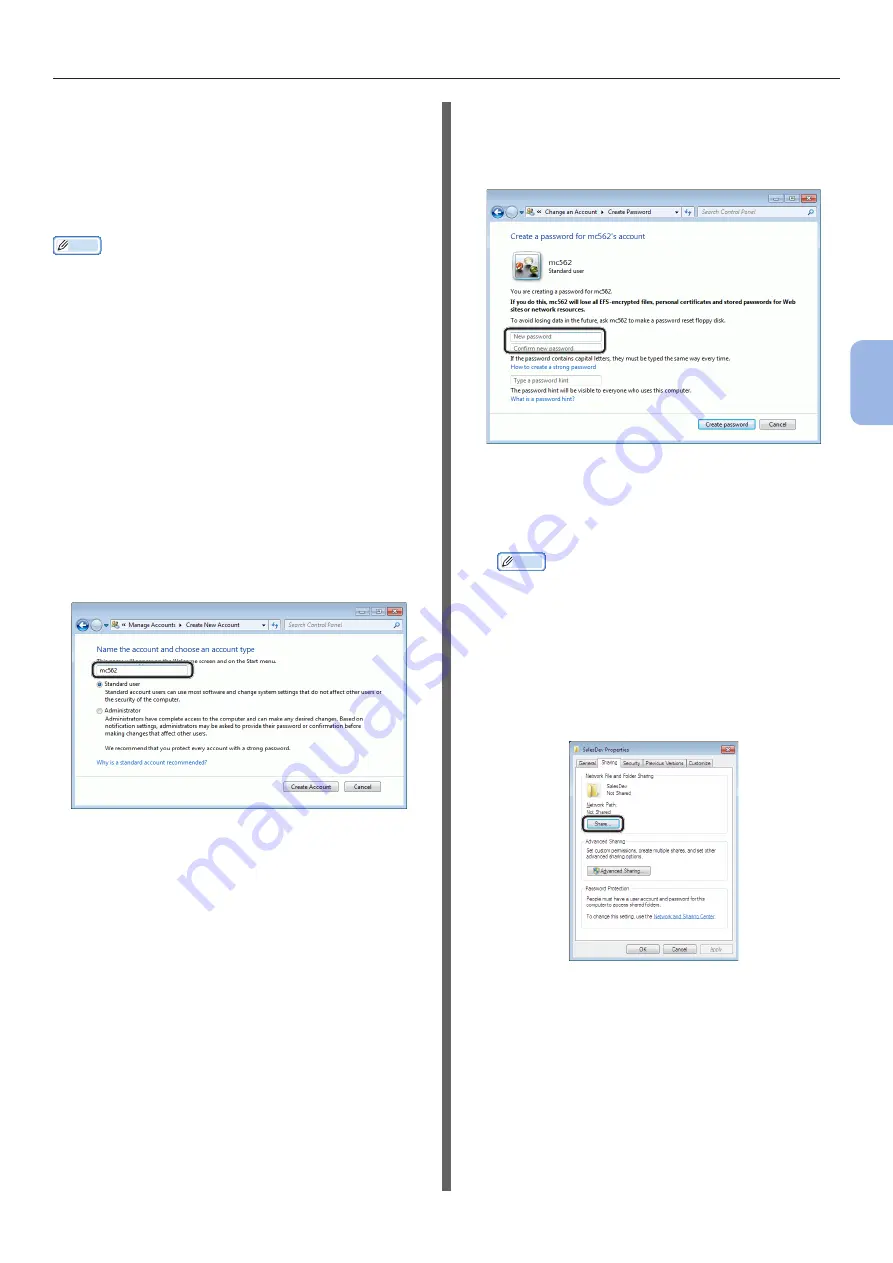
Enter the information in C-2 in the text
box.
5
Ensure that [Standard user] is
selected, and then click [Create
Account].
6
Click the icon of the user account
created in step 5.
7
Select [Create a password].
8
Enter the information in C-3 in [New
password] and [
Confirm new
password], and then click [Create
password].
9
Close the Control Panel.
10
Create a new folder on the computer
with the name entered in C-5.
Memo
● It is recommended that the folder be created in the
local drive (C drive or D drive), not on the desktop,
[Documents], or network drive.
11
Right-click the folder created in step 10
and select [Properties].
12
Select the [Sharing] tab and then click
[Share].


