25
1
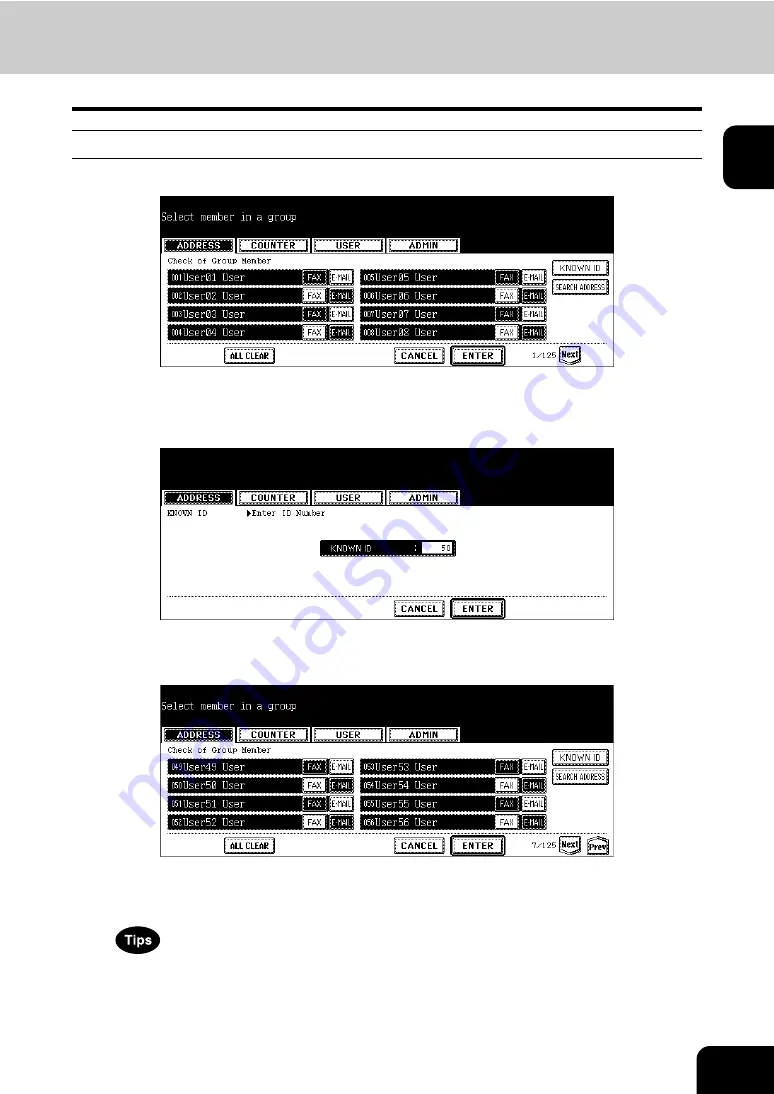
Adding Contacts by Searching with ID Number
1
Press the [KNOWN ID] button.
• The KNOWN ID screen is displayed.
2
Enter the ID Number using the digital keys and press the [ENTER] but-
ton.
3
The touch panel displays the screen that contains the searched con-
tact. Press the contact to be added to the group.
• To add both the fax number and E-mail address of a contact to the group, press over the contact name.
• To add only the fax number of a contact to the group, press the [FAX] button of the contact.
• To add only the E-mail address of a contact to the group, press the [E-MAIL] button of the contact.
• Press the [Prev] button or [Next] button to display the contacts in the different page.
• You can also clear the all highlighted contacts by pressing the [ALL CLEAR] button.
Содержание CX 1145 MFP
Страница 1: ...User Functions Guide CX1145 MFP 59315801 Rev 1 0...
Страница 23: ...21 1 8 New Group is created and appears on the touch panel...
Страница 47: ...45 2 4 Press the SCAN COUNTER button 5 The Scan Counter for the specified department code is displayed...
Страница 99: ...97 3 10Press the ENTER button The default settings for each mode are changed as you specified...
Страница 110: ...3 108 3 SETTING ITEMS USER...
Страница 137: ...135 4 9 Press the YES button to apply the calibration setting or press the NO button to cancel the calibration setting...
Страница 179: ...177 4 4 Press the ENTER button Returns you to the FAX menu...
Страница 212: ...4 210 4 SETTING ITEMS ADMIN...
Страница 237: ...235 5 PS3 Font List An output example of the PS3 Font List...
Страница 238: ...236 5 APPENDIX 1 LIST PRINT FORMAT Cont 5 PCL Font List An output example of the PCL Font List...


