


37
1.BEFORE USING EQUIPMENT
4.Setting Copy Paper (Cont.)
1
Placing paper in the Large Capacity Feeder (optional)
3
Push the drawer of the Large Capacity Feeder straight into the equip-
ment until it comes to a stop.
• Close the drawer completely. The elevator tray automatically moves up to the paper feeding position.
Be careful not to let your fingers be caught when closing the drawer. This could injure you.
1
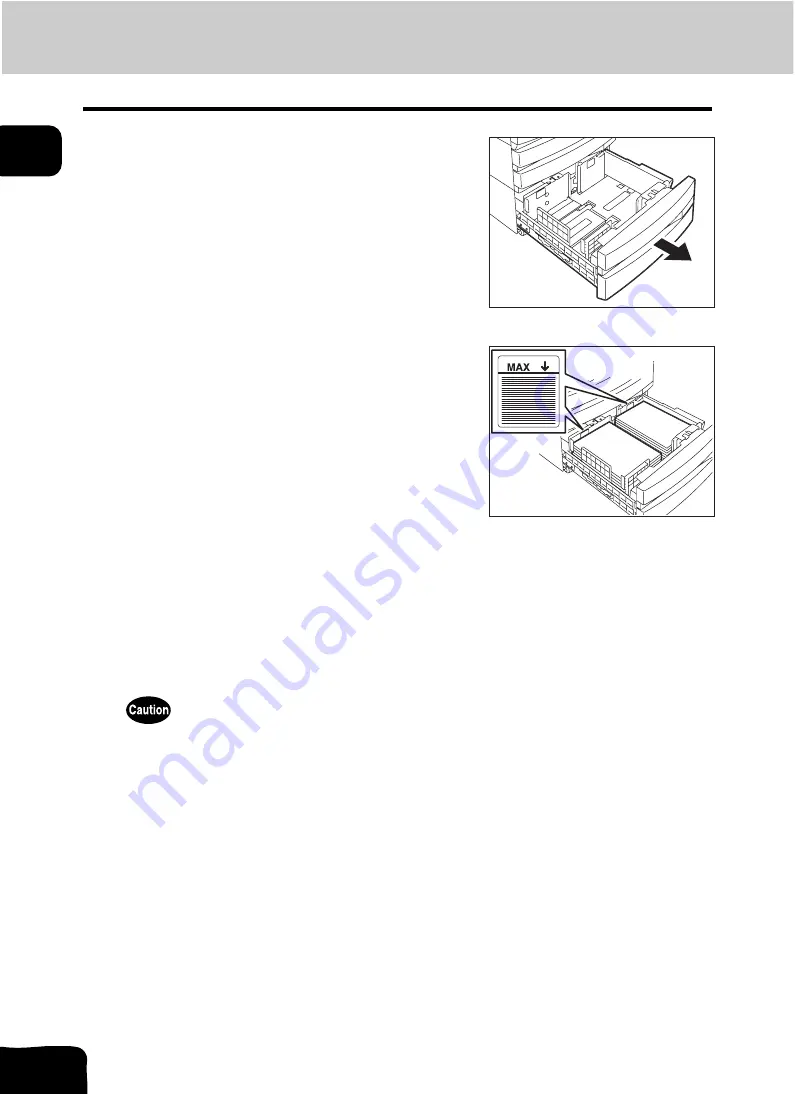
Pull out the Large Capacity Feeder care-
fully.
• Pull out the drawer until it comes to a stop.
2
Place paper in A and B.
• Place paper with its copy side up. (The copy side may be
described on the wrapping paper.)
• For the maximum number of sheets that can be set, see
• Be sure that the paper height does not exceed the line indicated
on the side guide.
• Fan and jog the paper well before placing it on the drawer. Set
the paper for A to the right side, and set that for B to the left side.
(The paper can be set neatly if you pile it up gradually and alter-
nately in A and B.) Be sure that the center lever is not open (see
the labels attached in the Large Capacity Feeder).
• Paper starts being fed out of the elevator tray (A) at first. When
the paper on A has run out, the paper on B moves to the position
of A and starts being fed.
• Do not use wrinkled, folded or damp sheets of paper.
A
B
Содержание CX 1145 MFP
Страница 1: ...Operator s Manual for Basic Functions CX1145 MFP 59315701 Rev 1 0...
Страница 5: ...5 CONTENTS Cont...
Страница 41: ...41 1 BEFORE USING EQUIPMENT 4 Setting Copy Paper Cont 1...
Страница 69: ...69 2 HOW TO MAKE COPIES 4 Proof Copy Cont 2...
Страница 72: ...72 3 2 Press the APS button 4 Press the START button...
Страница 86: ...86 3 4 Press the SORT or GROUP button Set other copy modes as required 5 Press the START button...
Страница 126: ...126 5 4 Press the ENTER button Set Book type original 2 sided copy P 102 in duplex copying as well...
Страница 171: ...171 6 e FILING 3 Changing Data of User Boxes Cont 6 7 Press the ENTER button The box settings are updated...
Страница 189: ...189 6 e FILING 8 Appendix Cont 6...
Страница 259: ...259 8 JOB STATUS 6 Error Code Cont 8...
Страница 270: ...270 9 4 Set a new toner bag and then close the front cover Check that the model name TB 281C is written on the toner bag...
Страница 321: ...10 321 10 WHEN THIS MESSAGE APPEARS...
Страница 322: ...322 11 11 MAINTENANCE 1 Daily Inspection 323 2 Simple Troubleshooting 324...
Страница 341: ...12 341 12 SPECIFICATIONS OPTIONS...