background image

Содержание DIRT OVAL

Страница 1: ...MODEL SHOWN MAY BE PROTOTYPE AND MAY VERY SLIGHTLY FROM KIT SPECIFICATIONS ARE SUBJECT TO CHANGE WITHOUT PRIOR NOTICE OFNA RACING 7 VANDERBILT IRVINE CA 92618 PHONE 949 586 2910 FAX 949 586 8812...

Страница 2: ......

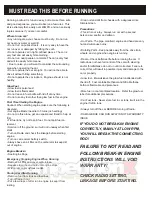
Страница 3: ...thanol and Nitro Methane both are flammable and poisonous Glow Fuel Glow fuel is poisonous Store fuel in cool ventilated location Refer the glow fuel Glow fuel is flammable Do not leave in fuel bottle...

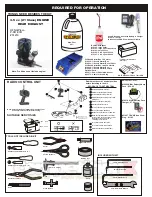
Страница 4: ...horn Turn off the switch Receiver Turn off the switch Transmitter Retract the antenna Transmitter 11 11 11 12 13 REQUIRED FOR OPERATION Bottle s with spout 10160 large 500cc 10161 large 500 ccAuto St...

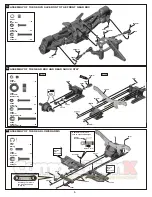
Страница 5: ...76 4x10mm Washer 30773 4mm Cross Pin x4 f Di f Oil 3x12mm 30773 30769 94004 3x12mm Hex Screw x8 Builds two differentials for front and rear x8 1 Tight the diff screws in this order 1 4 3 2 30769 Tight...

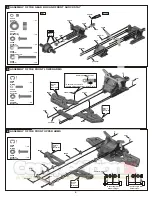
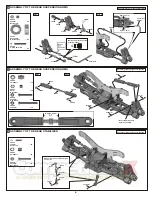
Страница 6: ...mm 30160 36890 3mm 4x10mm 36870 4x10mm Set Screw x2 Ensure Free Movement 36890 3mm 3x25mm 4x25mm 4x10mm 30010 34043 5 ASSEMBLY OF THE FRONT LOWER ARMS 6 ASSEMBLY OF THE FRONT UPPER ARMS 36905 3mm 3664...

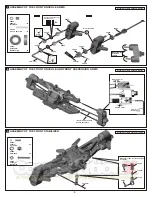
Страница 7: ...Pin x2 Assembly for both right and left side Do Not Over Tighten c ew S r Cem ent Notice the direction of the plastic washer 36905 36903 L Assembly for both right and left side Assembly for both right...

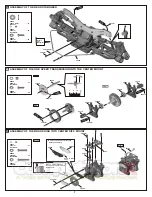
Страница 8: ...ment Ensure Free Movement x4 x2 Step 1 Step 2 Step 3 36740 36740 36741 8x12x1mm 30361 6mm 36740 36740 36740 30361 6mm 3x16mm 36742 30658 3mm 94005 3x16mm Hex Screw 94041 M3 Nylon Nut 6mm E Ring x2 En...

Страница 9: ...4x25mm Flat Head Screw x2 94036 5x5mm Set Screw x1 94005 3x16mm Hex Screw x2 94022 3x18mm Flat Head Screw x2 Screw t Cemen 3x18mm 4x25mm 3x16mm 30010 3mm 36171 4x10mm 30351 3mm 4x16mm 94027 4x16mm Fla...

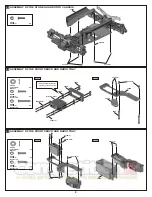
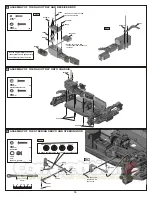
Страница 10: ...3mm 94006 3x18mm Hex Screw x2 x4 36850 7mm Ball 94041 3mm Nylon Nut x4 94008 3x25mm Hex Screw x2 Step 1 Step 2 36861 40065 36850 40065 Assembly for both right and left side 3x16mm Makes two rods for...

Страница 11: ...3x8mm x3 94036 5x5mm Set Screw 0 5 10 15 10mm Screw e C ment ASSEMBLY OF THE BRAKE DISK INTO CENTER DIFF MOUNT 94005 3x15mm Hex Screw x2 94033 3x3mm Set Screw x1 Step 2 Step 1 3x15mm 36650 3x12mm 306...

Страница 12: ...THE FRONT GEAR CASE ONTO CHASSIS 94019 3x10mm Flat Head Hex Screw x2 94026 4x12mm Flat Head Hex Screw x2 94023 3x25mm Flat Head Hex Screw x2 3x25mm 3x10mm 4x12mm 34042 24 ASSEMBLY OF THE REAR GEAR CA...

Страница 13: ...2 Step 1 3x16mm 3x8x0 8mm 34026 Steering Servo 34026 34026 3x10mm 30648 34015 140 94005 3x16mm Hex Screw x4 3x10mm ASSEMBLY OF THE FRONT SERVO AND RADIO TRAY 94003 3x10mm Hex Screw x4 Step 2 Step 1 3...

Страница 14: ...with your switch Put the servo wire into receiver box and connect to receiver Switch Use the original battery case or rechargeable hump pack battery Connect battery wire to switch 30 ASSEMBLY OF THE S...

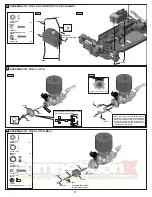
Страница 15: ...0 38313 Engine rotation direction Tighten Place the clutch shoes with the clutch springs over the 3 pins of the flywheel Using a phillips screw driver or needle nose pliers and bend the small end in t...

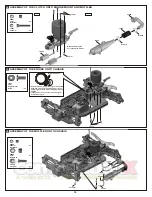
Страница 16: ...MBLY OF THE ENGINE ONTO CHASSIS Use note book paper to set gear backlash between spur gear and clutch bell gear applying pressure while retightening the engine If the space is not correct the spur gea...

Страница 17: ...LINKAGES Approx 1mm gap Neutral Throttle High Brake Idling adjusting Screw Approx 0 5mm Carburetor is Opening fully 10300 Snap on 30661 36140 Turn on the Transmitter then Receiver and set the Engine...

Страница 18: ...40643 Tighten 14 0 20 30 10 40 60 70 80 50 90 ASSEMBLY OF THE SHOCK CAP AND SPRING ASSEMBLY OF THE SHOCK SHAFT 41 UP Down Move slowly Fill the shocks with oil 42 2 6x5mm Washer x4 40060 2 5mm Nylon N...

Страница 19: ...3x12mm 94010 4x12mm Hex Screw x2 94004 3x12mm Hex Screw x2 34045 43 ASSEMBLY OF THE FRONT SHOCK ABSORBER 94041 3mm Nylon Nut x2 94007 3x20mm Hex Screw x2 3mm 3x25mm 40531 3x8mm 3x20mm 90018 3x25mm Ca...

Страница 20: ...7 3x8mm 94002 3x8mm Hex Screw x1 Connect to carbulater Connect to fuel nipple Connect to fuel tank nipple Connect to pressure nipple 10177 10177 40127 40129 A 81 Apply filter oil to the foam before us...

Страница 21: ...l assembly 40550 Wheel Nut x4 40550 40550 40550 Step 1 Step 2 Cut out the body as shown Before cutting and making holes in the body put the unpainted body on the chassis to confirm the mounting positi...

Страница 22: ...EAR WING 53 ASSEMBLY OF THE REAR WING Cut Out Cut Out Step 1 Cut out the rear wing as shown Step 2 Cutting and making holes in the rear wing Cut Out Nylon Nut Nylon Screw x2 x2 Nylon Nut Nylon Screw B...

Страница 23: ...1 2V Glow Plug Igniter Charge for 1 2V Glow Plug Igniter 1 2V Glow Plug Igniter and Charger Not Included Glow Plug Not Included There are 2 types of glow plugs available NORMAL or Turbo depending of...

Страница 24: ...NG YOUR MODEL SAFELY Before Running Engine Start Up While Running After Running Cautions for Safety Switch on receiver Adjust by screwing the needle little by little Remove the clips from the engine C...

Страница 25: ...usting the front toe out to 1 5 degrees Use a 5mm allen wrench to adjust toe in for front Front Note Place the model car on a flat surface Raise the chassis to it s maximum clearance before the wheels...

Страница 26: ...E E N G IN E M O U N T 4 9 5 3 6 7 9 0 4 x 4 6 M M T U R N B U C K L E S 4 P C S 1 0 9 5 3 0 4 9 1 M O U N T W IR E P IP E 1 5 3 6 8 5 0 7 m m B A L L 6 P C S 3 9 5 3 0 5 3 1 S P R IN G T H R O T T L...

Страница 27: ...LATE MODEL UPGRADE...

Страница 28: ......

Страница 29: ...t is incomplete or component parts are broken due to error in manufacturer contact your dealer from which you purchased the kit for replacement part or call OFNA at 949 586 2910 for your nearest deale...

Отзывы: