The scan function
125
How to scan a photo on the glass plate
1
Place and align the photo face down on the platen.
Follow the feed direction according to the dimensions of the photo.
2
Select the 'Scan' mode
.
The 'Workflow' section opens automatically.
3
Select a 'Scan profile' with the Arrow keys
.
4
Activate the 'Original' section.
Select '1-sided' in the 'Original' function box.
5
Select the icon in the 'Original type' function box to define the orientation of
the information of the original.
6
Activate the 'Digital document' section.
Make sure that the 'Page size' card is open.
7
Select the size and the orientation in the 'Size' function box.
Make sure that the orientation matches the feed direction of the photo (see
‘
Make an enlarged or reduced digital document
8
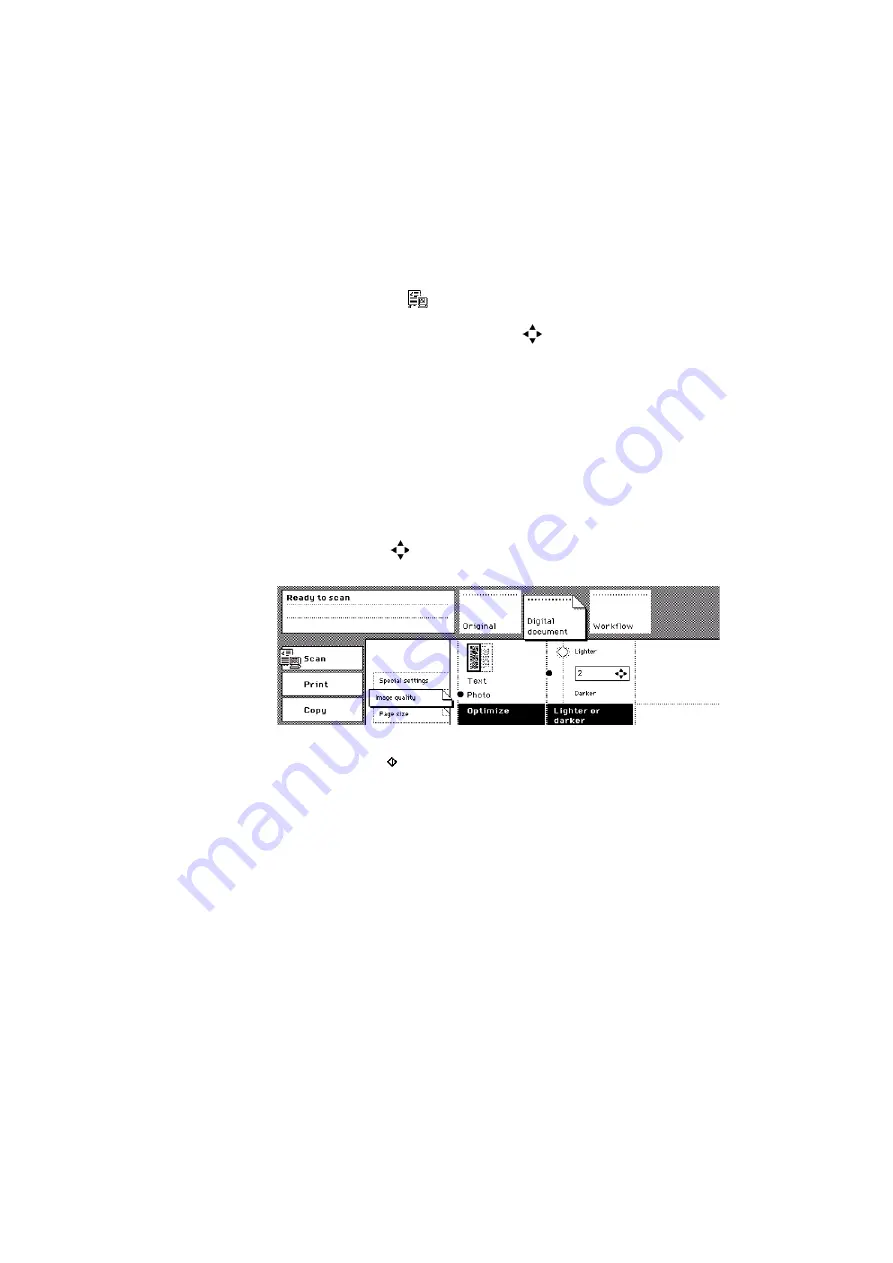
Open the 'Image quality' card.
9
Select 'Photo' in the 'Optimize' function box.
10
Use the Arrow keys
to adjust the 'Lighter or darker' value from 2 down to
-2.
[88] Select Photo to improve the image quality
[88] Select Photo to improve the image quality
11
Press the Start key .
Содержание VarioPrint 2050-70
Страница 1: ...Oc VarioPrint 2050 70 Job manual...
Страница 6: ...6 Oc VarioPrint 2050 70 Job manual...
Страница 7: ...7 Oc VarioPrint 2050 70 Job manual Chapter 1 Introduction...
Страница 28: ...28 Oc VarioPrint 2050 70 Job manual...
Страница 29: ...29 Oc VarioPrint 2050 70 Job manual Chapter 2 The copy function...
Страница 65: ...65 Oc VarioPrint 2050 70 Job manual Chapter 3 The print function...
Страница 101: ...101 Oc VarioPrint 2050 70 Job manual Chapter 4 The scan function...
Страница 129: ...129 Oc VarioPrint 2050 70 Job manual Chapter 5 Maintenance...
Страница 135: ...135 Oc VarioPrint 2050 70 Job manual Chapter 6 Errors...
Страница 139: ...139 Oc VarioPrint 2050 70 Job manual Appendix A Overview and tables...
Страница 145: ...145 Oc VarioPrint 2050 70 Job manual Appendix B Safety information...
Страница 159: ...159 Oc VarioPrint 2050 70 Job manual Appendix C Miscellaneous...
Страница 164: ...164 Oc VarioPrint 2050 70 Job manual...


