


74
ProPak6 Installation and Operation User Manual 4
Chapter 4
Ethernet Configuration
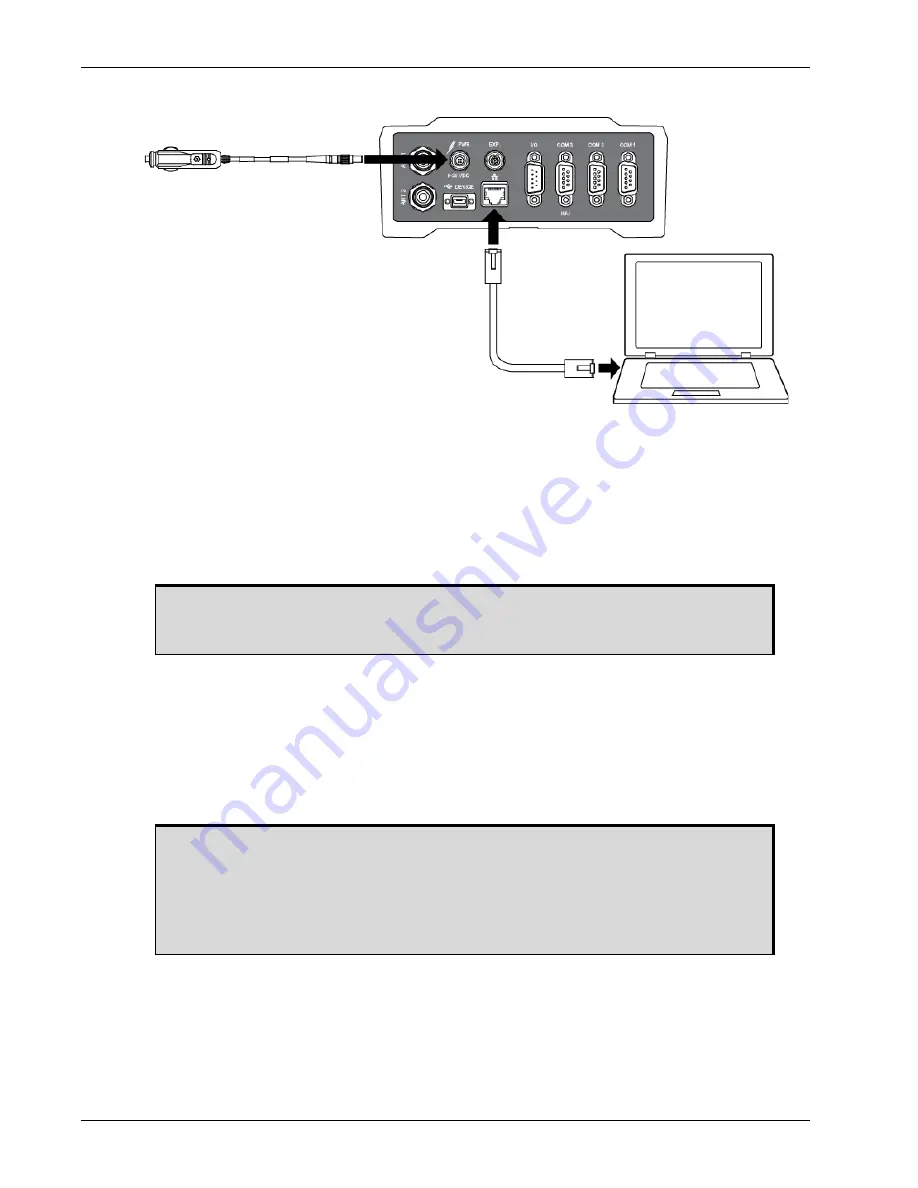
Figure 24: Cross-Over Ethernet Cable Configuration—ProPak6
4.2.1
Static IP Address Configuration—Receiver
Follow these steps to set up a static IP address on the ProPak6 receiver:
1. Connect a computer to the ProPak6 receiver using a null modem serial cable or USB cable or use
Bluetooth
or Wi-Fi.
2. Establish a connection to the receiver using either NovAtel Connect or another terminal program
such as HyperTerminal. This connection is used to send the commands in this procedure to the
receiver.
3. Enable the Ethernet port on the receiver by entering:
ethconfig etha auto auto auto auto
4. Assign the TCP/IP port number used for the connection by entering:
icomconfig icom1 tcp :2000
5. Assign the receiver IP address, subnet mask and default gateway by entering:
ipconfig etha static 192.168.74.10 255.255.255.0 192.168.74.1
6. Save the new Ethernet settings by entering:
saveconfig
7. Log the
IPCONFIG
command and confirm the TCP/IP configuration by entering:
log ipconfig once
Ethernet Cable
ProPak6
Computer
Power Cable
For information about establishing a connection using NovAtel Connect, refer to the
Quick Start Guide for the product or NovAtel Connect Help included with NovAtel
Connect PC Utilities available from our web site.
The command above assign the following values to the ProPak6 receiver:
ip address = 192.168.74.10
subnet mask = 255.255.255.0
gateway = 192.168.74.1
These settings are examples only. The settings appropriate to the network may be
different.


