Chapter 20 — Meridian Mail Compact Option installation and maintenance
Page 273 of 536
Option 11C Compact
Planning, Installation, Fault Clearing and CCBR Guide
5
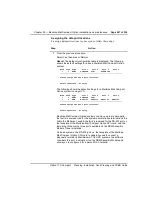
Remove the Install/data tape and press the reset button on the mail
card.
Result Various system routines are displayed and the Meridian Mail
logon screen appears. Normal system administration operations may
begin.
6
Log on using the system default password ADMINPWD (not case
sensitive), then change the password immediately.
7
Select Re-enter, then press <Return>.
Result You are returned to the beginning of the comprehensive
upgrade procedure.
Note:
All the data you have entered is lost and must be entered again.
8
Select Abort, then press <Return>.
Result The comprehensive upgrade is terminated.
Note:
Press the reset button on the Meridian Mail Compact Option card with the
Install/data tape in the tape drive, and try the comprehensive upgrade again (
“Setting up for a comprehensive upgrade” on page 252
), or call your Nortel
representative.
Step
Action
ATTENTION
Store the Install/data tape in a safe place. This will
ensure that if you need to reinstall or modify the system,
you will have quick access to the tape.
Содержание Meridian Meridian 1
Страница 3: ...553 3121 210 Standard 3 0 January 1999 ...
Страница 17: ...xiv Contents 553 3121 210 Standard 3 0 January 1999 ...
Страница 89: ...Page 70 of 536 Chapter 6 Bracing cabinets against earthquakes 553 3121 210 Standard 3 0 January 1999 ...
Страница 97: ...Page 78 of 536 Chapter 8 Installing a new system 553 3121 210 Standard 3 0 January 1999 ...
Страница 107: ...Page 88 of 536 Chapter 10 Installing the system ground 553 3121 210 Standard 3 0 January 1999 ...
Страница 113: ...Page 94 of 536 Chapter 11 Installing the power supply 553 3121 210 Standard 3 0 January 1999 ...
Страница 125: ...Page 106 of 536 Chapter 12 Adding an expansion cabinet 553 3121 210 Standard 3 0 January 1999 ...
Страница 139: ...Page 120 of 536 Chapter 13 Installing the circuit cards 553 3121 210 Standard 3 0 January 1999 ...
Страница 157: ...Page 138 of 536 Chapter 15 Installing and connecting SDI and Ethernet ports 553 3121 210 Standard 3 0 January 1999 ...
Страница 175: ...Page 156 of 536 Chapter 16 Starting up and testing the system 553 3121 210 Standard 3 0 January 1999 ...
Страница 209: ...Page 190 of 536 Chapter 18 Connecting the trunks 553 3121 210 Standard 3 0 January 1999 ...
Страница 323: ...Page 304 of 536 Chapter 21 Installing Hospitality 553 3121 210 Standard 3 0 January 1999 ...
Страница 419: ...Page 400 of 536 Chapter 23 Pre programmed data 553 3121 210 Standard 3 0 January 1999 ...
Страница 455: ...Page 436 of 536 Chapter 24 Changing pre programmed data 553 3121 210 Standard 3 0 January 1999 ...
Страница 555: ...Page 536 of 536 Chapter 25 Fault locating and clearing 553 3121 210 Standard 3 0 January 1999 ...


