Page 246 of 536
Chapter 20 — Meridian Mail Compact Option installation and maintenance
553-3121-210
Standard 3.0
January 1999
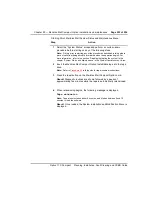
4
Remove the tape and press the reset button on the Meridian Mail
Compact Option card.
Result Various system routines are displayed and the Meridian Mail
Compact Option logon screen appears. Normal system administration
operations may begin.
5
Logon using the system default password ADMINPWD (not case
sensitive), then change the password immediately.
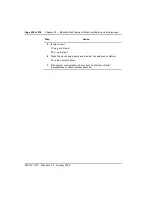
6
Select Re-enter, then press <Return>.
Result You are returned to the beginning of the installation procedure.
Note:
All the data you have entered is lost and must be entered again.
7
Select Abort, then press <Return>.
Result The installation is terminated.
Note:
Press the reset button on the mail card with the Install/data tape in the
tape drive, and try the installation again (
see “Beginning the software installation”
), or call your Nortel representative.
Step
Action
ATTENTION
Store the Install/data tape in a safe place. This will
ensure that if you need to reinstall or modify the system,
you will have quick access to the tape.
Содержание Meridian Meridian 1
Страница 3: ...553 3121 210 Standard 3 0 January 1999 ...
Страница 17: ...xiv Contents 553 3121 210 Standard 3 0 January 1999 ...
Страница 89: ...Page 70 of 536 Chapter 6 Bracing cabinets against earthquakes 553 3121 210 Standard 3 0 January 1999 ...
Страница 97: ...Page 78 of 536 Chapter 8 Installing a new system 553 3121 210 Standard 3 0 January 1999 ...
Страница 107: ...Page 88 of 536 Chapter 10 Installing the system ground 553 3121 210 Standard 3 0 January 1999 ...
Страница 113: ...Page 94 of 536 Chapter 11 Installing the power supply 553 3121 210 Standard 3 0 January 1999 ...
Страница 125: ...Page 106 of 536 Chapter 12 Adding an expansion cabinet 553 3121 210 Standard 3 0 January 1999 ...
Страница 139: ...Page 120 of 536 Chapter 13 Installing the circuit cards 553 3121 210 Standard 3 0 January 1999 ...
Страница 157: ...Page 138 of 536 Chapter 15 Installing and connecting SDI and Ethernet ports 553 3121 210 Standard 3 0 January 1999 ...
Страница 175: ...Page 156 of 536 Chapter 16 Starting up and testing the system 553 3121 210 Standard 3 0 January 1999 ...
Страница 209: ...Page 190 of 536 Chapter 18 Connecting the trunks 553 3121 210 Standard 3 0 January 1999 ...
Страница 323: ...Page 304 of 536 Chapter 21 Installing Hospitality 553 3121 210 Standard 3 0 January 1999 ...
Страница 419: ...Page 400 of 536 Chapter 23 Pre programmed data 553 3121 210 Standard 3 0 January 1999 ...
Страница 455: ...Page 436 of 536 Chapter 24 Changing pre programmed data 553 3121 210 Standard 3 0 January 1999 ...
Страница 555: ...Page 536 of 536 Chapter 25 Fault locating and clearing 553 3121 210 Standard 3 0 January 1999 ...


