Chapter 20 — Meridian Mail Compact Option installation and maintenance
Page 211 of 536
Option 11C Compact
Planning, Installation, Fault Clearing and CCBR Guide
Installing the external tape drive and printer
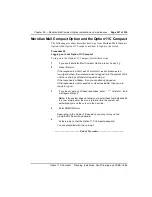
The external tape drive is used to install and upgrade software, and to make
backups of Meridian Mail Compact Option data. It can be attached
permanently to the SCSI connector on the Meridian Mail Compact Option
voice mail card or installed only when needed.
Installing the tape drive
Procedure 41
Installing the external tape drive
1
Unless you are installing Meridian Mail Compact Option for the first
time, courtesy down. To courtesy-down follow
.
2
Set the power selector switch at the back of the tape drive to the
correct voltage for your area.
3
Plug the tape drive’s power cord into the same circuit used by the
Option 11C Compact cabinet.
4
Set the SCSI address for the appropriate tape drive to 1 as described
in
.
5
If you have an Archive tape drive, go to step 6. If you have a Tandberg
tape drive go to step 7.
6
For the Archive tape drive, plug the SCSI cable into either SCSI
connector and plug a SCSI terminator (A0379544) into the other
connector.
7
For the Tandberg tape drive, plug the SCSI cable into the the SCSI
connector marked IN on the back of the tape drive.
Note: Unlike the Archive drive, the Tandberg drive has internal
terminating resistors. You
must not connect an external SCSI
terminator to the SCSI connector marked OUT (see
) on the
back of the Tandberg tape drive. Leave the OUT connector unused.
8
For either tape drive, connect the other end of the tape drive cable to
the SCSI connector on the faceplate of the Meridian Mail Compact
Option card.
9
Attach the grounding wire on the tape drive cable to a convenient
ground connection on the Option 11C Compact cabinet.
Note: Procedure continues on
.
Содержание Meridian Meridian 1
Страница 3: ...553 3121 210 Standard 3 0 January 1999 ...
Страница 17: ...xiv Contents 553 3121 210 Standard 3 0 January 1999 ...
Страница 89: ...Page 70 of 536 Chapter 6 Bracing cabinets against earthquakes 553 3121 210 Standard 3 0 January 1999 ...
Страница 97: ...Page 78 of 536 Chapter 8 Installing a new system 553 3121 210 Standard 3 0 January 1999 ...
Страница 107: ...Page 88 of 536 Chapter 10 Installing the system ground 553 3121 210 Standard 3 0 January 1999 ...
Страница 113: ...Page 94 of 536 Chapter 11 Installing the power supply 553 3121 210 Standard 3 0 January 1999 ...
Страница 125: ...Page 106 of 536 Chapter 12 Adding an expansion cabinet 553 3121 210 Standard 3 0 January 1999 ...
Страница 139: ...Page 120 of 536 Chapter 13 Installing the circuit cards 553 3121 210 Standard 3 0 January 1999 ...
Страница 157: ...Page 138 of 536 Chapter 15 Installing and connecting SDI and Ethernet ports 553 3121 210 Standard 3 0 January 1999 ...
Страница 175: ...Page 156 of 536 Chapter 16 Starting up and testing the system 553 3121 210 Standard 3 0 January 1999 ...
Страница 209: ...Page 190 of 536 Chapter 18 Connecting the trunks 553 3121 210 Standard 3 0 January 1999 ...
Страница 323: ...Page 304 of 536 Chapter 21 Installing Hospitality 553 3121 210 Standard 3 0 January 1999 ...
Страница 419: ...Page 400 of 536 Chapter 23 Pre programmed data 553 3121 210 Standard 3 0 January 1999 ...
Страница 455: ...Page 436 of 536 Chapter 24 Changing pre programmed data 553 3121 210 Standard 3 0 January 1999 ...
Страница 555: ...Page 536 of 536 Chapter 25 Fault locating and clearing 553 3121 210 Standard 3 0 January 1999 ...


