Page 210 of 536
Chapter 20 — Meridian Mail Compact Option installation and maintenance
553-3121-210
Standard 3.0
January 1999
4
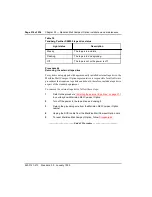
At the prompt, Do you want to courtesy down the system?,
press the up arrow key to choose Yes, and press <Return>.
The display charts the progress of the courtesy down. Hardware
locations are put out of service as users finish their sessions. System
Status displays “CourtesyDown” when the process is complete.
5
Disable the data ports for the console and the AML. (Refer to
.)
Note: At this point, Meridian Mail Compact Option can be worked
on, the CPU card can be removed for maintenance or, an external tape
drive can be attached.
—————————— End of Procedure ——————————
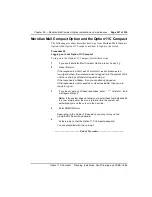
Resetting Meridian Mail Compact Option
The “Reset” button is located on the Meridian Mail Compact Option card
faceplate. Press the Reset button after installing an external tape drive, after
removing an external tape drive, or after performing troubleshooting and
maintenance.
Note: Power up an external tape drive connected to the mail card.
Procedure 40
Resetting mail
1
Press the reset button on the Meridian Mail Compact Option card.
2
Enable the data ports for the console and the AML. (Refer to
and disabling the console and AML data ports” on page 208
.)
3
Enter AX <Return> to view the Meridian Mail Compact Option screen.
4
Wait until the system has loaded and the logon screen is displayed
(approximately four minutes).
5
From the Main Menu, choose
“5 System Status and Maintenance.”
→
“1 System Status.”
6
Press the [Activate System] softkey.
—————————— End of Procedure ——————————
Содержание Meridian Meridian 1
Страница 3: ...553 3121 210 Standard 3 0 January 1999 ...
Страница 17: ...xiv Contents 553 3121 210 Standard 3 0 January 1999 ...
Страница 89: ...Page 70 of 536 Chapter 6 Bracing cabinets against earthquakes 553 3121 210 Standard 3 0 January 1999 ...
Страница 97: ...Page 78 of 536 Chapter 8 Installing a new system 553 3121 210 Standard 3 0 January 1999 ...
Страница 107: ...Page 88 of 536 Chapter 10 Installing the system ground 553 3121 210 Standard 3 0 January 1999 ...
Страница 113: ...Page 94 of 536 Chapter 11 Installing the power supply 553 3121 210 Standard 3 0 January 1999 ...
Страница 125: ...Page 106 of 536 Chapter 12 Adding an expansion cabinet 553 3121 210 Standard 3 0 January 1999 ...
Страница 139: ...Page 120 of 536 Chapter 13 Installing the circuit cards 553 3121 210 Standard 3 0 January 1999 ...
Страница 157: ...Page 138 of 536 Chapter 15 Installing and connecting SDI and Ethernet ports 553 3121 210 Standard 3 0 January 1999 ...
Страница 175: ...Page 156 of 536 Chapter 16 Starting up and testing the system 553 3121 210 Standard 3 0 January 1999 ...
Страница 209: ...Page 190 of 536 Chapter 18 Connecting the trunks 553 3121 210 Standard 3 0 January 1999 ...
Страница 323: ...Page 304 of 536 Chapter 21 Installing Hospitality 553 3121 210 Standard 3 0 January 1999 ...
Страница 419: ...Page 400 of 536 Chapter 23 Pre programmed data 553 3121 210 Standard 3 0 January 1999 ...
Страница 455: ...Page 436 of 536 Chapter 24 Changing pre programmed data 553 3121 210 Standard 3 0 January 1999 ...
Страница 555: ...Page 536 of 536 Chapter 25 Fault locating and clearing 553 3121 210 Standard 3 0 January 1999 ...


