


,167$//$7,21 &200,66,21,1*+$1'%22.
•
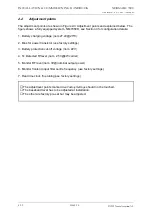
Check that you read the desired modulation depth in
Maintenance
.
•
Set
TX2
to air and repeat the two previous steps.
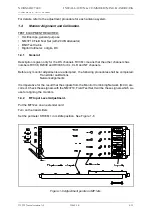
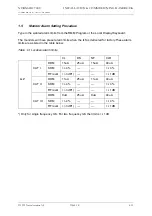
2.3.2
Monitor calibration
The software adjustments are most easily done with the RMM program, but may be carried
out from the front panel.
•
This procedure requires that the output power is already adjusted
•
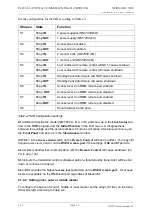
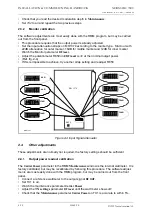
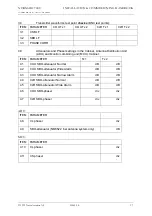
Set the input attenuation straps on MO1374 according to the marker type. Start out with
22dB attenuation for outer marker, 18dB for middle marker and 12dB for inner marker.
•
Watch the Monitor parameter
RF level
.
•
Adjust the potentiometer R850 until
RF level
is
3V
at the nominal output power.
•
(Ref. fig. 2-4)
•
If this is impossible to achieve, try another strap setting and readjust R850
.
Figure 2-4 Input Signal attenuator
2.4
Other adjustments
These adjustments are normally not required, the factory settings should be sufficient.
2.4.1
Output power readout calibration
The
Carrier Power
parameter in the RMM
Maintenance
window is the internal wattmeter. It is
factory calibrated, but may be recalibrated by following this procedure. The software adjust-
ments are most easily done with the RMM program, but may be carried out from the front
panel.
•
Connect a reference wattmeter to the output signal
RF OUT
.
•
Set TX1 to air.
•
Watch the maintenance parameter
Carrier Power
•
Adjust the
TX settings
parameter
RF level
until the watt meter shows
2W
•
Check that the
Maintenance
parameter
Carrier Power
on TX1 is accurate to within 5%.
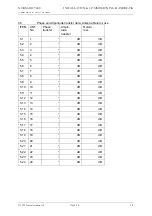
0dB
6dB
12dB
16dB
MO 1374
18dB
22dB
R850
28dB
34dB
HBK799/1
Содержание NM 7000 Series
Страница 7: ...1250 5 167580 17 1 1 6 67 0 167 7 21 200 66 21 1 1 22 1DYLD YLDWLRQ 6 ...
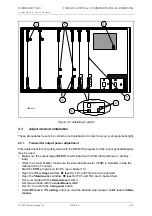
Страница 11: ...1250 5 167580 17 1 1 6 67 0 167 7 21 200 66 21 1 1 22 1DYLD YLDWLRQ 6 Figure 2 3 ...
Страница 13: ...1250 5 167580 17 1 1 6 67 0 167 7 21 200 66 21 1 1 22 1DYLD YLDWLRQ 6 ...
Страница 19: ...1250 5 167580 17 1 1 6 67 0 167 7 21 200 66 21 1 1 22 1DYLD YLDWLRQ 6 ...
Страница 21: ...1250 5 167580 17 1 1 6 67 0 167 7 21 200 66 21 1 1 22 1DYLD YLDWLRQ 6 ...
Страница 23: ...1250 5 167580 17 1 1 6 67 0 167 7 21 200 66 21 1 1 22 1DYLD YLDWLRQ 6 ...
Страница 25: ...1250 5 167580 17 1 1 6 67 0 167 7 21 200 66 21 1 1 22 1DYLD YLDWLRQ 6 ...
Страница 27: ...1250 5 167580 17 1 1 6 67 0 167 7 21 200 66 21 1 1 22 1DYLD YLDWLRQ 6 ...
Страница 31: ...1250 5 167580 17 1 1 6 67 0 167 7 21 200 66 21 1 1 22 1DYLD YLDWLRQ 6 ...
Страница 45: ...1250 5 167580 17 1 1 6 67 0 167 7 21 200 66 21 1 1 22 1DYLD YLDWLRQ 6 ...
Страница 55: ...1250 5 167580 17 1 1 6 67 0 167 7 21 200 66 21 1 1 22 1DYLD YLDWLRQ 6 ...
Страница 65: ... ...
Страница 81: ... ...
Страница 111: ... ...
Страница 129: ... ...
Страница 132: ... ...
Страница 134: ...1250 5 167580 17 1 1 6 67 0 167 7 21 200 66 21 1 1 22 1DYLD YLDWLRQ 6 ...
Страница 150: ...1250 5 167580 17 1 1 6 67 0 167 7 21 200 66 21 1 1 22 1DYLD YLDWLRQ 6 ...
Страница 158: ...1250 5 167580 17 1 1 6 67 0 167 7 21 200 66 21 1 1 22 1DYLD YLDWLRQ 6 ...