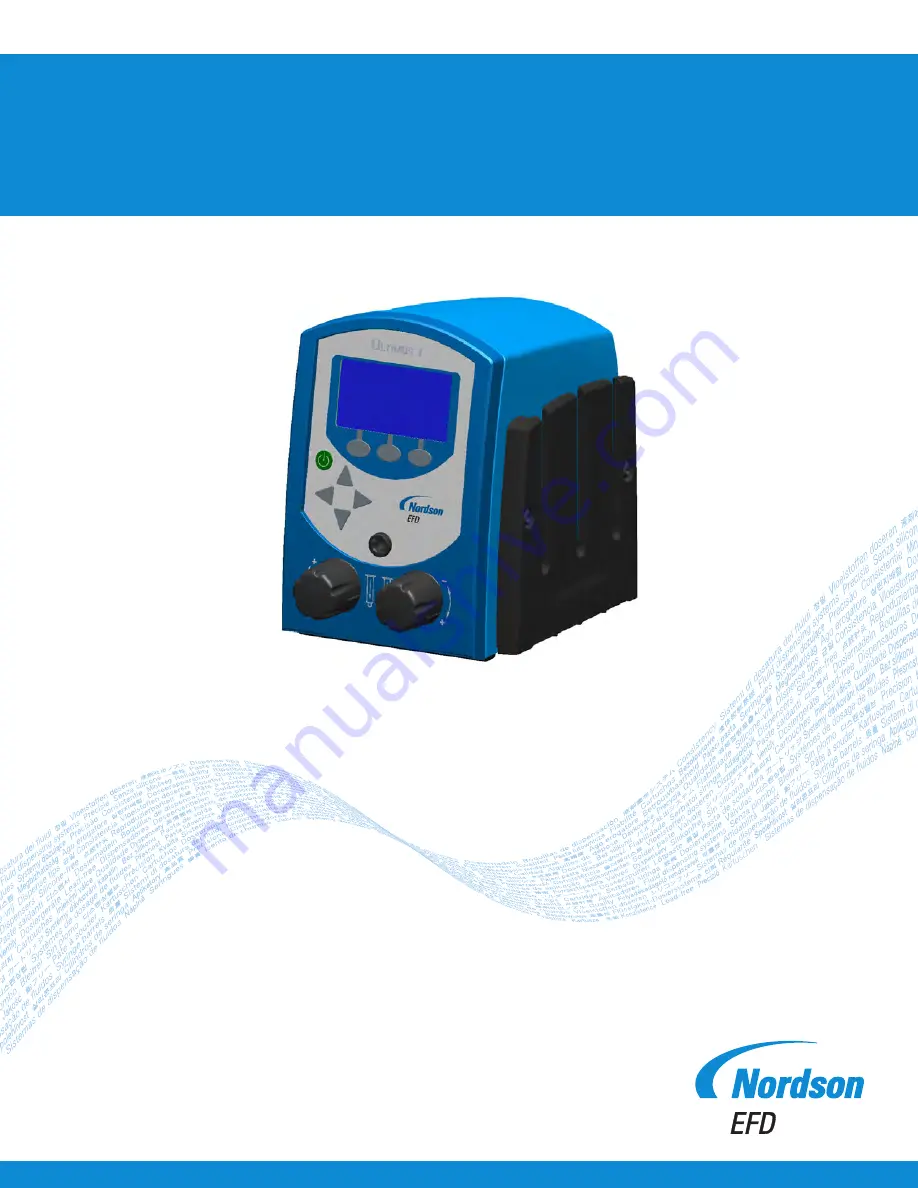
Ultimus
™
I–II High Precision Fluid Dispensers
Operating Manual
Electronic pdf files of Nordson EFD manuals are also available at www.nordsonefd.com
Страница 1: ...Ultimus I II High Precision Fluid Dispensers Operating Manual Electronic pdf files of Nordson EFD manuals are also available at www nordsonefd com...
Страница 2: ...authorized EFD distributor Detailed contact information is provided on the last page of this document The Nordson EFD Pledge Thank You You have just purchased the world s finest precision dispensing...
Страница 3: ...ve a Job Program 20 To Work in a Saved Job Program 20 To Edit or Clear a Saved Job 21 Menu Functions 22 Units of Pressure Units of Vacuum 22 Language 22 Info 22 Security Code 23 Input Output Connectio...
Страница 4: ...ht electrical shock shut down all equipment immediately Do not restart the equipment until the problem has been identified and corrected MAXIMUM AIR PRESSURE Unless otherwise noted in the product manu...
Страница 5: ...also cause toxic poisoning Any injury caused by high pressure liquid can be serious If you are injured or even suspect an injury Go to an emergency room immediately Tell the doctor that you suspect an...
Страница 6: ...not bypass or disarm any safety devices Keep clear of moving equipment Before adjusting or servicing moving equipment shut off the power supply and wait until the equipment comes to a complete stop Lo...
Страница 7: ...nuous trouble free use of this product Nordson EFD recommends the following simple preventive maintenance checks Periodically inspect tube to fitting connections for proper fit Secure as necessary Che...
Страница 8: ...only To prevent fluid waste use Nordson EFD SmoothFlow pistons Action in the Event of a Malfunction If a system or any equipment in a system malfunctions shut off the system immediately and perform th...
Страница 9: ...irst Steps First Place the dispenser in your work area The Ultimus is equipped with stay put rubber pads It can be placed on the benchtop or any flat surface Second Connect to power and air supplies a...
Страница 10: ...s per minute Time Range Programmable from 0 0001 999 9999 seconds Accuracy Within 0 05 of the selected time setting Repeatability Less than 16 sec at any time setting Pressure readout accuracy Ultimus...
Страница 11: ...mit requirement in SJ T11363 2006 X EIP A EIP B EIP C SJ T11363 2006 Indicates that this toxic or hazardous substance contained in all the homogeneous materials for this part according to EIP A EIP B...
Страница 12: ...steps to set the dispense time 1 Begin in TIMED mode 2 Press the left right arrows to highlight the first number you want to change 3 Press the up down arrows to set the dispense time 4 Repeat as nee...
Страница 13: ...s shown with the icon of an arrow pulling out of a syringe barrel Follow these steps to set vacuum pressure 1 Pull the vacuum regulator knob out to unlock it bottom right knob 2 Turn the knob clockwis...
Страница 14: ...or as long as you press the foot pedal or finger switch From TIMED mode press STEADY This toggles the display so that the top left corner is now shows the STEADY mode Refer to Initial Test Procedures...
Страница 15: ...onnector Input output features are used when the Ultimus is interfaced with external control circuits The 8 pin connector is located on the top row of ports Refer to Input Output Connection on page 24...
Страница 16: ...6 mm located at the bottom right corner of the Ultimus workstation 1 Push one end of the 6 mm air input tubing into the air input fitting on the back of the Ultimus A 2 4 mm 8 ft length of air tubing...
Страница 17: ...e following tests to demonstrate the ease at which deposit sizes can be established using the various dispense modes Testing in Steady Mode 1 Select STEADY mode 2 Pull the air pressure regulator knob...
Страница 18: ...Teach Mode 1 Refer to Testing in Steady Mode on page 17 to purge the dispensing tip with fluid 2 Change to TEACH mode by going to the menu and scrolling to TEACH 3 Rest the dispense tip on the Dot Sta...
Страница 19: ...ays use new EFD syringe barrels and tips Carefully dispose of after use This procedure ensures maximum cleanliness prevents contamination and provides proper safety Do not completely fill the syringe...
Страница 20: ...g and storing a new job into memory 4 Press SAVE This automatically saves the settings in the job program To Work in a Saved Job Program 1 Press MENU Use the up down arrows to highlight MEMORY Press S...
Страница 21: ...to return to TIMED mode in the selected program 6 Adjust the settings for dispense time air pressure and vacuum as needed to achieve the correct deposit size 7 Press MENU 8 Use the up down arrows to...
Страница 22: ...Press the up down arrows to highlight LANGUAGE then press SELECT 3 Press the up down arrows to highlight the appropriate option 4 Press SELECT again to make the change This automatically returns you t...
Страница 23: ...k mark next to each function To protect the function from unauthorized changes add the check mark Delete the check mark to allow or change settings 6 Press HOME to return to the Home screen To change...
Страница 24: ...pins 7 and 8 Closure of the contacts can be momentary no less than 0 01 seconds or maintained A new cycle will begin once the contacts are opened and then closed again End of Cycle Feedback Circuit A...
Страница 25: ...he welcome letter and accompanying literature shipped with the unit A calibration cable kit is recommended refer to Accessories on page 29 Install the software on your computer and follow the instruct...
Страница 26: ...ling you can spoon it into the syringe barrel with a spatula Or if the fluid comes packed in a 300 ml 1 10 gallon cartridge try loading the barrel with a caulking gun Then press the SmoothFlow piston...
Страница 27: ...1 bar 2 psi 6 From TIMED mode press STEADY 7 With the syringe barrel pointing down over a container unsnap the safety clip Press and hold the foot pedal or finger switch to fill the tip 8 As a drop b...
Страница 28: ...Using air pressure the barrel loader fills the syringe barrel with a piston installed from the bottom up If the fluid comes packed in a 300 ml 1 10 gallon caulking type cartridge use the EFD P N 7022...
Страница 29: ...ations based on NIST standards Replacement Parts Part Description 7362891 Foot pedal 7017101 Barrel holder sleeve Accessories See the Dispenser Accessories data sheet for a complete list of optional a...
Страница 30: ...being drawn into the dispenser Attach an empty barrel put the unit in STEADY mode place the barrel in a cup and then press the foot pedal to expel the fluid Order the vacuum suck back filter trap acce...
Страница 31: ...Notes Ultimus I II High Precision Fluid Dispensers 31 www nordsonefd com info nordsonefd com 800 556 3484 Sales and service of Nordson EFD dispensing systems are available worldwide...
Страница 32: ...ult Warranty Nordson EFD dispensers are warranted to the original end user for 10 years from date of purchase Within the period of this warranty EFD will repair or replace free of charge any defective...