23
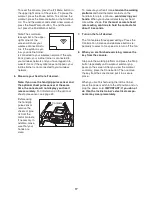
To use a static IP address,
press the Use Static
IPs button. Enter the IP address, netmask, gate-
way IP address, and at least one DNS. Press the
arrow buttons to view additional entry boxes. When
you are finished, press the Submit button. To re-
turn to the advanced settings screen, press the
Cancel button.
To use a static DNS,
press the Use Static DNS
button. Enter at least one DNS. Press the arrow
buttons to view additional entry boxes. When you
are finished, press the Submit button. To return to
the advanced settings screen, press the Cancel
button.
If necessary, press the Cancel button to exit the
Advanced Settings screen.
If you are having problems connecting, unencrypt
your network, update your console firmware (see
step 7 on page 24), and then encrypt your network.
Note: If you turn on encryption on a non-encrypted
network, the console will not function correctly.
Note: The iFit Live mode supports unsecured and
secured (WEP, WPA, and WPA2) encryption. A
broadband connection is recommended; perfor-
mance depends on connection speed.
Note: If you have questions after following these in-
structions, go to www.iFit.com/support for assis-
tance.
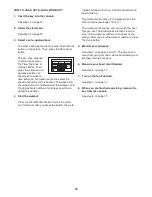
3. Log in to your iFit Live account.
Press the iFit Live Login button. Then, enter your
user name and password using the keyboard on
the screen. To use numbers or other characters,
press the .?123 button or the #+= button. To return
to the letter keyboard, press the ABC button. To
capitalize a character, press the button with an up-
ward-facing arrow. To clear the last character,
press the button with a backward-facing arrow and
an X. When you are finished, press the Login but-
ton. To return to the settings mode, press the
Cancel button.
To set up an iFit Live account, or for more informa-
tion about the account, go to www.iFit.com.
4. Turn on or turn off the display demo mode.
The console features a display demo mode, de-
signed to be used if the incline trainer is displayed
in a store. While the demo mode is turned on, the
console will function normally when you plug in the
power cord, press the power switch into the reset
position, and insert the key into the console.
However, when you remove the key, the screen
will remain lit, although the buttons will not func-
tion.
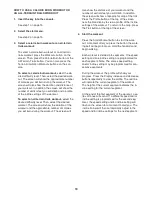
To turn on or turn off the display demo mode, first
press the Demo Mode button. Next, press the On
button or the Off button. Then, press the Back
button.
5. View the unit of measurement.
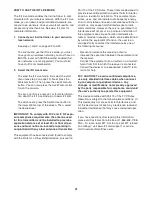
Press the US/Metric button to view the selected
unit of measurement. Change the unit of measure-
ment, if desired. Then, press the Back button.
Note: If you purchased your incline trainer in the
US, the US/Metric button may not be enabled.
6. Exit the settings mode.
To exit the settings mode, press the Back button.
THE OPTIONAL CHEST PULSE SENSOR
An optional chest pulse sensor offers hands-free oper-
ation as it tracks your heart rate during your workouts.
To purchase the optional chest pulse sensor, call
the telephone number on the front cover of this
manual.

