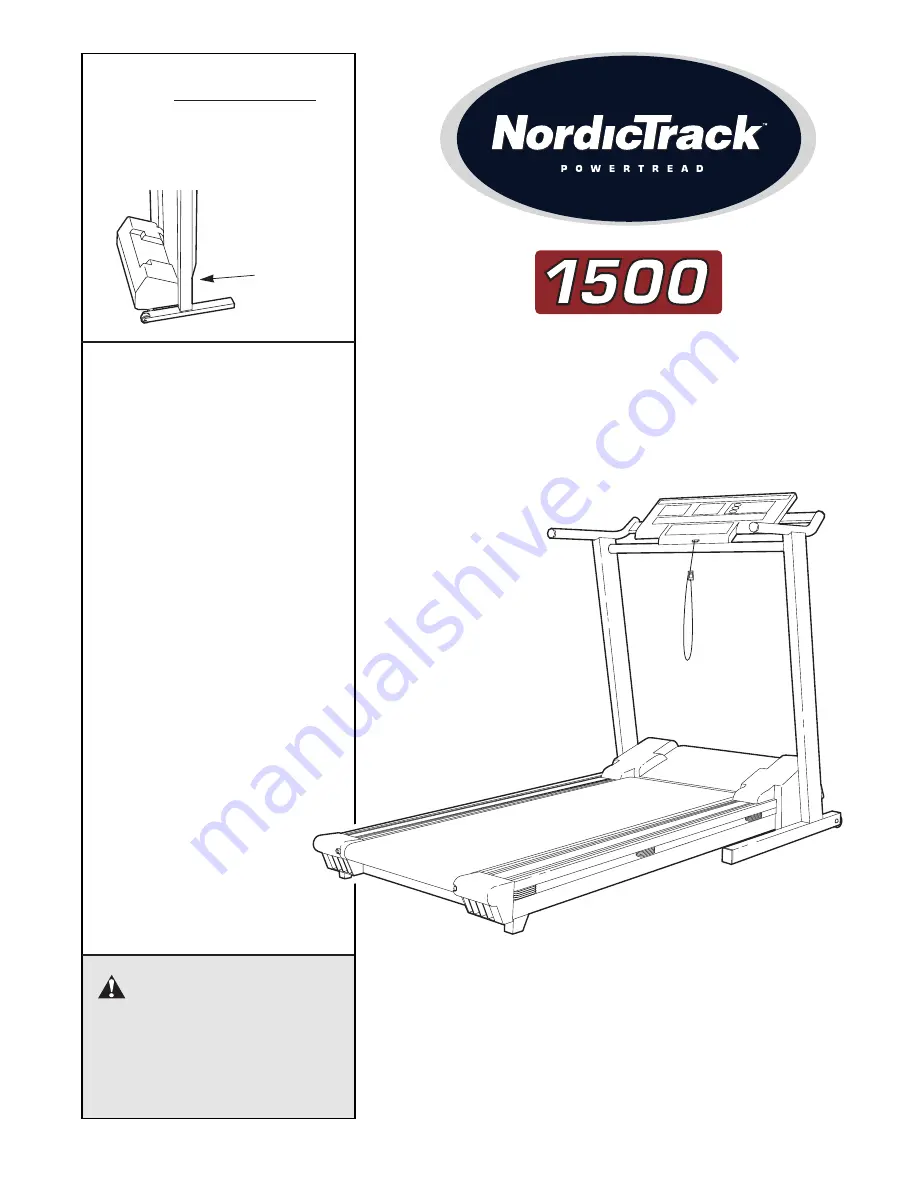
background image

CAUTION

Read all precautions and instruc-
tions in this manual before using
this equipment. Save this manual
for future reference.

Serial

Number

Decal

Model No. 831.298801
Serial No. 

Find the serial number in the location
shown below. Write the serial number
in the space above for reference.

Questions?

As a manufacturer, we are com-
mitted to providing complete
customer satisfaction. If you
have questions, or if there are
missing or damaged parts, we
will guarantee complete satis-
faction through direct assistance
from our factory.

TO AVOID UNNECESSARY
DELAYS, PLEASE CALL DIRECT
TO OUR TOLL-FREE CUSTOMER
HOT LINE. The trained techni-
cians on our Customer Hot Line
will provide immediate assis-
tance, free of charge to you. 

CUSTOMER HOT LINE:  

1-888-825-2588 

Mon.ÐFri., 6 a.m.Ð6 p.m. MST

OWNER'S GUIDE

SEARS, ROEBUCK AND CO., HOFFMAN ESTATES, IL 60179

Содержание 831.298801

Страница 1: ...we are com mitted to providing complete customer satisfaction If you have questions or if there are missing or damaged parts we will guarantee complete satis faction through direct assistance from our factory TO AVOID UNNECESSARY DELAYS PLEASE CALL DIRECT TO OUR TOLL FREE CUSTOMER HOT LINE The trained techni cians on our Customer Hot Line will provide immediate assis tance free of charge to you CU...

Страница 2: ...ly 6 Treadmill Operation 7 How to Fold and Move the Treadmill 13 Maintenance and Trouble shooting 15 Conditioning Guidelines 18 Part List 22 Ordering Replacement Parts 23 Limited Warranty Back Cover Note An Exploded Drawing is attached in the center of this ownerÕs guide ...

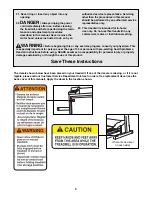
Страница 3: ...0 volts or less and a minimum surge dis sipation of 450 joules The surge suppressor must be electrically rated for 120 volts AC and 15 amps 11 Keep the power cord and the surge protector away from heated surfaces 12 Never move the walking belt while the power is turned off Do not operate the treadmill if the power cord or plug is damaged or if the treadmill is not working properly See Before You B...

Страница 4: ...ove the motor hood unless instructed to do so by an authorized service representative Servicing other than the procedures in this manual should be performed by an authorized service representative only 23 This treadmill is intended for in home use only Do not use this treadmill in any commercial rental or institutional setting WARNING Before beginning this or any exercise program consult your phys...

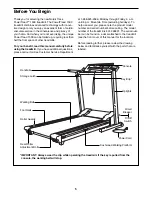
Страница 5: ...8 Monday through Friday 6 a m until 6 p m Mountain Time excluding holidays To help us assist you please note the product model number and serial number before calling The model number of the treadmill is 831 298801 The serial num ber can be found on a decal attached to the treadmill see the front cover of this manual for the location Before reading further please review the drawing below and famil...

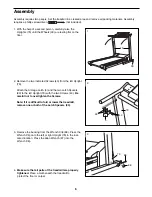
Страница 6: ... Storage Latch 5 and the two Latch Spacers 93 to the left Upright 70 with the two Screws 43 Be careful not to overtighten the Screws Note If it is difficult to fold or lower the treadmill remove one or both of the Latch Spacers 93 2 70 93 43 5 4 Make sure that all parts of the treadmill are properly tightened Place a mat beneath the treadmill to protect the floor or carpet 3 Remove the backing fro...

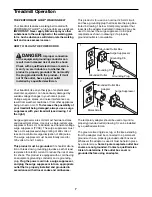
Страница 7: ...ctor and a grounding plug Plug the power cord into a surge suppressor and plug the surge suppressor into an appropriate outlet that is properly installed and grounded in accordance with all local codes and ordinances This product is for use on a nominal 120 volt circuit and has a grounding plug that looks like the plug illus trated in drawing 1 below A temporary adapter that looks like the adapter...

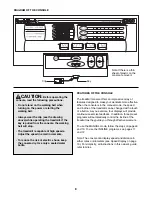
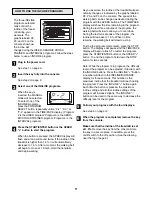
Страница 8: ...pages 11 and 12 Note The console can display speed and distance in either miles or kilometers see Speed Display on page 10 For simplicity all instructions in this ownerÕs guide refer to miles Clip Key CAUTION Before operating the console read the following precautions Do not stand on the walking belt when turning on the power or starting the walking belt Always wear the clip see the drawing above ...

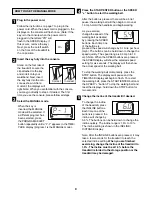
Страница 9: ...ercise change the speed of the walking belt as desired by pressing the SPEED buttons Each time one of the buttons is pressed the speed will change by 0 1 mile per hour mph The buttons can be held down to change the speed quickly The speed range is 0 5 mph to 10 mph Note When the SPEED buttons are pressed the SPEED display will show the selected speed setting for six seconds The display will then s...

Страница 10: ...ator beside the SPEED display will light when the speed is shown in kph To change the unit of measurement first hold down the START ENTER button while inserting the key into the console An ÒEÓ for english miles or an ÒMÓ for metric kilometers will appear in the PULSE CALORIES display Press the SPEED Ò Ó button to change the unit of measurement Remove and then reinsert the key INCLINE DISTANCE disp...

Страница 11: ...ons The TIME PACE display will show the time remaining in the program During the last three minutes of the program the walking belt will slow to allow you to cool down During the last ten seconds of the program the incline will decrease to 1 5 When no time remains the walking belt will slow to a stop To stop the program momentarily press the STOP button The displays will pause and the TIME PACE di...

Страница 12: ...12 Notes ...
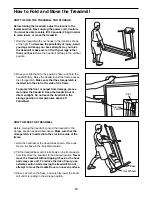
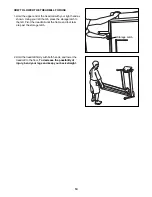
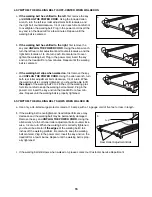
Страница 13: ...To protect the floor or carpet from damage place a mat under the treadmill Keep the treadmill out of direct sunlight Do not leave the treadmill in the storage position in temperatures above 85 Fahrenheit HOW TO MOVE THE TREADMILL Before moving the treadmill convert the treadmill to the storage position as described above Make sure that the storage latch is inserted into the slot in the side of the...

Страница 14: ...ing your left thumb press the storage latch to the left Pivot the treadmill until the frame and foot rails are past the storage latch 2 Hold the treadmill firmly with both hands and lower the treadmill to the floor To decrease the possibility of injury bend your legs and keep your back straight Storage Latch ...

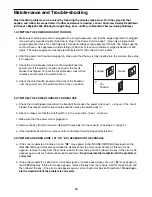
Страница 15: ...mill near the power cord The switch must be in the on position 2 SYMPTOM THE POWER TURNS OFF DURING USE a Check the circuit breaker located on the treadmill frame near the power cord see 1 c above If the circuit breaker has tripped wait for five minutes and then press the switch back in b Check to make sure that the on off switch is in the on position See 1 d above c Make sure that the power cord ...

Страница 16: ...ckwise 1 4 of a turn When the walking belt is correctly tightened you should be able to lift the edges of the walking belt 3 to 4 inches off the walking plat form Be careful to keep the walking belt centered Plug in the power cord insert the key and run the treadmill for a few min utes Repeat until the walking belt is properly tightened 5 SYMPTOM THE WALKING BELT SLOWS WHEN WALKED ON a Use only a ...

Страница 17: ...e left side of the Pulley 17 Turn the Pulley until the Magnet is aligned with the Reed Switch Make sure that there is a 1 8Ógap between the Magnet and the Reed Switch If necessary loosen the Screw 90 and move the Reed Switch slightly Retighten the Screw Re attach the hood and run the treadmill for a few min utes to check for a correct speed reading 95 74 90 Top View 1 8Ó 17 ...

Страница 18: ...al training aerobic or cardiovascular levelÑ the Fitness level Advanced exercisers or those wishing to do sports athletic conditioning or inter val training workouts should exercise at 80 to 85 percent of the MHR for short periods of time The chart below shows Target Heart Rate Zones for Health Fitness and Advanced exercisers Be sure to check your heart rate at least twice during an aerobic condit...

Страница 19: ...end your back leg as well Stretches Calves achilles tendons and ankles 3 Hamstring StretchÑSit with one leg extended Bring the sole of the opposite foot toward you and rest it against the inner thigh of your extended leg Reach toward your toes as far as possible Hold for 15 to 30 seconds then relax Repeat 3 times for both legs Stretches Hamstrings lower back and groin 4 Inner Thigh StretchÑSit wit...

Страница 20: ... t go the full 20 minutes from the start which is common try to exercise for five minutes at a time a couple of times a day Recent research indicates that several short workouts in one day can also provide fitness benefits Gradually your stamina will increase and it will become easier to exercise for longer periods of time Cool down after aerobic exercise Keep moving It is important that you cool ...

Страница 21: ...er intensity For example a one minute spurt of high resistance fast exercise is followed by a two to three minute active rest period of low resistance slow exercise The duration of these periods should be based more on how you feel rather than time A sequence such as this should be repeated 5 to 20 times during your workout session Estimated maximum heart rate MHR 220 Ð your age WORKOUT TIPS Full ...

Страница 22: ...or Tension Washer 46 2 Tension Star Washer 47 2 Sensor Screw 48 2 Belt Guide Key No Qty Description 49 3 Roller Adjustment Washer 50 1 Belly Pan 51 4 Plastic Stand Off 52 1 Wire Harness 53 2 Rear Pad 54 1 Left Rear Endcap 55 1 Sensor Star Washer 56 4 Frame Pivot Bolt 57 1 Console Wire Harness 58 1 Right Foot Rail 59 1 Incline Spacer 60 1 Front Roller Adj Nut 61 2 Sensor Locknut 62 18 Belly Pan Fas...

Страница 23: ...call our Customer Service Department toll free at 1 888 825 2588 Monday through Friday 6 a m until 6 p m Mountain Time excluding holidays When ordering parts please be prepared to give the following information The MODEL NUMBER OF THE PRODUCT 831 298801 The NAME OF THE PRODUCT NordicTrack PowerTreadª 1500 The SERIAL NUMBER OF THE PRODUCT see the front cover of this manual The KEY NUMBER AND DESCRI...

Страница 24: ... 60 25 49 25 2 47 76 69 61 24 90 90 90 62 62 91 62 62 43 1 49 91 49 1 43 43 8 8 56 56 80 7 77 83 68 68 28 62 62 24 36 36 44 90 29 6 8 6 90 90 6 8 73 90 94 94 34 44 8 8 39 96 46 45 25 71 40 42 41 72 90 90 3 3 74 90 11 95 59 25 25 55 82 90 27 90 92 51 51 Exploded DrawingÑModel No 831 298801 R0299A ...

Страница 25: ...9 91 89 91 79 85 21 37 24 30 84 38 Exploded Drawing ÑModel No 831 298801 R0299A 43 90 90 43 43 43 86 86 86 56 90 90 56 43 43 43 88 87 52 52 57 15 93 13 13 64 43 10 89 91 89 91 14 14 43 75 75 10 10 Exploded DrawingÑModel No 831 298801 R0299A ...

Страница 26: ...tion and your continued satis faction HOW TO GET PARTS AND SERVICEÑSimply call our Customer Service Department at 1 888 825 2588 and tell them your name and address and the serial number of your Product They will tell you how to get a part replaced or if neces sary arrange for service where your Product is located or advise you how to ship the Product for service Before shipping always obtain a Re...

Отзывы: