9. Working with the Editor: Patch window
NORD MODULAR G2 V1.1
Page 100
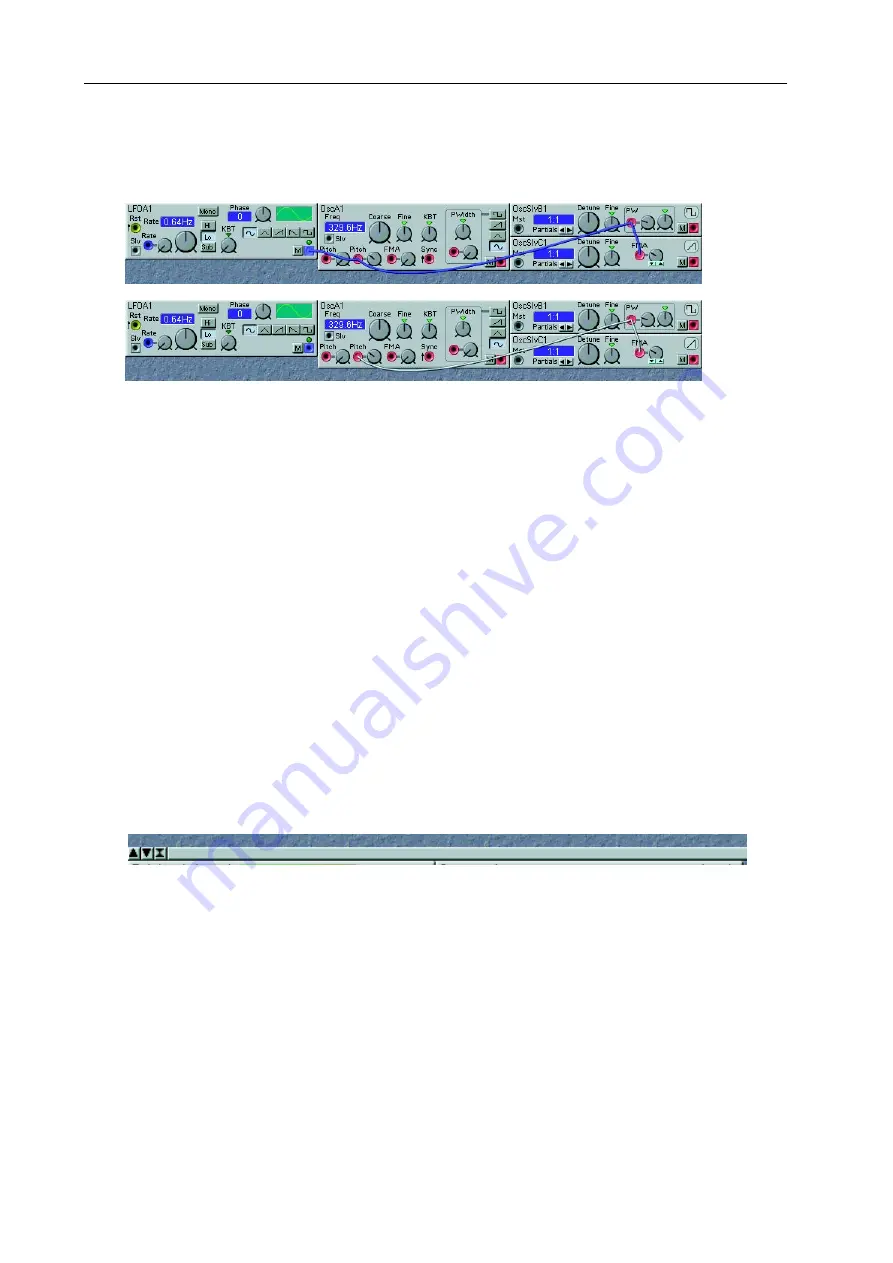
the in- and outputs of the connected modules. The white button represents any remaining connections
after you have broke a part of a cable chain (see figure below).
Let’s say you want to break the cable between the ‘LFOA1’ output and the ‘OSCA1’ Pitch input in the
upper picture. Since this cable is part of a serial cable chain, the Editor will keep the remaining cable
chain. In the lower picture, the remaining cable chain is shown. As you can see, the three remaining in-
puts are still connected. This won’t result in any practical functionality, but will make it easier to route
the serial chain elsewhere in the Patch. These non-functional input-to-input connections are indicated
by white cable color. Click on the white cable button to make these remaining connections visible/invis-
ible. As soon as you route any of the remaining connected inputs to an output, the cable color will change
to the output’s color.
H
H
H
H
IIIID
D
D
DE
E
E
E
A
A
A
AL
L
L
LL
L
L
L
C
C
C
CA
A
A
AB
B
B
BL
L
L
LE
E
E
ES
S
S
S
Click the H button to hide all visible cables in the active Patch. “Invisible” cable connections will be in-
dicated by a colored dot on the in- and outputs of the connected modules. Pressing the space bar on the
computer keyboard performs the same operation.
S
S
S
S
H
H
H
HA
A
A
AK
K
K
KE
E
E
E
C
C
C
CA
A
A
AB
B
B
BL
L
L
LE
E
E
ES
S
S
S
Click on the S button to reposition - shake - the cables in a Patch. This can be useful if it is hard to see
where the cables are actually connected, or if they hide visual information (display boxes etc.) in the
Patch. Pressing the Ctrl key and the space bar on the computer keyboard performs the same operation.
P
P
P
P
A
A
A
AT
T
T
TC
C
C
CH
H
H
H
W
W
W
WIIIIN
N
N
ND
D
D
DO
O
O
OW
W
W
W
S
S
S
SP
P
P
PL
L
L
LIIIIT
T
T
T
B
B
B
BA
A
A
AR
R
R
R
Click-hold on the Patch window split bar and drag up or down to resize the two Patch sections, the Voice
and FX Areas. Click on the up arrow button to the left in the bar to show only the Voice Area, and on
the down arrow button to show only the FX Area. Click on the double arrow button to place the split
bar in the middle of the screen, showing both Areas. Press V on the computer keyboard to toggle between
the current split position and viewing only the Voice Area. Press F on the computer keyboard to toggle
between the current split position and viewing only the FX Area.


