background image

GB 11

ABOUT THE SMART CARD AND CA MODULE

General

To be able to receive scrambled digital channels you will need a
CA module and a smart card from a service provider.

There are a few different CA modules on the European market.
Each one of the CA modules support a certain kind of encryption
system. The Mediamaster supports CA modules which are made
to work according to the DVB standard. Depending on the chan-
nels you want to watch, your local dealer will provide you with
the right type of CA module.

Please note that a smart card may only be valid for a single Serv-
ice Provider and due to this, a specific range of channels.

The smart card and the CA module may cause special menus,
not described in this manual, to appear. Follow the instructions
from the Service Provider.

Note:

 CA modules and smart cards are only distributed by serv-

ice providers and special distributors, not by Nokia.

After inserting a card, leave it in the slot permanently. Do not re-
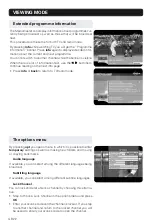
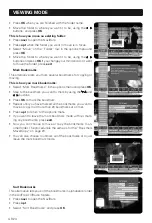
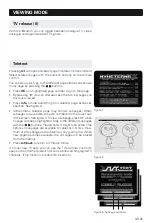
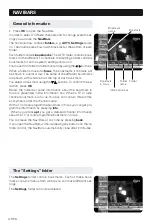
move it again, unless you will be asked to do so. This is impor-
tant because, for example, if your Service Provider wants to
download new information to the smart card, the card has to be
in the slot.

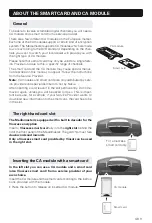
The right-hand card slot

The Mediamaster is equipped with a built in decoder for the
Viaccess encryption

.

Insert a 

Viaccess smart card

 fully into the 

right slot

 behind the

lid of the front panel of the Mediamaster. The gold chip must face

downwards and inwards

.

Only a Viaccess smart card provided by Viasat can be used
in the right slot.

CA module

Smart card

For a Viaccess
smart card only

CA module

Smart card

Inserting the CA module with a smart card

In the left slot you can use a CA module and a smart card
(also Viaccess smart card) from a service provider of your
own choice.

Insert the CA module and the smart card according to the instruc-
tions provided with the module.

• Press the button to release an inserted CA module.

Содержание Mediamaster 220S

Страница 1: ...User Guide ...

Страница 2: ...t ja laitteeseen sovellettavat määräykset Tämä päätelaite on tarkoitettu liitettäväksi yleiseen kytkentäiseen puhelinverkkoon PSTN Jos käytössä on verkko osoitteiden käsittely se perustuu äänitaajuusvalintasignalointiin DTMF NO Nokia erklærer herved at denne digitale mottakeren Mediamaster 220 S er i overenstemmelse med vesentlige krav og andre relevante bestemmelser i EU direktivet 1999 5 EC Dett...

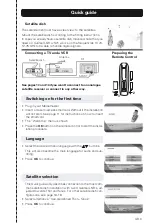
Страница 3: ...ct the desired menu language with the buttons This will also become the main language for audio and sub titling Press OK to continue Satellite selection This Quick guide only describes connection to the most com mon satellite dish installation with two Universal LNB s ad justed towards Thor and Sirius For other satellite dish con figurations see page 16 18 Select alternative Use predefined Thor Si...

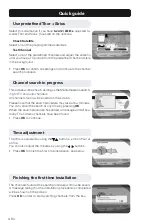
Страница 4: ...TV and radio channels have been found Press OK to continue Use predefined Thor Sirius Select this alternative if you have two 2 LNB s adjusted to wards Thor and Sirius mounted on the antenna Check Satellite Select one of the preprogrammed satellites Test Channel Select one of the predefined channels and adjust the antenna until you have a TV picture from the predefined channel visible in the backg...

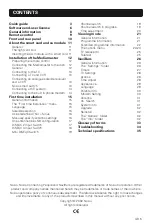
Страница 5: ...TV and VCR 13 Connecting an analogue satellite receiver and a VCR 13 Nokia smart switch 13 Connecting a HiFi system 14 Connecting to the built in phone modem 14 First time installation 15 General information 15 The First time installation menu 15 Language 15 Satellite selection 15 Use predefined Thor Sirius 16 Manually specify antenna settings 16 One antenna one LNB configuration 17 DiSEqC 2 Input...

Страница 6: ... translate reproduce or transfer the right to use the Software or copy the Software except as expressly provided in this Agreement c You may not resell except as set forth in clause 3 a sublicense rent lease or lend the Software d You may not reverse engineer decompile dis assemble or otherwise attempt to discover the source code of the Software except to the extent that this restriction is expres...

Страница 7: ... government A Government End User is defined in Part 772 of the EAR as any foreign central re gional or local government department agency or other entity performing governmental functions in cluding governmental research institutions govern mental corporations or their separate business units as defined in part 772 of the EAR which are engaged in the manufacture or distribution of items or servic...

Страница 8: ...irius Hotbird and Astra satellites Software is updated automatically via the Sirius satellite A valid Viasat smart card must be inserted in the embedded Viaccess card reader to be able to use the reciver Allow 10 cm space around the Mediamaster for sufficient ventilation Do not cover the Mediamaster s ventilation openings with items such as news papers table cloths curtains etc Do not place the Me...

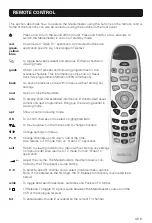
Страница 9: ...highlighted item To move up down in the menus and to change channels Change settings in menus P P Change channels up and down one at the time Also returns to TV mode from an Open TV application exit Return to viewing mode from a menu without storing any settings in menu mode Also returns to TV mode from an Open TV application Adjust the volume The Mediamaster s maximum level is con trolled by the ...

Страница 10: ...een LED indicator 2 Green Red Single flash Continuous green flashing Continuous red flashing to put the Mediamaster in and out of standby mode to change channels and to move in menus Indica tor 1 Indica tor 2 Slot for inserting of a Viaccess smart card Slot for a CA module with a smart card Button push the button to release an inserted CA module Lid open the lid in order to insert the CA module an...

Страница 11: ...e providers and special distributors not by Nokia After inserting a card leave it in the slot permanently Do not re move it again unless you will be asked to do so This is impor tant because for example if your Service Provider wants to download new information to the smart card the card has to be in the slot The right hand card slot The Mediamaster is equipped with a built in decoder for the Viac...

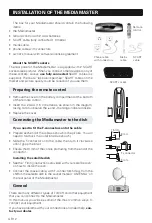
Страница 12: ...markings indicated inside Replace the cover Installing the satellite dish See the Fitting instructions provided with your satellite dish on how to install the dish Connect the coaxial cable with F connectors fitted from the LNB on the satellite dish to the socket marked ANTENNA on the rear panel of the Mediamaster Connecting the Mediamaster to the dish If you need to fit the F connectors onto the ...

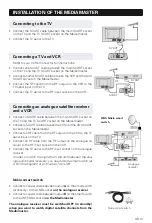
Страница 13: ...onnect an RF cable from the RF output on the analogue re ceiver to the RF input socket on the VCR Connect the TV aerial to the RF input socket on the analogue receiver In order to switch the signal from the dish between the ana logue and digital receivers you need a Nokia smart switch at A B in the diagram or a Universal Twin LNB With Nokia smart switch Analogue receiver SCART RF Nokia smart switc...

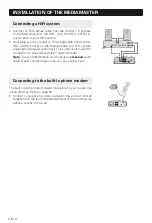
Страница 14: ...tem equipped with digital audio input This output is also used for connection to an external DolbyTM digital decoder Note To avoid interference you must use a screened audio cable Never connect digital output to any analog input Connecting to the built in phone modem The built in phone modem makes it possible for you to use inter active services Refer to page 30 Connect a telephone cable between t...

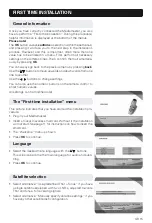
Страница 15: ...You can always go back to the previous menu by pressing back Use the buttons to move upwards and downwards from one line to another Use the buttons to change settings You can also use the numeric buttons on the remote control to enter numeric values All settings can be modified later FIRST TIME INSTALLATION The First time installation menu This picture indicates that you have started the installat...

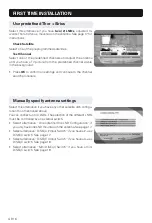
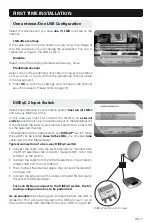
Страница 16: ...ontinue to the channel search procedure Manually specify antenna settings Select this alternative if you have any other satellite dish configu ration than mentioned above You can connect up to 4 LNBs The selection of the different LNBs must be controlled by an external switch Select alternative One antenna One LNB Configuration if you only have one LNB mounted on the antenna See page 17 Select alt...

Страница 17: ... is only one antenna input on the Mediamaster Once installed the switch automatically selects the correct LNB for the selected channel This external switch is better known as a DiSEqC switch Since the switch can be located close to the LNBs you only need one cable down to the Mediamaster Typical connection of a two way DiSEqC switch Connect the cable from the LNB intended for channels from the THO...

Страница 18: ...el visible in the background Go through the same procedure for the second DiSEqC port But this time select 2 from Switch port and Sirius as the sat ellite When the configuration of both DiSEqC ports are ready press OK to continue to the channel search procedure Please refer to page 19 DiSEqC 4 Input Switch Select this alternative if your antenna system has four LNB s The selection of the different...

Страница 19: ...ith the button FEC Select Auto or any of the preprogrammed values Network search Select Yes if you want to search on all trans ponders connected to a specific network Press OK to start searching for channels Mini DiSEqC Switch Select this alternative if your antenna system has two LNB s and a Mini DiSEqC Switch Tone burst The procedure is the same as for two port DiSEqC as described on page 17 18 ...

Страница 20: ...ttons Press OK to finish the first time installation see below FIRST TIME INSTALLATION Finishing the first time installation The channels found at the search procedure will now be saved A message telling that the installation procedure is completed will be shown on the screen Press OK in order to start watching channels from the box ...

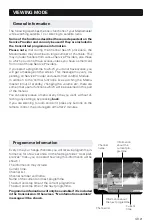
Страница 21: ...master in out of standby changing the volume etc there are some other useful functions which will be explained in this part of the manual You can always leave a menu at any time you want without af fecting any settings by pressing back If you are listening to radio and don t press any buttons on the remote control the picture gets dim after 2 minutes Programme information Every time you change cha...

Страница 22: ...he next info page Press info or back to return to TV radio mode The options menu By pressing opt you open a menu in which it is possible to enter temporary settings as well as making new folders and moving or copying bookmarks Audio language If available you can select among the different languages being broadcast Subtitling language If available you can select among different subtitle languages L...

Страница 23: ...press OK to move the channel you are currently watch ing Note You can only move bookmarks in and from your own folders Not valid for the All Free TV Radio folders Move the bookmark to where you want it to be using the and buttons and press OK If you change your mind and don t want to move the bookmark press exit In order to move more than one bookmark see Mark Bookmars on page 24 Folder New Move T...

Страница 24: ...ange your mind and don t want to move the folder press exit Mark Bookmarks This alternative lets you mark several bookmarks for copying or moving This is how you mark bookmarks Select Mark Bookmarks in the options menu and press OK Step to the bookmark you want to mark by using the and buttons Press OK to mark the bookmark Repeat until you have marked all the bookmarks you want to move or copy not...

Страница 25: ...adline See figure 2 Sometimes a teletext page may contain subpages When subpages are available they are numbered in the lower part of the screen See figure 3 To view a subpage press OK when no page number is highlighted Step to the different subpages with the buttons Please note It might take some time before all subpages are available for selection Only a maxi mum of 20 subpages are available at ...

Страница 26: ...okmark using the buttons To confirm the se lection press OK Below the folder bar some information about the bookmark in focus is presented in the information box When a TV or radio channel bookmark is in focus this box can contain three differ ent symbols after the channel name With a TV or radio programme bookmark in focus you can get pro gramme information by pressing info When you press opt you...

Страница 27: ...ou enter a wrong digit you can erase it using the button The different start times may never overlap each other If you try to enter a start or stop time within an already occupied period of time you will get a warning message Select if you want the timer to Repeat and in what interval Set the Start and stop time using the numerical buttons on the remote control If you enter a wrong digit you can e...

Страница 28: ...om the factory the access code is set to 1234 From here you can adjust the audio video settings for your Media master TV screen format Select your TV screen format The 4 3 format is the standard format for most TV screens Select 16 9 for a wide screen TV Picture format If you have a TV set with the 4 3 picture format and the transmis sion is in 16 9 you can select Fullscreen or Letterbox Fullscree...

Страница 29: ...vices will show a symbol in the upper left corner of the screen By pressing the red button on the remote control you start the download of the application Manually You select to download the application manually A Symbol will be shown on the screen when you select the chan nel Automatically When you select a channel containing a downloadable application it will automatically be downloaded when you...

Страница 30: ...r transmissions Change access code From here you can change the access code from the stand ard 1234 DO NOT FORGET IT Without it you do not have access to any of the functions where the code is required Modem Setting To open this menu you will be asked to enter your access code From the factory the access code is set to 1234 The Mediamaster is equipped with a built in telephone modem Via the modem ...

Страница 31: ...our access code From the factory the access code is set to 1234 Change antenna type The procedure is the same as performed during the First Time In stallation Please refer to page 16 18 Modify antenna settings Select this alternative if you want to make changes in your cur rent antenna settings Ch Search To open this menu you will be asked to enter your access code From the factory the access code...

Страница 32: ...nt in for service Reinstall To open this menu you will be asked to enter your access code From the factory the access code is set to 1234 Use this option only if you have to start the complete installa tion procedure from scratch If you continue from here all your previous settings access code and favourite channels etc will be erased If you do not want to perform a reinstallation you can leave th...

Страница 33: ... Group Established by the Inter national Standards Organisation to provide the basis for a picture coding and compression system Network A number of digital channels transmitted from one source Grouped under separate headings in the chan nel list GLOSSARY OF TERMS PCM Pulse Code Modulation Non compressed digital audio format PCR Program Clock Reference PID Packet Identifier Polarisation Polarisati...

Страница 34: ...o do Check that the mains cable is plugged into the power socket Press the standby button to bring the Mediamaster out of standby mode Adjust the dish Check the signal level indicator in one of the channel search submenus Check the cable connections LNB and other equipment connected between the LNB and the receiver or adjust the dish Replace the LNB Increase the LNB voltage with 0 5 V from the Ant...

Страница 35: ...ol V32 bis Security information The modem connection is made according to the TNV 3 circuit type All other connections are made according to the SELV circuit type Front panel 2 LEDs Buttons standby progr number up and down Conditional Access system Embedded Viacccess One PCMCIA Interface for a Common Interface CA module DVB standard General data The model code variant and serial number are located...

Страница 36: ...Nokia is a registered trademark of Nokia Corporation www nokia com 667698521 01 ...

Отзывы: