Electronic user’s guide released subject to "Nokia User’s Guides Terms and
Conditions, 7th June, 1998"
User’s guide
9352346
Issue
4
Страница 1: ...Electronic user s guide released subject to Nokia User s Guides Terms and Conditions 7th June 1998 User s guide 9352346 Issue 4 ...
Страница 2: ...s on is a trademark of Nokia Mobile Phones Nokia tune is a trademark of Nokia Mobile Phones Nokia operates a policy of continuous development Nokia reserves the right to make changes and improvements to any of the products described in this document without prior notice Under no circumstances shall Nokia be responsible for any loss of data or income or any special incidental consequential or indir...
Страница 3: ...arted to learn how to insert the SIM card install and charge the battery switch on your phone 1 Key in the area code and phone number and press 2 Press to end the call Call functions Answering a call Press Ending rejecting a call Press Adjusting earpiece volume Press the volume keys on the side of the phone Last number redial Press in the standby mode to access the list of last dialled numbers Scr...
Страница 4: ...ring Exiting a menu Press Menu scroll with or to the desired menu function and press Select Press to exit a menu function without changing its settings and return to the standby mode Locking Unlocking the keypad Press Menu and and then quickly Press Unlock and then quickly Writing a message Press Menu to enter Write messages Key in the message Using the predictive text input Press the key labelled...
Страница 5: ...5 Erasing a name and phone number 26 One by one 26 Erase all 26 Assigning a phone number as a speed dial number 27 Caller groups 27 Including a phone number in a caller group 28 Setting the ringing tone and graphic for a caller group 28 Phone book status 29 Setting the type of view for stored names and phone numbers 29 Service numbers Service Nos 30 Copying and printing via IR 30 Copying a name an...
Страница 6: ...ings Menu 4 5 56 Security settings Menu 4 6 57 Restore factory settings Menu 4 7 60 Call divert Menu 5 60 Games Menu 6 61 Game options 61 Starting a 2 player game 62 Calculator Menu 7 62 Using the calculator 62 To make a currency conversion 63 Calendar Menu 8 63 Infrared Menu 9 65 Setting the devices ready for infrared connection 65 Receiving data via the IR port 65 Sending data via the IR port 65...
Страница 7: ...IN HOSPITALS Follow any regulations or rules Switch phone off near medical equipment SWITCH OFF IN AIRCRAFT Wireless phones can cause interference Using them on aircraft is illegal SWITCH OFF WHEN REFUELING Don t use phone at a refuelling point Don t use near fuel or chemicals SWITCH OFF NEAR BLASTING Don t use phone where blasting is in progress Observe restrictions and follow any regulations or ...
Страница 8: ...ucts Remember to make backup copies of all important data MAKING CALLS Ensure the phone is switched on and in service Enter the phone number including the area code then press To end a call press To answer a call press EMERGENCY CALLS Ensure the phone is switched on and in service Press as many times as needed e g to exit a call to exit a menu etc to clear the display Enter the emergency number th...
Страница 9: ...s 4 6 6 1 Keep the new code secret and in a safe place which is separate from your phone Network services The wireless phone described in this guide is approved for use on the GSM900 GSM1800 and EGSM900 networks NOTE Dual band functionality is a network dependent feature Check with your local operator if you can subscribe to and use this functionality A number of features included in this guide ar...
Страница 10: ...manufacturer for use with this particular phone model The use of any other types will invalidate any approval or warranty applying to the phone and may be dangerous For availability of approved accessories please check with your dealer When you disconnect the power cord of any accessory grasp and pull the plug not the cord Typographics used in this guide The display texts which appear on the phone...
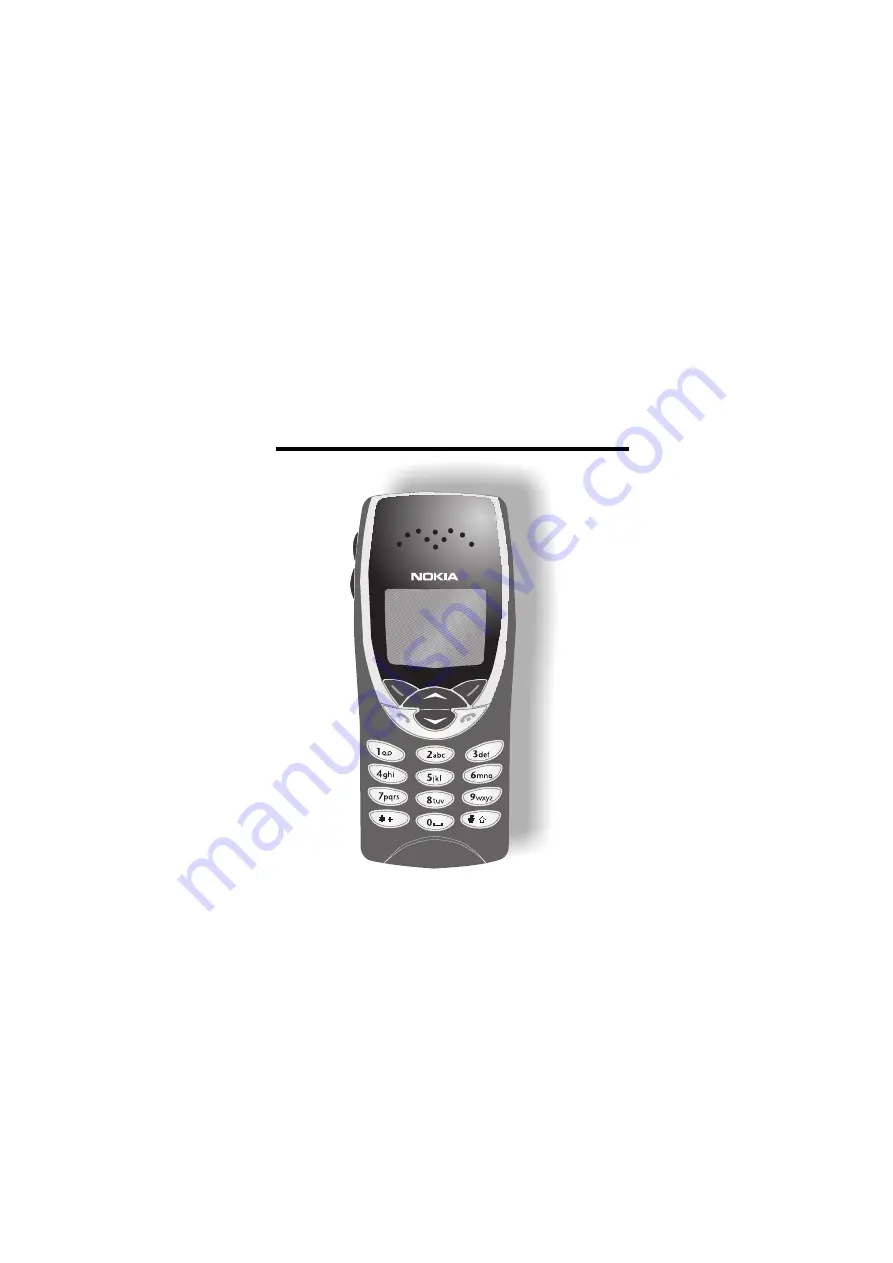
Страница 11: ...uide 1 Power key Pressing and holding the power key on top of your phone switches the phone on or off When pressed briefly in the standby mode or during a call it opens the list of profiles When pressed briefly while in the phone book or menu functions it turns the phone s display lights on for approximately 10 seconds 2 Volume keys The upper key increases and the lower key reduces the phone s ear...
Страница 12: ... right 4 Answers a call and dials a phone number In the standby mode it shows the most recently called numbers 5 to are used to key in numbers and letters Pressing and holding calls your voice mailbox and are used for various purposes in different functions 6 Selection keys Each of these keys performs the function indicated on the display above it Pressing and holding Names activates voice diallin...
Страница 13: ...is ready for use and no characters have been entered by the user The name of the current cellular network operator is shown on the display and bar Shows the signal strength of the cellular network at your current location The higher the bar the stronger the signal and bar Shows the battery charge level The higher the bar the more power there is in the battery X X X X Stands for the network operato...
Страница 14: ...and its contacts can easily be damaged by scratches or bending so be careful when handling inserting or removing the card Before installing the SIM card always make sure that the phone is switched off and then remove the battery 1 With the back of the phone facing you press the back cover release button Slide the back cover off 2 Remove the battery by lifting it from the finger grip ...
Страница 15: ...led corner is on the right NOTE If you need to remove the SIM card carefully slide it out of the SIM card slot 4 Replace the battery 5 Slide the back cover into its place Charging the battery 1 Attach the lead from the charger carefully to the socket 1 on the bottom of your phone NOTE Connector 2 is the headset connector Do not plug your headset in the charger connector It may damage the charger c...
Страница 16: ... 7 charger takes about 2 hours and 25 minutes 3 The battery is fully charged when the battery indicator bar stops scrolling If the phone is on the text Battery full is also briefly displayed 4 Disconnect the charger from the AC outlet and the phone If Notchargingis displayed charging has been suspended Wait for a while disconnect the charger and plug it in again If charging still fails contact you...
Страница 17: ...y cause interference or danger NOTE Your phone has a built in antenna As with any other radio transmitting device do not touch the antenna unnecessarily when the phone is switched on Contact with the antenna affects call quality and may cause the phone to operate at a higher power level than otherwise needed Not touching the antenna area during a phone call optimizes the antenna performance and th...
Страница 18: ... number 3 Press to end the call or to cancel the call attempt International calls 1 Press twice for the international prefix character replaces the international access code 2 Enter the country code area code and the phone number 3 To call the number press Making a call using the phone book 1 Press Names 2 When Search is highlighted press Select 3 Key in the first letter s of the name and press OK...
Страница 19: ... phone asks for the voice mailbox number key it in and press OK You obtain this number from your service provider To edit this number at a later time see Voice mailbox number Menu 1 9 2 Speed dialling a phone number If you have assigned a phone number to one of the speed dialling keys to you can call that phone number in either of the following ways Press the corresponding speed dialling key and p...
Страница 20: ...ting This network service allows you to answer an incoming call while you have a call in progress if you have activated the menu function Call waiting options Menu 4 4 4 1 While in a call press or press Options and select Answer to answer the waiting call The first call is put on hold 2 To switch between the two calls press Swap or 3 To end the active call press To reject the waiting call press Re...
Страница 21: ...y in the phone number or recall it from memory and call the number by pressing Call The first call is put on hold 3 When the new call has been answered join it in the conference call by pressing Options Then scroll to Conference and press Select 4 To add a new participant to the call repeat steps 1 and 2 5 To have a private conversation with a single participant press Options scroll to Private and...
Страница 22: ...quickly When the keypad is locked appears at the top of the display To unlock the keypad Press Unlock and then quickly When the keyguard is on To answer a call press To end or reject a call press The keyguard is off during a call NOTE When Keyguard is on calls may be possible to the emergency number programmed into your phone e g 112 or other official emergency number Key in the emergency number a...
Страница 23: ...e numbers In addition to storing names and phone numbers phone book also offers a wide range of functions for managing them Entering the phone book 1 In the standby mode press Names 2 During a call press Options scroll with or to Names and press Select Selecting the phone book Memory in use 1 In the standby mode press Names 2 Scroll with or to Options and press Select 3 Scroll to Memory in use and...
Страница 24: ...cted case To insert a number press and hold the key labelled with the desired number To switch between letter and number mode press and hold To insert a space press Pressing brings up a list of special characters Move through the list to the desired character with or and press Use to insert it in the name If you make a mistake you can remove characters to the left of the cursor by pressing Clear a...
Страница 25: ...ep 3 above 5 Press or until the desired name appears TIP QUICK SEARCH Press or key in the first letter of the name Scroll with or until the desired name appears Copying a name and phone number You can copy names and phone numbers all at once or one by one from the phone to the SIM card or vice versa 1 In the standby mode press Names 2 Scroll to Copy and press Select 3 Select the copying direction ...
Страница 26: ...n the target phone book with a different phone number an ordinal number is added to the end of the name Erasing a name and phone number You can remove names and phone numbers from the selected phone book one by one or all at once One by one 1 In the standby mode press Names 2 Scroll to Erase and press Select 3 Scroll to One by one and press Select 4 Scroll to the name and phone number you want to ...
Страница 27: ...ber is assigned to a key press Assign If a phone number is already assigned to a key you can view the number change it or erase it by first pressing Options NOTE Assign is also shown when the phone has automatically saved a phone number from the phone book to a speed dialling key 2 Search for the desired name and or phone number from phone book and press OK to select it Using the speed dial keys s...
Страница 28: ...roup e g Family and press Select Setting the ringing tone and graphic for a caller group 1 In the standby mode press Names 2 Scroll to Caller groups and press Select 3 Scroll to the desired caller group and press Select 4 Scroll to one of the following options and press Select Rename group Key in the name and press OK Group ringing tone Scroll to the desired ringing tone and press OK Preset is the...
Страница 29: ...locations and locations in use are displayed Setting the type of view for stored names and phone numbers The phone can show the stored phone numbers and names in three different ways called Type of view Name list shows three names at a time Name number shows a single name and phone number together Large font shows just one name at a time To set the type of view 1 In the standby mode press Names 2 ...
Страница 30: ...n copy names and phone numbers from a compatible phone 1 Press Menu scroll to Infrared Menu 9 and press Select Your phone is ready to receive data through its IR port The user of the other phone can now send the name and phone number via Infrared 2 Once the name and phone number have been copied to your phone press Options and scroll to Show Save or Discard and press OK Copying and printing from y...
Страница 31: ...ecord them and make calls in a quiet environment When recording a voice tag or making a call hold the phone in the normal position close to your ear The phone must be in a service area with adequate cellular signal strength The maximum length for the voice tag recording is 1 5 seconds but very short names are not accepted You can store up to eight voice tags in the phone s memory NOTE The phone mu...
Страница 32: ...ounds a notification tone and Please speak now is displayed 5 Say clearly the word s you want record as a voice tag 6 The phone plays the recorded tag and Playing voice tag is displayed If you do not want to save the recording press Quit 7 When the voice tag has been successfully saved Voicetagsaved is displayed The voice tag is saved in the phone book s Voice tags list Replaying a voice tag 1 In ...
Страница 33: ...o the name or phone number with a voice tag you want to change and press Options 4 Scroll to Change and press OK Press Start then speak after tone is displayed 5 Press Start The phone sounds a notification tone and Please speak now is displayed 6 Say the word s you want to record as a new voice tag The phone replays the new voice tag and confirms that this voice tag has been saved Erasing a voice ...
Страница 34: ...menu function by scrolling 1 In the standby mode press Menu to access the menu facility Scroll with or to reach the desired main menu e g Settings Press Select to enter the menu 2 If the menu contains any submenus for example Call Settings find the one you want by scrolling with or Press Select to enter the submenu If the menu you have selected contains submenus repeat this step 3 Scroll with or t...
Страница 35: ...nu shortcuts see the list of menu functions 1 In the standby mode press Menu 2 Within three seconds key in the first digit of the shortcut number Repeat this for each digit of the shortcut number Example setting the Anykey function on Press Menu and Menu for entering the menu for Settings for Call Settings for Anykey Answer and to set the Anykey answer on To access the functions in Menu 1 Press Me...
Страница 36: ...3 Dialled numbers 4 Erase recent call lists 5 Show call duration 1 Last call duration 2 All calls duration 3 Received calls duration 4 Dialled calls duration 5 Clear timers 6 Show call costs 1 Last call cost 2 All calls cost 3 Clear counters 7 Call cost settings 1 Call costs limit 2 Show costs in 3 Profiles 1 General 1 Activate 2 Personalise 1 Incoming call alert 2 Ringing tone 3 Ringing volume 4 ...
Страница 37: ...ing Phone line in use3 5 Phone settings 1 Language 2 Cell info display 3 Confirm SIM service actions 4 List of own numbers 5 Welcome note 6 Network selection 6 Security settings 1 PIN code request 2 Call barring service 1 Outgoing calls 2 International calls 3 Internationalexceptto home country 4 Incoming calls 5 Incoming calls if abroad 6 Cancel all barrings 3 Fixed dialling 4 Closed user group 5...
Страница 38: ...1 Memory 2 Snake 3 Logic 4 Rotation 7 Calculator 8 Calendar 9 Infrared 10 Services 1 Personal bookmarks Service name Add new service 2 Operator services Service name Operator settings Operator access number 1 Operator access number 2 Update operator services 11 SIM services 3 1 For availability contact your network operator or service provider 2 The divert options that are not supported by your ne...
Страница 39: ...ct 2 Scroll to the desired message and press Read to read it Use or to browse through the message and related information such as Sender s phone number and Reception date and time 3 While reading the message press Options to access one of the following options and press OK to activate it Erase to delete the message Reply to reply to the message Edit to change the contents of the message Use number...
Страница 40: ...Once you are in the Messages menu scroll to Outbox and press Select 2 Scroll to the desired message and press tRead to view it 3 Pressing Options while you are reading a message allows you to access the same functions as Inbox Menu 1 1 except for Reply and Details 4 If you wish to send the saved message use the Forward option Sending a text message Write messages menu 1 3 The Short Message Service...
Страница 41: ...ber with a name on page 24 Alternatively use the predictive text input See the following section Predictive text input 3 Press Options to display the following functions Send to send the message Dictionary to set the predictive text input on and select the language Send by set to send the message to a preselected set see below Save to save the message in the Outbox for use at a later time Clear sc...
Страница 42: ...can change from the predictive text input to the traditional text input either by pressing Options and scrolling to Dictionary Press OK scroll to Dictionary off and press OK T9 dictionary deactivated is displayed or by pressing twice Writing words with predictive text input 1 When in the English predictive text input start writing a word by using the keys to Press each key only once for one letter...
Страница 43: ...g or by adding space with 3 If the word is correct start writing the next word If the word is not correct you have the following options Press repeatedly until the desired word appears and confirm it Press Options scroll to Matches and press OK Scroll through the words and select the correct one by pressing Use Add the desired word to the match list 1 If no matches are found in the predictive text...
Страница 44: ...nu First press Exit and then OK to save the message NOTE If there is no space to save a new message you first need to select one of the old messages and replace it with the new one Sending a picture message 1 In the Picture messages menu select one of the preset pictures and press View 2 If the displayed picture is the one you want press Options scroll to Edit text and press Select If the displaye...
Страница 45: ...g the set in which you have defined the proper settings for fax transmissions Each set has its own submenu Message centre number Use this menu to store the phone number of the message centre needed for sending text messages Key in or edit the phone number and confirm with OK Messages sent as You can request the network to convert your Text messages into alternative formats Fax Paging or E mail net...
Страница 46: ... and relevant topic numbers contact your service provider By selecting On you will receive messages about the active topics Topic Index retrieves a list of available topics from the network In Topics you can add a topic to the topics list You can also Edit or Erase the topics list or Select to mark the topics as active or inactive Select Language to set the language for the messages Only messages ...
Страница 47: ...sing Receiving a data or fax call You can answer a data or fax call in the normal way even when the phone keypad is locked Calling fax and data mailbox You can call your fax and data mailbox by using the menus Fax mailbox and Data mailbox which are available if you subscribed to the corresponding network services In menu 5 Call divert you can divert your fax and data calls to these mailboxes Servi...
Страница 48: ...ne is switched on and is within the network s service area Missed calls Menu 2 1 This function allows you to view a list of the last ten phone numbers from which somebody has tried to call you with no success network service Using the options provided in the Missed calls menu you can view the date and time of each call and view edit erase or save the number in the phone book TIP When a note about ...
Страница 49: ...cards used most recently with the phone change the Security level setting in menu 4 6 5 Show call duration Menu 2 5 This function allows you to view the approximate duration of your incoming and outgoing calls You can clear these call timers by using Clear timers For that you need the security code See Reference Information Access Codes NOTE The actual time invoiced for calls by your service provi...
Страница 50: ...a call cost limit See Reference Information Access Codes Show costs in Menu 2 7 2 The phone can show the call cost limits in terms of charging units or the desired currency Contact your service provider for charging unit prices To select the currency or unit in this menu you may need the PIN2 code See Reference Information Access Codes Profiles Menu 3 This menu offers you a convenient way to custo...
Страница 51: ...e the selected profile is only set on The profile cannot be customised NOTE When the phone is connected to the car kit PPH 1 or headset HDC 5 the Activate function is not available 4 Scroll to the desired setting for example Ringing tone and press Select 5 While in the list of ringing tones scroll to the desired option and press OK 1 Headset will not appear in the Profiles list unless headset HDC ...
Страница 52: ...o the group Scroll to the desired group and press Mark to select or Unmark to deselect it Repeat this as many times as necessary Next press Back and then Yes to save or No to discard the changes See also Phone book Caller groups Ringing tone Sets the ringing tone for voice calls Ringing volume Sets the volume level for the ringing and message alert tones Vibrating alert Sets the phone to vibrate w...
Страница 53: ...o On or Off and press OK Lights in car profile only Sets the display and keypad lights Scroll to On always on or Automatic on for approximately 10 seconds after key press or incoming call alert and press OK NOTE While in phone book or the menu functions you can switch on the lights for approximately 10 seconds by pressing the power key quickly even if Automatic is selected Renaming profiles This f...
Страница 54: ... alarm for a full minute or if you press any other key the alarm stops for a few minutes and then resumes You can end this snoozing by pressing Stop or by switching the phone off If the alarm time expires while the phone is switched off the phone starts alerting If you press Stop the phone asks whether you want to activate the phone for calls Press Yes to register or No to keep the phone switched ...
Страница 55: ...make up to ten attempts to connect the call after an unsuccessful call attempt Speed dialling Menu 4 4 3 When this function is set to on the names and phone numbers assigned to the speed dial keys to can be dialled by pressing and holding the corresponding number key Pressing and holding the key dials your voice mailbox number Call waiting options Menu 4 4 4 When this network service is activated ...
Страница 56: ... Phone settings Menu 4 5 Language Menu 4 5 1 Within this menu you can select the language in which the display texts will be shown If the setting Automatic is selected the language used is chosen based on the current SIM card English will be used if the language on the SIM card is not found in the phone This setting also affects the time and date formats in Alarm clock Menu 4 1 Clock Menu 4 2 and ...
Страница 57: ...1800 or EGSM900 In Manual mode the phone shows a list of the available networks and you can select the network you wish to use if this network has a roaming agreement with your home network operator If no such agreement is in force the text No Access will be displayed and you must select another network The phone stays in manual mode until the automatic mode is selected or another SIM card is inse...
Страница 58: ...rrings For each function except Cancel all barrings you have the following options Activate Cancel or Status which shows the types of barred call When you make a call and a barring mode is activated the phone may display a note reminding you of this NOTE When calls are barred calls may be possible to certain emergency numbers in some networks e g 112 or other official emergency number Fixed dialli...
Страница 59: ...ecurity level The available options are None no security code is needed Memorysecurity code is required when the phone book memory is selected Phone security code required when a new SIM card is inserted NOTE When you change the security level all the recent calls lists are cleared Change access codes Menu 4 6 6 With this menu you can change the access codes security code PIN code PIN2 code and ba...
Страница 60: ...operator may not be shown 1 Select the Call divert menu The divert modes available are Divert all voice calls without ringing Divert when busy for voice calls only Divert when not answered for voice calls only Divert when phone off or no coverage voice calls are diverted when your phone switched off or outside the network service area Divert when off no answer or no coverage voice calls are divert...
Страница 61: ... to play Memory Snake Logic and Rotation NOTE Your phone must be switched on to use this function Do not switch on the phone when the use of a wireless phone is prohibited or when it may cause interference or danger Choose the desired game and then select Instructionsto see how to play the game Game options New game starts a new game session Top score shows the highest score Instructions shows a h...
Страница 62: ...unding errors may occur especially in long divisions NOTE Your phone must be switched on to use this function Do not switch on the phone when the use of a wireless phone is prohibited or when it may cause interference or danger Using the calculator 1 In Calculator menu press Select 2 When 0 is displayed on the screen enter the first number in the calculation To add a decimal press 3 To add press o...
Страница 63: ...meetings and birthdays The phone sounds an alarm tone when the set date for a birthday reminder or a call is reached NOTE Your phone must be switched on to use this function Do not switch on the phone when the use of a wireless phone is prohibited or when it may cause interference or danger 1 Select the Calendar menu and scroll to the desired date 2 Press Options to obtain the functions below Scro...
Страница 64: ...birth include the year and press OK The note and the person s age will be shown in every coming year NOTE You can set the phone to sound a tone in anticipation for a note At the prompt Set alarm for the note press Yes key in the alarm date and press OK Repeat this with the alarm time The presence of a tone alert is indicated by when you view the notes Erase notes to delete the selected note s Scro...
Страница 65: ...s between the two communicating devices The IR ports of the two devices must point at each other Receiving data via the IR port To receive data from another compatible phone 1 Ensure that the two phones are ready for the IR connection 2 Select the Infrared menu to activate the IR port for data reception 3 The user of the sending phone selects the desired IR function to start data transfer If data ...
Страница 66: ...usly there is an IR connection between your phone and the other device When is not displayed no IR connection exists When blinks your phone is trying to establish a connection with the other device or a connection has been lost Services Menu 10 Nokia Smart Messaging enables the use of a variety of network services offered by operators or service providers Some services may be available through the...
Страница 67: ...menu item NOTE As the services that are available vary this guide can give you only some of the basic guidelines on how to use such services For more detailed information on using a specific service contact your service provider and follow the guide texts on your phone s display Using operator services The following instructions provide some basic guidelines on how to use Smart Messaging services ...
Страница 68: ...service or a list of services you can either start using the service immediately or you can save it under Menu 10 1 as a personal bookmark Saving the service message as a bookmark provides you with a quick and easy way of accessing that service next time round To save a service message as a personal bookmark 1 Once you have received the list of available services select the desired service by high...
Страница 69: ...erent ways to Operator services The service address for such services may be sent to your phone by a service provider or you can manually add a service address by using the Addnewservicemenu For availability of services and additional information contact your service provider Saving a service address Once in the Add new service menu give the following information title enter the name of the servic...
Страница 70: ...on to the functions available in the phone your SIM card may provide additional services that you can access in menu 11 SIM Services Menu 11 is shown only if it is supported by your SIM card The name and contents of the menu depend entirely on the services available You can set the phone to display the confirmation messages when you are using the SIM card services by selecting the option Enabled w...
Страница 71: ...he phone If you key in an incorrect security code five times in succession the phone will not accept the correct code for the next five minutes PIN code 4 to 8 digits The PIN Personal Identification Number code protects your SIM card against unauthorised use The PIN code is usually supplied with the SIM card When the PIN code request is enabled Menu 4 6 1 the code is asked each time the phone is s...
Страница 72: ...card You cannot change the PUK code If you lose the code contact your service provider PUK2 code 8 digit The PUK2 code supplied with some SIM cards is required to change a blocked PIN2 code If you key in an incorrect PUK2 code ten times in succession you cannot use the functions requiring the PIN2 code Contact your service provider for a new card You cannot change the PUK2 code If you lose the cod...
Страница 73: ... shorter than normal it is time to buy a new battery Use only batteries approved by the phone manufacturer and recharge your battery only with the chargers approved by the manufacturer When a charger is not in use disconnect it from the power source Do not leave the battery connected to a charger for longer than a week since overcharging may shorten its life If left unused a fully charged battery ...
Страница 74: ...aces such as in a closed car in summer or winter conditions will reduce the capacity and lifetime of the battery Always try to keep the battery between 15 C and 25 C 59 F and 77 F A phone with a hot or cold battery may temporarily not work even when the battery is fully charged Li Ion batteries performance is particularly limited in temperatures below 0 C 32 F Do not dispose of batteries in a fire...
Страница 75: ... press the locking catch of the cover for example with a coin Start to open the cover from its upper part To replace the cover first place and close the catch in the lower part of the cover into the corresponding hole in the phone and then gently close the whole cover ...
Страница 76: ...rten the life of electronic devices damage batteries and warp or melt certain plastics Do not store it in cold areas When the phone warms up to its normal temperature moisture can form inside the phone which may damage electronic circuit boards Do not attempt to open it Non expert handling of the device may damage it Do not drop knock or shake it Rough handling can break internal circuit boards Do...
Страница 77: ...ur phone whenever it is forbidden to use it or when it may cause interference or danger When connecting the phone or any accessory to another device read its user s guide for detailed safety instructions Do not connect incompatible products As with other mobile radio transmitting equipment users are advised that for the satisfactory operation of the equipment and for the safety of personnel it is ...
Страница 78: ...ids Some digital wireless phones may interfere with some hearing aids In the event of such interference you may want to consult your service provider Other medical devices Operation of any radio transmitting equipment including cellular phones may interfere with the functionality of inadequately protected medical devices Consult a physician or the manufacturer of the medical device to determine if...
Страница 79: ...s clearly marked They include below deck on boats chemical transfer or storage facilities vehicles using liquified petroleum gas such as propane or butane areas where the air contains chemicals or particles such as grain dust or metal powders and any other area where you would normally be advised to turn off your vehicle engine Vehicles Only qualified personnel should service the phone or install ...
Страница 80: ...ngth Emergency calls may not be possible on all wireless phone networks or when certain network services and or phone features are in use Check with local cellular service providers To make an emergency call 1 If the phone is not on switch it on Some networks may require that a valid SIM card is properly inserted in the phone 2 Press as many times as needed e g to exit a call to exit a menu etc to...
Страница 81: ...s unauthorized opening or repair repair by use of unauthorized spare parts misuse improper installation accident forces of nature spillage of food or liquid influence from chemical products or other acts beyond the reasonable control of Nokia including but not limited to deficiencies in consumable parts such as batteries which all by their nature have a limited lifetime and breakage or damage to a...
Страница 82: ..._____________________________ Date of Purchase dd mm yy __ __ __ __ __ __ Product Type on phone type label under battery __ __ __ __ __ __ Product Model on phone type label under battery __ __ __ __ Phone Serial No on phone type label under battery __ __ __ __ __ __ __ __ __ __ __ __ __ __ __ Place of Purchase __________________________________________________ Store Name __________________________...