


P-400R Digital Microscope Instructions
19
3
Basic Operations
(3)
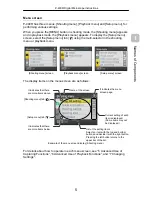
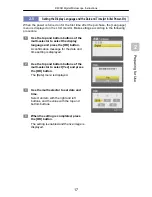
Obtaining optimal shooting conditions
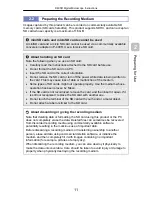
1
Check that [STD] is displayed on
the top left of the LCD monitor.
When the scene mode is standard,
[STD] is displayed. For the general
objects, you can use this mode for
capturing.
2
Make adjustment using the
illumination area switching
button ( ) and the light control
button (
) so that the
brightness of the illumination is
appropriate for the object.
The illumination area can be
adjusted by six patterns and the
light control amount can be
adjusted by 10 levels. The [Lighting
pat.] and [Light value] menus are
displayed respectively during
operation.
3
Make adjustment using [+]/[-] of
the zoom button ( ) so that the
object is displayed at a desired
magnification.
The zoom magnification can be
adjusted by 1.0x to 20x (16 levels).
The [Zoom] menu is displayed
during operation.
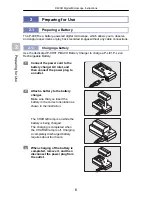
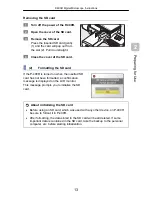
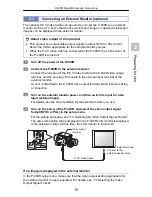
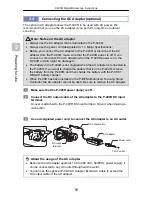
(4) Capturing
an
image
1
To capture an image, press the
capture switch.
The image under observation is
captured and saved in the SD card.
The captured image is displayed in
the LCD monitor for one second
and the live image appears again.
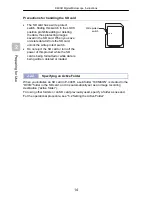
LCD panel
Zoom button
LCD panel
Light control button (upper)
and Illumination area
switching button (lower)
Capture
switch
Содержание P-400R
Страница 1: ...P 400R Digital Microscope Instructions M559EN01 M559 E 10 11 NF 1 ...
Страница 2: ......