background image

47

Mor

e on 
Pl

ayb
ack

More on Playback

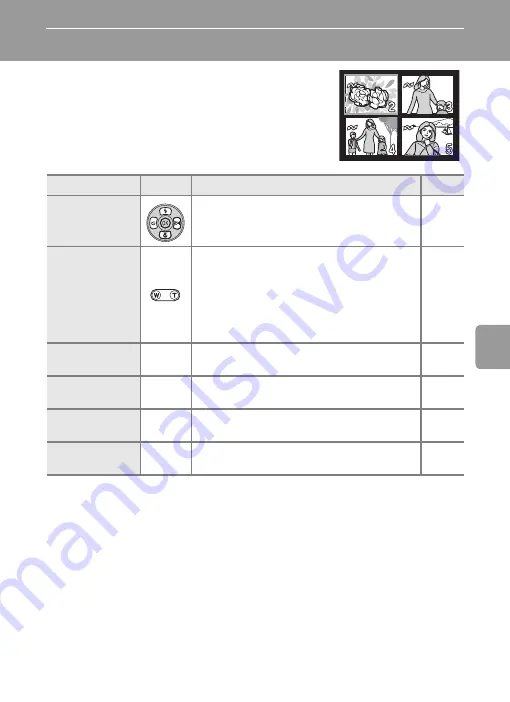
Viewing Multiple Pictures: Thumbnail Playback

Pressing 

j

 (

t

) in full-frame playback (

c

24) to

display pictures in “contact sheets” of four, nine, or
sixteen thumbnail images. The following operations
can be performed while thumbnails are displayed:

To

Press

Description

c

Choose pictures

Press the multi selector 

G

H

I

, or 

J

 to 

choose pictures. 

8

Change number 

of pictures dis-

played

With four thumbnails displayed, press 

j


(

t

) once to view nine thumbnails, or twice to 

view sixteen thumbnails. With sixteen thumb-

nails displayed, press 

k

 (

v

) once to display 

nine thumbnails or twice to display four 

thumbnails. With four thumbnails displayed, 

press 

k

 (

v

) to return to full-frame playback.

Cancel thumb-

nail playback

d

Cancel thumbnail playback and return to full-

frame playback.

Delete picture

T

Confirmation dialog will be displayed. Choose 

[Yes] and press 

d

 to delete.

24

View playback 

menu

m

Display the playback menu.

82

Switch to shoot-

ing mode

i

Switch to the shooting mode selected with 

the mode selector.

24

Содержание Coolpix L5

Страница 1: ...En N K K OR 5X OPTICAL Z O O M I6 3 31 4mm 1 2 9 5 0 The Nikon Guide to Digital Photography with the ...

Страница 2: ...k of the SD Card Association Adobe and Acrobat are registered trademarks of Adobe Systems Inc PictBridge is a trademark D Lighting technology is pro vided by o Apical Limited Face priority AF technology is provided by Identix All other trade names mentioned in this manual or the other documentation provided with your Nikon prod uct are trademarks or registered trademarks of their respective holder...

Страница 3: ...sic Photography and Playback L Auto Mode Selecting Scene Mode b Scene Mode One Touch Portrait Mode More on Playback Connecting to Televisions Computers and Printers Shooting Playback and Setup Menus Technical Notes Recording and Viewing Movies ...

Страница 4: ...ment to a Nikon authorized service representative for inspection Do not disassemble Touching the product s internal parts could result in injury Repairs should be performed only by quali fied technicians Should the camera break open as the result of a fall or other accident take the product to a Nikon authorized service represen tative for inspection after unplug ging the product and or removing t...

Страница 5: ...charged To avoid damage to the product be sure to remove the batteries when no charge remains Discontinue use immediately should you notice any change in the batteries such as discolora tion or deformation If liquid from damaged batteries comes in contact with clothing or skin rinse immediately with plenty of water Observe the following pre cautions when handling the battery charger If an MH 71 ba...

Страница 6: ...be played back on audio CD equipment Playing CD ROMs on an audio CD player could cause hearing loss or damage the equipment Observe caution when using the flash Using the flash close to your sub ject s eyes could cause temporary visual impairment Particular care should be observed if photograph ing infants when the flash should be no less than one meter 39 in from the subject Do not operate the fl...

Страница 7: ...nterference by one or more of the following mea sures Reorient or relocate the receiving antenna Increase the separation between the equipment and receiver Connect the equipment into an outlet on a circuit different from that to which the receiver is con nected Consult the dealer or an experi enced radio television technician for help CAUTIONS Modifications The FCC requires the user to be notified...

Страница 8: ...s du Règlement sur le matériel brouilleur du Canada Symbol for Separate Collec tion in European Countries This symbol indicates that this product is to be col lected separately The following apply only to users in European coun tries This product is designated for separate collection at an appropri ate collection point Do not dis pose of as household waste For more information contact the retailer...

Страница 9: ... the Batteries EN MH1 batteries only 10 Insert the Batteries 12 Supported Batteries 12 Turning On and Off the Camera 12 Setting Display Language Date and Time 14 Inserting Memory Cards 16 Removing Memory Cards 17 Basic Photography and Playback L Auto Mode 18 Step1 Select L Auto Mode and Turn the Camera On 18 Step2 Frame a Picture 20 Step3 Focus and Shoot 22 Step4 Viewing Deleting Pictures 24 Viewi...

Страница 10: ...y Crop 49 Enhancing Contrast D Lighting 50 H Resizing Pictures Small Picture 51 Restrictions on Picture Editing 52 Voice Memos Recording and Playback 53 Recording Voice Memos 53 Playing Voice Memos 53 Deleting Voice Memos 53 Recording and Viewing Movies 54 Movie Mode 54 The Movie Menu 55 Movie Options 55 Auto Focus Mode 55 Applying Movie Setting 56 Movie Playback 57 Deleting Movie Files 57 Connect...

Страница 11: ...5 m Metering 77 q Continuous 78 A BSS 79 d Color Options 79 k AF Area Mode 80 Restrictions on Camera Settings 81 Playback Options The Playback Menu 82 z Slide Show 84 A Delete 85 D Protect 85 E Transfer Marking 86 L Copy 87 Basic Camera Setup The Setup Menu 88 R Menus 89 V Welcome Screen 90 W Date 91 Z Monitor Settings 94 f Date Imprint 95 h Sound Settings 97 i Auto Off 97 M Format Memory O Format...

Страница 12: ...troduction Technical Notes 103 Optional Accessories 103 Image File and Folder Names 104 Caring for the Camera 105 Cleaning 106 Storage 107 Error Messages 108 Troubleshooting 111 Specifications 115 Index 118 ...

Страница 13: ...m monitor display samples so that monitor icons can be more clearly shown Illustrations and Screen Display Illustrations and text displays shown in this manual may differ from actual display k Memory Cards Pictures taken with this camera can be stored in the camera s internal memory or on remov able memory cards If a memory card is inserted all new pictures will be stored on the mem ory card and d...

Страница 14: ...he operational and safety requirements of this electronic circuitry THE USE OF NON NIKON ELECTRONIC ACCESSORIES COULD DAMAGE THE CAMERA AND MAY VOID YOUR NIKON WARRANTY For more information about Nikon brand accessories contact a local authorized Nikon dealer Before Taking Important Pictures Before taking pictures on important occasions such as at weddings or before taking the cam era on a trip ta...

Страница 15: ...use by a company Also do not copy or reproduce passports issued by the government licenses issued by public agencies and private groups ID cards and tickets such as passes and meal coupons Comply with copyright notices The copying or reproduction of copyrighted creative works such as books music paintings woodcut prints maps drawings movies and photographs is governed by national and international...

Страница 16: ...ower on lamp c 12 Speaker c 53 57 Self timer lamp c 28 Built in flash c 26 Lens c 106 115 Lens cover closed Lens cover Optional AC adapter power cable con nector under cover c 103 Eyelet for camera strap Built in microphone c 53 54 Shutter release button c 22 Power switch c 12 m one touch portrait button c 44 u D Lighting button c 50 K vibration reduction button c 21 ...

Страница 17: ...c 24 53 57 Zoom buttons c 20 t Zoom out v Zoom in See also j thumbnail playback c 47 k playback zoom c 48 l help c 9 H Display self timer menu c 28 L Display macro close up mode menu c 29 J Display flash mode menu c 26 d E Make selection transfer picture c 60 I Adjust the exposure setting c 30 Battery chamber cover c 12 Battery chamber Memory card slot c 16 Multi selector c 8 Mode selector c 8 18 ...

Страница 18: ...ry memory card indicator 19 8 Battery level indicator 18 9 ISO sensitivity 27 10 Vibration reduction VR icon 21 11 Self timer indicator 28 12 Date not set indicator 108 Time zone indicator 91 13 Date imprint Date counter 95 14 Number of exposures remaining 18 Movie length 54 15 Focus area 22 80 16 Reference circle for center weighted metering 77 17 Exposure compensation value 30 18 Image mode 73 1...

Страница 19: ...nal memory memory card indicator 19 4 Battery level indicator 18 5 Volume indicator 53 57 6 Voice memo recording guide 53 7 Voice memo playback guide 53 8 Current frame number total number of frames 24 movie length 57 9 D Lighting icon 50 10 Movie playback indicator 57 11 Voice memo icon 53 12 Image mode 73 13 Movie indicator 57 14 Protect icon 85 15 Print order icon 70 16 Transfer icon 63 86 17 T...

Страница 20: ...indicated with G H I and J T Movie mode c 54 Record movies Select one of three movie options b Scene mode c 31 Select one of fifteen scenes suited to differ ent subjects of shooting conditions such as indoor parties or night landscapes and let the camera do the rest L Auto mode c 18 A simple point and shoot mode in which the majority of camera settings are con trolled by the camera Display the pre...

Страница 21: ...8 choose Set up at the top of all menus Help Displays Press l v to view a description of the currently selected item Pressing G or H shows the previous or next menu item Press d while the help dialog is displayed to apply the setting MENU Exit 1m Set up Date imprint Sound settings Auto off Format memory Language Displayed when there are one or more previ ous menu items Displayed when there are one...

Страница 22: ... power outlet The CHARGE lamp will light 2 Charge the batteries Insert the batteries as indicated on the charger The CHARGE lamp will begin blinking Charging is com plete when the CHARGE lamp stops blinking A pair of new or fully exhausted batteries will charge in about two and a half hours Battery charger recharging state and recommendations Take the charger and batteries to your retailer or loca...

Страница 23: ...MH 71 battery charger are provided with the camera in some regions and are also available separately c 103 NiMH batteries may suffer a temporary drop in capacity if charged after long periods of disuse or before being fully discharged They will return to normal after being refreshed a few times as described below 1 Insert both batteries into the charger 2 Press the REFRESH button until the REFRESH...

Страница 24: ...lowing size AA batteries Two LR6 alkaline batteries batteries supplied Two Nikon EN MH1 rechargeable nickel metal hydride batteries NiMH Two ZR6 oxyride batteries Two FR6 L91 lithium batteries Turning On and Off the Camera To turn on the camera press the power switch The power on lamp green will light and the mon itor will turn on To turn off the camera press the power switch again j Replacing Bat...

Страница 25: ...periods use an EH 65A AC adapter c 103 Do not under any circumstances use another make or model of AC adapter Failure to observe this precaution could result in overheating or in damage to the camera k Power Saving Function in Shooting Mode To reduce the drain on the batteries the brightness of the monitor will be reduced to about 50 normal brightness after approximately five seconds pass without ...

Страница 26: ...ge and press d For information on using the multi selector see Multi Selector c 8 3 Press G or H to choose Yes and press d If No is selected the date and time will not be set 4 Press J The Home time zone menu is displayed If daylight saving time is in effect see Daylight Saving Time on the next page 5 Press I or J to choose your home time zone and press d The Date menu is displayed Date No Yes Set...

Страница 27: ...o the standard display for the current mode j Daylight Saving Time If daylight saving time is in effect turn on DaylightSaving in the time zone menu in step 4 and set the date 1 Press the multi selector H to choose DaylightSaving 2 Press d to enable daylight saving time y The d button toggles the daylight saving time option on and off 3 Press G and then J and proceed to step 5 When daylight saving...

Страница 28: ... play back delete or transfer pictures from the internal memory 1 Turn the camera off and open the battery chamber cover Make sure that the camera is off power on lamp is off before opening the battery cham ber cover Hold the camera upside down to prevent the batteries from falling out 2 Insert the memory card Slide the memory card in as shown until it clicks into place Close the battery chamber c...

Страница 29: ...r devices into the COOLPIX L5 be sure to format them with Format c 98 j The Write Protect Switch SD memory cards are equipped with a write protect switch Pictures cannot be recorded or deleted and the memory card cannot be formatted when this switch is in the Lock position j Memory Cards Use only Secure Digital SD memory cards Do not eject the memory card turn the camera off remove the batteries o...

Страница 30: ...ra on The power on lamp green will light and the moni tor will turn on 3 Check the battery level and number of exposures remaining Battery Level Number of Exposures Remaining The number of pictures that can be stored depends on the capacity of the internal memory or memory card and option chosen for the image mode setting Monitor Description NO ICON Batteries fully charged Batteries low ready spar...

Страница 31: ... image mode c 73 white balance setting c 75 metering mode c 77 AF area mode c 80 and to apply continuous shooting c 78 BSS c 79 and color options c 79 to suit shooting conditions or your own preferences 4 Vibration reduction Vibration reduction can be set up according to the shooting conditions The default setting is W Normal Image mode Choose from six options depend ing on how you plan to use the...

Страница 32: ...r the center of the monitor Press t j v k to activate optical zoom Press t j to zoom out increasing the area visible in the frame or v k to zoom in so that the subject fills a larger area of the frame When the camera is zoomed in to the maximum magnification 5 holding v k down for approximately two seconds triggers digital zoom The subject is magnified up to 4 for a total magnification of 20 A mon...

Страница 33: ...o activate after the camera recovers from the standby mode or the power is turned on Wait until the display stabilizes before shooting There may also be a slight display lag after a picture is taken Vibration reduction may be unable to completely eliminate the effects of camera shake in some situations Monitor Features K Normal default setting Best choice for most situations Camera detects and fac...

Страница 34: ...t to the camera When the subject is in focus the focus indicator p is green When the camera is unable to focus the focus indicator blinks red Change the composition and try again When digital zoom is in effect the focus area is not displayed 2 Press the shutter release button the rest of the way down to take the picture The shutter will be released and the picture will be recorded to the memory ca...

Страница 35: ...these circumstances could result in loss of data or in damage to the camera or card l Shutter Release Button To set focus and exposure press the shutter release button halfway stopping when you feel resistance Focus and exposure lock while the shutter release button is held in this position To release the shutter and take a picture press the shutter release button down the rest of the way down Do ...

Страница 36: ...ulti Selector c 8 Pictures may be displayed briefly at low resolution while being read from the memory card or internal memory Press i again to return to the shooting mode Deleting Pictures 1 Press T to delete the picture currently displayed in the monitor 2 Press the multi selector G or H to choose Yes and press d To exit without deleting the picture choose No and press d For information on using...

Страница 37: ...t Picture Taken In shooting mode press T to delete the last picture taken The confirmation dialog shown at right will be displayed Press the multi selector G or H to choose Yes and press d To exit without deleting the picture choose No and press d Option Press Description c Quick playback zoom d Enlarge view of picture currently displayed in the monitor about 3 48 Enlarge picture k v Enlarge view ...

Страница 38: ...ss ing d within five seconds For information on using the multi selector see Multi Selector c 8 The icon for the selected flash mode is displayed at the top of the monitor When z is selected the icon is only displayed for five seconds after the setting is applied The flash mode applied in L mode is stored in the camera s memory even after the camera is turned off z Auto default setting in L mode F...

Страница 39: ...educe these reflections set the flash to B Off in the monitor or zoom in on the subject k The Flash Lamp The flash lamp indicates flash status when the shutter release button is pressed halfway On Flash will fire when picture is taken Blinks Flash charging Wait a few seconds and try again Off Flash will not fire when picture is taken k Red eye Reduction The COOLPIX L5 is equipped with an advanced ...

Страница 40: ...ed by pressing d within five seconds For information on using the multi selector see Multi Selector c 8 3 Frame the picture and press the shutter release button halfway The focus and exposure are adjusted 4 Press the shutter release button fully The self timer starts The self timer lamp will blink for about nine seconds The lamp stops blinking one second before the photograph is taken and remains ...

Страница 41: ...tor will return to the normal display for the current mode if the setting is not applied by pressing d within five seconds For information on using the multi selector see Multi Selector c 8 3 Press v k or t j to frame the pic ture Minimum focus distance varies with zoom position The camera can focus at a distance of 4 cm 1 6 in at the zoom position at which L turns green 4 Focus and shoot The macr...

Страница 42: ...ation to side When the picture is too bright adjust the exposure compensation to side The monitor will return to the normal display for the current mode if the setting is not applied by pressing d within five seconds Exposure compensation can be set to values between 2 0 and 2 0 EV For information on using the multi selector see Multi Selector c 8 3 Press d The I icon is displayed in the monitor T...

Страница 43: ...e scene assist modes or in the scene menu Changes made to the image mode setting apply to all shooting modes B Portrait Use for portraits The main subject stands out clearly while the background details are softened lending a sense of depth to the composition E Landscape Use for vivid landscape shots that enhance outlines colors and contrast in such subjects as skyscapes and forests P Sports Fast ...

Страница 44: ...r G or H to choose a scene assist mode and press d The framing assist menu is displayed For information on using the multi selector see Multi Selector c 8 4 Press G or H to choose the appropriate composition type and press d 5 Frame a picture and shoot When the framing guides are displayed position the subject in the framing guides MENU Exit Scene menu SCN Set up Portrait Landscape Sports Night po...

Страница 45: ... with subject in the right half of the frame Camera focuses on subject inside the framing guides P Portrait close up Compose shot with subject s face in the top half of the frame Camera focuses on face area inside the framing guides Q Portrait couple Compose shot with two subjects side by side Camera focuses on subjects inside the framing guides R Portrait figure Compose shot in tall orientation C...

Страница 46: ... top of skyline with the wavy framing guide displayed to determine the composition U Architecture Use to photograph buildings Camera focuses at infinity A grid is displayed in the monitor to help keep verticals and horizontals aligned with the frame V Group right Use to compose portraits with portrait subjects to right and landmark or other objects in background at left of frame W Group left Use t...

Страница 47: ...ps X Sport spectator As above except that camera focuses at ranges of 2 m 6 ft to infinity at maximum wide angle zoom position and 30 m 98 ft to infinity at maximum telephoto position Y Sport composite Each time the shutter release button is pressed camera takes 16 shots in about 2 seconds and arranges them in four rows to form a single picture E Normal 3 072 2 304 pixels Camera focuses continuous...

Страница 48: ...utter speeds are processed to reduce noise to prevent blurring mount the camera on a tripod or rest it on a flat stable surface j Using a Tripod Turn vibration reduction c 21 off when using a tripod k Noise Reduction Noise reduction c 27 may be automatically applied as pictures taken in night portrait assist mode are recorded J Flash A Fill flash with slow sync and red eye reduction A is displayed...

Страница 49: ...tor G or H to choose the scene mode and press d Three pages of scene modes are available begin ning with Party indoor and ending with Pan orama assist For information on using the multi selector see Multi Selector c 8 4 Frame the subject and take the picture MENU Exit Scene menu SCN Party indoor Beach snow Sunset Dusk dawn Night landscape Scene modes 4 4 ...

Страница 50: ... brightness of such subjects as snowfields beaches or sunlit expanses of water Camera focuses on subject in the center of the frame J Flash Changeable Default z Auto H Self timer Available L Macro close up Available I Exposure compensation Available I Sunset Preserves the deep hues seen in sunsets and sunrises Camera focuses at infinity Focus indicator c 22 always lights up green when the shutter ...

Страница 51: ...ease button is pressed halfway note however that objects in foreground may not always be in focus Use of a tripod recommended to prevent blurring J Flash B Off H Self timer Available L Macro close up Off I Exposure compensation Available G Night landscape Slow shutter speeds are used to produce stunning night land scapes Camera focuses at infinity Focus indicator c 22 always lights up green when t...

Страница 52: ...ngs in which you do not want to use the flash Camera focuses on subject in the center of the frame A c 79 turns on automatically Turn vibration reduction c 21 on and hold the camera steadily to prevent camera shake J Flash B Off H Self timer Available L Macro close up Available I Exposure compensation Available K Fireworks show Slow shutter speeds are used to capture the expanding burst of light f...

Страница 53: ...on Available L Back light Use when light is coming from behind your portrait subject throwing features or details into shadow The flash fires auto matically to fill in illuminate shadows Camera focuses on subject in the center of the frame J Flash J Fill flash H Self timer Available L Macro close up Off I Exposure compensation Available F Panorama assist c 42 Use when taking a series of pictures t...

Страница 54: ...n that is the direction in which pic tures are serialized For information on using the multi selector see Multi Selector c 8 2 Take the first picture The first picture is displayed in the first third of the monitor 3 Take the second picture Compose the next picture so that it overlaps the first picture Repeat until you have taken the neces sary number of pictures to complete the scene 4 Press d to...

Страница 55: ...djusted after the first picture is taken Pictures cannot be deleted nor can zoom or image mode setting c 73 be adjusted until the series is finalized l G The G icon white is displayed to show that white balance and exposure have been locked at the values set with the first shot All pictures taken in a panorama series have the same exposure and white balance settings 3 3 ...

Страница 56: ...in to return to the shooting mode indicated with the mode selector 1 Press m The K guide is displayed 2 Frame a picture using the K guide When the camera detects a face the guide is dis played with a double yellow border When the camera detects more than one face the closest face is framed by a double border and the rest by a single border The camera focuses on the face framed by the double border...

Страница 57: ...no face is recognized when the shutter release button is pressed halfway the camera focus is on the center of the frame The camera may be unable to detect faces in the following situations When faces are partially hidden by sunglasses or other obstructions When faces take up too much or too little of the frame When face priority AF recognizes one or more faces with shooting in tall orientation pic...

Страница 58: ... for Portrait effect are dis played For information on using the multi selector see Multi Selector c 8 3 Press G or H to choose the option and press d The setting is applied and the one touch portrait menu is displayed Press m to return the one touch portrait menu without applying the setting Z Set up Display the setup menu c 88 Z Image mode Choose an image mode c 73 B Portrait effect Choose from ...

Страница 59: ...th four thumbnails displayed press j t once to view nine thumbnails or twice to view sixteen thumbnails With sixteen thumb nails displayed press k v once to display nine thumbnails or twice to display four thumbnails With four thumbnails displayed press k v to return to full frame playback Cancel thumb nail playback d Cancel thumbnail playback and return to full frame playback Delete picture T Con...

Страница 60: ...nitor Zoom out j t Zoom decreases each time j t is pressed To cancel playback zoom zoom out until entire picture is displayed View other areas of picture Use the multi selector to scroll to areas of pic ture not visible in the monitor To use the multi selector to view other pictures cancel playback zoom In quick playback zoom scroll to areas of pic ture not visible by pressing G H I or J referring...

Страница 61: ...ation on using the multi selector see Multi Selector c 8 3 Press the shutter release button The confirmation dialog will be displayed 4 Press G or H to choose Yes and press d A new picture containing only the area visible in the monitor is created k Cropped Copy Image Mode Depending on the size of the original picture and the zoom ratio in effect at the time the copy was created the camera will au...

Страница 62: ... back mode The original picture is displayed at left and the pic ture applied with D lighting enhancement is dis played at right 2 Press the multi selector G or H to choose OK and press d A new copy with enhanced brightness and contrast is created To exit without creating a new copy choose Can cel and press d For information on using the multi selector see Multi Selector c 8 D Lighting copies can ...

Страница 63: ...For information on using the multi selector see Multi Selector c 8 3 Press G or H to choose the desired copy size and press d The confirmation dialog will be displayed To exit without creating a new copy press m 4 Press G or H to choose Yes and press d A small picture copy is created at the chosen size I 640 480 Suited to television playback J 320 240 Suited to display on web pages K 160 120 Suita...

Страница 64: ... L5 digital cameras If a copy created using the COOLPIX L5 is viewed on a different digital camera the picture may not be displayed or may not be transferred to a computer Editing functions are not available when there is not enough free space in the internal memory or on the memory card l Original Pictures and Edited Pictures Copies created with editing functions are not deleted if the original p...

Страница 65: ...e button to play it back Playback ends when the voice memo ends or the shutter release button is pressed again Pictures with voice memos are indicated by the N P and P icons in full frame playback Press t j or v k to adjust the volume Deleting Voice Memos Select a picture with a recorded voice memo and press T Choose P and press d to delete the voice memo only j Voice Memos Voice memo file names a...

Страница 66: ...se button again Recording will end automatically when the internal memory or memory card is full j Recording Movies The flash c 26 self timer c 28 and exposure compensation c 30 can not be used in movie mode Macro close up c 29 can be used while movies are being recorded Digital zoom up to 2 can be applied TV movie 640 up to 1 9 while movies are being recorded Adjust zoom before beginning recordin...

Страница 67: ...ecorded at 30 frames per second Each frame is 640 480 pixels in size 5 sec 2 min 50 sec 2 S Small size 320 default setting Movies are recorded at 30 frames per second Each frame is 320 240 pixels in size 13 sec 6 min 30 sec U Smaller size 160 Movies are recorded at 30 frames per second Each frame is 160 120 pixels in size Small size allows for recording of longer movies 50 sec 25 min Option Descri...

Страница 68: ...ected item are dis played For information on using the multi selector see Multi Selector c 8 4 Press G or H to choose the desired set ting and press d The setting is enabled and the movie menu is dis played Press m to return to the main movie menu with out applying the setting MENU Exit Movie Set up Movie options Auto focus mode Movie options TV movie 640 Small size 320 Smaller size 160 MENU Exit ...

Страница 69: ...splayed Choose Yes and press d to delete the movie or choose No and press d to return to the normal playback dis play without deleting the movie To Press Description Rewind Q Movie rewinds while d is pressed Fast forward U Movie advances while d is pressed Pause R Pause playback The following operations can be performed while playback is paused V Rewind movie by one frame W Advance movie by one fr...

Страница 70: ...ures transferred to a computer from your personal printer and printing over a direct camera to printer connection the following options are also available for printing pictures Insert a memory card into a DPOF compatible printer s card slot Take a memory card to a digital photo lab For printing using these methods specify the pictures and the number of prints each using your camera s Print set men...

Страница 71: ...nitor will remain off and the image normally shown in the monitor will be displayed on the television j Connecting the A V Cable When connecting the A V cable be sure that the camera connector is oriented correctly Do not use force when connecting the A V cable to the camera When disconnecting the A V cable do not pull the connector at an angle Do not pinch the connector cover between the camera s...

Страница 72: ...ss storage device class default setting Mass storage and Picture Transfer Protocol PTP USB transfer protocols 2 The camera s E d button cannot be used to transfer pictures when the memory card write protect switch is in the lock position Use the Transfer button in PictureProject To use E d on the camera unlock by sliding the switch to the write position before transferring pictures 3 If your compu...

Страница 73: ...nu is displayed For information on using the multi selector see Multi Selector c 8 3 Press G or H to choose Interface and press d 4 Press G or H to choose USB and press d 5 Press G or H to choose PTP or Mass storage and press d The setting is enabled To finish setting press m MENU Exit Shooting menu Set up Image mode White balance Metering Continuous MENU Exit Set up Interface Reset all Battery Ty...

Страница 74: ...ansfer are copied to the computer Once transfer is complete pictures are displayed in PictureProject Transfer using E d on the camera While PictureProject Transfer is launched press E d on the camera to copy pictures marked for transfer c 63 to the computer The following messages are displayed in the camera monitor during transfer j Connecting the USB Cable When connecting the USB cable be sure th...

Страница 75: ...menu displayed Windows 2000 Professional Click the Unplug or Eject Hardware icon in the taskbar and select Stop USB Mass Storage Device from the menu displayed Macintosh Drag the untitled camera volume NO NAME to the Trash k Marking Pictures for Transfer Pictures marked for transfer are recognized by the E icon dis played during playback By default all pictures are automati cally marked for transf...

Страница 76: ...e c 117 printers can connect the camera directly to the printer and print pictures without using a computer Take pictures Select pictures for print ing using Print set option c 70 Connect to printer c 65 Print pictures one at a time c 66 Print multiple pictures c 67 Turn camera off and disconnect USB cable ...

Страница 77: ...or The camera will then enter full frame playback with the PictBridge logo dis played in the top left corner of the monitor j Connecting the USB Cable When connecting the USB cable be sure that the connectors are oriented correctly Do not use force when connecting the USB cable When disconnecting the USB cable do not pull the connector at an angle Do not pinch the connector cover between the camer...

Страница 78: ...enu is displayed To choose a picture from a list of thumbnails press j t and use the multi selector to choose the desired picture or press k v to exit to full frame playback For information on using the multi selector see Multi Selector c 8 2 Press G or H to choose Copies and press d 3 Press G or H to choose the number of copies up to 9 and press d 4 Press G or H to choose Paper size and press d 4...

Страница 79: ...Printing starts Monitor display returns to that shown in step 1 when printing is complete Press d to terminate printing before printing is complete Printing Multiple Pictures After connecting the camera to the printer correctly c 65 print pictures by following the procedure below 1 Press m The print menu is displayed Paper size Default 3 5 x 5 in 5 x 7 in Postcard 100 x 150mm PictBridge Start prin...

Страница 80: ... for each picture Proceed to step 5 Print all images All pictures stored in the internal memory or memory card are printed Proceed to step 7 DPOF printing Pictures for which a print order has been cre ated are printed accordingly c 70 The options for DPOF printing are dis played To print press G or H to choose Start print and press d Proceed to step 7 To view the current print order choose Confirm...

Страница 81: ...d these pictures will not be printed When the setting is complete press d 6 Press G H I or J to confirm the pic tures and press d Press m to modify the selection and return to the print selection screen 7 Printing starts Monitor display returns to the Print menu step 2 when printing is complete Press d to terminate printing before it is complete k Paper Size The camera supports the following paper...

Страница 82: ...ridge compatible printer create print orders before connecting the camera to the printer 2 Press the multi selector G or H to choose Print set from the playback menu and press d The Print set menu is displayed For information on using the multi selector see Multi Selector c 8 3 Press G or H to choose Print selected and press d 4 Choose the pictures and number of cop ies up to 9 of each and press d...

Страница 83: ...he date and time printed on pictures with DPOF printing when Date in the print set menu is enabled are those recorded with the picture when it was taken Date and time printed using this option are not affected when the camera s date and time setting are changed from the setup menu after pictures are recorded l Differences Between Print Set and Date Imprint Date and time can only be printed on pict...

Страница 84: ...election use the multi selector c 8 To exit the shooting menu press m Z Set up c 88 Display the setup menu Z Image mode c 73 Choose image size and quality d White balance c 75 Match white balance to the light source m Metering c 77 Choose the method used to control exposure q Continuous c 78 Take pictures one at a time or in a sequence A BSS c 79 Use the best shot selector to choose the sharpest p...

Страница 85: ...ng is displayed in the monitor c 6 7 Option Size pixels Description F High 3072 3 072 2 304 Highest quality suitable for enlarge ments or high quality prints E Normal 3072 default setting 3 072 2 304 Best choice in most situations d Normal 2592 2 592 1 944 e Normal 2048 2 048 1 536 Smaller size allows more pictures to be stored h PC screen 1024 1 024 768 Suited to display on computer display i TV ...

Страница 86: ...000 or more the number of exposure remaining display shows 9999 l Image Mode The image mode setting can also be applied from the one touch portrait and scene menus Changes made to the image mode setting from any of the three menus apply to all shooting modes Image mode Internal memory 8 MB Memory card 256 MB Print size 300 dpi cm in F High 3072A 2 70 26 19 5 10 7 7 E Normal 3072 4 135 26 19 5 10 7...

Страница 87: ...to or Flash turn the flash off B c 26 e Auto default setting White balance automatically adjusted to suit lighting conditions Best choice in most situations f White bal preset Neutral colored object used as reference to set white balance under unusual lighting conditions c 76 g Daylight White balance adjusted for direct sunlight h Incandescent Use under incandescent lighting i Fluorescent Use unde...

Страница 88: ...or c 8 3 Press G or H to choose Measure To apply the most recently measured value for pre set white balance choose Cancel and press d 4 Frame the reference object 5 Press d The shutter is released and the new white balance value is set No pictures are recorded k Notes on Preset White Balance The camera cannot measure a value for preset white balance when the flash fires Regardless of the flash mod...

Страница 89: ...re m Matrix default setting Analyzes the distribution of brightness over a wide area of the frame produc ing optimal results for most situations n Center weighted Meters the entire frame but assigns the greatest weight to the center area Suitable for portraits Reference circle for center weighted metering appears in the monitor during shooting c 6 Metering Matrix Center weighted MENU Exit ...

Страница 90: ...displayed in the monitor c 6 When Single is selected no indicator is displayed in the monitor r Single default setting One shot is taken each time shutter release button is pressed q Continuous While the shutter release button is pressed camera takes pictures continu ously COOLPIX L5 can take up to 0 7 frames per second at image mode set ting of E Normal 3 072 w Multi shot 16 Each time the shutter...

Страница 91: ...t produce the desired results if the subject moves or the composition changes dur ing shooting d Color Options Make colors more vivid or record pictures in mono chrome The effects of the selected option can be previewed in the monitor At set tings other than Standard color the icon for the current setting is displayed in the monitor c 6 e Standard color default setting Use for pictures exhibiting ...

Страница 92: ...focus Autofocus may not perform as expected if the subject is very dark or moving rapidly if there are objects of significantly differing levels of brightness in the scene as when the sun is behind the subject throwing their features into shadow if the primary subject exhibits little contrast as when the subject is generally the same color as the background or if the scene contains several objects...

Страница 93: ...sen for Continuous and BSS Applied Continuous and BSS setting is restored when picture is taken or self timer is turned off Continuous Selecting Continuous or Multi shot 16 turns BSS off Applied BSS setting is not restored when Single is selected BSS Continuous is automatically set to Single when BSS is on Applied Contin uous setting is not restored when BSS is turned off White balance and color o...

Страница 94: ...ess m Z Set up c 88 Display the setup menu w Print set c 70 Select pictures for printing z Slide show c 84 View pictures in an automatic slide show A Delete c 85 Delete all or selected pictures D Protect c 85 Protect selected pictures from accidental deletion E Transfer marking c 86 Change transfer marking for existing pictures H Small pic c 51 Create a small copy of the current picture L Copy c 8...

Страница 95: ... choose a picture The current picture is displayed at the center of the monitor For information on using the multi selector see Multi Selector c 8 2 Press G or H to choose ON or OFF or the number of copies when applying print settings When ON is selected the indicator for the speci fied function is displayed in the center of the cur rent picture Repeat steps 1 and 2 to select additional pictures 3...

Страница 96: ...picture or I to return to the previous picture Hold I or J down to fast forward or rewind Press d to pause the slide show The menu shown at right is displayed when the slide show ends or is paused Choose Restart and press d to play the slide show again or choose End to stop the slide show and return to the play back menu j Notes on the Slide Show Only the first frame of movies c 57 included in sli...

Страница 97: ...ted pictures are recognized by the D icon c 7 and cannot be deleted using T or the Delete option in the playback menu Note how ever that formatting will delete protected files c 98 See Navigating the Menus c 83 for more information on using this function B Erase selected images Delete selected pictures See Navigating the Menus c 83 for more information on using this function C Erase all images Del...

Страница 98: ...than 999 pictures can be marked for transfer If more than 999 pictures are marked use PictureProject to transfer the pictures See the PictureProject Reference Man ual on CD for details This camera cannot recognize the transfer settings for pictures applied with another make of camera Use the COOLPIX L5 to select the pictures to transfer again E All on Mark all images for transfer F All off Remove ...

Страница 99: ... a computer k File Number When pictures are copied using the Selected images option the newly copied pictures are numbered consecutively from the largest number existing between the two memory sources Ex when the last number in the source memory is 32 DSCN0032 JPG and the last number in the destination memory is 18 DSCN0018 JPG The copied pictures are assigned numbers starting form DSCN0033 After ...

Страница 100: ...tyle f Date imprint c 95 Imprint date or date counter on pictures h Sound settings c 97 Adjust sound and volume settings i Auto off c 97 Set time before camera enters standby mode to save power M O Format memory Format card c 98 Format internal memory or memory card j Language c 99 Choose language for camera menus and messages k Interface c 99 Adjust settings for connection to television or comput...

Страница 101: ...use text or icons When Icons is selected all menu items can be dis played with a single page and the name of the highlighted menu displayed at the top of the page MENU Exit Shooting menu Set up Image mode White balance Metering Continuous MENU Exit Shooting menu Set up Image mode White balance Metering Continuous MENU Exit Set up Shooting menu Menus Welcome screen Date Monitor settings Displaying ...

Страница 102: ...turned on Nikon Displays a welcome screen when the camera is turned on Animation Displays a short animation when the camera is turned on Select an image Select a picture in the internal memory or on the memory card for the wel come screen See Navigating the Menus c 83 for more information on using this function The image used in the welcome screen is a copy of the selected picture and therefore is...

Страница 103: ...ess H to choose DaylightSaving and press d then press G The time is automatically advanced one hour 3 Press J The New city time zone screen is displayed Date Set camera clock to current date and time c 14 15 Time zone When Y destination time zone is selected the time difference c 93 is automatically calculated and the date and time in the selected region are dis played Home time zone and daylight ...

Страница 104: ...harging k X Home Time Zone To switch to the home time zone choose X in step 2 and press d To change the home time zone choose X in step 2 and perform the following steps for the home time zone k Daylight Saving Time If date and time are set when daylight saving time is not in effect Turn DaylightSaving on y when daylight saving time begins to automatically advance the camera s clock one hour If da...

Страница 105: ...he camera clock to local time GMT Location GMT Location 11 Midway Samoa 1 Madrid Paris Berlin 10 Hawaii Tahiti 2 Athens Helsinki 9 Alaska Anchorage 3 Moscow Nairobi 8 PST PDT Los Angeles Seattle Vancouver 4 Abu Dhabi Dubai 7 MST MDT Denver Phoenix La Paz 5 Islamabad Karachi 6 CST CDT Chicago Houston Mexico City 6 Colombo Dhaka 5 EST EDT New York Toronto Lima 7 Bangkok Jakarta 4 Caracas Manaus 8 Be...

Страница 106: ...ion displayed when Show info is selected is shown but icons are displayed for just 5 seconds Hide info Framing grid Indicators are displayed in the monitor c 6 In L mode framing grid is displayed to help frame pictures other indicators are displayed for 5 seconds The same information dis played when Show info is selected is shown but icons are displayed for just 5 sec onds Monitor settings Photo i...

Страница 107: ...g the format selected in the Date item c 14 91 k Date imprint and Print set When using DPOF compatible devices shooting date or photo information will be printed if Date or Info is selected in the print set menu c 70 See Differences Between Print Set and Date Imprint c 71 for more information on the difference between Date imprint and Print set a Off default setting Time and date are not imprinted...

Страница 108: ...ee dates can be stored To set highlight an option press the multi selector J and enter a date c 15 To select a date choose an option and press d Display options Choose Number of days Years and days or Yrs mnths days and press d Date counter Number of days MENU Exit 01 01 2006 155 Press d to display the stored dates option Press d to display the display option Stored dates 01 01 2006 03 03 2006 MEN...

Страница 109: ...hree times when error is detected Shutter sound Choose volume of shutter sound from Loud Normal default setting and Off Start up sound Choose volume of sound that plays when camera is turned on from Loud Normal default setting and Off Auto off Choose the time allowed to elapse before the camera enters standby mode when no operations are performed from 30s 1m default setting 5m and 30m Sleep Mode I...

Страница 110: ...er important pictures to a computer before formatting Do not turn the camera off or remove the batteries or memory card during formatting The first time you insert the memory cards used in other devices into the COOLPIX L5 for mat them with Format Repeated recording and deleting of pictures without regular formatting reduces memory card performance Regular formatting of memory cards is recommended...

Страница 111: ...Danish Portuguese German Russian English default setting Finnish Spanish Swedish French Simplified Chinese Indonesian Traditional Chinese Italian Japanese Dutch Korean Norwegian Thai USB Select Mass storage or PTP for connection to computer c 60 or printer c 65 Video mode Choose from NTSC and PAL Auto transfer Choose On default setting to mark all new pic tures for transfer to computer c 63 Interf...

Страница 112: ...29 Off Exposure compensation c 30 0 Scene mode c 31 Portrait Portrait assist c 33 Portrait Landscape assist c 34 Landscape Sports assist c 35 Sports Night portrait assist c 36 Night portrait Portrait effect c 46 Normal Movie options c 55 Small size 320 Auto focus mode c 55 Single AF Image mode c 73 E Normal 3072 White balance c 75 Auto Metering c 77 Matrix Continuous c 78 Single BSS c 79 Off Color...

Страница 113: ...efore selecting Reset All other settings including Date c 91 Date counter c 96 Lan guage c 99 USB and Video mode in the Interface menu c 99 and Battery Type c 102 remain unaffected Menus c 89 Text Welcome screen c 90 Disable welcome off Photo info c 94 Show info Brightness c 94 3 Date imprint c 95 Off Button sound c 97 On Shutter sound c 97 Normal Start up sound c 97 Normal Auto off c 97 1 m one m...

Страница 114: ...he type that matches the batteries currently in use B Firmware Version View the current camera firmware version Alkaline default setting LR6 alkaline batteries COOLPIX NiMH Nikon EN MH1 rechargeable nickel metal hydride batteries ZR6 oxyride batteries Lithium FR6 L91 lithium batteries Battery Type Alkaline COOLPIX NiMH Lithium MENU Exit COOLPIX L5 Ver XX Back ...

Страница 115: ...n the memory cards listed above please contact the manufacturer Rechargeable battery Two Nikon EN MH1 rechargeable NiMH batteries EN MH1 B2 Battery charger MH 71 battery charger AC adapter EH 65A AC adapter kit connects as shown EH 62B AC adapter kit cannot be used SanDisk 64 MB 128 MB 256 MB 512 MB 1 GB 256 MB 512 MB 1 GB Toshiba 64 MB 128 MB 256 MB 512 MB 1 GB 128 MB 256 MB 512 MB Panasonic 64 M...

Страница 116: ...ber for pictures taken using panorama assist e g 101P_001 c 42 and NIKON for all other pictures e g 100NIKON Folders can hold up to 200 pictures if a picture is taken when the current folder contains 200 pic tures a new folder will be created by adding one to the current folder num ber If a picture is taken when the current folder is numbered 999 and contains 200 pictures or a picture numbered 999...

Страница 117: ...e batteries while the product is on or while images are being recorded or deleted Forcibly cutting power in these circumstances could result in loss of data or in damage to product memory or internal circuitry To prevent an accidental interruption of power avoid carrying the product from one place to another while an AC adapter is connected j Keep dry The device will be damaged if immersed in wate...

Страница 118: ...ass parts with your fingers Remove dust or lint with a blower typically a small device with a rubber bulb attached to one end that is pumped to produce a stream of air out the other end To remove fingerprints or other stains that cannot be removed with a blower wipe the lens with a soft cloth using a spiral motion that starts at the center of the lens and work ing toward to the edges If this fails...

Страница 119: ...ce a month Turn the camera on and release the shutter a few times before put ting the camera away again k Notes on the Monitor The monitor may contain a few pixels that are always lit or that do not light This is a char acteristic common to all TFT LCD displays and does not indicate a malfunction Images recorded using the product will not be affected When framing bright subjects vertical comet lik...

Страница 120: ...e clears from dis play automatically when recording is complete Memory card is write protected O Write protect switch is in lock position Slide write protect to write position 17 This card cannot be used x Error accessing memory card Use approved card Check that connectors are clean Confirm that memory card is correctly inserted 103 16 16 Warning This card cannot be read O O Card is not format ted...

Страница 121: ...n not be enhanced using D Light ing Copies from D Lighting crop or small picture option can not be adjusted using D Light ing 52 Cannot record movie Time out error while recording movie Choose memory card with faster write speed 103 Memory contains no images r No pictures available for playback File contains no image data r File not created with COOLPIX L5 View file on computer or other device Thi...

Страница 122: ...ctureProject did not start No images are marked for transfer s No pictures selected for transfer Select pictures for trans fer in the playback menu and try again 63 86 Transfer error E Transfer error Check battery level Check that USB cable is connected 18 60 System error u Error has occurred in camera s internal cir cuitry Turn camera off remove and reinsert batteries and turn camera on If error ...

Страница 123: ...ted A V cable is connected 12 18 13 23 27 60 59 No indicators displayed in moni tor Hide info is selected for Photo info Select Show info 94 Monitor is hard to read Adjust monitor brightness Monitor is dirty Clean monitor Monitor brightness at 50 to save power 94 106 13 Camera clock is not correct Pictures recorded before clock has been set will have time stamp of 00 00 0000 00 00 movies will be d...

Страница 124: ...Flash is off Flash window is blocked Subject is beyond flash range Adjust exposure compensation Subject is backlit Select L Back light scene mode or use fill flash 26 20 26 30 26 41 Pictures are too bright overexposed Adjust exposure compensation 30 Randomly spaced bright pixels noise appear in image Shutter speed too slow Noise can be reduced by Using flash Choosing B E L C I J G M or O scene mod...

Страница 125: ... when option other than Single is selected for Continuous 31 78 Image mode not available Image mode cannot be adjusted when Multi shot 16 is selected for Continu ous or Sports composite is selected in sports assist mode 35 78 Date imprint not available Camera clock has not been set 14 91 Date not appearing on pictures Date does not appear on movies or on pictures taken using panorama assist 42 54 ...

Страница 126: ...ay result in the loss of any data not recorded to internal memory or the memory card at the time the problem occurred Data already recorded will not be affected PictureProject does not start when camera is connected Camera is off Batteries are exhausted USB cable is not correctly connected Appropriate USB option is not selected Camera is not registered in Device Manager Windows only See the Pictur...

Страница 127: ...detect AF Focus range from lens W 50 cm 1 ft 7 7 in T 1 m 3 ft 3 4 in Macro close up mode 4 cm 1 6 in W Focus area selection Center Auto five area automatic selection Vibration reduction Lens shift Monitor 2 5 in 115 000 dot TFT LCD with brightness adjustment Frame coverage Shooting mode Approximately 98 horizontal and 98 vertical Playback Approximately 100 horizontal and 100 ver tical Storage Med...

Страница 128: ...ange W 0 5 5 5 m 1 ft 7 7 in 18 ft 0 5 in T 0 6 4 m 1 ft 12 in 13 ft 1 8 in Flash control Sensor flash system Interface USB Video output Can be selected from NTSC and PAL I O terminals Audio video A V out digital I O USB Supported languages Czech Danish German English Spanish French Indone sian Italian Dutch Norwegian Polish Portuguese Rus sian Finnish Swedish Chinese Simplified and Traditional Ja...

Страница 129: ... and printer industries allowing photographs to be output directly to a printer without connecting the camera to a computer k Specifications Nikon will not be held liable for any errors this manual may contain The appearance of this product and its specifications are subject to change without notice k EN MH1 NiMH Batteries The capacity of NiMH batteries will drop if they are charged repeatedly wit...

Страница 130: ...assist 33 P sports assist 35 A AC adapter 13 58 103 AF area mode 80 Audio video A V cable EG CP14 59 Auto off 13 97 Auto transfer 99 Auto focus mode 55 full time AF 55 single AF 55 B Back light 41 Batteries 5 10 12 102 charger 103 EN MH1 10 11 12 102 103 FR6 L91 AA 12 102 LR6 AA 12 13 102 ZR6 AA 12 102 Battery level 18 Battery type 13 102 Battery chamber cover 5 Beach snow 38 Best shot selector 79...

Страница 131: ...e 19 31 73 Image quality 73 Image size 73 Interface 99 Internal memory 16 formatting 98 ISO 27 J JPG 104 L Lamp redJ 27 Language 99 Lens 4 M Macro close up mode 29 Memory cards 5 16 103 capacity 18 formatting 17 98 Menus text or icons 89 Metering 77 Microphone 4 53 Mode selector 5 8 Monitor 5 6 Monitor settings 94 MOV 104 Movie menu 55 Movie mode 54 Movie options 55 maximum movie length 55 small s...

Страница 132: ...7 Reset all 100 S Self timer 28 Self timer lamp 4 Setup menu 88 Shooting menu 72 Shutter release button 4 22 23 Slide show 84 Small picture 51 Sound settings 97 Speaker 4 Standby mode 13 Strap camera 4 Sunset 38 T Television 59 connecting to 59 Time zone 14 91 time zone list 93 Transfer marking pictures for 63 Transfer marking 86 99 Transferring pictures 62 Tripod 5 36 39 U USB 61 63 65 99 cable U...

Страница 133: ...121 ...

Страница 134: ...122 ...

Страница 135: ...123 ...

Страница 136: ...lgium YP6G01 11 6MA20311 01 No reproduction in any form of this manual in whole or in part except for brief quotation in critical articles or reviews may be made without written authorization from NIKON CORPORATION ...

Отзывы: