background image

102

Creating a DPOF Print Order: Print Set

C

o

n

n

ec
ti

ng
 to
 T

e

le

v

isi

o

n

s, 

C

o

mp
uters an

d

 P

rin

ters

5

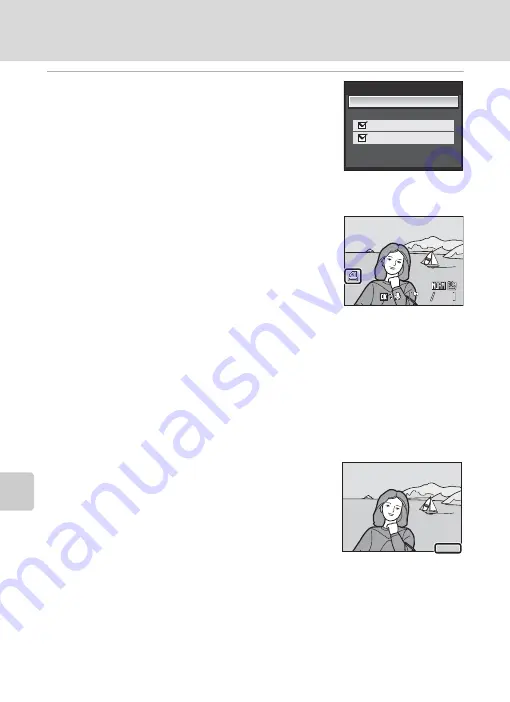
Choose whether or not to also print shooting 
date and photo information.

Choose 

Date

 and press the 

k

 button to print date of 

recording on all pictures in the print order.

Choose 

Info

 and press the 

k

 button to print photo 

information (shutter speed and aperture) on all pictures 
in the print order.

Choose 

Done

 and press the 

k

 button to complete the 

print order.

Pictures selected for printing can be confirmed during 
playback. 

B

Notes on Printing Shooting Date and Photo Information

When the 

Date

 and 

Info

 options are enabled in the print set menu, shooting date and photo 

information are printed on pictures when a DPOF-compatible (

A

200) printer which supports 

printing of shooting date and photo information is used.

Photo information cannot be printed when the camera is connected directly to a printer, via the 
supplied USB cable, for DPOF printing (

A

100).

• Date

 and 

Info

 are reset each time the 

Print set

 menu is displayed.

C

Deleting All Print Orders

Choose 

Delete print set

 in step 3 and press the 

button. Print orders for all pictures will be 

deleted.

C

Note on the Print Set Date Option

The date and time printed on pictures with DPOF printing, when date 
in the print set menu is enabled, are those recorded with the picture 
as it was shot. Date and time printed using this option are not affected 
when the camera’s 

Date

 setting are changed from the setup menu 

after pictures are recorded.

D

Date Imprint

The date and time of recording can be imprinted on pictures using the 

Date imprint

 option (

A

165) 

in the setup menu. Pictures with the date and time imprinted on them can be printed from printers 
that do not support printing of the date and time on pictures.
Only the Date imprint date and time on pictures will be printed, even if 

Print set

 is enabled with date 

selected in the print set screen.

Print set

Done

Date
Info

4

4

4

4

15/11/2008 15:30

15/11/2008 15:30
0004.JPG

0004.JPG

0004.JPG

15/11/2008 15:30

15.11.2008

15.11.2008

15.11.2008

Содержание 26135

Страница 1: ...En User s Manual DIGITAL CAMERA ...

Страница 2: ...acintosh Mac OS and QuickTime are trademarks of Apple Inc Adobe and Acrobat are registered trademarks of Adobe Systems Inc The SD logo is a trademark of the SD Card Association PictBridge is a trademark All other trade names mentioned in this manual or the other documentation provided with your Nikon product are trademarks or registered trademarks of their respective holders ...

Страница 3: ... Suited for the Scene Shoot pictures using A B C and D G Using the GPS c More on Playback D Movies E Voice Recordings Connecting to Televisions Computers and Printers H Uploading Pictures to the my Picturetown Server Picture Bank d Shooting Playback and Setup Menus Technical Notes ...

Страница 4: ... parts of the camera or AC adapter could result in injury Repairs should be performed only by qualified technicians Should the camera or AC adapter break open as the result of a fall or other accident take the product to a Nikon authorized service representative for inspection after unplugging the product and or removing the battery Do not use the camera or AC adapter in the presence of flammable ...

Страница 5: ...ould you notice any change in the battery such as discoloration or deformation If liquid from the damaged battery comes in contact with clothing or skin rinse immediately with plenty of water Observethe followingprecautions when handling the AC adapter Keep dry Failure to observe this precaution could result in fire or electric shock Dust on or near the metal parts of the plug should be removed wi...

Страница 6: ...ould be observed if photographing infants when the flash should be no less than 1 m 3 ft 4 in from the subject Do not operate the flash with the flash window touching a person or object Failure to observe this precaution could result in burns or fire Avoid contact with liquid crystal Should the monitor break care should be taken to avoid injury caused by broken glass and to prevent liquid crystal ...

Страница 7: ...e by one or more of the following measures Reorient or relocate the receiving antenna Increase the separation between the equipment and receiver Connect the equipment into an outlet on a circuit different from that to which the receiver is connected Consult the dealer or an experienced radio television technician for help CAUTIONS Modifications The FCC requires the user to be notified that any cha...

Страница 8: ...003 du Canada Notice for customers in Europe This symbol indicates that this product is to be collected separately The following apply only to users in European countries This product is designated for separate collection at an appropriate collection point Do not dispose of as household waste For more information contact the retailer or the local authorities in charge of waste management ...

Страница 9: ...l 10 The Command Dial and w FUNC Button 11 The Multi Selector 12 The d Button 13 Switching Between Tabs 13 The x Monitor Button 14 The I My Menu button 15 Help Displays 15 Attaching the Camera Strap 15 First Steps 16 Inserting the Battery 16 Removing the Battery 17 Turning On and Off the Camera 17 Charging the Battery 18 Setting Display Language Date and Time 20 Insert the Memory Card 22 Removing ...

Страница 10: ... Self timer Remote Control 35 Shooting with the Self timer 35 Shooting with Remote Control 36 Choosing a Focus Mode 37 Setting the Focus Mode 38 Using Manual Focus 39 Exposure Compensation 40 y Shooting Suited for the Scene 41 Shooting in the Scene Mode 41 Setting the Scene Mode 41 Features 42 Shooting Pictures for a Panorama 48 Shoot pictures using A B C and D 50 A B C D mode 50 A Programmed Auto...

Страница 11: ...Border 71 RAW Processing Using the Camera NRW RAW Processing 72 Voice Memos Recording and Playback 74 Recording Voice Memos 74 Playing Voice Memos 74 Deleting Voice Memos 74 Viewing Pictures by Date 75 Selecting a Date in Calendar Mode 75 Selecting a Date in List by Date Mode 76 Using Calendar Mode and List by Date Mode 77 Calendar and List by Date Menus 78 D Movies 79 Recording Movies 79 The Movi...

Страница 12: ...e Bank 103 LAN Features and my Picturetown 103 my Picturetown 103 Picture Bank 103 my Picturetown Setup Workflow 104 First Steps 105 Confirming LAN Connection 105 Ready Information Required for LAN Connection 105 Settings from the Camera 107 Basic Operation of the Network Settings 107 Configuring a Network Profile 109 Entering my Picturetown User Information 110 Protecting LAN Information Stored i...

Страница 13: ... J Flash Exp Comp 147 K Flash Control 147 M Noise Reduction 148 Q Distortion Control 148 X Wide angle Converter 149 Restrictions on Camera Settings 150 Playback Options The Playback Menu 153 Displaying the Playback Menu 153 b Slide Show 155 c Delete 156 d Protect 156 f Rotate Image 157 i Hide Image 157 h Copy 158 Basic Camera Setup The Setup Menu 159 Displaying the Setup Menu 160 c Welcome Screen ...

Страница 14: ... Notes 177 Optional Accessories 177 Approved Memory Cards 178 Wide angle Converter 179 Using Optional Speedlights External Flash 180 Image Sound File and Folder Names 181 Caring for the Camera 182 Cleaning 183 Storage 184 Error Messages 185 Troubleshooting 190 Specifications 197 Supported Standards 200 Index 201 ...

Страница 15: ...lay samples so that monitor indicators can be more clearly shown Illustrations and Screen Display Illustrations and text displays shown in this manual may differ from actual display C Internal Memory and Memory Cards Pictures taken with this camera can be stored in the camera s internal memory or on removable memory cards If a memory card is inserted all new pictures will be stored on the memory c...

Страница 16: ...this electronic circuitry THE USE OF NON NIKON ELECTRONIC ACCESSORIES COULD DAMAGE THE CAMERA AND MAY VOID YOUR NIKON WARRANTY For more information about Nikon brand accessories contact a local authorized Nikon dealer Before Taking Important Pictures Before taking pictures on important occasions such as at weddings or before taking the camera on a trip take a test shot to ensure that the camera is...

Страница 17: ...y or reproduce passports issued by the government licenses issued by public agencies and private groups ID cards and tickets such as passes and meal coupons Comply with copyright notices The copying or reproduction of copyrighted creative works such as books music paintings woodcut prints maps drawings movies and photographs is governed by national and international copyright laws Do not use this ...

Страница 18: ...t or indirect damages or lost profits resulting from any connection made at your own risk Nikon makes no guarantees whatsoever concerning the ability of these Services to store or safeguard images Be sure to maintain separate back up copies of all important images Nikon is not responsible for any direct or indirect damages or lost profits resulting from alteration or loss of content that is not at...

Страница 19: ...nd conditions that Nikon may require in connection with your use of the Services These Services are subject to change suspension or termination without notice Be sure to read Nikon s Privacy Management Policy located at the following URL http www nikon co jp main eng privacy index htm If you are in Europe click on your country of residence at the following URL and follow the link privacy policy ht...

Страница 20: ...oe Cover BS 1 180 6 Accessory shoe 180 7 Built in flash 32 8 Shutter release button 28 9 Eyelet for camera strap 2 15 10 Connector cover 18 90 92 96 11 DC input connector 18 117 12 Cable connector 90 92 96 13 Zoom control 27 f Wide 27 g Tele 27 h Thumbnail playback 65 i Playback zoom 66 j Help 15 14 Infrared receiver 36 15 Self timer lamp 35 AF assist illuminator 168 16 Microphone 74 79 85 17 Lens...

Страница 21: ...k apply selection button 12 8 l delete button 30 31 74 84 88 9 GPS Antenna 60 10 w FUNC button 11 172 11 I My Menu button 15 12 J manual focus button 39 13 c playback button 30 14 d button 13 41 80 123 153 15 Speaker 74 84 87 16 Monitor 8 14 25 17 Tripod socket 18 Battery chamber memory card slot cover 16 22 19 Memory card slot 22 20 Battery chamber 16 21 LAN connector cover 117 22 LAN connector 1...

Страница 22: ...49 5 Flash mode 32 6 Speedlights 180 7 Active D Lighting 57 8 Battery level indicator 24 9 Vibration reduction icon 25 167 10 Distortion control 148 Wide angle convertor 149 11 GPS connection indicator 60 12 Focus area 28 144 Focus area Face Priority 144 13 Date not set indicator 185 Time zone indicator 162 14 Date imprint date counter 165 15 Image size 126 Movie options 80 16 a Number of exposure...

Страница 23: ... 2 Time of recording 20 3 Volume indicator 74 84 4 Battery level indicator 24 5 GPS data recording indicator 60 6 Image quality 124 7 Image size 126 Movie options 80 8 a Current frame number total number of frames 30 b Movie length 84 9 Internal memory indicator 30 10 Voice memo recording guide 74 11 Voice memo playback guide 74 12 Movie playback guide 84 13 Calendar guide list by date guide 75 76...

Страница 24: ...s to suit the selected subject type or use the voice recording option to record sound only D Movie A79 Choose this mode to shoot movies G GPS A60 Check the settings and status oftheGPS function Use the GPS feature to record the orientation for the picture H Picture Bank A103 Use the LAN feature to send pictures taken from the camera to my Picturetown on the Internet E F User setting A58 Register t...

Страница 25: ...rture 54 Manual mode dial set to D Adjust shutter speed or aperture Press the multi selector K to switch between the different options 55 Mode dial set to A B C D E or F w Adjust the setting assigned to FUNC button At the default setting the ISO sensitivity setting can be adjusted 172 Mode dial set to y w Choose a scene mode 41 Mode dial set to D w Choose a movie option 80 Mode Use Description A P...

Страница 26: ...2 menu or move cursor up Apply selection Display L focus mode A37 menu or move cursor down Display n self timer remote control A35 menu Flash mode Display o exposure compensation A40 menu Choose the previous picture Choose the next picture 4 4 4 4 15 11 2008 15 30 15 11 2008 15 30 0004 JPG 0004 JPG 0004 JPG 15 11 2008 15 30 Shooting menu Image quality Image size Picture Control Custom Picture Cont...

Страница 27: ...play the setup menu Displayed when the menu contains two or more pages Shooting menu Metering Continuous Auto bracketing AF area mode Autofocus mode Flash exp comp Auto bracketing 0 3 0 7 1 0 Off Press the k button or the multi selector K to apply selection Displayed when there are more previous menu items Press the k button or the multi selector K to proceed to the next set of options Shooting me...

Страница 28: ...ing indicator shooting mode A B C or D shutter speed aperture exposure compensation ISO sensitivity and file number total number of exposures A is displayed when shooting mode is set to A y or A With Shooting Photo information displayed Display the image taken and shooting information Framing guides 1 Display a boxed guide for framing Monitor off 1 2 Turn off the monitor Photo information hidden D...

Страница 29: ...enu A159 Help Displays Rotate the zoom control to g j when M is displayed at the lower of the menu screen to view a description of the currently selected menu option To return to the original menu rotate the zoom control to g j again Attaching the Camera Strap Attach the camera strap to the eyelet as shown below 2 eyelets available My Menu Image quality Image size Picture Control White balance Act...

Страница 30: ...described on the label at the entrance of the battery chamber and insert the battery Use the battery to push the orange battery latch up 1 as the battery is inserted 2 The latch raises back into place when the battery is fully inserted B Inserting the Battery Inserting the battery upside down or backwards could damage the camera Make sure that the Battery is correctly oriented 3 Close the battery ...

Страница 31: ...rnings and cautions of For Your Safety Aiii before using the rechargeable battery Be sure to read and follow the warnings for The Battery A183 of the section Caring for the Camera before using the battery If the battery is not used for long periods of time make sure to charge the battery once every half a year and keep the battery after it has been exhausted D Auto Power Off in Shooting Mode Stand...

Страница 32: ...er to the camera s DC input connector 2 The DC input connector should be fully inserted 4 Plug the power cable into an outlet 3 The AC adapter power on lamp will light 4 C Charging the Battery After Setting the Camera s Clock When the camera s built in clock has not been set the battery begins charging when the AC adapter is connected Once the clock is set Picture Bank A117 will start when the AC ...

Страница 33: ...r the Camera before using the battery Do not under any circumstances use another make or model of AC adapter Failure to observe this precaution could result in overheating or in damage to the camera Only use the power cable for the AC Adapter EH 66 supplied D Charging the Battery with the Battery Charger The Battery Charger MH 61 A177 for EN EL5 is available separately Camera Status Description Th...

Страница 34: ...nd press the k button For information on using the multi selector A12 3 Choose Yes and press the k button If No is selected the date and time will not be set 4 Press J or K to select your home time zone A164 and press the k button D Daylight Saving Time If daylight saving time is in effect press H to turn on Daylight saving in the Time zone menu in step 4 to set the date The W mark will be display...

Страница 35: ...n which the day month and year are displayed and press the k button or the multi selector K The setting is enabled and screen changes to shooting screen D Changing the Date and Time To change the current date and time go into Date A162 in the setup menu A159 choose Date and follow the instructions above starting from step 5 To change the time zone and daylight saving settings go into Date in the s...

Страница 36: ...amber memory card slot cover Make sure that the camera is off before inserting or removing the memory card 2 Insert the memory card Slide the memory card in correctly until it clicks into place Close the battery chamber memory card slot cover after inserting the memory card B Inserting the Memory Card Inserting the memory card upside down or backwards could damage the camera or the memory card Mak...

Страница 37: ...ot be formatted when this switch is in the lock position Unlock by sliding the switch to the write position Unlock when using the LAN features of the COOLPIX P6000 to upload pictures from memory card onto my Picturetown B Memory Cards Use only Secure Digital memory cards Do not perform the following during formatting while data is being written to or deleted from the memory card or during data tra...

Страница 38: ...end at this time 3 Check the battery level and number of exposures remaining Battery Level Number of Exposures Remaining The number of exposures remaining will be displayed The number of pictures that can be stored depends on the capacity of the memory or memory card image quality and image size A127 Monitor Description NO INDICATOR Battery fully charged B Battery low prepare to charge or replace ...

Страница 39: ...ation reduction A167 when On default setting is selected can be applied to effectively reduce blur caused by slight hand movement known as camera shake that commonly occurs when shooting with zoom applied or at slow shutter speeds Vibration reduction can be used in all shooting modes Set Vibration reduction to Off when using a tripod to stabilize the camera during shooting 14 14 1 125 1 125 F2 7 F...

Страница 40: ...ewfinder to frame pictures when bright light makes it difficult to see the display in the monitor B Notes on the Viewfinder As the area visible in the viewfinder may differ from that of the final picture use the monitor to frame pictures in the following situations When shooting at ranges of about 1 m 3 ft 3 in or less When a converter lens is used available separately from Nikon A149 179 When dig...

Страница 41: ...igital Zoom and Interpolation Unlike optical zoom digital zoom uses a digital imaging process known as interpolation to magnify images A126 resulting in slight deterioration of picture quality Interpolation is applied at zoom positions beyond V When zoom is increased beyond the V position interpolation is initiated and the zoom indicator turns yellow to indicate that interpolation is being applied...

Страница 42: ...AF lamp will flicker when the shutter release button is pressed halfway Change the composition and press the shutter release button halfway again 2 Press the shutter release button the restof the way down The picture will be recorded to the memory card or internal memory D Shutter release Button The camera features a two stage shutter release button To set focus and exposure press the shutter rele...

Страница 43: ...te wall wearing a white shirt Several objects are at different distances from the camera e g the subject is inside a cage Subject is moving rapidly In the situations noted above try pressing the shutter release button halfway to refocus several times or focus on another subject and use focus lock D Focus Lock To focus on an off center subject when Center is selected for AF area mode use focus lock...

Страница 44: ...ard or internal memory Press the c button or the shutter release button to switch to shooting mode When C is displayed pictures stored in the internal memory will be displayed When memory card is inserted C is not displayed and pictures stored on the memory card will be displayed Deleting Pictures 1 Press the l button to delete the picture currently displayed in the monitor 2 Usethemultiselectorto...

Страница 45: ...leting the Last Picture Shot In shooting mode press the l button to delete the last picture shot D Deleting Multiple Pictures Choose Delete A156 from Playback menu A153 or Calendar List by Date menu A78 to delete multiple pictures Option Use Description A Playback zoom g i Enlarge view of picture currently displayed in monitor up to about 10 Press the k button to return to full frame playback mode...

Страница 46: ...set the flash mode according to your shooting environment Available Flash Modes U Auto Flash fires automatically when lighting is poor V Auto with red eye reduction Reduces red eye in portraits A34 W Off Flash will not fire X Fill flash Flash fires when a picture is shot Use to fill in illuminate shadows and backlit subjects Y Slow sync Fill flash is combined with slow shutter speed Flash illumina...

Страница 47: ... multi selector to choose the desired flash mode and press the k button The icon for the selected flash mode is displayed at the monitor When U auto is applied D is only displayed for a few seconds even if monitor indicators A14 are On If a setting is not applied by pressing the k button within a few seconds the selection will be cancelled B Lowering the Built in Flash When not using the built in ...

Страница 48: ...ith the flash set to V red eye reduction while in A auto mode and the setting will be saved even after the camera is turned off When shooting mode is set to A B C or D the setting is saved even after the camera is turned off C Red eye Reduction This camera uses advanced red eye reduction In Camera Red Eye Fix The flash fires repeatedly at low intensity before the main flash reducing red eye The ca...

Страница 49: ...eventing camera shake The mode selected for self timer is displayed If a setting is not applied by pressing the k button within a few seconds the selection will be cancelled 3 Frame the picture and press the shutter release button halfway Focus and exposure will be set 4 Press the shutter release button the rest of the way down The self timer starts and the number of seconds remaining before the s...

Страница 50: ...yed If a setting is not applied by pressing the k button within a few seconds the selection will be cancelled 2 Frame the picture 3 Aim the transmitter at the infrared receiver on the front of the camera and press the send button Press the send button from a distance of 5 m 16 ft or less In quick response remote mode once focus has been locked the shutter will be released and the self timer lamp w...

Страница 51: ... close up Use for close ups of flowers insects or small objects When the F mark on the monitor glows green when the zoom indicator is positioned before G the camera can focus on subjects as close as about 2 cm 0 8 in from the lens The closest distance at which the camera can focus varies depending on the zoom position B Infinity Use when shooting distant scenes through foreground objects such as w...

Страница 52: ... setting is not applied by pressing the k button within a few seconds the selection will be cancelled C Macro Close up Mode In macro close up mode the camera focuses continuously due to autofocus Press the shutter release button halfway to lock focus and set the exposure However in A B C D E and F modes the setting of Autofocus mode A146 will be applied C Infinity Focus Mode If you set focus mode ...

Страница 53: ... far subjects Rotate counterclockwise to focus on near subjects 3 Releasethe J button to endthesettingformanual focus W appears at the top of the monitor and the focus is locked to the set focus To readjust the focus repeat steps 2 to 3 C Notes on E Manual Focus Press the shutter release button halfway to preview the depth of field the area of focus on the subject Digital zoom is not available Foc...

Страница 54: ...the setting for exposure compensation When an exposure compensation value other than 0 0 is applied thevalueisdisplayedwiththe H iconinthemonitor To cancel exposure compensation select 0 0 before pressing the k button or follow steps 1 and 2 to select 0 0 C Exposure Compensation Value When shootingmodeis set to A B or C the settingof exposure compensation is savedeven after the camera is turnedoff...

Страница 55: ...flash pop up button to raise the built in flash before shooting D Using the Command Dial to Select a Scene Instead of pressing the d button a scene can also be selected by holding down the w button and rotating the command dial in step 1 above D Image Quality and Image Size Image quality A124 and Image size A126 can be set in the scene menu However NRW RAW images cannot be recorded in scene mode b...

Страница 56: ...g skin tones The camera detects and focuses on a face looking toward the camera Shooting with Face Priority A145 If the camera detects multiple faces the camera focuses on the face closest to the camera If no face is recognized the camera will focus on the subject in the center focus area Digital zoom is not available X V n Off L A o 0 0 c Landscape Use this mode for vivid landscapes and cityscape...

Страница 57: ... a rate of about 0 9 frames per second fps when image quality is set to Normal and image size is set to N 4224 3168 Focus exposure compensation and white balance are fixed at values determined with the first shot in each series The maximum frame rate with continuous shooting may vary depending upon the current image quality setting image size setting and the memory card used The camera focuses on ...

Страница 58: ...The camera focuses on the subject in the center of the frame Hold the camera steadily as pictures are easily affected by camera shake When shooting under low lighting use of a tripodis recommended Set Vibration reduction A167 to Off when using a tripod to stabilize the camera during shooting X V1 n Off2 L A o 0 02 g Beach snow Captures the brightness of such subjects as snowfields beaches or sunli...

Страница 59: ...t Camera focuses at infinity When the shutter release button is pressed halfway the AF lamp always glows green Note however that objects in the foreground may not always be in focus AF assist illuminator will not light up regardless of the AF assist A168 setting X W n Off L B o 0 0 j Night landscape OQ Slow shutter speeds are used to produce stunning night landscapes Camera focuses at infinity Whe...

Страница 60: ... varies depending on the zoom position AF area mode is set to Manual When the k button is pressed camera focuses on subject in active focus area A144 The camera will continuously focus on different objects until you press the shutter release button halfway to lock focus As pictures are easily affected by camera shake check the Vibration reduction A167 setting and hold the camera steadily X U n Off...

Страница 61: ...he foreground may not always be in focus Digital zoom is not available AF assist illuminator will not light up regardless of the AF assist A168 setting X W n Off L B o 0 0 n Copy Provides clear pictures of text or drawings on a white board or in print The camera focuses on the subject in the center of the frame Use p macro close up mode A37 in focus mode with this mode to focus at short ranges Col...

Страница 62: ...press the k button Select how pictures will be joined together in the completed panorama right I left J up K or down L Yellow direction icons II appear for the selected direction When you press the k button the selected direction is set and a white direction icon I appears for that direction Apply flash mode A32 self timer A35 focus mode A37 and exposure compensation A40 settings with this step if...

Страница 63: ... be adjusted until the series is finalized The panorama series is terminated if the camera enters standby mode with the auto off function A169 during shooting Setting the time allowed to elapse before the auto off function is enabled to a longer setting is recommended D R exposure lock Display In Panorama Assist R is displayed on the screen when the first shot has been taken This indicates that ex...

Страница 64: ...ot using those settings that are frequently used A58 Mode Description Usage A Programmed auto A52 Camera sets shutter speed and aperture for optimal exposure Flexible program which changes thecombinationofshutterspeed and aperture can be used A52 Recommended for most situations B Shutter priority auto A53 Camera selects aperture according to the shutter speed set for best results Use to shoot fast...

Страница 65: ... field The following figure shows how shutter speed and aperture affects exposure When the ISO sensitivity setting A138 is changed the range of shutter speeds and aperture values at which the correct exposure can be obtained also changes Fast shutter speed 1 1 000 s Slow shutter speed 1 30 s Large aperture small f number f 2 7 Small aperture large f number f 7 2 14 14 1 125 1 125 F2 7 F2 7 1 125 F...

Страница 66: ...command dial to the right for large apertures small f numbers that blur background details or fast shutter speeds that freeze motion Rotate the command dial to the left for small apertures large f numbers that increase depth of field or slow shutter speeds that blur motion To disable flexible program rotate the command dial until the asterisk A next to the mode indicator is no longer displayed Sel...

Страница 67: ...utter release button is pressed halfway Choose another shutter speed and try again At speeds slower than 1 4 s the shutter speed indicator will turn red to show that noise is in the image Setting Noise reduction to On A148 is recommended to reduce noise in the form of randomly spaced brightly colored dots B Note on Shutter Speed Shutter speed is restricted to a maximum of 1 2 s when Continuous BSS...

Страница 68: ...ter Speed Shutter speed is restricted to a maximum of 1 2 s when Continuous BSS Continuous flash and Multi shot 16 are set for Continuous A140 or when any mode other than Off is set for Auto bracketing A143 D Aperture and Zoom Aperture is expressed as an f number which is the ratio of the focal length of the lens to the effective diameter of the opening aperture through which light enters the came...

Страница 69: ... s and 30 s When adjusting aperture or shutter speed the degree of deviation from the exposure value measured by the camera is displayed for a few seconds in the exposure display The degree of deviation in the exposure display is shown in EVs 2 to 2 EV in increments of 1 3 EV A display similar to that illustrated at right indicates that the picture will be overexposed by 1 EV 1 4 Press the multi s...

Страница 70: ...uous flash and Multi shot 16 are set for Continuous A140 or when any mode other than Off is set for Auto bracketing A143 Shutter speed is restricted to a maximum of 8 s when Intvl timer shooting is set for Continuous Shutter speed is restricted to a maximum of 8 s when ISO sensitivity A138 is set to higher than 1600 B Shutter Speed of 1 2 000 s A shutter speed of 1 2 000 s is available only when t...

Страница 71: ...othing will be displayed if Off is selected A8 B Notes on Active D Lighting Additional time is required to record images when Active D Lighting is on Although exposure is in fact reduced to prevent loss of detail in highlights and shadows highlights underexposed areas and mid tones are automatically adjusted to prevent the resulting photograph from being underexposed Set Metering A139 to Matrix wh...

Страница 72: ...a position selected in Manual is also registered Register the Settings in E or F 1 Set the mode dial to the desired exposure mode Set to A B C or D Can be set even if E or F is selected The default settings of shooting mode A will be set at time of purchase Exposure mode A B C D A50 q Image quality A124 K Flash control A147 m Flash mode A32 r Image size A126 M Noise reduction A148 L Focus mode A37...

Страница 73: ...ination will be overwritten Resetting Registered Settings The registered setting will be changed back to the default setting of shooting mode A 1 Choose Reset user settings at the shooting menu screen and press the k button 2 Choose the destination to reset and press the k button The registered settings have been reset Shooting menu Flash control Noise reduction Distortion control Wide angle conve...

Страница 74: ... button The GPS menu is displayed 3 Choose Record GPS data and press the k button 4 Choose On and press the k button Signals are received from the GPS satellites and positioning begins Several minutes may be required to obtain the positional information if setting Record GPS data to On for the first time or about two hours have passed since obtaining the last positioning information The setting On...

Страница 75: ...ioning status C GPS Signal Status Display The GPS signals that will be displayed when the mode dial is set to G are as follows Signal strength Position 14 14 1 125 1 125 F2 7 F2 7 1 125 F2 7 14 Signal strength Position Positional information Displays the latitude and longitude of the determined position Time elapsed Displays the time elapsed since the last positioning GPS satellite position and si...

Страница 76: ... positioning the power on lamp will blink The monitor will not light up Positioning will cancel if three minutes pass and positioning cannot be done The date of the camera s internal clock at the time of shooting is recorded in the date of recording and time of recording indicators displayed on the camera during playback The time obtained by the positional information recorded on images will not b...

Страница 77: ...ose the valid storage period from 15 seconds or less 30 seconds or less 1 minute or less default setting 5 minutes or less 15 minutes or less 30 minutes or less 60 minutes or less or 2 hours or less If positioning cannot be done after the valid storage period has ended the positional information will not be recorded onto the picture Update GPS Data Positioning is updated automatically but Update G...

Страница 78: ...ns When the updating is complete Done is displayed on the screen and the monitor display returns to the GPS menu To cancel the date time adjustment choose No C Synchronize Date time adjustment by Synchronize is set according to the time zone set in Date A162 of the setup menu A159 Check the time zone before setting Synchronize The date time set using Synchronize is not as accurate as radio clocks ...

Страница 79: ...ted the icons shown on the right appear Movies are displayed as film frames Option Use Description A Choose pictures Press the multi selector HIJK to choose pictures 12 Rotate the command dial to choose pictures Increase number of pictures displayed 4 9 16 f h Rotate the zoom control to f h Decrease number of pictures displayed 16 9 4 g i Rotate the zoom control to g i Cancel thumbnail playback k ...

Страница 80: ...int and pressingthe multi selector HIJK will enable you to switch between the people s faces Change the zoom ratio back to the normal playback zoom by rotating the zoom control to g i or f h Option Use Description A Zoom in g i Zoom increases each time the zoom control is rotated to g i up to about 10 Zoom also increases by rotating the command dial to right Zoom out f h Rotate the zoom control to...

Страница 81: ...he restricted use of combination exists A black border cannot be applied to copies created using editing functions D Original Pictures and Edited Copies Copies created with editing functions are not deleted if the original pictures are deleted The original pictures are not deleted if copies created with editing functions are deleted Edited copies are stored with the same recording date and time as...

Страница 82: ...k menu by choosing the playback tab from any mode other than playback menu and choose D Lighting to display the picture selection screen A154 Choose the picture to be edited and press the k button 3 Choose the extent of the setting using HI of the multi selector and press the k button Choose from three levels High Normal or Low A new copy with enhanced brightness and contrast is created To cancel ...

Страница 83: ...e for cropping crop the picture and then rotate the cropped picture back to tall portrait orientation 2 Refine copy composition Rotate the zoom control to g i or f h to adjust the zoom ratio Press the multi selector HIJK to move the display area 3 Press the d button 4 Use the multi selector to choose Yes and press the k button A new picture containing only the portion visible in the monitor is cre...

Страница 84: ...n playback menu and choose Small pic to display the picture selection screen A154 Choose the picture to be edited and press the k button 3 Choose the desired copy size and press the k button 4 Choose Yes and press the k button A new smaller copy is created To cancel creating a small copy choose No The copy is displayed with a gray frame D More Information See Image Sound File and Folder Names A181...

Страница 85: ...the picture selection screen A154 Choose the picture to be edited and press the k button 3 Choose the desired thickness of frame and press the k button 4 Choose Yes and press the k button A new copy with black border is created To cancel creating a copy with black border choose No B Black Border Borders of a picture will be hidden with black lines because black portion is drawn from picture s edge...

Страница 86: ... RAW Normal or NRW RAW Basic within the camera 1 Press the d button in playback mode The playback menu is displayed 2 Use the multi selector to choose NRW RAW processing and press the k button 3 Use the multi selector JK to choose the picture to be processed and press the k button The NRW RAW processing menu is displayed Playback menu Hide image Small pic Copy Black border NRW RAW processing NRW R...

Страница 87: ...g I and displaying the second page Choose Use default settings to change back to the default settings Choose Save copy when all settings have been adjusted 5 Choose Yes and press the k button A NRW RAW processed JPEG image will be created To cancel creating a JPEG image copy choose No B Notes on NRW RAW Processing The COOLPIX P6000 can only create JPEG format copies of NRW RAW processed images tak...

Страница 88: ...during playback to adjust the volume Deleting Voice Memos Select a picture with a voice memo and press the l button Use the multi selector to choose w and press the k button Only the voice memo will be deleted B Notes on Voice Memos When a picture with a voice memo attached is deleted both the picture and its voice memo are deleted If a voice memo already exists for the current picture it must be ...

Страница 89: ...ss the w button in playback mode and use the command dial to choose B Calendar When the w button is released the camera enters calendar mode 2 Choose the date and press the k button Dates for which pictures exist are underlined in yellow Choose a date which is underlined in yellow Rotate the zoom control to f h to view the previous month rotate the zoom control to g i to view the following month T...

Страница 90: ...and press the k button Camera lists up to 29 dates If pictures exist for more than 30 dates all pictures recorded earlier than most recent 30 dates will be listed together as Others The first picture for that date will be displayed in full frame playback Rotate the zoom control to f h in full frame playback mode to return to the date list Playback mode List by date 20 11 2008 3 2 56 15 11 2008 Lis...

Страница 91: ... the multi selector HI The date can also be selected by rotating the command dial 12 Select previous month calendar mode only f h Rotate the zoom control to f h to view the last month Select next month calendar mode only g i Rotate the zoom control to g i to view the following month Switch to full frame playback k Display the first picture shot on the selected date Rotate the zoom control to f h i...

Страница 92: ... in the date selection screen A75 76 options can be applied to all pictures shot on the same date or all pictures shot on the same date can be deleted To apply options to individual pictures or to select individual pictures for deletion display a picture full frame and press the d button B Note on Print Set When print marking already exists for pictures shot on dates other than that specified a co...

Страница 93: ...ure compensation settings cannot be applied or changed while movies are being recorded Apply or change settings as necessary before movie recording begins Optical zoom cannot be adjusted once movie recording begins Digital zoom cannot be applied before movie recording begins However digital zoom up to 2 can be applied while movies other than time lapse movies are being recorded B Note on During Re...

Страница 94: ... J TV movie 640P default setting Image size 640 480 pixels Frame rate 30 frames per second I TV movie 640 Image size 640 480 pixels Frame rate 15 frames per second S Small size 320 Image size 320 240 pixels Frame rate 15 frames per second y Time lapse movieP A82 The camera automatically shoots pictures at intervals and joins them into a movie Record flowers opening or butterflies emerging from coc...

Страница 95: ...y approx 48 MB Memory card 256 MB J TV movie 640P default setting 43 s 3 m 40 s I TV movie 640 1 m 26 s 7 m 20 s S Small size 320 2 m 50 s 14 m 25 s y Time lapse movie P A82 513 frames 1 800 frames per movie Q Sepia movie 320 2 m 50 s 14 m 25 s R B W movie 320 2 m 50 s 14 m 25 s Type Description A Single AF default setting Camera focuses when shutter release button is pressed halfway and locks at ...

Страница 96: ...utton all the way down to start recording Monitor turns off and power on lamp blinks between shots Monitor reactivates automatically for the next shot 6 Press the shutter release button all the way down a second time to end recording Recording will automaticallystop if the internal memory or memory cardbecomes full or when 1 800 frames have been recorded An 1 800 frame movie has a playback time of...

Страница 97: ...hooting starts Apply the appropriate settings before shooting begins To prevent the camera from turning off unexpectedly during recording use a fully charged battery To power the camera continuously for extended periods use an AC Adapter EH 66 Do not under any circumstances useanothermakeormodelofACadapter Failuretoobservethisprecautioncouldresult in overheating or in damage to the camera Do not r...

Страница 98: ...es and press the k button To cancel deletion choose No Option Use Description Rewind K Rewind movie when the k button is pressed down Advance L Advance movie when the k button is pressed down Pause O Press the k button to pause playback The following operations can be performed while playback is paused M Press the k button to rewind movie by one frame Rewind continues while the button is pressed N...

Страница 99: ...hts during recording If no operations are performed for about 30 seconds after voice recording begins the camera s power saving function is enabled and the monitor turns off See Operations During Recording A86 for more information 4 Press the shutter release button all the way down a second time to end recording Recording will end automatically if the internal memory or memory card becomes full or...

Страница 100: ...ton The AF lamp blinks when recording is paused Create index Press the multi selector HIJK Indexes make it easy to locate desired portions of a recording Start of recording is index number 01 other numbers that follow are assigned in ascending order each time the multi selector is pressed up to index number 98 End recording Press the shutter release button the rest of the way down 01 00 01 00 00 4...

Страница 101: ...cording screen A85 step 3 2 Use the multi selector to choose the desired sound file and press the k button The selected sound file will be played back 008 009 007 006 15 12 2008 17 30 15 12 2008 18 30 26 12 2008 13 00 29 12 2008 16 40 30 12 2008 08 00 010 Select sound file Copy Play ...

Страница 102: ... No Option Use Description Rewind K Rewind the voice recording when the k button is pressed down Advance L Advance the voice recording when the k button is pressed down Skip to previous index R Press the k button to skip to previous index Skip to next index S Press the k button to skip to next index Pause O P Press the k button to pause playback Press the k button to resume playback while playback...

Страница 103: ...ection no checkmark Multiple files can be selected Press the k button when setting is complete 5 When a confirmation dialog is displayed choose Yes and press the k button Copying starts B Note on Voice Recordings The COOLPIX P6000 may be unable to play or copy sound files created with cameras other than the COOLPIX P6000 C No sound file Message If there are no sound files stored on the memory card...

Страница 104: ... See the documentation provided with your television for details 4 Hold down the c button to turn on the camera The camera enters playback mode and pictures recorded will be displayed on the television While connected to the TV the camera monitor will remain off B Connecting the USB Cable Be sure that the connectors are oriented correctly and do not use force to connect the USB cable When disconne...

Страница 105: ...rvice Pack 3 Home Edition Professional Macintosh Mac OS X version 10 3 9 10 4 11 10 5 4 Refer to the Nikon website for the latest information on operating system compatibility B Notes on Power Source When connecting the camera to a computer or printer use a fully charged battery to prevent the camera from turning off unexpectedly To power the camera continuously for extended periods use an AC Adap...

Страница 106: ...this device Windows XP When the action selection dialog is displayed click Nikon Transfer Copy pictures to afolder on my computer and click OK Nikon Transfer will start To bypass this dialog in the future check Always use this program for this action Mac OS X Nikon Transfer will start automatically if Yes was selected in the Auto Launch setting dialog when Nikon Transfer was first installed B Conn...

Страница 107: ...t the Nikon Transfer default setting the folder to which pictures are transferred is automatically opened when transfer is complete If ViewNX has been installed ViewNX will start automatically and you can view the pictures transferred For more information on using Nikon Transfer or ViewNX refer to the help information contained in Nikon Transfer or ViewNX 6 Disconnect the camera when transfer is c...

Страница 108: ...tures were savedand open a picture in the viewer supplied with your operating system For information on playback of NRW RAW images refer to COOLPIX P6000 NRW RAW images A125 Sound files copied to the computer can be played back using QuickTime or any other WAV compatible audio player D Panorama Creation with Panorama Maker Use a series of pictures taken using the Panorama assist option in scene mo...

Страница 109: ...er Failuretoobservethisprecautioncouldresult in overheating or in damage to the camera D Printing Pictures In addition to printing pictures transferred to acomputer from your personal printer and printing over a direct camera to printer connection the following options are also available for printing pictures Insert a memory card into a DPOF compatible printer s card slot Take a memory card to a d...

Страница 110: ...ted correctly the PictBridge startup screen 1 will be displayed in the camera monitor Then the print selection screen will be displayed 2 B Connecting the USB Cable When connecting the USBcable besurethat the connectors are oriented correctly Do notuse forcewhen connecting the USB cable When disconnecting the USB cable do not pull the connector at an angle D More Information See Printing Images of...

Страница 111: ... zoom control to f h to display 12 thumbnails or to g i to switch back to full frame playback 2 Choose Copies and press the k button 3 Choose the number of copies up to nine and press the k button 4 Choose Paper size and press the k button 5 Choose the desired paper size and press the k button To specify paper size using printer settings choose Default in the paper size menu 15 11 2008 NO 32 32 Pr...

Страница 112: ...e procedure below 1 When the print selection screen is displayed press the d button The print menu is displayed 2 Use the multi selector to choose Paper size and press the k button To exit the print menu press the d button 3 Choose the desired paper size and press the k button To specify paper size using printer settings choose Default in the paper size menu PictBridge Start print Copies Paper siz...

Страница 113: ... be printed Rotate the zoom control to g i to switch to full frame playback or f h to switch back to thumbnail display Press the k button when setting is complete The menu shown at right will be displayed To print choose Start print and press the k button Choose Cancel and press the k button to return to the print menu Print all images All pictures stored in the internal memory or on the memory ca...

Страница 114: ...in Letter A3 and A4 only sizes supported by thecurrent printer will be displayed DPOF printing Print pictures for which a print order was created in Print set A101 The menu shown at right will be displayed To print choose Start print and press the k button Choose Cancel and press the k button to return to the print menu To view the current print order choose View images and press the k button To p...

Страница 115: ...s the k button 3 Choose Select images and press the k button 4 Choose the pictures and number of copies up to nine of each Press the multi selector JK to select pictures and press HI to set the number of copies for each The command dial can also be used to choose the picture Pictures selected for printing can be recognized by the check markiconandthenumeralindicatingthenumberofcopiesto be printed ...

Страница 116: ... cable for DPOF printing A100 Date and Info are reset each time the Print set menu is displayed C Deleting All Print Orders Choose Delete print set in step 3 and press the k button Print orders for all pictures will be deleted C Note on the Print Set Date Option The date and time printed on pictures with DPOF printing when date in the print set menu is enabled are those recorded with the picture a...

Страница 117: ...using a computer Access my Picturetown from the following URL http mypicturetown com Picture Bank Pictures and movies are uploaded to the my Picturetown server for storage The my Picturetown server can be used as your own personal storage space for pictures and those pictures can be downloaded to a computer any time Upload just the selected pictures or upload all pictures automatically when the AC...

Страница 118: ...gistration with my Picturetown will be sent to the e mail address specified from the camera s Sender option Registering with my Picturetown A114 Use a computer to open the e mail notification requesting user registration click the URL provided in the email notification and register the camera and user information with my Picturetown from the sign up Web page Setup is complete when you receive an e...

Страница 119: ...net service provider ISP Ready Information Required for LAN Connection Network Profile Retrieve settings for the LAN network to which the camera will be connected This information is necessary when setting up the camera s Network profile A109 For information on the network profile see the documentation provided by the service provider IP address This is a unique identifier assigned to communicatio...

Страница 120: ...ss with my Picturetown Specify an e mail address comprised of up to 64 alphanumerical characters Cellular telephone e mail addresses are not supported E mail notification requesting user registration with my Picturetown will be sent to this e mail address Once registered use this e mail address for the Email ID when logging in to my Picturetown Alias Specify an alias comprised of up to 16 alphanum...

Страница 121: ...nd user information Basic Operation of the Network Settings Displaying the Network Settings Menu 1 Rotate the mode dial to H The select image screen is displayed 2 Press the d button The network settings menu is displayed Select image Settings Network settings Network profile Sender Picture Bank Password Key information Reset ...

Страница 122: ...acters displayed in the keyboard area can also be changed by rotating the command dial right or left The position of the scroll bar at left in the monitor display indicates the type of characters currently shown To delete a character move the cursor to that character s position and press the l button to delete When some of the characters cannot be displayed rotate the zoom control to g i to previe...

Страница 123: ...iguring IP address Subnet mask Gateway Primary DNS and Secondary DNS settings enter each set of numbers so that they are aligned totheright Numbers mustbeenteredcorrectly for the settings to be properly applied Forinformation on enteringtext see EnteringText with the Camera A108 Once all network settings have been configured Done will be displayed and the monitor display will return to the network...

Страница 124: ...t entry of e mail addresses For information on entering text see Entering Text with the Camera A108 3 Enter your alias up to 16 alphanumerical characters Once the alias has been entered the confirm address and alias screen will be displayed Press the k button to apply the settings and return to the network settings menu C Editing the my Picturetown User Information When uploading pictures using Pi...

Страница 125: ...stored to their default settings and data stored in the camera s internal memory can be deleted before the camera is transferred to another owner or discarded Applying a Password to the Camera If the camera is protected with a password the password must be entered to perform LAN operations using the camera 1 Choose Password from the Network settings menu A107 and press the k button The password sc...

Страница 126: ...ll return to the network settings menu C Entering the Password If a password has been set for the camera the Password screen will be displayed when changing network settings or when choosing pictures to upload to Picture Bank Enter the password to remove protection When setting up the LAN features of this camera for the first time the final step requires user registration with my Picturetown First...

Страница 127: ...een reset will be displayed and the monitor display will return to the network settings menu To cancel the reset operation choose No in the confirmation dialog C Resetting the Camera and Camera Password Avoid using a password that can be easily guessed such as a birth date Be sure that you do not forget your password To delete the current password without resetting the camera choose Delete passwor...

Страница 128: ...r with my Picturetown from the sign up Web page The following information is required for user registration Nickname the alias stored in the camera s Sender setting A110 Email ID the e mail address stored in the camera s Sender setting A110 Password for my Picturetown Key information Confirm key information by selecting Key information from the Network settings menu A107 and pressing the k button ...

Страница 129: ...password cannot be edited from the camera Use a computer s Web browser to access my Picturetown to edit user information Before discarding the camera or transferring it to another owner confirm whether or not pictures have ever been uploaded using my Picturetown services If pictures have been uploaded ever once be sure that you have registered with my Picturetown and then reset all network setting...

Страница 130: ...me alias currently used by my Picturetown If the current nickname uses characters or symbols that are not available using the camera enter a new nickname comprised of alphanumerical characters when a different nickname alias is registered with the camera the nickname alias currently used by my Picturetown will be used to identify you in e mail notification of picture upload sent to recipients 4 Re...

Страница 131: ...be fully inserted 5 Plug the power cable into an outlet 5 When the camera is turned on and the message Starting upload to Picture Bank is displayed uploading of pictures will begin A119 If sender setting has not been configured enter your Email ID e mail address and Nickname alias necessary for my Picturetown user information A110 After using Picture Bank to upload pictures for the first time usin...

Страница 132: ...ecessary for my Picturetown user information A110 When the Transfer is Unsuccessful A119 5 Choose pictures Press JK on the multi selector to highlight a picture and press HI to select the desired picture checkmark ticked or cancel the selection no checkmark The command dial can also be used to choose the picture Up to 30 pictures can be selected Rotate the zoom control to g i to switch to full fra...

Страница 133: ...ial to H the confirmation dialog shown at right will be displayed Choose Yes to resume the interrupted transfer This confirmation dialog will not be displayed when upload of all pictures using Picture Bank is initiated by connecting the AC adapter A117 C File Types Supported by Picture Bank Still pictures JPEG NRW RAW images including those with voice memos attached and movie files can be uploaded...

Страница 134: ...cturetown server can be deleted Register the camera and user information with my Picturetown before deleting pictures from the internal memory or the memory card A114 When you receive the e mail message confirming my Picturetown registration use a computer to be sure that the uploaded pictures have all been saved to my Picturetown before deleting those pictures 1 Press the w button in playback mod...

Страница 135: ...ure Controls as custom settings to be used for picture editing B White balance A136 Match white balance to the light source to save images with real life colors E ISO sensitivity A138 Control the camera s sensitivity to light G Metering A139 Choose how the camera meters exposure C Continuous A140 Select the option to shoot pictures one at a time in a sequence or with Best Shot Selector BSS H Auto ...

Страница 136: ...50 Q Distortion control A148 Correct the distortion X Wide angle converter A149 Adjust settings for the optional converter lenses J Active D Lighting A57 This option can be used to prevent loss of detail in highlights and shadows when shooting images i Save user settings A58 Register the current edited settings into the mode dial E and F i Reset user settings A59 Reset the registered settings in E...

Страница 137: ...ss the d button to display the shooting menu Use the multi selector to select items and set functions on menus A12 To return to the shooting mode from the shooting menu press the d button or the shutter release button C Navigating the Camera Menu The command dial can also be used in place of the multi selector HI Shooting menu Image quality Image size Picture Control Custom Picture Control White b...

Страница 138: ... formats JPEG compression ratio of 1 8 c Basic Basic image quality that is of a lower quality than Normal suitable for pictures that will be distributed by e mail or used in web pages File formats JPEG compression ratio of 1 16 F NRW RAW Raw data from the image sensor are saved Create JPEG image files after shooting using NRW RAW processing A72 in the playback menu White balance and COOLPIX Pictur...

Страница 139: ... of NRW RAW images cannot be set in ViewNX Capture NX Capture NX 2 and Mac OS X are not compatible with NRW RAW images ViewNX Ver 1 2 and NRW Codec can be downloaded through the Internet See Installing Nikon Transfer of the Quick Start Guide For more information on using ViewNX refer to the on screen instructions and help information contained in ViewNX C Notes on the Image Quality Setting Digital...

Страница 140: ... image quality is set to NRW RAW Fine NRW RAW Normal or NRW RAW Basic However I 4224 2816 G 4224 2376 and H 3168 3168 cannot be selected The image size of JPEG images created using NRW RAW processing A72 can be chosen for recorded NRW RAW images up to a maximum of 4224 3168 pixels Image size Description N 4224 3168 default setting Record pictures exhibiting greater detail than those shot at E 3264...

Страница 141: ...y approx 48 MB Memory card 1 256 MB Print size 2 cm in N 4224 3168 default setting Fine Normal Basic NRW RAW 7 14 29 2 35 75 145 10 36 27 14 2 10 63 E 3264 2448 Fine Normal Basic 12 24 48 60 120 240 28 21 10 8 8 1 D 2592 1944 Fine Normal Basic 19 38 75 95 195 380 22 16 8 6 6 4 C 2048 1536 Fine Normal Basic 31 60 114 155 305 575 17 13 6 8 5 1 B 1600 1200 Fine Normal Basic 50 96 171 255 485 865 14 1...

Страница 142: ...t the same image size pictures printed at higher resolutions will print smaller than the size indicated and those printed at lower resolutions will print larger than the size indicated 3 The print size of NRW RAW images will differ according to the image size of NRW RAW processed images A72 D Printing Images of Size 1 1 Set the printer to Border when printing images of size set to 1 1 The images m...

Страница 143: ...in the shooting information display nothing will be displayed when Standard is selected A8 b Standard default setting Standard processing for balanced results Recommended for most situations c Neutral Minimal processing for natural results Choose for photographs that will later be extensively processed or retouched d Vivid Pictures are enhanced for a vivid photoprint effect Choose for photographs ...

Страница 144: ... cannot be set for NRW RAW images in ViewNX The COOLPIX Picture Control feature of the COOLPIX P6000 cannot be used with other makes of cameras Capture NX Capture NX 2 and ViewNX Picture Control feature C The COOLPIX Picture Control Bar Rotating the zoom control in g i direction displays a COOLPIX Picture Control bar showing the contrast and saturation for the selected COOLPIX Picture Control Rota...

Страница 145: ...ose COOLPIX Picture Control and press the k button 2 Press HI tohighlightthe desired setting and press JK to choose a value 3 Press the k button The value will be set Selecting Resetandpressingthek button willchange the values back to the default setting C Modifications to Original COOLPIX Picture Controls COOLPIX Picture Controls that have been modified from default settings are indicated by an a...

Страница 146: ...appearance Choose lower values to prevent highlights in portrait subjects from being washed out in direct sunlight higher values to preserve detail in misty landscapes and other low contrast subjects The default setting is 0 Saturation 2 Control the vividness of colors Choose A auto to adjust saturation automatically according to the type of scene or seven levels of adjustment can be done by choos...

Страница 147: ...on and A Auto Results for contrast and saturation vary with exposure and the position and size of the subject in the frame The setting for the COOLPIX Picture Control which has A auto selected for either Contrast or Saturation will be displayed in green in the COOLPIX Picture Control bar C The COOLPIX Picture Control Bar Rotating the zoom control in g i direction while adjusting Contrast or Satura...

Страница 148: ...hlightthe desired setting and press JK to choose a value This setting is the same as adjusting the COOLPIX Picture Control Press the k button to display the Save as screen Selecting Resetandpressingthek button willchange the values back to the default setting 4 Choosethedestinationtoregistertoandpress the k button The COOLPIX Custom Picture Control will be created Custom 1 or Custom 2 can be selec...

Страница 149: ...ulti selector to choose Delete and press the k button 2 Choose a COOLPIX Custom Picture Control to delete and press the k button 3 Choose Yes and press the k button The registration has been deleted To cancel deletion choose No Custom Picture Control Edit and save Delete Delete Custom 1 Custom 2 Delete Delete Custom 1 No Yes ...

Страница 150: ...r the weather to achieve more accurate results The setting for white balance can be viewed in the screen during shooting nothing will be displayed when Auto is set A8 B Settings Other than Auto and Flash At white balance settings other than Auto or Flash turn the flash off W A32 a Auto default setting White balance automatically adjusted to suit lighting conditions Best choice in most situations b...

Страница 151: ...hoose Measure To apply the most recently measured value for preset manual choose Cancel and press the k button The most recently measured value will be applied for White Balance 4 Frame the reference object 5 Press the k button to measure the white balance value The shutter is released and the new white balance value is set No pictures are recorded B Note on Preset Manual Regardless of the flash m...

Страница 152: ...e image size setting to C 2048 1536 When any option other than 3200 or 6400 is next selected for ISO sensitivity the original image size setting is restored At an ISO sensitivity setting of 3200 or 6400 the Multi shot 16 A140 option of the continuous shooting mode is not available When Continuous is set to Multi shot 16 selecting 3200 or 6400 for ISO sensitivity switches the setting to Single and ...

Страница 153: ...ations q Center weighted Camera meters entire frame but assigns greatest weight to subject in center of frame Classic meter for portraits preserves background details while letting lighting conditions at center of frame determine exposure Can be used with focus lock A29 to meter off center subjects r Spot Camera meters area shown by circle in center of frame Ensures that subject in metering target...

Страница 154: ...er situations in which camera shake is likely to blur pictures When Best Shot Selector BSS is enabled the camera shoots up to ten pictures while the shutter release button is held down The sharpest picture picture with the most detail in the series is automatically selected and saved Y Continuous flash Whilethe shutter releasebuttonis helddown continuousshootingisdone usingthe built in flash appro...

Страница 155: ...elease button is pressed all the way down B Notes on Continuous Flash Continuous flash cannot be used when the built in flash is shut Popup the built in flash when using continuous flash to shoot When Continuous flash is selected for Continuous turning on the Speedlight will change the option to Single B Notes on Multi shot 16 Digital zoom is not available At an ISO sensitivity A138 setting of 320...

Страница 156: ... shutter release button all the way down a second time to end recording Recording will end automatically if the internal memory or memory card becomes full or when 1 800 frames have been recorded C Notes on Interval Timer Shooting To prevent the camera from turning off unexpectedly during recording use a fully charged battery To power the camera continuously for extended periods use an AC Adapter ...

Страница 157: ...to bracketing the combined exposure compensation values will be applied Shutter speed will be restricted to a maximum of 1 2 s when any mode other than Off is selected for Auto bracketing Auto bracketing cannot be used when Image quality A124 is set to NRW RAW NRW RAW Fine NRW RAW Normal or NRW RAW Basic X 0 3 Camera varies exposure by 0 EV 0 3 EV and 0 3 EV over next three shots Keep shutter rele...

Страница 158: ...ocus area one of nine containing the subject closest to the camera Press the shutter release button halfway to activate the focus area When the shutter release button is pressed halfway the focus area selected by the camera will be displayed in the monitor When the monitor has been turned off the camera focuses using only the center focus area x Manual Choose the focus position from 99 areas in th...

Страница 159: ...ects more than one face the closest face is framedby a double border and the others by single borders Up to 12 faces can be detected 2 Press the shutter release button halfway The camera focuses on the face framed by the double border The double border will glow green and focus will be locked When the double border blinks the camera is unable to focus Press the shutter release button halfway again...

Страница 160: ...es depends on a variety of factors including whether or not the subject is facing the camera In some rare cases shooting subjects with which autofocus may not perform as expected A29 the subject may not be in focus despite the fact that the focus area glows green Should this occur switch to auto mode or change the AF area mode setting to Manual or Center in A B C D E or F modes refocus on another ...

Страница 161: ... flash unit mounted on the camera s accessory shoe is not used A180 B Note on Flash Control When Flash control isset to Built in off onlyU Auto and W Off andX Fill flash flash modes A32 are available 0 3 to 2 0 Flash output is reduced from 0 3 to 2 0 EV in increments of 1 3 EV to prevent unwanted highlights or reflections Reduce flash output to prevent unwanted highlights 0 0 default setting Flash...

Страница 162: ...l is set to On and Wide angle converter A149 is set to None w Distortion control is set to Off and Wide angle converter is set to On x Both Distortion control and Wide angle converter are set to On No display Both Distortion control and Wide angle converter are set to Off a Auto default setting Noise reduction is performed at slow shutter speeds likely to result in pictures affected by noise When ...

Страница 163: ...140 Using the flash units available separately from Nikon to shoot at wide angle may cast shadows in the pictures shot Check the picture using the monitor after shooting A wide panel is recommended when shooting with the Speedlight SB 600 SB 800 or SB 900 AF Assist cannot be used with Wide angle converter is set to On D More Information See Distortion Control Converter Display A148 for more inform...

Страница 164: ...ttings are restored when self timer remote control is turned off or when shooting with the self timer remote control has finished Focus mode B infinity is not available when Continuous is set to Continuous flash If Continuous is set to Continuous flash while focus mode is set to B infinity the focus mode setting automatically switches to A When Face priority is selected for AF area mode setting fo...

Страница 165: ...age size settings selecting 3200 or 6400 for ISO sensitivity automatically switches the image size setting to C 2048 1536 When any option other than 3200 or 6400 is next selected for ISO sensitivity the original image size setting is restored At an ISO sensitivity setting of 3200 or 6400 the Multi shot 16 option of the continuous shooting mode is not available When Continuous is set to Multi shot ...

Страница 166: ...to W off Distortion control When Distortion control is set to On Continuous is automatically set to Single and Auto bracketing is set to Off Even when the Distortion control option is changed back to Off Continuous will still be set to Single and Auto bracketing will still be set to Off Distortion control cannot be used if the imagequality settingis set to NRW RAW NRW RAW Fine NRW RAW Normal or NR...

Страница 167: ...er of copies for each b Slide show A155 View pictures stored in the internal memory or on a memory card in an automatic slide show c Delete A156 Delete pictures d Protect A156 Protect selected pictures from accidental deletion f Rotate image A157 Change the orientation of pictures i Hide image A157 Hide selected pictures during playback g Small pic A70 Create a small copy of the current picture h ...

Страница 168: ...r than Playback menu Follow the procedure described below to select multiple pictures 1 Press the multi selector JK to choose the desired picture The command dial can also be used in place of pressing JK on the multi selector Only one picture can be selected for Rotate image D Lighting Small pic Black border NRW RAW processing and Welcome screen step 3 Rotate the zoom control to g i to switch to f...

Страница 169: ...mark w to the loop option 2 The slide show begins Press the multi selector K while the slide show is in progress to view pictures in the order recorded hold down to fast forward or J to view pictures in reverse order hold down to rewind Press the k button to pause the slide show 3 Choose End or Restart When the slide show ends or is paused choose End and press the k button to return to the playbac...

Страница 170: ... the image and apply the setting in the picture selection screen Selecting Multiple Pictures A154 Note however that formatting the camera s internal memory or the memory card will permanently erase protected files A170 Protected pictures are recognized by the s icon A9 65 Erase selected images Delete selected pictures in the Picture Selection screen Selecting Multiple Pictures A154 Picture Bank im...

Страница 171: ... display the Rotate Image screen Press the multi selector J or K to rotate the picture 90 degrees Press the k button to set the orientation displayed and save the orientation data with the picture i Hide Image Use this setting to hide pictures during playback Select the image and apply the setting in the picture selection screen Selecting Multiple Pictures A154 Hidden pictures cannot be deleted us...

Страница 172: ... are copied with the pictures Sound files recorded using Voice Recording A85 can be copied using the Copy sound files option A89 Pictures recorded with another make of camera or that have been modified on a computer cannot be copied Edited copies have the same protection marking as the original but are not marked for printing A101 Copying a picture that is protected A156 will result in the copy be...

Страница 173: ...168 Enable or disable AF assist illumination u Digital zoom A168 Enable or disable digital zoom i Sound settings A169 Adjust the sound settings k Auto off A169 Set time before camera enters standby mode l m Format memory Format card A170 Format internal memory or memory card n Language A171 Choose the language used for camera monitor display o Video mode A171 Adjust settings for connection to TV U...

Страница 174: ...ctable Use the multi selector to select items and set functions on menus A12 To exit the setup menu press the d button or J to select other tabs Shooting menu Image quality Image size Picture Control Custom Picture Control White balance ISO sensitivity Shooting menu Image quality Image size Picture Control Custom Picture Control White balance ISO sensitivity Set up Welcome screen Date Brightness D...

Страница 175: ...ternal memory or on the memory card for the welcome screen Choose a picture in the picture selection screen A154 and press the k button As the selected image is stored in the camera the image will appear in the welcome screen even if the original picture is deleted NRW RAW images cannot be chosen Picturesshot at an Imagesizesetting A126 ofI 4224 2816 G 4224 2376 or H 3168 3168 cannot be selected C...

Страница 176: ...ing to the region currently selected Date Set camera clock to current date and time To use the setup menu Multi selector JK Move to another category in the order of day month year DMY Multi selector HI Change the settings k button The setting is enabled Time zone w home time zone can be specified and daylight saving enabled or disabled from Time zone options When x destination time zone is selecte...

Страница 177: ...different battery from the camera s battery The clock battery charges when the main battery is installed or the AC Adapter EH 66 is connected and can provide several days of backup power after about ten hours of charging C w Home Time Zone To switch to the home time zone choose w Home time zone in step 2 and press the k button To change the home time zone choose w Home time zone in step 2 and perf...

Страница 178: ...ns Helsinki Ankara 18 Alaska Anchorage 6 Moscow Nairobi Riyadh Kuwait Manama 17 PST PDT Los Angeles Seattle Vancouver 5 Abu Dhabi Dubai 16 MST MDT Denver Phoenix La Paz 4 Islamabad Karachi 15 CST CDT Chicago Houston Mexico City 3 5 New Delhi 14 EST EDT New York Toronto Lima 3 Colombo Dhaka 13 Caracas Manaus 2 Bangkok Jakarta 12 Buenos Aires Sao Paulo 1 Beijing Hong Kong Singapore 11 Fernando de No...

Страница 179: ... situations A191 When d Sports l Museum or p Panorama assist is selected in scene mode When Continuous BSS or Continuous flash is selected for Continuous A140 When modes other than Off is selected for Auto bracketing A143 Movie mode When NRW RAW NRW RAW Fine NRW RAW Normal or NRW RAW Basic is selected for Image quality A124 C Date Imprint and Print Set When printing from DPOF compatible printers w...

Страница 180: ...Choose from 1 to 3 and press K on the multi selector to display the date screen To set choose an option enter a date A21 step 5 of Setting Display Language Date and Time and press the k button Up to 3 types of date can be set To select a different date choose from 1 to 3 and press the k button Display options Choose the display format and press the k button Date counter Stored dates Display option...

Страница 181: ...ected A8 B Notes on Vibration Reduction Vibration reduction may take a few seconds to activate after the power is turned on or the camera enters shooting mode from playback mode Wait until the display stabilizes before shooting Vibration reduction may be unable to completely eliminate the effects of camera shake in some situations VR stands for vibration reduction On default setting Vibration redu...

Страница 182: ...plied while movies other than time lapse movies are being recorded At magnifications of 1 2 to 1 8 Metering is set to Center weighted and at magnifications of 2 0 to 4 0 to Spot Auto default setting AF assist illumination will be used to assist the focus operation when the subject is poorly lit The illuminator has a range of about 5 5 m 18 ft at the maximum wide angle position and about 3 2 m 10 f...

Страница 183: ...o elapse before the camera enters standby mode The time options are 30 s 1 min default setting 5 min and 30 min B Notes on Auto Off The time taken for the monitor to enter standby mode is as follows Menus are displayed three minutes Mode dial is set to G three minutes Mode dial is set to H three minutes Using voice recording 30 seconds Slideshow playback maximum of 30 minutes AC adapter is connect...

Страница 184: ...era the Format card option appears in the setup menu B Formatting Internal Memory and Memory Cards Formatting the internal memory or memory cards permanently deletes all data Be sure to transfer important pictures to a computer before formatting Do not turn the camera off or open the battery chamber memory card slot cover until formatting is complete The first time you insert the memory cards used...

Страница 185: ...lay of camera menus and messages o Video Mode Adjust settings for connection to TV Choose NTSC or PAL Czech Polish Danish Portuguese German Russian default setting Finnish Spanish Swedish Greek Turkish French Simplified Chinese Indonesian Traditional Chinese Italian Japanese Hungarian Korean Dutch Thai Norwegian Arabic ...

Страница 186: ...y releasing the w button One of the following shooting menu options can be assigned to the w button When Preset manual is selected the screen shown in step 3 of the section Preset Manual A137 will be displayed ISO sensitivity A138 default setting Distortion control A148 Picture Control A129 Image quality A124 Wide angle converter A149 Metering A139 Image size A126 Vibration reduction A167 Auto bra...

Страница 187: ...tem to be registered and press the k button The chosen menu item will be switched Image quality A124 Continuous A140 Distortion control A148 Image size A126 Auto bracketing A143 Wide angle converter A149 Picture Control A129 AF area mode A144 Active D Lighting A57 Custom Picture Control A134 Autofocus mode A146 Vibration reduction A167 White balance A136 Flash control A147 Digital zoom A168 ISO se...

Страница 188: ... A35 OFF Focus mode A37 Autofocus Exposure compensation A40 0 0 Option Default value Scene menu A41 Portrait Option Default value Movie options A80 TV movie 640 P Time lapse movie A82 30 s Autofocus mode A81 Single AF Option Default value Image quality A124 Normal Image size A126 N 4224 3168 Picture Control A129 Standard White balance A136 Auto ISO sensitivity A138 Auto Fixed range auto A138 ISO 6...

Страница 189: ...ive D Lighting A57 Off Option Default value Welcome screen A161 None Brightness A165 3 Date imprint A165 Off Vibration reduction A167 On AF assist A168 Auto Digital zoom A168 On Button sound A169 On Shutter sound A169 On Auto off A169 1 min FUNC button A172 ISO sensitivity Customize My Menu A173 1 Image quality 2 Image size 3 Picture Control 4 White balance 5 Active D Lighting 6 Distortion control...

Страница 190: ...set manual data of White balance A137 Setup menu Date A162 registration date of Date counter A166 Language A171 Video mode A171 Network profile A109 Sender A110 and Password A111 settings in the Network settings menu will not return to their original settings by Reset all Use Reset to return the settings back to the original settings User settings that were registered to the mode dial E and F mode...

Страница 191: ...harger Battery Charger MH 61 AC adapter AC Adapter EH 66 USB cable USB Cable UC E6 A V cable Audio Video Cable EG CP14 Converter lens require UR E21 lens adapter ring Wide angle Converter WC E76 0 76 Lens adapter ring Adapter Ring UR E21 Speedlights available separately from Nikon Speedlight SB 400 SB 600 SB 900 Remote control Remote Control ML L3 How to replace the battery 3 V CR2025 lithium batt...

Страница 192: ...oved Memory Cards The following Secure Digital SD memory cards have been tested and approved for use in this camera All cards of the designated make and capacity can be used regardless of speed 1 If the memory card will be used with a card reader or similar device check that the device supports 2 GB cards 2 SDHC compliant If the memory card will be used with a card reader or similar device check t...

Страница 193: ...ikon to the camera lens 1 Then screw the converter lens into the Adapter Ring UR E21 2 4 Rotate the mode dial to A B C D E or F and set Wide angle converter A149 in the shooting menu to On 5 Remove the lens cap from the converter lens To remove the wide angle converter turn the camera off and perform steps 1 to 4 in reverse order Set the Wide angle converter option in the camera shooting menu A149...

Страница 194: ...ghting conditions Refer to the Speedlight manual for more information on i TTL flash control Shooting with Wireless Lighting can be done by setting the SB 800 SB 900 or Wireless Speedlight Commander SU 800 to commander and setting the SB 600 SB 800 and SB 900 to remote flash However the flash is not usable even if the monitor flashes when the SB 800 and SB 900 is set to commander The Wireless Ligh...

Страница 195: ... file names do not change but new folder numbers are assigned in ascending order starting from the largest folder number on the destination medium A89 158 A single folder can hold up to 200 pictures if the current folder already contains 200 pictures a new folder named by adding one to the current folder name will be created the next time a picture is shot If the current folder is numbered 999 and...

Страница 196: ...ods when using or storing the camera Intense light may cause deterioration of the CCD image sensor producing a white blur effect in photographs B Keep away from strong magnetic fields Do not use or store this device in the vicinity of equipment that generates strong electromagnetic radiation or magnetic fields Strong static charges or the magnetic fields produced by equipment such as radio transmi...

Страница 197: ...en when off if left in place the battery could be drained to the point that it no longer functions Turning the camera on or off while the battery is exhausted can result in reduced battery life If the battery will not be used for an extended period store it in a cool 15 to 25 C 59 to 77 F dry place Recharge it at least once every six months and run it flat before returning it to storage Replace th...

Страница 198: ...ages over 250 V applied to the accessory shoe could not only prevent normal operation but damage the sync circuitry of the camera or flash Before using a Nikon Speedlight not listed in this section contact a Nikon authorized service representative for more information C Notes on the Monitor The monitor may contain a few pixels that are always lit or that do not light This is a characteristic commo...

Страница 199: ...pidly After the lamp blinks for three minutes the camera will turn off automatically butyoucan also press the power switch to turn it off manually 17 N Memory card is write protected Write protect switch is in lock position Slide write protect switch to write position 23 P This card cannot be used Error accessing memory card Use an approved card Check that connectors are clean Confirm that memory ...

Страница 200: ... Format internal memory or memory card 22 170 N Image cannot be modified Pictures cannot be modified using the D Lighting crop small picture orblackborder functions Confirm restrictions on editing using the D Lighting crop small picture and black border functions NRW RAW pictures that were taken with a non COOLPIX P6000 camera cannot be RAW processed Movies cannot be edited 67 72 N Cannot record m...

Страница 201: ...r position Mode dial is set between two modes Rotate mode dial to select desired mode 10 N Press the flash pop up button toraisetheflash The built in flash is not raised during the Night portrait or Backlight scene modes and when continuous shooting is set to Continuous flash Press the K flash pop up button to raise the built in flash 33 43 47 N Select manual focus MF mode The focus mode is not se...

Страница 202: ...nternal circuitry Turn camera off remove and reinsert battery and turn camera on If error persists contact retailer or Nikon authorized service representative 17 N Battery exhausted Transfer terminated Battery exhausted during picture upload Use the AC Adapter EH 66 or charge the battery Turn the camera on and upload the picture again 18 117 P Connection error LAN cable was disconnected during con...

Страница 203: ...ect Resume and press the k button to resume printing PR Printer error paper jam Paper has jammed in the printer Eject the jammed paper select Resume and press the k button to resume printing PR Printer error out of paper No paper is loaded in printer Load the specified paper select Resume and press the k button to resume printing PR Printer error check ink Ink error Check ink select Resume and pre...

Страница 204: ...or brightness Monitor is dirty Clean monitor Monitor has dimmed to save power Monitor brightens when controls are used 26 165 182 17 Camera turns off without warning Battery is low Camera has turned off automatically to save power as no operations have been performed for some time Battery is cold 24 17 183 Date and time of recording are not correct If the date has not been set Date not set indicat...

Страница 205: ...set to NRW RAW NRW RAW Fine NRW RAW Normal or NRW RAW Basic Continuous BSS or Continuous flash is selected for Continuous When modes other than Off is selected for Auto bracketing Movies 43 46 48 124 140 143 79 Camera settings reset Backup battery is exhausted all settings were restored to their default values 163 Monitor turns off and the power on lamp blinks rapidly Battery temperature is high T...

Страница 206: ...35 149 Bright specks appear in pictures shot with flash Flash is reflecting off particles in air Turn flash W off 32 Built in flash does not fire Flash is W off Some scene modes that cannot turn on flash are selected Focus mode is set to B infinity D modes other than Time lapse movieP is selected Continuous BSS or Multi shot 16 is selected for Continuous Option other than Off is selected for Auto ...

Страница 207: ... 2376 or H 3168 3168 cannot be selected for Image size Image size cannot be adjusted when Multi shot 16 is selected for Continuous When ISO sensitivity is set to 3200 or 6400 N 4224 3168 E 3264 2448 D 2592 1944 I 4224 2816 G 4224 2376 or H 3168 3168 cannot be selected for Image size 126 140 138 No sound when shutter is released Off is selected for Sound settings in Shutter sound in setup menu Cont...

Страница 208: ...c and red eye reduction of the Night portrait scene mode is applied during shooting In Camera Red Eye Fix may in very rare cases be applied to areas not affected by red eye Set a flash mode other than V when in a shooting mode other than the Night portrait scene mode during shooting 32 43 Camera does not shoot continuously On is selected for Noise reduction in the shooting menu 148 Camera does not...

Страница 209: ...turesedited with this camera 84 126 72 67 Pictures not displayed on television Video mode in Setup menu has not been set correctly Memory card contains no pictures Insert new memory card Remove memory card to play back pictures from internal memory 171 22 Nikon Transfer does not start when camera is connected Power is off Battery is low USB cable is not correctly connected Camera is not recognized...

Страница 210: ...may be mistakes depending on the positioning environment 63 63 62 Problem Cause Solution A Connection to the access point or server failed Network settings stored in the camera may not be the same as those for the LAN to which connection was attempted Confirm network profile information using the camera s network settings menu 109 Connection was terminated during picture upload and upload failed L...

Страница 211: ...rea selection Face priority auto 9 area automatic selection center manual with 99 focus areas Viewfinder Real image optical viewfinder with LED indication Frame coverage Approx 80 horizontal and 80 vertical compared to the actual screen Monitor 2 7 in approx 230k dot wide viewing angle TFT LCD with anti reflection coating and 5 level brightness adjustment Frame coverage shooting mode Approx 97 hor...

Страница 212: ... 6 blade iris diaphragm Range 10 steps of 1 3 EV Self timer Can be selected from 10 and 2 second duration Built in flash Range approx ISO sensitivity Auto W Approx 0 3 to 6 0 m 1 to 19 ft T Approx 0 3 to 3 0 m 1 to 9 ft Flash control TTL auto flash with monitor preflashes Accessory shoe Hot shoe contact with safety lock Sync contact X contact only Interface USB Hi Speed USB Date transfer protocol ...

Страница 213: ...wer sources One Rechargeable Li ion Battery EN EL5 supplied AC Adapter EH 66 supplied Batterylife Approx 260 shots when EN EL5 is used Dimensions W H D Approx 107 65 5 42 mm 4 2 2 8 1 7 in excluding projections Weight Approx 240 g 12 9 oz without battery and SD memory card Operating environment Temperature 0 to 40 C 32 to 104 F Humidity Less than 85 no condensation Type Rechargeable lithium ion ba...

Страница 214: ...ed from print orders stored on the memory card Exif version 2 2 This camera supports Exif Exchangeable Image File Format for Digital Still Cameras version 2 2 a standard that allows information stored with photographs to be used for optimal color reproduction when images are output from Exif compliant printers PictBridge A standard developed cooperatively by the digital camera and printer industri...

Страница 215: ...50 53 g Tele 27 h Thumbnail playback 65 E F User Setting Mode 58 f Wide 27 AVI 181 JPG 181 NRW 181 WAV 181 A AC Adapter 18 177 Accessory shoe 180 Accessory Shoe Cover 180 Active D Lighting 57 Adapter Ring 177 179 AF area 28 AF area mode 144 AF assist 6 168 Alias 106 110 114 Aperture priority auto 54 Apeture 51 Audio video cable 90 Audio in Video in 90 Auto 32 Auto bracketing 143 Auto mode 24 Auto ...

Страница 216: ...awn i 45 E E mail 106 110 114 Entering Text with the Camera 108 Exposure compensation 40 Exposure mode 50 External flash 152 177 180 Eyelet for camera strap 6 F Face priority 144 145 File extension 181 File name 181 Fill flash 32 Filter effects 132 Fireworks show m 47 Firmware version 176 Fixed range auto 138 Flash exp comp 147 Flash lamp 34 Flash mode 32 Flash off 32 Focus 28 81 144 146 Focus loc...

Страница 217: ...vie playback 84 Movie recording 79 Multi selector 12 Multi shot 16 140 Museum l 46 My Menu 15 my Picturetown 103 N Network connection settings 109 Network profile 105 Network settings menu 107 Night landscape j 45 Night portrait e 43 Nikon Transfer 92 Noise reduction 148 NRW RAW Images 72 124 125 NRW RAW processing 72 Number of exposures remaining 24 127 O Optical zoom 27 Optional Accessories 177 ...

Страница 218: ...ed 51 Shutter priority auto 53 Shutter release button 28 Single 140 Single AF 81 146 Slide show 155 Slow sync 32 Small pic 70 Small size 80 81 Sound file playback 87 Sound settings 169 Speaker 7 Speedlight 152 177 180 Sports d 43 SSCN 181 Strap 15 Subnet mask 105 109 Sunset h 44 T Tele 27 Thumbnail playback 65 Time difference 164 Time zone 162 164 Time lapse movie 82 Toning 132 Tripod socket 7 TV ...

Страница 219: ...205 Index Technical Notes Wide angle converter 149 177 179 Z Zoom 27 Zoom control 6 27 ...

Страница 220: ...poration FX8H01 11 6MM62011 01 No reproduction in any form of this manual in whole or in part except for brief quotation in critical articles or reviews may be made without written authorization from NIKON CORPORATION ...

Отзывы: