3.
Wireless network connection in Windows
1.
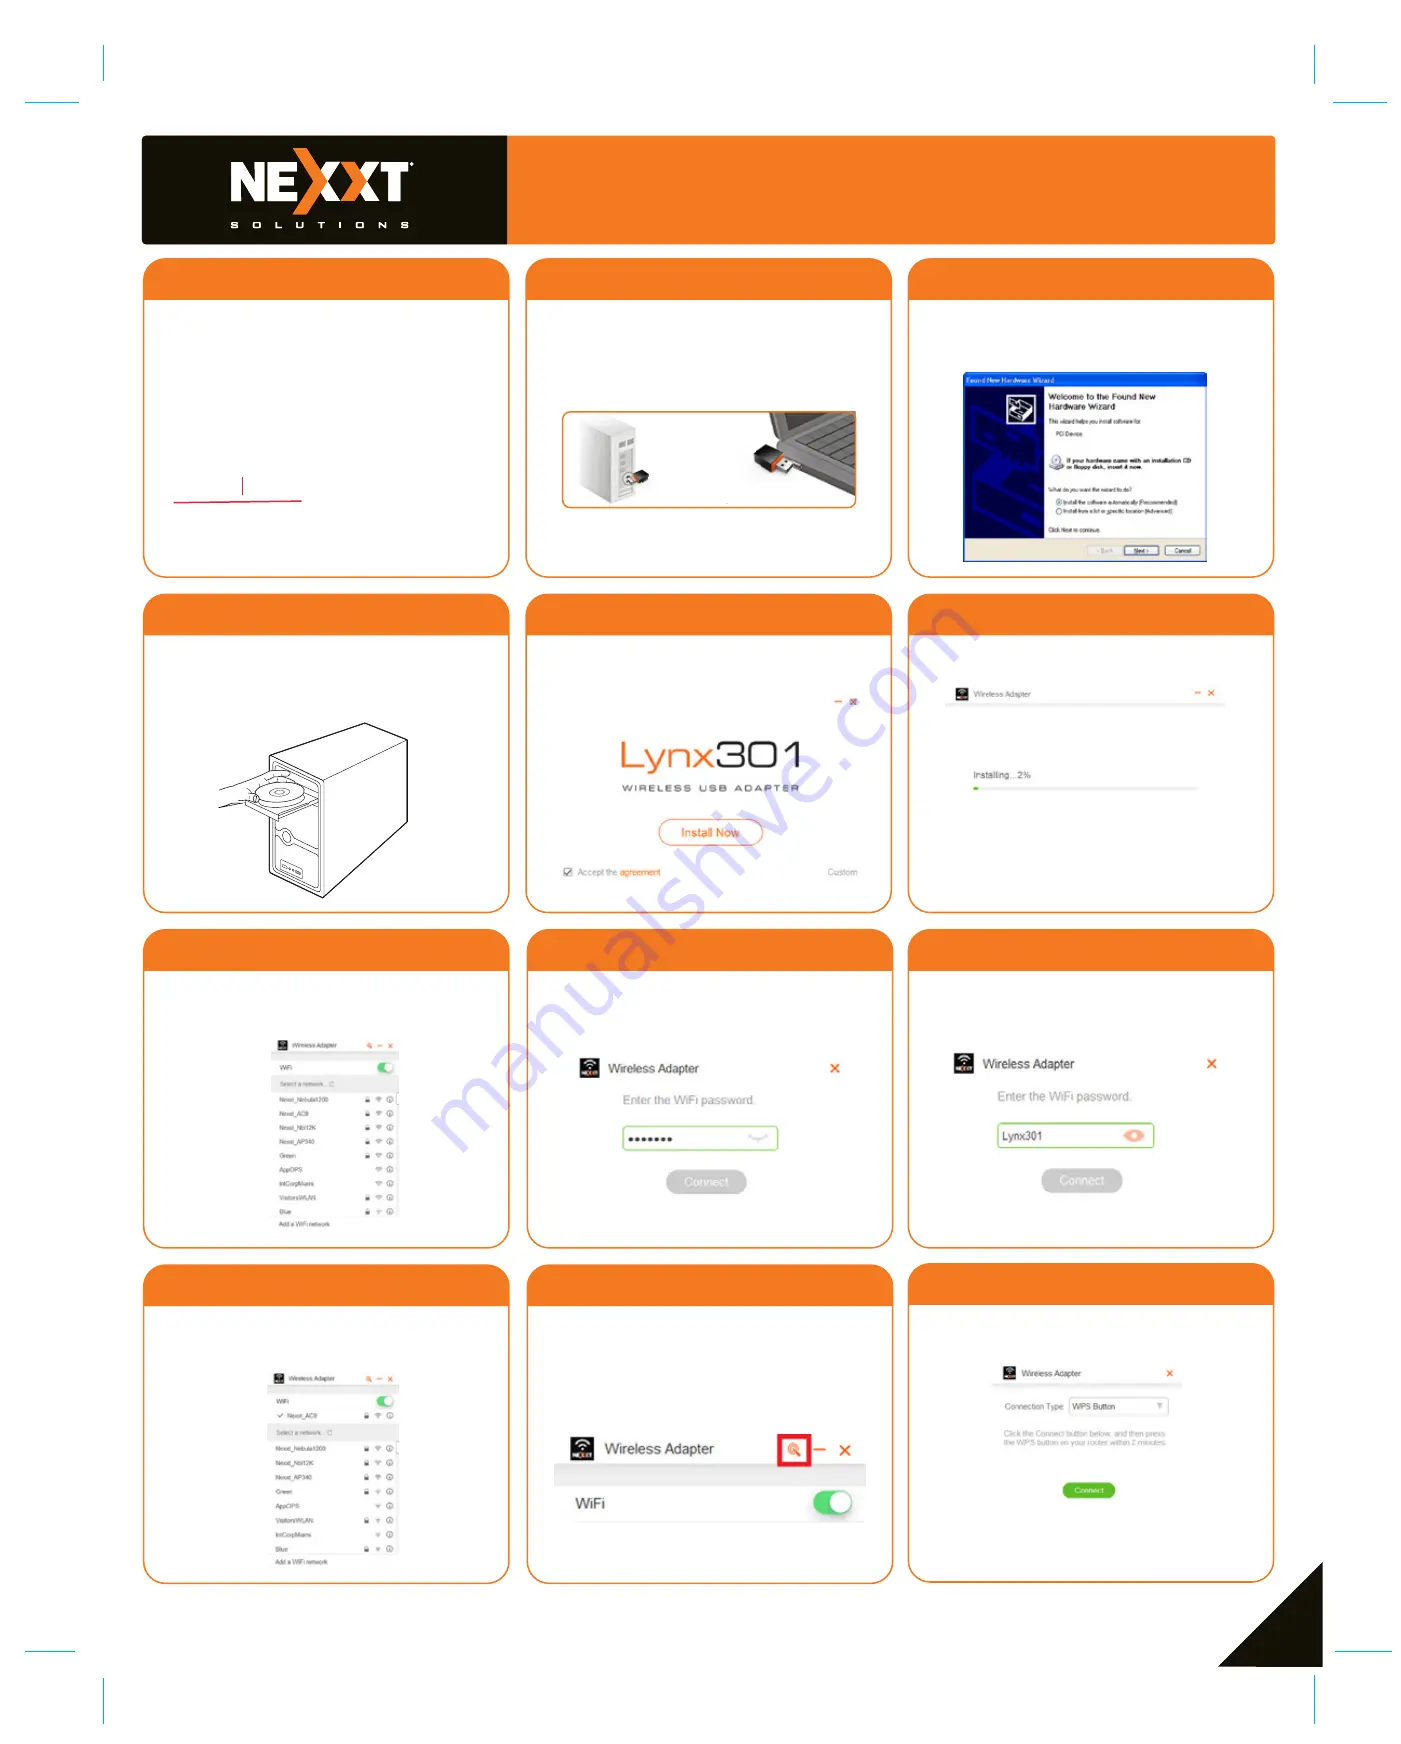
The Lynx301 wireless adapter software will now be
displayed.
Quick installation guide
1
2
3
1
If the Found New Hardware Wizard system dialogue
appears, select Cancel and use the included Setup
Wizard Software CD for a faster installation.
4
5
6
7
8
10
11
12
9
The WPS function can be used to securely connect
to your wireless network. If your router supports this
feature, click on the WPS button on the upper right
hand corner of the Lynx301 wireless adapter
software.
5.
Once done, click on Connect. If the connection has
been established successfully, a check mark next to
the wireless router will be shown on the screen.
4.
Click the Connect button. Within 2 minutes, press
the WPS button on your wireless router.
6.
Click on Install Now to initiate the setup. The status
bar appears on the screen during this process.
6.
Once the progress bar reaches 100%, it means that the
installation is complete.
5.
2.
Insert the supplied software CD into the CD drive of your
computer. Click on the Run button to continue. (If the
autorun fails, double click
Setup.exe
in the software CD
to manually install the software).
To connect to a wireless network, select the
corresponding SSID from the list. If the wireless
network you are connecting to is secured, you will be
prompted to enter a password.
2.
The following screen will be displayed in this step.
4.
Initial setup
1.Insert the wireless USB adapter into an available USB
port on your computer.
Thank you for purchasing the Lynx-301 wireless-N
network adapter from Nexxt Solutions. This quick
installation guide will lead you through the basic setup
process of the device to ensure its fast and seamless
integration into your network.
• Wireless-N mini USB adapter
• Quick installation guide
• CD ROM (with a digital copy of the quick installation
guide and driver configuration tool)
Package content
To view the password you have entered, you may click
on the closed eye icon. The eye will open and will
display the password you just typed in.
3.


