background image

                 Questions, problems, missing parts? 

Before returning to your retailer, call our customer service 

                 department at U.S.A:1-800-913-8999, 8 a.m.-5 p.m., PST, Monday-Friday. 

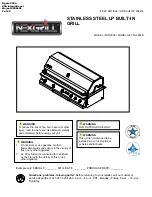
OUTDOOR GAS GRILL 

This instructions manual contains important information necessary for the 
proper assembly and safe use of the appliance. 

Read and follow all warnings and instructions before assembling and using 
the appliance. 

Keep this manual for future reference. 

 SERIAL # ____________________ MFG. DATE _____________ PURCHASE DATE: ____________


      MODEL #720-0888 Pages 2 - 41 

19000474A2 

PARRILLA DE GAS PARA 

EXTERIORES 

MODELO #720-0888  Páginas 42 - 82 

GRIL À GAS EXTÉRIEUR 

      MODÈLE 720-0888  Pages 83 - 123 

State of California Proposition 65 Warnings: 

WARNING: This product contains one or more chemicals known to the State of California to cause cancer. 

WARNING: This product contains one or more chemicals known to the State of California to cause birth defects or other 
reproductive harm. 


In the State of Massachusetts, the following installation instructions apply: 

 Installations and repairs must be performed by a qualified or licensed contractor, plumber, or gasfitter qualified or licensed     

     by the State of Massachusetts. 

 If using a ball valve, it shall be a T-handle type. 

 A flexible gas connector, when used, must not exceed 3 feet. 

Содержание 720-0888 A

Страница 1: ...4A2 PARRILLA DE GAS PARA EXTERIORES MODELO 720 0888 P ginas 42 82 GRIL GAS EXT RIEUR MOD LE 720 0888 Pages 83 123 State of California Proposition 65 Warnings WARNING This product contains one or more...

Страница 2: ...nce Trouble Shooting Ordering Parts Grill Cooking Chart Grill Recipe Suggestion Limited Warranty 34 35 36 37 37 38 39 40 41 Safety Instruction Package Contents List Hardware Contents Exploded View Par...

Страница 3: ...ny open flame 3 Open lid 4 If odor continues keep away from the appliance and immediately call your gas supplier or your fire department WARNING 1 Do not store or use gasoline or other flammable liqui...

Страница 4: ...of time A clogged tube can be lead to a fire beneath the grill Grill Installation Codes Check your local building codes for the proper method of installation in the absence of local codes this unit sh...

Страница 5: ...age or any other enclosed area Do Not obstruct the flow of ventilation air around the gas grill housing Only use the regulator and the hose assembly supplied with your gas grill Replacement regulators...

Страница 6: ...a burner pay close attention to what you are doing Make certain you are aware of which burner you are lighting so your body and clothing remain clear of open flames When using the grill do not touch t...

Страница 7: ...Package parts List 5 6 7 8 9 10 1 3 4 2 x2 x2 x2 x2 6...

Страница 8: ...Package parts List 14 16 17 18 19 20 11 12 13 15 7...

Страница 9: ...Package parts List 22 23 24 21 x5 x2 8...

Страница 10: ...D E x2 Truss head screw Black 5 32 x 10mm Flat Washer 5 16 Truss head screw Black 1 4 x12mmTruss A x20 Truss head screw Stainless steel 5 32 x 10mm D x2 Nut 5 16 9 Some parts come with Screws pre inst...

Страница 11: ...Explode View 54 55 52 35 34 49 53 45 32 19 16 15 14 13 9 8 7 6 5 4 3 1 10 12 13 12 53 54 2 20 11 17 18 22 23 24 25 26 21 27 28 42 43 44 29 30 31 33 10 36 37 38 39 40 41 47 46 50 51 56 48 10...

Страница 12: ...ex Gas Line 1 1 13 Main Lid Screw 1 2 42 Side burner gas valve 1 1 14 Main Burner Bowl Assembly Non replaceable 1 43 Side Manifold 1 1 15 Cart Leg Rear Left 1 1 44 Regulator LP 1 1 16 Pulse Ignite Mod...

Страница 13: ...1 2 3 1 2 4 5 A x2 Assembly Instructions 12...

Страница 14: ...3 4 A x8 3 6 7 2 8 13...

Страница 15: ...5 6 9 D x2 E x2 8 14...

Страница 16: ...7 8 10 10 15...

Страница 17: ...9 10 B x2 11 B x2 12 16...

Страница 18: ...11 12 13 17...

Страница 19: ...13 14 A x4 14 A x3 Ax3 18...

Страница 20: ...15 16 Cx2 15 Ax3 A x3 x2 C 19...

Страница 21: ...17 18 Cx2 C x2 16 20...

Страница 22: ...19 20 17 21...

Страница 23: ...te After completing side burner installation make sure there is no more than a 3 mm gap between igniter pin and burner as shown in Figur 5mm 3mm Side Side Burner Igniter Wire Figure 1 22 22 re1 e Burn...

Страница 24: ...x2 C 23 24 19 18 23...

Страница 25: ...20 25 26 21 24...

Страница 26: ...27 28 22 23 25...

Страница 27: ...29 30 24 26...

Страница 28: ...31 32 27...

Страница 29: ...ped with gas supply orifices for use only with liquid propane gas It is also equipped with a high capacity hose regulator assembly for connection to a standard 20lb L P cylinder 18 1 4 46 35cm high 12...

Страница 30: ...ater You will need a spray bottle brush or rag to apply the solution to the fittings For the initial leak test make sure the L P cylinder is 80 full TO TEST 1 Make sure the control valves are in the O...

Страница 31: ...h the cylinder valve Other types of caps or plugs may result in leakage of propane The gas must be turned off at the supply cylinder when the unit is not in use If the appliance is stored indoors the...

Страница 32: ...arker the grill marks DO NOT LEAVE THE GRILL UNATTENDED WHILE COOKING WARNING IMPORTANT USING THE SIDE BURNER Inspect the gas supply hose prior to turning the gas ON If there is evidence of cuts wear...

Страница 33: ...continued TO MATCH LIGHT THE SIDE BURNER Hold a lit extended match near the side burner ports turn the control knob counterclockwise to HIGH Move your hand immediately once the burner is lit Rotate th...

Страница 34: ...ght after step 3 turn the knob to OFF position wait 5 minutes then repeat the lighting procedure or light by match 1 2 3 1 If the burner will not light after several attempts then the burner can be ma...

Страница 35: ...ow often you use the grill MAIN GRILL BURNER CLEANING Ensure the gas supply is off and the knobs are in the OFF position Make sure the grill is cool Clean the exterior of the burner with a wire brush...

Страница 36: ...e needs a pre heat period of five minutes food that requires a lower cooking temperature needs only a period of two to three minutes COOKING TEMPERATURES High setting Use this setting for fast warm up...

Страница 37: ...od portion of the cover to your grill Spread the cover and allow it to relax preferably in warm sunlight or in a warm room For grill with a side shelf bunch the cover like a sock put on left to right...

Страница 38: ...is recommended that it be done overnight in the refrigerator as opposed to a microwave This in general yields a juicier cut of meat Use a spatula instead of tongs or a fork to turn the meat as a spatu...

Страница 39: ...edium 1 inch 1 1 2 inch Medium to High 13 to 20 minutes 18 to 25 minutes PORK Chops 1 inch Medium 20 to 30 minutes Trim edges Grill turning once Cook to desired doneness Well done 1 1 2 inches Medium...

Страница 40: ...juice or vinegar 2 tbs oil tsp powdered mustard 2 tsp Worcestershire sauce tsp freshly ground black pepper 1 tsp sugar tsp paprika 1 clove garlic Peel grate onion and add rest of the ingredients exce...

Страница 41: ...ng Strip off the skin and chop eggplant finely Add all the seasonings Chill thoroughly and serve on toast CHICKEN TANDOORI STYLE 8 large chicken thighs or drumsticks 1 c plain nonfat yogurt c lemon ju...

Страница 42: ...the terms of this limited warranty MANUFACTURER WILL NOT PAY FOR Service calls to your home Repairs when your product is used for other than normal single family household or residential use Damage re...

Страница 43: ...oposici n 65 del estado de California ADVERTENCIA Este producto contiene una o m s sustancias qu micas identificadas por el estado de California como causantes de c ncer ADVERTENCIA Este producto cont...

Страница 44: ...s del aparato reproductor Su parrilla llegar a tener una temperatura muy elevada Nunca se incline sobre el rea de cocci n mientras use la parrilla No toque las superficies de cocci n la carcasa de la...

Страница 45: ...po prolongado Un tubo obstruido puede ocasionar un incendio debajo de la parrilla C digos de instalaci n de la parrilla Para utilizar el m todo correcto de instalaci n verifique los c digos locales de...

Страница 46: ...quier otro tipo de lugar cerrado No obstruya el flujo de aire de la ventilaci n que se encuentra en la carcasa de la parrilla a gas S lo use el ensamble del regulador y la manguera que vienen con su p...

Страница 47: ...un mechero preste atenci n a lo que est haciendo Aseg rese de saber qu mechero est encendiendo para as mantener su cuerpo y ropas alejados de las llamas encendidas Cuando utilice la parrilla no toque...

Страница 48: ...Lista de piezas del paquete 5 6 7 8 9 10 1 3 4 2 x2 x2 x2 x2 47...

Страница 49: ...Lista de piezas del paquete 14 16 17 18 19 20 11 12 13 15 48...

Страница 50: ...Lista de piezas del paquete 22 23 24 21 x5 x2 49...

Страница 51: ...Nut 5 16 Tornillos de cabeza reforzada con la arandela negro 12mm Tornillo de cabeza ovalada negro 5 32 10mm Tornillo de cabeza ovalada acero inoxidable 5 32 10mm Arandela plana 5 16 50 Algunas partes...

Страница 52: ...Vista en detalle 54 55 52 35 34 49 53 45 32 19 16 15 14 13 9 8 7 6 5 4 3 1 10 12 13 12 53 54 2 20 11 17 18 22 23 24 25 26 21 27 28 42 43 44 29 30 31 33 10 36 37 38 39 40 41 47 46 50 51 56 48 51...

Страница 53: ...el quemador lateral 1 1 14 Ensamble de la cuba del mechero principal No reemplazable 1 43 Colector lateral 1 1 15 Pata trasera izquierda del carro 1 1 44 Regulador del propano l quido 1 1 16 M dulo de...

Страница 54: ...1 2 3 1 2 4 5 A x2 53 Instrucciones de armado...

Страница 55: ...3 4 A x8 3 6 7 2 8 54...

Страница 56: ...5 6 9 D x2 E x2 8 55...

Страница 57: ...7 8 10 10 56...

Страница 58: ...9 10 B x2 11 B x2 12 57...

Страница 59: ...11 12 13 58...

Страница 60: ...13 14 A x4 14 A x3 Ax3 59...

Страница 61: ...15 16 Cx2 15 Ax3 A x3 x2 C 60...

Страница 62: ...17 18 Cx2 C x2 16 61...

Страница 63: ...19 20 17 62...

Страница 64: ...n del quemador lateral asegure de que no exista una separaci n de m s de 3 mm entre la clavija del encendedor y el quemador como se muestra e Figura 1 Q lat 5mm 3mm Encendedor del quemador lateral Fi...

Страница 65: ...x2 C 23 24 19 18 64...

Страница 66: ...20 25 26 21 65...

Страница 67: ...27 28 22 23 66...

Страница 68: ...29 30 24 67...

Страница 69: ...31 32 68...

Страница 70: ...de propano l quido de 20lb 18 1 4 46 35cm de alto por 12 1 4 31cm de di metro Para conectar el cilindro de suministro de gas LP siga los siguientes pasos a continuaci n 1 Aseg rese de que la v lvula d...

Страница 71: ...dora un cepillo o un trapo para aplicar la soluci n sobre los accesorios Para la prueba inicial aseg rese de que el cilindro de LP est lleno en un 80 PARA HACER LA PRUEBA 1 Aseg rese que las v lvulas...

Страница 72: ...o que viene con la mencionada v lvula Otros tipos de tapas o tapones pueden causar fugas de propano Debe cerrar el paso de gas desde el cilindro de suministro cuando no est utilizando el dispositivo S...

Страница 73: ...emplace los ensambles de los reguladores y de la manguera por otros que no sean los que vienen con la parrilla Si es necesario cambiarlos p ngase en contacto con el fabricante para realizar el cambio...

Страница 74: ...de despachar la parilla Sin embargo debido a que los suministros de gas locales var an puede ser necesario realizar algunos ajustes menores Instrucciones de encendido Nota Retire todo el envoltorio i...

Страница 75: ...a posici n de apagado OFF aguarde 5 minutos y repita el procedimiento de encendido o enci ndalo con un cerillo 1 2 3 1 Si el mechero no se enciende despu s de varios intentos entonces puede encender e...

Страница 76: ...utilice un palillo de madera ya que podr a romperse y obstruir el puerto Controle que ning n insecto u otro tipo de obstrucci n interfieran en el flujo de gas a trav s del mechero En caso de ser as p...

Страница 77: ...ratura de cocci n necesitar n un precalentamiento de cinco minutos los alimentos que requieran una temperatura de cocci n baja necesitar n un per odo de dos a tres minutos TEMPERATURAS DE COCCI N Temp...

Страница 78: ...ela reposar preferentemente al sol o en una habitaci n c lida Para las parrillas que tiene un estante lateral arremangue a funda como una media y col quela de izquierda a derecha El motor del asador n...

Страница 79: ...el microondas Por lo general esto hace que el corte de carne sea m s jugoso Para dar vuelta la carne utilice una esp tula en lugar de pinzas o un tenedor ya que con la esp tula no pincha la carne y po...

Страница 80: ...de 18 a 25 minutos CERDO Costillas 1 pulgada Media De 20 a 30 minutos Recorte los bordes Coc nelos en la parrilla d ndolos vuelta una vez Cocine hasta el nivel de cocci n deseado Bien cocido 1 1 2 pu...

Страница 81: ...COSTILLAS DE CERDO 4 costillas de cerdo Adobo 1 cebolla grande 2 cucharadas grandes de jugo de lim n o vinagre 2 cucharadas grandes de aceite cucharada de mostaza en polvo 2 cucharadas grandes de Sals...

Страница 82: ...a gas a fuego medio dela vuelta de vez en cuando hasta que est cocida Esto puede llevar unos 30 minutos Qu tela de la parrilla y espere que se enfr e para prepararla Qu tele la c scara y corte la ber...

Страница 83: ...mal en casas de familia o residencias Da os que resulten de accidentes alteraciones mal uso falta de mantenimiento limpieza abuso incendio inundaciones casos fortuitos instalaci n incorrecta e instala...

Страница 84: ...Californie AVERTISSEMENT Ce produit contient au moins un produit chimique connu par l tat de Californie pour tre l origine de cancers AVERTISSEMENT Ce produit contient au moins un produit chimique co...

Страница 85: ...uvercle 4 Si l odeur persiste tenez vous l cart de l appareil et contactez imm diatement votre fournisseur de gaz ou le service des pompiers AVERTISSEMENT 1 Ne pas entreposer ou utiliser de l essence...

Страница 86: ...ode Un tube bouch peut favoriser un feu en dessous du gril Codes d installation du gril V rifiez les codes du b timent locaux concernant la m thode d installation appropri e En l absence de ces dernie...

Страница 87: ...e doivent pas tre entrepos s dans un b timent un garage ou tout autre emplacement ferm Ne pas bloquer le courant de ventilation autour du bo tier du gril gaz Utilisez seulement l ensemble tuyau et r g...

Страница 88: ...entrez vous sur ce que vous faites Gardez toujours l esprit le br leur que vous tes en train d allumer et tenez votre corps et vos v tements l cart des flammes nues Lorsque vous utilisez le gril ne to...

Страница 89: ...Liste des pi ces de l emballage 5 6 7 8 9 10 1 3 4 2 x2 x2 x2 x2 88...

Страница 90: ...Liste des pi ces de l emballage 14 16 17 18 19 20 11 12 13 15 89...

Страница 91: ...Liste des pi ces de l emballage 22 23 24 21 x5 x2 90...

Страница 92: ...0 D x2 Nut 5 16 Vis t te bomb e avec rondelle de blocage noir 12mm Vis cruciforme acier inoxydable 5 32 10mm Vis cruciforme noir 5 32 10mm Rondelle plate 5 16 91 Certaines pi ces sont livr es avec les...

Страница 93: ...Vue clat e 54 55 52 35 34 49 53 45 32 19 16 15 14 13 9 8 7 6 5 4 3 1 10 12 13 12 53 54 2 20 11 17 18 22 23 24 25 26 21 27 28 42 43 44 29 30 31 33 10 36 37 38 39 40 41 47 46 50 51 56 48 92...

Страница 94: ...uvercle principal 1 2 42 Valve de gaz du br leur lat ral 1 1 14 Assemblage du bol de br leur principal non rempla able 1 43 Collecteur lat ral 1 1 15 Pied du chariot arri re gauche 1 1 44 R gulateur P...

Страница 95: ...1 2 3 1 2 4 5 A x2 94 Consignes pour l assemblage...

Страница 96: ...3 4 A x8 3 6 7 2 8 95...

Страница 97: ...5 6 9 D x2 E x2 8 96...

Страница 98: ...7 8 10 10 97...

Страница 99: ...9 10 B x2 11 B x2 12 98...

Страница 100: ...11 12 13 99...

Страница 101: ...13 14 A x4 14 A x3 Ax3 100...

Страница 102: ...15 16 Cx2 15 Ax3 A x3 x2 C 101...

Страница 103: ...17 18 Cx2 C x2 16 102...

Страница 104: ...19 20 17 103...

Страница 105: ...install le br leur lat ra assurez vous que l cart entre la broche de l allumeur et l allumeur ne d passe pas 3 mm comme illustr la Figure 1 Br leu 5mm 3mm Fil de l allumeur du br leur lat ral Figure...

Страница 106: ...x2 C 23 24 19 18 105...

Страница 107: ...20 25 26 21 106...

Страница 108: ...27 28 22 23 107...

Страница 109: ...29 30 24 108...

Страница 110: ...31 32 109...

Страница 111: ...st galement quip d un ensemble tuyau r gulateur grande capacit destin au raccordement d une bouteille de propane liquide de 9 kg hauteur 46 35 cm diam tre de 31 cm Pour connecter la bouteille de propa...

Страница 112: ...r ou d une brosse ou d un chiffon pour appliquer la solution sur le raccord Lors du test de fuite initiale assurez vous que la bouteille de propane liquide est pleine 80 POUR TESTER 1 Assurez vous que...

Страница 113: ...binet de la bouteille Les autres types de bouchons peuvent entra ner des fuites du propane Lorsque vous n utilisez pas l unit le gaz doit tre coup au niveau de la bouteille Si l appareil est entrepos...

Страница 114: ...au r gulateur qui sont fournis avec le gril En cas de remplacement n cessaire contactez le fabricant pour obtenir le remplacement appropri Le remplacement doit tre celui qui a t sp cifi par le manuel...

Страница 115: ...des diff rences dans l alimentation du gaz local peuvent exiger le r glage des br leurs Consignes d allumage Remarque avant d utiliser le gril enlevez le mat riau d emballage y compris les sangles As...

Страница 116: ...allume toujours pas apr s l tape 3 tournez le bouton sur arr t OFF attendez 5 minutes et r p tez la proc dure d allumage ou allumez avec une allumette 1 2 3 1 Si le br leur ne s allume pas apr s plus...

Страница 117: ...ports bouch s avec un clip que vous d pliez N utilisez jamais de cure dents en bois Ils peuvent se briser et boucher l orifice Si des insectes ou tout autre type d obstruction ont bloqu le flux du ga...

Страница 118: ...nutes est requis pour les aliments n cessitant une temp rature de cuisson plus basse TEMP RATURES DE CUISSON R glage lev utilisez ce r glage pour r chauffer rapidement saisir les biftecks et les c tel...

Страница 119: ...e gril talez le couvercle et laissez se d tendre de pr f rence la lumi re du jour ou dans une pi ce chaude Pour le gril ayant une tag re lat rale pliez le couvercle en forme de chaussette placez le de...

Страница 120: ...ns le r frig rateur pendant la nuit et non dans un micro onde Cette m thode permet d obtenir une viande plus juteuse Utilisez une spatule et non des pinces ou une fourchette pour tourner la viande La...

Страница 121: ...tes de porc 2 5 cm Moyenne 20 30 minutes D couper les bords Griller en retournant une seule fois Cuisiner jusqu la cuisson d sir e Bien cuit 3 8 cm Moyenne 30 40 minutes C tes Moyenne 30 40 minutes Gr...

Страница 122: ...re 2 c soupe d huile c caf de moutarde en poudre 2 c caf de sauce Worcestershire c caf de poivre fra chement moulu 1 c soupe de sucre c caf de paprika 1 gousse d ail plucher r per l oignon et ajouter...

Страница 123: ...moyen tourner de temps en temps jusqu ce qu elle soit bien cuite La cuisson peut prendre 30 minutes Enlever du gril et laisser refroidir Enlever la peau et couper finement l aubergine Ajouter tous les...

Страница 124: ...our r paration votre domicile R parations lorsque votre produit est utilis pour une utilisation autre qu une famille normale ou r sidentielle Dommage r sultant d accident modification utilisation erro...

Отзывы: