XPS-RL
Quick Start
2.4.2
Power ON
•
Plug the AC line cord supplied with the XPS-RL into the AC power receptacle on
the rear panel.
•
Plug the AC line cord into the AC wall-outlet. Turn the Main Power Switch to ON
(located on the Rear Panel).
•
The system must be installed in such a way that power switch and power connector
are accessible by the user.
•
There is a beep about 50 seconds after power on when the controller has finished
booting. If the controller boots properly, beep is happy-sounding, otherwise a sad-
sounding beep is emitted.
•
There is also an Inhibit switch with a BNC connector in the rear of the XPS-RL. The
Inhibit switch is directly linked by hardware to cut off motor power supply.
2.5
Connecting to the XPS-RL
XPS-RL supports 10/100/1000 Mbps Ethernet networking:
1.
Direct connection PC-to-XPS-RL.
The DHCP server active on the Ethernet plug identified “REMOTE” will
automatically configure the connected computer to make it ready for communication
with the XPS-RL controller.
2.
Network connection.
The Ethernet plug identified “HOST” must be used to connect the XPS-RL
controller to a Network. Before connection, the controller IP setting must be set by
the Network administrator.
Two cables are provided with the motion controller:
•
Cross-over cable – used when connecting the XPS-RL directly to a PC.
•
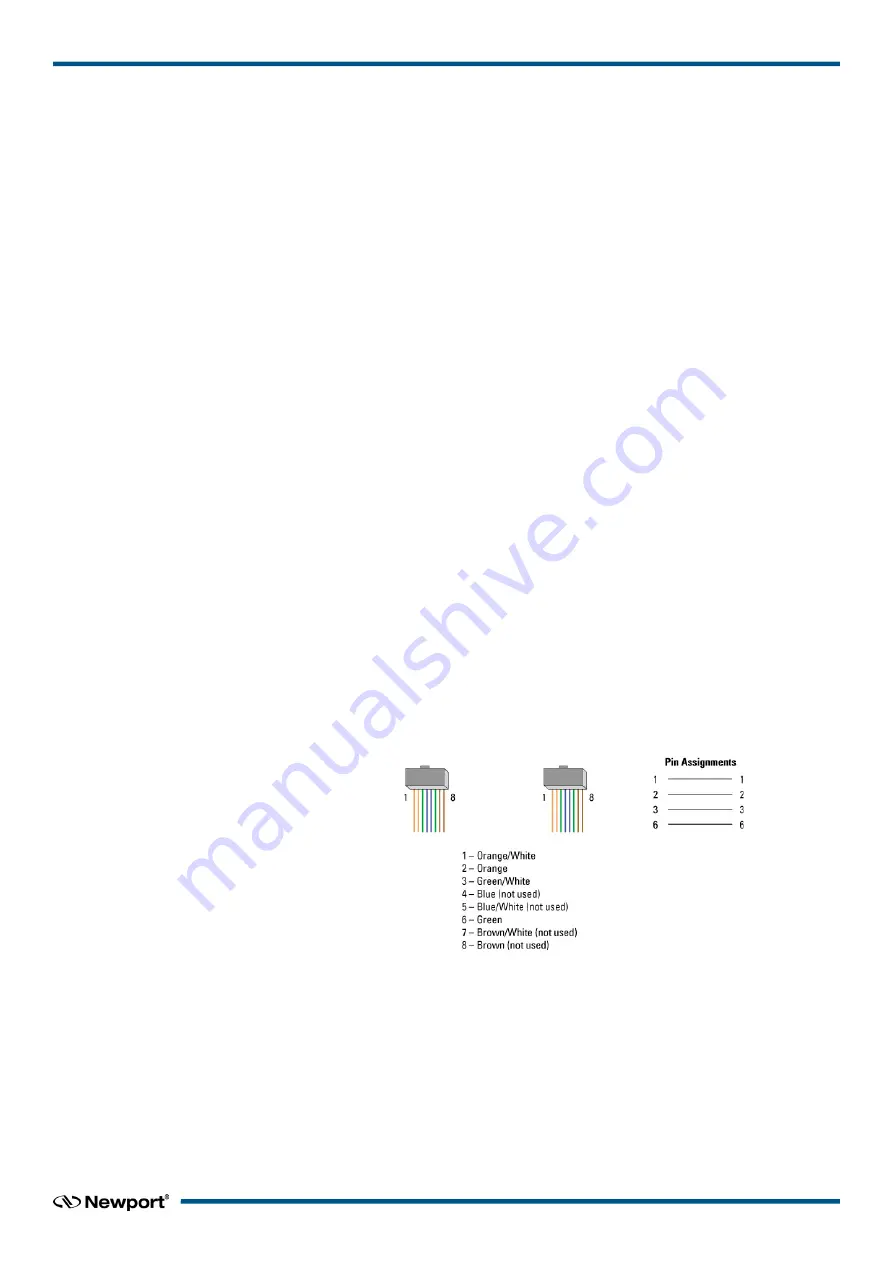
Straight Ethernet cable – used when connecting the XPS-RL through an intranet.
2.5.1
Straight Through Cables (Black)
Standard Ethernet straight through cables are required when connecting the device to a
standard network hub or switch.
Figure 7: Straight through cables.
7
EDH0367En1021 — 12/17


