MAN064 Rev Date 9/4/2008
ST-
x
UO
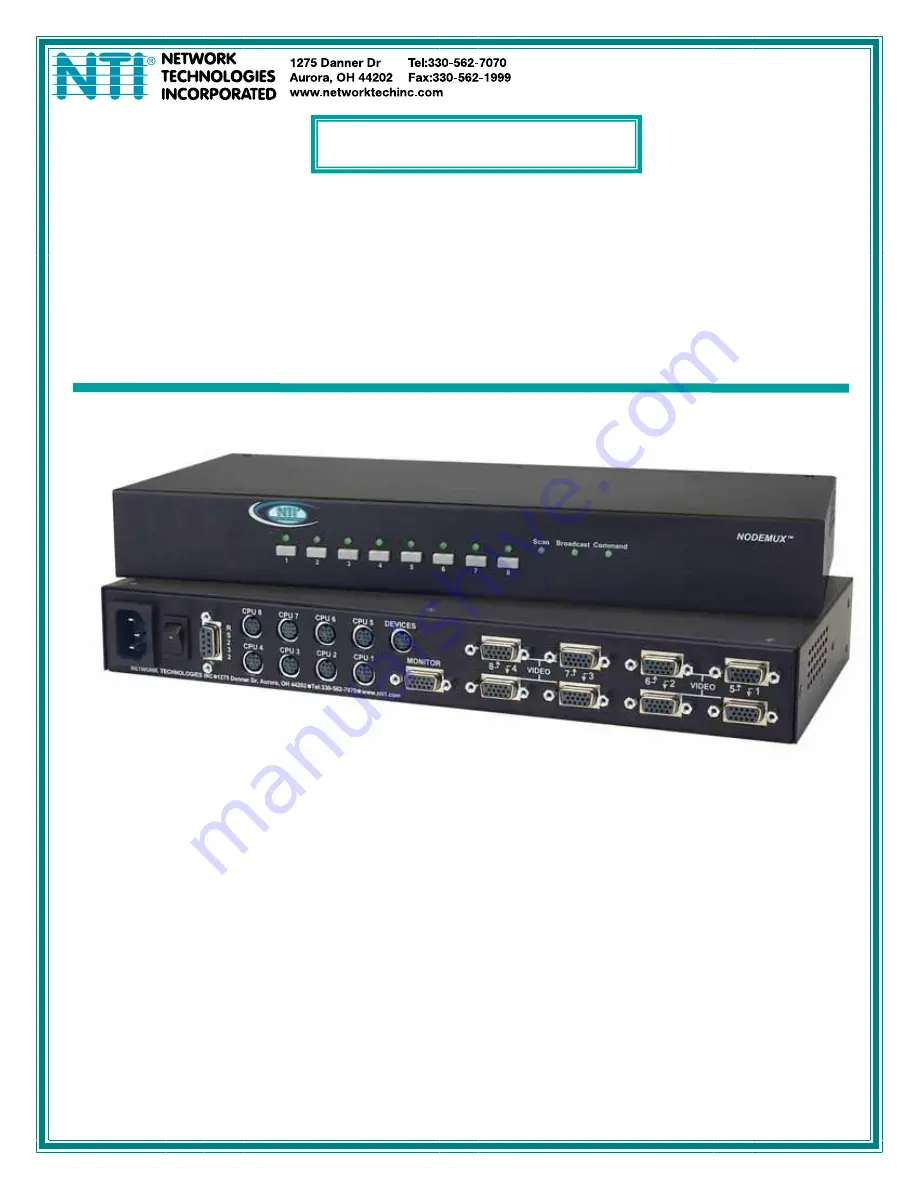
Universal KVM Switch
Installation and Operation Manual
NODEMUX
®
Series
Страница 1: ...MAN064 Rev Date 9 4 2008 ST xUO Universal KVM Switch Installation and Operation Manual NODEMUX Series...
Страница 2: ...al system or transmitted in any form or by any means electronic mechanical photocopying recording or otherwise without the prior written consent of Network Technologies Inc 1275 Danner Drive Aurora Oh...
Страница 3: ...t Mode 15 Normal Mode 15 Edit Mode 16 Search Mode 17 Maintenance Mode 18 Help Mode 19 OSD TOUCH SCREEN SUPPORT 19 Touch Maintenance Mode 19 Reset Default Values 20 Align The Cursor 20 OSD Entry Method...
Страница 4: ...de screen 11 Figure 12 Administrator password change 12 Figure 13 Command Mode menus 14 Figure 14 Video and Device connections identified with port numbers 15 Figure 15 Edit Mode 16 Figure 16 Search M...
Страница 5: ...the part number i e ST 8UTSO available in 8 port model only Audio support to enable user to connect stereo speakers to receive audio signals from connected CPUs add A to the part number i e ST xUO A...
Страница 6: ...e VKTINT xx MM for keyboard and mouse interface OR SUN CPU to Switch VEXT xx MM for video interface 13W3M 15HDF adapter for 13W3 to 15HD SKTINT xx MM for keyboard mouse interface One of the following...
Страница 7: ...C Connector for power cord attachment 8 CPU x 8 pin miniDIN female connectors for connection of device cable s from CPU s 9 DEVICES 8 pin miniDIN female connector for connection of input device s keyb...
Страница 8: ...ded holes in the sides of the NTI switch Tighten the screws securely Figure 1 Secure rackmount ears to switch 2 Install 4 captive nuts not provided to the rack in locations that line up with the holes...
Страница 9: ...e connector with the keyboard symbol on it see Fig 4a and the mouse will plug into the 6 pin green female connector with the mouse symbol on it see Fig 4b Figure 4 Connect a PS 2 keyboard and mouse Fi...
Страница 10: ...ame number PS 2 CPU Connect a PS 2 CPU video port using a VEXT xx MM cable between a VIDEO x port on the ST xU and the CPU Connect the PS 2 CPU keyboard and mouse ports using a VKTINT xx MM cable betw...
Страница 11: ...eyboard and mouse ports on the PS 2 CPU and a CPU x port of the same number as the SERIAL and VIDEO ports just connected to g Connect additional PS 2 CPUs to additional SERIAL x VIDEO x and CPU x port...
Страница 12: ...ON power to any or all CPUs connected to the NODEMUX FYI If upon startup the monitor immediately displays a USER LOGIN menu requiring a USER NAME and PASSWORD then the administrator has already setup...
Страница 13: ...in Normal Mode controlling directly the CPU to which the user is connected through the NODEMUX Keyboard Control A user has Keyboard control of the NODEMUX using Command Mode through on screen display...
Страница 14: ...users and the limitations of their use of the individual CPUs on the system When a standard user powers up the system a security screen may appear as setup by the administrator The user will need to l...
Страница 15: ...Note Cascading is no longer supported in this switch Be careful not to change this field to anything except STAND ALONE SWITCH Switch Configuration is also used to setup the communication settings for...
Страница 16: ...on Mode User Name List The User Name List displays the list of users and provides control for adding new users changing or assigning user passwords and changing access rights for any given user User n...
Страница 17: ...es at a time The screen can be used for switching as well as editing the CPUs names Through the OSD menu the user can control the NODEMUX to cycle through all modes of operation COMMAND SCAN BROADCAST...
Страница 18: ...rs Search Mode and adds a character to search string and selects the CPU s name that matches best Switch to a selected port Exit Command Mode E Ctrl M Ctrl F1 T xxx from 002 to 255 ie t002 would set t...
Страница 19: ...de Also the Command Mode main menu will show SCAN ON The port with the CPU powered ON remains active while in use When the switch becomes idle for the configured time out period default time out perio...
Страница 20: ...r one position to the right Move cursor one position to the left Previous port Next port Selects the first port on the switch Figure 15 Edit Mode Selects the last port on the switch Toggles between in...
Страница 21: ...when the search option has been invoked from Command Mode Function Keystroke Erase previous character in search name Move cursor one position to the right in search name Move cursor one position to th...
Страница 22: ...ke OSD window shorter Change user password Present only when a standard user is logged in Log current user out and return to User Login Mode Activate security features Present only when security is av...
Страница 23: ...creen support option has been built into the NODEMUX Touch Maintenance Mode is used to communicate the operating values of the connected touch screen monitor to the NODEMUX and to synchronize the curs...
Страница 24: ...eeds to be done once for the monitor connected If the monitor is changed it must be repeated for the new monitor Steps 3 and 4 establish the location of the OSD menu when the CPU connected to the sele...
Страница 25: ...s To daisy chain multiple units a Matrix Y 1 cable is used see page 24 for each NODEMUX in the chain The last unit will have no connection on its output port and should have DIP switch 1 ON see table...
Страница 26: ...down arrow to enable or disable loop back as needed for the application Figure 22 Daisy chain configuration with Matrix Y 1 cable Unit Address In order for a terminal to communicate with one or more N...
Страница 27: ...y use the NTI Switch Control Program or SerTest to control the NODEMUX via RS232 see page 25 Terminal control commands supported by the NODEMUX are defined below RS reset unit s to default power up sw...
Страница 28: ...ed by at least one space AA unit address RESPONSE CR command received and executed OK XX YY CR XX of CPU s YY of USERS OR CR syntax or transmission error occurred RV read unit software version FORMAT...
Страница 29: ...bout SerTest display the program version Switch Operations Key Selection Description 1 Connect Output User to an Input CPU connect an output to an input 2 Connect All Outputs Users to an Input CPU con...
Страница 30: ...it Address current 1 select the unit address the current address is displayed in parentheses For any selection that requires user input the user is prompted When commands are sent to the NODEMUX the c...
Страница 31: ...SB RT Arrow Power SB Space Bar L and R Left and Right keys when two keys are marked the same on a keyboard SB Space Bar Figure 25 Keyboard key layouts Keyboard Replacement If the keyboard is being re...
Страница 32: ...d then a standard VGA multi scan monitor without touch screen features can be used It is also possible to use both the monitor with touch screen features and a keyboard with mouse Figure 26 Support pr...
Страница 33: ...ty while in the OSD menu GENERAL NOTE Verify that the port 1 LED on the front panel of the KVM switch illuminates when the power switch is turned ON If it doesn t call NTI for assistance Turn ON power...