SmartNA-X 1G/10G Modular | Getting Started |
25
SmartNA-X
™
1G/10G User Guide 1.4
©
2015 Network Critical Solutions Limited
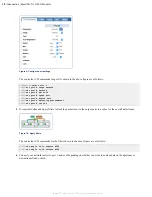
• Click on a port (ALT-click for multiple ports) and drag to another port to create a mapping between them.
• Click on a port map to set up packet filters.
5.
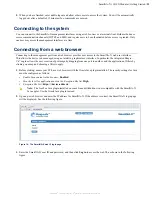
If you make changes to the configuration, click the
Review/apply changes
button to review and apply them.
6.
Click the
Log out
button when you have finished updating the system. This allows other users to access the system,
although there is a 15 minute idle timeout if you forget to logout.
Connecting from a terminal client
You can connect from a terminal client and use SmartNA-X commands to manage the system.
To connect from a terminal client, you'll need:
• Your SmartNA-X username and password.
• The network address for SmartNA-X.
• A terminal client that supports Secure Shell (SSH). On Linux and Mac OS, you can use the native Terminal client. On
Windows, you can use a third-party SSH client such as PuTTY (
).
1.
In the terminal client, enter the following command:
$
where 192.168.254.100 is the network address of SmartNA-X.
2.
If prompted, enter
yes
to add SmartNA-X to the list of known hosts:
The authenticity of host '192.168.254.100' can't be established.
RSA key fingerprint is 9a:30:7b:95:ec:b4:fe:53:e1:a4:42:69:4f:15:5c:1a.
Are you sure you want to continue connecting (yes/no)?
yes
Warning: Permanently added '192.168.254.100' (RSA) to the list of known hosts.
3.
When prompted, type your SmartNA-X password and press enter. The SmartNA-X CONTROLLER> prompt is
displayed after logging in:
[email protected]’s password:
*****
CONTROLLER>
4.
Enter commands to query or configure the system as required. You can get help on which commands are available by
entering the
help
command.
5.
When you have finished, enter
exit
or
quit
to close the connection and exit the CLI.
Configuring network settings
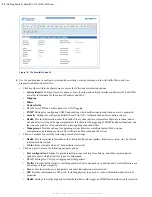
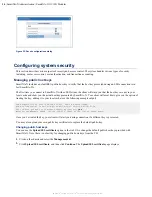
You may need to configure the network address to gain access to the management interfaces from networked management
stations. By default, the system is assigned the static IP address 192.168.254.0, as well as an IPv6 link-local address that
can be obtained from the
System identity
tab, as shown in the figure below.
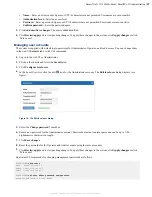
If necessary, the network address can be configured in either of the following ways:
•
Manual
— You have to input the information, including system address and subnet mask. If your management station
is not in the same IP subnet as the unit, you will also need to specify the default gateway router.
•
Dynamic
— The unit can send IPv4 configuration requests to a DHCP address allocation server on the network.


