


Chapter 1: Get Acquainted
Touchscreen
33
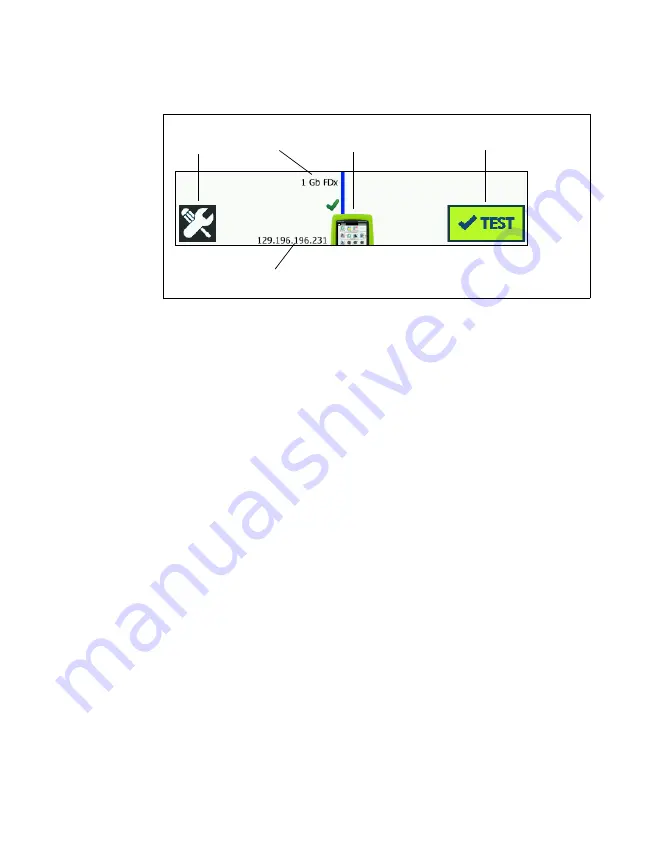
Instrument Tier
TOOLS button:
Tap this button to enter the TOOLS menu. See
Chapter 8: "Tools," beginning on
Cable:
Tap the text to view cable and link test results. See
for more information.
OneTouch Icon:
Tap the icon to view a detailed list of wired
transmit and receive statistics, along with address
information. Note that the analyzer’s wired IP addresses are
shown to the left and right of the icon.
AutoTest Button:
Tap the button to run all configured tests.
The analyzer does not link and does not perform any
infrastructure tests or user tests until you tap the AutoTest
button (or press the AutoTest key
).
Wired IP Address:
This is the IP address of the Ethernet NUT
(Network Under Test) port.
Touchscreen
Caution
For correct operation and to prevent damage to the
touchscreen, touch the screen only with your
fingers. Do not touch the screen with sharp objects.
You can use these gestures on the touchscreen:
Содержание OneTouch AT 10G
Страница 14: ...OneTouch AT 10G User Manual xii...
Страница 135: ...Chapter 5 User Tests Video RTSP Test 133 launch a browser against the target server or Telnet SSH to the server...
Страница 146: ...OneTouch AT 10G User Manual 144...
Страница 172: ...OneTouch AT 10G User Manual 170...
Страница 173: ...171 Chapter 8 Tools Tap the TOOLS icon on the HOME screen to access the TOOLS screen Figure 64 Tools Screen...
Страница 222: ...OneTouch AT 10G User Manual 220...
Страница 225: ...Chapter 11 Maintenance Remove and Install the Battery 223 GVO003 EPS Figure 86 Remove and Install the Battery...
Страница 226: ...OneTouch AT 10G User Manual 224...
Страница 234: ...OneTouch AT 10G User Manual 232...
Страница 240: ...OneTouch AT 10G User Manual 238...
Страница 246: ...OneTouch AT 10G User Manual 6...
Страница 247: ...7 Notes...


